David Regan
-
Posts
217 -
Joined
-
Last visited
Everything posted by David Regan
-
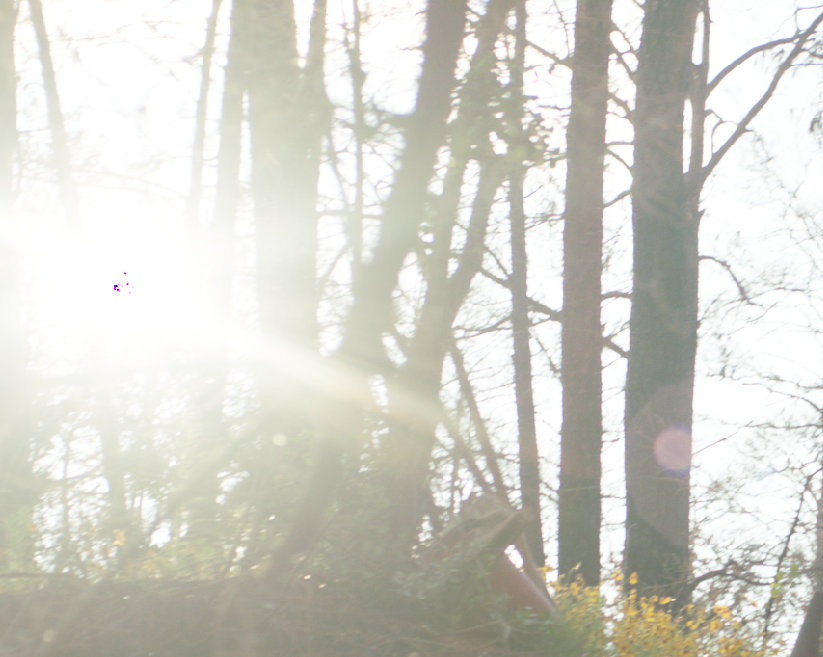
So the other day noticed this strange issue while shooting straight into the sun with the Alexa. Looks like the sensor overloaded and introduced some strange electronic noise/color, right in the hot spot of the sun. Shooting with Super Baltars, we were at a 4/5.6, with some ND in front, but this doesn't look optical at all. The aberration would move as the camera did, depending on the angle into the sun, this small digital noise would move around, but always right within the hot spot. Haven't noticed it since or been able to reproduce it. Any thoughts about what could cause this? Thanks!
-
How do I identify batch numbers?
David Regan replied to Michael T Gardner's topic in Film Stocks & Processing
Should be the first set of numbers (3 digit typically) following the stock type. I.e. 8547-420-016, then the batch number is 420, and 016 is the parent roll. Following numbers denote cut and slit numbers, which are the real ID of that roll, since you will often shoot just one batch and only 1 or 2 parent rolls if a lot of film has been ordered at once, hence the first sets of numbers don't change much in the course of say a feature. -
Film Workflow
David Regan replied to Steve McBride's topic in Students, New Filmmakers, Film Schools and Programs
Dominic Case, a regular contributor on here, has a a book: "Film Technology in post production" which I found quite helpful back when I was first trying to figure out workflows. -
Pulling Focus from a dolly and Dolly Grip
David Regan replied to Glynn Albert's topic in Camera Assistant / DIT & Gear
Well for starters, Nikon still lenses won't be your best of friends, as they typically have very few focus markings, and the barrel is so small you pulls are miniscule. But in general pulling from a dolly can be tough even with cine-style lenses. There are a few tricks depending on the type of shot that can help. 1. Laser Pointers. Clip or Velcro a small laser pointer to the side of the dolly, aimed down slightly so it hits a desired spot on the floor (out of frame of course). This can be great for certain types of shots, especially walk and talks, when the camera is dollying back as people walk towards the camera. If you know your distance to the laser, it becomes much easer to guess if people are a few inches off, than if you are trying to guess if they are at 10' or 10' 4" from the actual lens. 2. A very good dolly grip. A dolly grip that hits their marks at the appropriate time is invaluable to you as an assistant. The more off their marks they are the more your have to compensate on the fly. 3. Know your space. When I am waiting around for lighting and such, once the camera has been set, I just measure lots of distances that seem relevant. Use landmarks in the room, table to couch, fridge to sink, door to door, etc...general distances that you can use during the take. I often write these distances on a piece of tape and put it on the mattebox. So if things change I can quickly see, oh we are near the door, and they are by the couch, I know that is 'x' feet. And in the end just practice. You will develop a feel, and the ability to come closer and closer to judging distances. And remember, always guess a distance before you measure it! Good luck. -
Ha, go figure. Marketing scheme 101.
-
Interesting Article about Panavision
David Regan replied to Keith Walters's topic in General Discussion
I think the phrase 'the old days' is interesting in a thread of this nature. In the old days, they didn't have 500ASA stock to work with. Nor did they have 7lb lightweight cameras that could go anywhere with ease. There wasn't the incredible control of a DI to work with. And yet nobody would think for a minute that somehow the art of Cinematography wasn't any good before all of these, and other, breakthroughs. And yet all these discussions, while valid, and I indeed love partaking them as well, and have my own opinions, seem to me only to suggest that we as a body of society, are never satisfied with what we have. I'm not condemning this, it is admirable to always push for higher standards, higher quality, there is nothing wrong in demanding perfection from one's craft. But consider how much more we have than cinematographer's had 50, 30, 10, even 3 years ago. We get given so much, yet only find reasons to argue and complain that it still isn't good enough. Again, not judging, I do my own enormous share of complaining and whining about substandard technologies, but in the end, science isn't going to stop. No matter what we do, new cameras will get made, new lenses will be developed, new methods of production and post-production workflow will be introduced. For once, I'd like us to enjoy what we have, when we have it, and make compelling, interesting visual stories, which whatever 'horrible and unsatisfactory' equipment we may be given. -
http://www.cookeoptics.com/cooke.nsf/products/redset.html Possibly thinking of these, not the new RED lenses. If memory serves, these Cookes came out a while ago.
-
Lighting black and white skin tones EXT Day + Night
David Regan replied to Ashley Barron's topic in Lighting for Film & Video
Same thought applies. But you could consider the natural separation of the darker skinned individual against the white snow, which would make me think I could get away with that subject going a little darker, without worrying about losing them as you might in a dark INT. -
Lighting black and white skin tones EXT Day + Night
David Regan replied to Ashley Barron's topic in Lighting for Film & Video
Hey Ashley, Been there, had to deal with that. It can by tricky, I suppose a lot of it has to do with the general mood/feel you are going for in the first place. I.e. it can be tougher if you want a more even, high key sort of look, with less contrast, in which case you'll have to balance out your exposure between the two. In my case, when having shot like this, I suppose I was somewhat fortunate in that the material was quite dark/moody/contrasty in nature, so the black/white skin tones actually played into that fairly well. However, I did often find myself on the verge of losing detail in the african american actor, especially as the caucasian actor was quite fair skinned. In the end, I found I would usually start by exposing for the darker subject, and then stopping down about two stops. That would put him at an acceptable level of detail. Then it was all about netting/diffusing the lighter skinned actor to where they didn't get too overexposed where they moved. On which note, being discretionary with your blocking can help to keep them from always moving through same areas of light etc... In the end, I think the most important thing is; darker skin should look darker just as the lighter skin should look lighter. In other words it isn't so much about balancing them, it's just about getting them within an acceptable range of difference to what the film (or video) can handle. And in that sense testing is your best option. -
As per forum rules, your please change your display name to your full first and last name. As for your question, every assistant in the world has different ways of marking, especially outside, it comes down to preference. For good hard marks, sandbag Ts or colored metal Ts work best for me. But I have used golf ts before often just as a quick 'soft' mark or if the DP is looking at shots for later in the day and wants a reminder of camera positions. Often too, if I find out the marks have to be pulled as they are visible in shot, golf ts are small enough to be hidden in the grass so the camera won't see them. On the flip side they are so small that often people can't see them too, so they have limitations.
-
"Inglourious Basterds"
David Regan replied to Jonathan Bowerbank's topic in On Screen / Reviews & Observations
Whenever I feel that urge I watch 'There will be Blood." I agree, it was contrasty, but for the most part it didn't bother me at all. Seemed to fit the often direct lighting style quite well. -
"Inglourious Basterds"
David Regan replied to Jonathan Bowerbank's topic in On Screen / Reviews & Observations
This film was probably the most fun I've had in a theatre in a while. Great tension as mentioned above, and a very 'smart' fillm, not the pointless bloodbath the trailer had me expecting. I also enjoyed Richardson's work, although the heavy-top down didn't always cut it for me. There were some great, dramatic, almost noir feeling shots where heavy back/top light really worked wonderfully. However the scene that really bothered me was the very first, the conversation at the table, perhaps it was an overly bright projector, but that table was just so incredibly hot, and so obviously coming from source directly above. The scene being in an otherwise dim cottage, with windows on the sides, the light just seemed strikingly out of place. Perhaps you could say it was a skylight, but given how much brighter the table was than even the ext. seen through the windows, it didn't seem justified. However scenes such as the bar (particularly the SS agents introduction) made up for it. -
Try doing a search on the subject on here, I know it's come up before several times (I think once or twice by me a while ago). You should find plenty of good answers. In short however, you will use likely either an incident meter, or reflected meter. If you take an incident meter reading, the resultant f-stop you get is telling you: In this light, if you shoot at this stop, you whites will be white, grays gray, blacks black etc... With a reflected meter, if you point it at a subject, the reading tells you that if you expose at that stop, the object/surface you metered will be rendered as middle gray. So if you take a reflected reading of a black surface, it will want you to overexpose to get that black to read as gray. And conversely to underexpose if you meter a white surface for the same result. These are the fundamentals of what the meter is telling you, it is not a rule, it is only information, you take that information and base your exposure on how you want your scene to look. There are many factors when you take a meter reading, most importantly where you are metering. But yes, do a search and you should find a bunch more on the subject.
-
Now all we need is redrock to introduce the M2, excuse me...M3g lens adaptor
-
Thanks everyone, Brian I'll check those websites out. And be staying away from Ryan Air... Cheers
-
Yeah definitely worth it. Were you shipping your equipment separately, or did you just check it on the airline? Because If I shipped an item overseas separetly, would that require the same procedure? Not that I necessarily trust shipping a camera as a good idea.
-
Thanks Rich, Assuming I rent the equipment, I would guess they would photocopy the proof of purchase they have for the equipment and give that to me to show Customs?
-
Hey all, So I've got a shoot coming up in a couple weeks in Taiwan, and we are considering renting the camera (Probably HPX500) here in the US and bringing it over. However I've heard issues where you need waivers to travel with that kind of equipment because customs worries you might be trying to resell it in another country. Anybody have experience with either bringing a camera or similar equipment, or at least with shipping it over? Thanks
-
If you have a monitor you will be using to frame up with, other than the EVF (I assume this is a digital shoot, since we aren't discussing groundglass?) I would use a transparency. First frame up a 1.85 framing chart, as you want the frame lines to be on your monitor. Then be sure both the chart and the camera are locked off completely and will not move. Get an overhead transparency, the clear plastic things you use with a slide projector. Find a good, permanent (for your shoot) way to apply it to your monitor. Then use a ruler and sharpie and carefully trace the lines. This will now serve as your framing guide as long as you use the monitor. Of course if the transparency falls off or is moved on your monitor you will have to do it again since it will be useless. Also try a search of this website, I'm not positive but I have the feeling this kind of question may have been asked before.
-
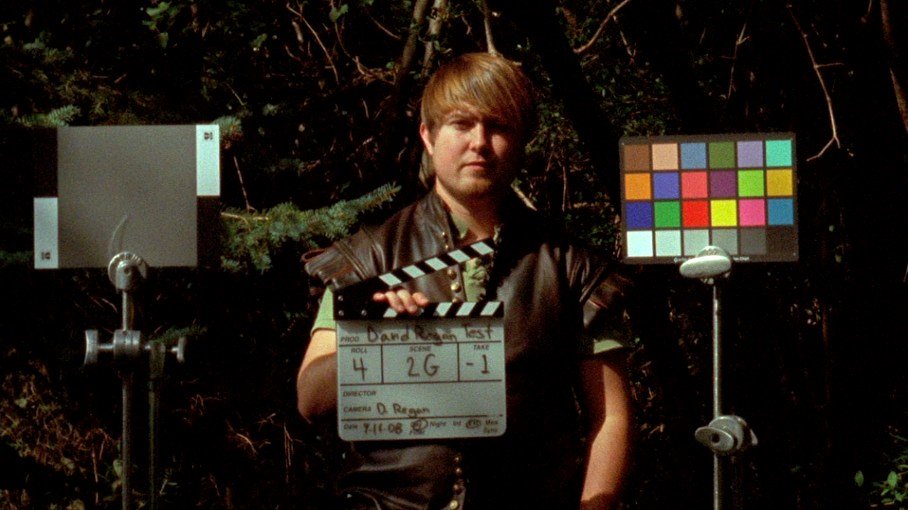
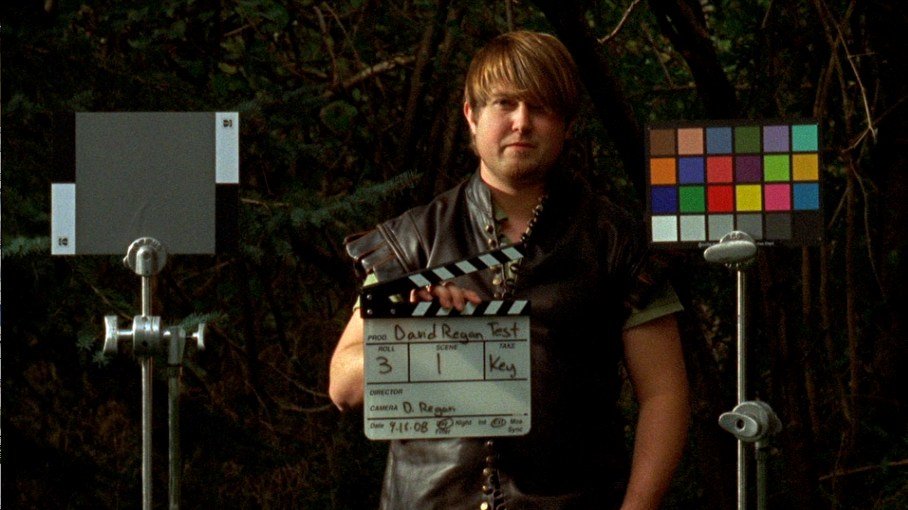
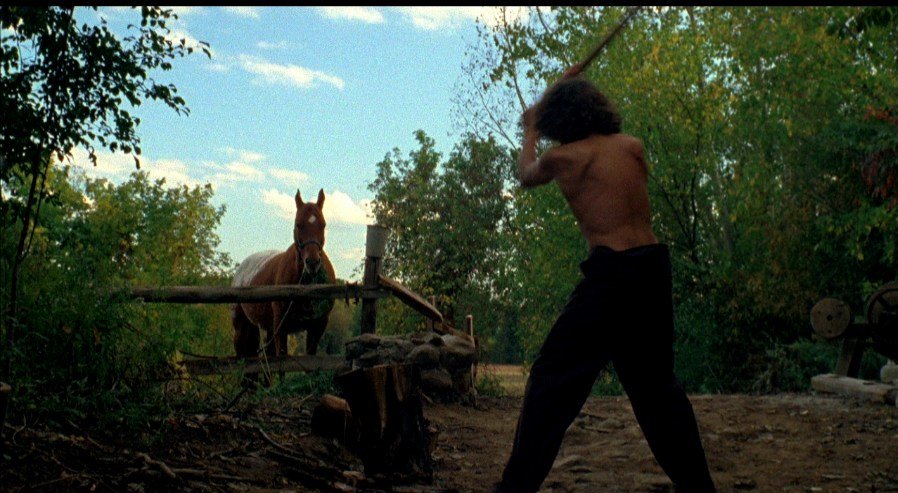
In the process normal test, I rated the film normally, EI 250. In the push test, I rated it at EI 500, so everything was 1 stop under. Incidentally, here is a shot I had fighting exposure, my meter told me I was 1+ stops under, (I was shooting wide open). This is on 7219, sorry I know your shooting on '18 so it's not a direct correlation, but just to give you some idea. The grain isn't horrible timing it up, the blacks are a bit crushed for my taste, and the gradation from midtones to shadow on the skin looks iffy in my opinion, but if it's grain your worried about, I don't think 1/3 should be horrendous. I believe a huge amount of the appearance of grain depends on contrast, the grain is there its just in how you see it, so a lot of this I think depends on 'what' you shot not just 'how' you shot it. (Of course not implying the how isn't huge as well)

-
While it's not quite the same as your situation hopefully this can help. A while ago I mistakenly underexposed 250D (s16mm) and wasn't sure if I should push or print up 1 stop. I had tested the stock prior, and looking at the test footage of normal processing vs. push, determined push would be the way to go, for reasons like Karl described above. I know these are just compressed stills but can give you some idea. The Last image is the footage I got back. Yes, as Karl said the grain is more apparent, but I think it's forgivable, the contrast and color that are retained are worth it in my opinion. This is printed up 1 stop This was underexposed 1 stop and pushed And the resultant push on my actual footage Good luck, hope it turns out.
-
Lighting hospital room NIGHT
David Regan replied to Shubham Kasera's topic in Lighting for Film & Video
I'm not familiar with the shows personally, but I would imagine any episodes of "House", "ER", "Grey's Anatomy" etc...could provide a plethora of such examples. -
Yeah I certainly wouldn't lose too much sleep over it as far as usability. Last year I had a shoot, and we actually wanted it to look really blue, so we shoot 500T without an 85 filter. Of course we forgot to tell the colorist, and he did a damn fine job of correcting it out, You can see a terribly compressed pic of what the color looked like below. So yeah in short you should be able to work with the footage assuming a decent transfer.
-
In the never ending effort to make a better reel, I finally chopped mine down to a minute, half it's length of before, and replaced a lot of older shots with new work. Just trying to show the very best of things, I think before I was a little forgiving in what I considered 'good' shots. http://vimeo.com/3173599 Anyways, comments or criticism would be appreciated. Everything there is s16 with only 3 of the shots on HD. Enjoy.
-
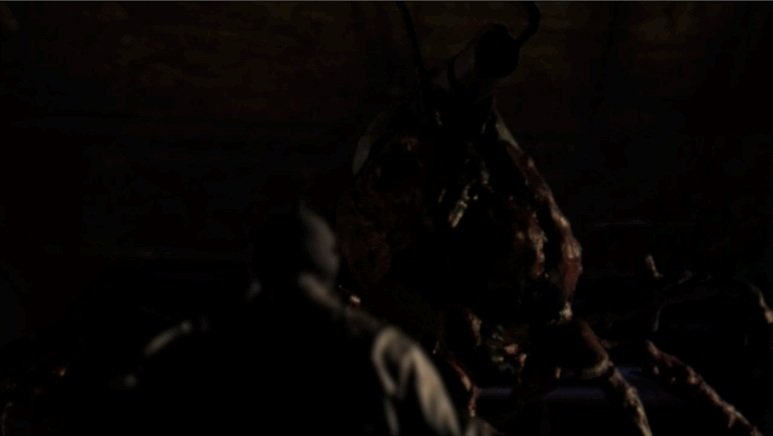
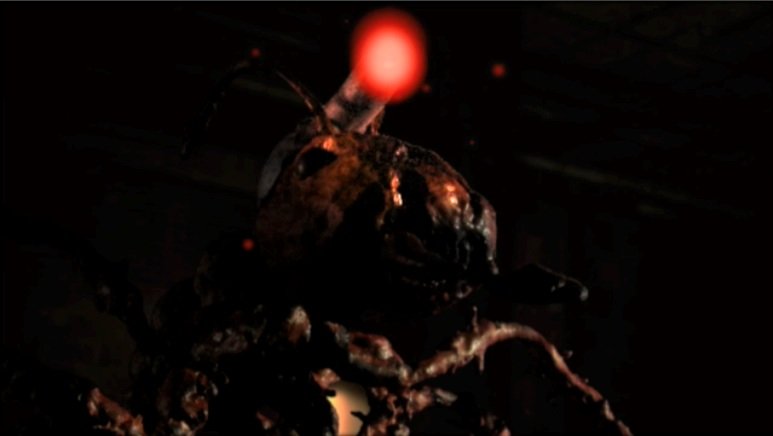
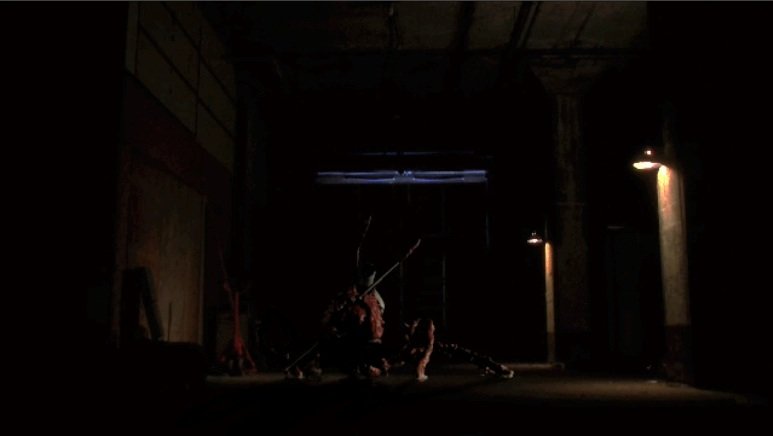
A couple months ago I had a thread on here asking questions about compositing stop motion stuff with film, for a big fight this guy was supposed to have with an ant. Well now it is finally done, so I have so screen grabs of the composites. I'll try and post a link to the full sequence when it is all edited, and the compositor does a couple last touches. I ended up approaching the breakdown in three ways, 1. Shots where the actor was in front of the ant, 2. Shots where the actor was behind the ant, and 3. Shots of just the ant. (3) was the simplest, I just lined up a plate for where the ant would be and rolled about 15 seconds. I shots about 4 or 5 times more angles than I needed, on the offhand chance one seemed too tight, too wide, to up/down etc...Having never done this before I wanted to have those options. (2) was also not too bad, I just filmed the actor doing his thing, but framed it with the imagination of an ant consuming part of the frame. (1) was the toughest as it required 3 layers of composites, (I know not much in the real world lol) so I actually first shot plates, then the actor on greenscreen, then the ant on mesh it all together. Since the ant stuff was dSLR compositing was a breeze, but as you all pointed out in my former thread about this, compositing s16 wouldn't be great, something our compositor echoed in sentiment as well. So we shot that HVX200, not ideal, but it made for an easy key, and the footage actually meshes, especially since the actor is typically out of focus for those shots, as we are focused on the ant behind him. The following are some low-res screenshots of different angles. Again, I'll try to post the full sequence as it is completed. A 3 layer composite, HVX 200 footage of the actor, dSLR of the ant, and super16 7219 plates. An insert of the ant's leg hitting the post. Lots of motion blur here, its a very vast shot. For the dust/particles, I just rolled the plate, and threw in a chunk of dust to hit the post. Works well in motion. The Ant's laser charging up. In the compression, the black detail in my film plate got pretty crushed, so you can't even really see much of the plate. Will be corrected for the final comp. The actor stabbing the ant. The pole is real, just aimed up to frame right. Once the end of the pole left frame, we had someone pull the pole out of the actors hands, which goes with the motion of the and pulling back, as if it is stuck in his head. I think the detail on the and doesn't hold up very well here, I think I lit it too flat, and it is washing out the texture. The wide after the hero has run away, the ant collapses and dies. So all in all it was great fun to do, and a huge learning experience. The stop motion was done well, it looks like stop motion, but that's the point really, we are trying to fool anyone with photorealism. It's all in the wonderful aesthetic of 70's B-movies. I certainly learned a lot from this, especially about the value of pre-planning, knowing eyelines for shooting plates, lens choice, etc...I also wish I could have done more with lighting the ant. It really came down to the wire to get this out to the compositor, so he could get it done for picture lock. But it is what it is and I think everyone learned from it. Enjoy, let me know your thoughts.