Robert Hart
-
Posts
378 -
Joined
-
Last visited
Everything posted by Robert Hart
-
16mm transfer options in Australia?
Robert Hart replied to Patrick Cooper's topic in Post Production
For those who are considering going the DIY route, your light will need to be very, very evenly bright across the whole image frame. Inverting a negative image amplifies any deficiencies in the light source. Note the brighter sides and corners in this test where the light from the lamp was slightly less, not apparent in positive scans but amplified by the inversion of the negative. -
Might have been a continuity camera. I don't think they were still using Polaroid instant cameras by then.
-
Electronic components seem to be the achilles heel of many appliances nowadays. For mechanical wearing surfaces, there are some splendidly robust metals available and surface finishing has been a fine art for many years. Modern automotive engine valves often endure the lifetime of the entire car. My money would be on camera sensors becoming obsolete and being upgraded before they actually lay down for the count. Pixels do go hot. Capacitors do age and not in a beautiful way. Electric motors seem to endure for years if the quality is built in. Simple plain oilite bearings and ball bearings so long as they are not drowned by water can go on for years. The film transports of old telecines are enduring long enough for the machines to become rebirthed with modern electronics. Steenbeck flatbeds seem to live forever mechanically and it is perishable stuff like electronics and synthetic cogbelts which bring them low. A few old ones have burned down. In stepping scanners, Intermittent transports may eventually wear enough to go off spec. Maybe this can be adjusted for or replacement parts required. I guess it may depend upon how much any given manufacturer wants to extract revenue from after-sales product support. Finally, any appliance depends upon the care shown by the operator as to how long it will keep running. As to how long a machine wikll keep on going. - that is anyone's guess. There are two basic usage models for any machinery. Drive until it until drops then rebuild/replace or operate it within a regular maintenance schedule and replace parts within their lifetime before they fail.
-
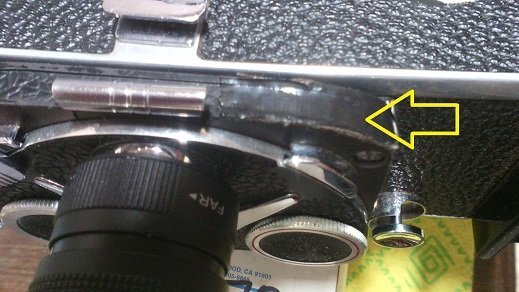
The little lamphouse is in a different position on the H16RX5. The piece had been destroyed in some past mishap so I cut a small strip of gaffer tape to cover what remained.
-
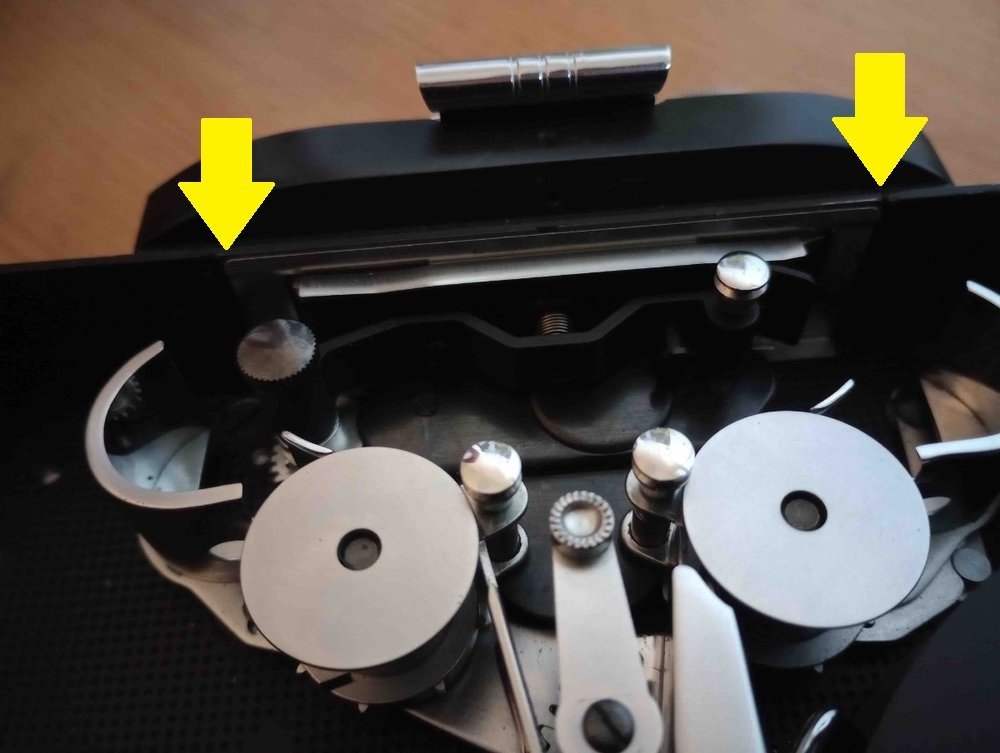
This is where the light leak occurred with my old Bolex H16 non-reflex. The light bands only occurred when the film was at rest. During motion there was not enough light leaked in to cause a problem. In daylight outdoors, a timelapse would be likely to be spoiled by banding.

-
Static electricity when winding film may create more of a visual effect like a variable area sound track as a faint blue stain on prints from neg. My money would be on the following, a light leak where the front assembly fits into the maincase or damage to a small enclosure for a tiny sync lamp in the front of the camera body, lower right as viewed from the front. In regard Dom Jaeger's suggestion, I experienced light leak with an old H16 in those joints at the front after a desperate dismantlement to deal with water entry. My cure was fairly primitive at the time, a thin layer of clear Tarzan's Grip over the seams inside the case, blacked over with a felt tip pen. The leak was very faint and only occurred when the camera was at rest and marked stationary film. It is over 30 years ago so my memory is vague. I think the leak occurs where those seams are exposed by a small clearance where the door overhangs. Whether I was on the right track or not I do not know. Whichever, the problem went away.
-
Depending upon where you are, look up Kelvin Crumplin. He had and maybe still has a couple of cameras which were remade as 2 perf by an Australian master who has built some amazing things over his lifetime. https://www.facebook.com/multivision235films/
-
With a spring powered camera, it would also be prudent to have it serviced with light lube for the cold conditions. If you have a strobe light that can be set accurately to the frame rate or a small video camera with a high shutter speed, it is possible for a good example of a Bolex for the governor to adjusted whilst drawing waste film, viewing with the video camera and using the frame counter as a means of syncing as close to the desired frame rate. The camera will hold sync for about eight seconds. They are also dreadfully noisy. I use a video camera as a means of setting the governor on a generator.
-
Joerg Polzfisz. It is about choice. If you invest in 2x anamorphic lenses or adaptors, then you are stuck with 2x. You can crop it at cost of resolution. Stacking anamorphic lenses or adaptors will give you both. A rear anamorphic adaptor like the Laowa 1.33 yields a clean image. If the view is expanded with a front anamorphic adaptor, you are more likely to get the ricegrain bokeh and flare artifacts some people want for pieces set in the past times. It is one of those "do it because I should" versus "do it because I can" conflicts. My personal preference would be to rent good 2x anamorphic lenses if a production called for 2x.
-
If you happen to buy a CP16/CP16R from Visual Products, ask if the memory battery can be removed so that it can have no chance to corrode the circuit board. That is the way most CPs die.
-
BMPCC 4K Anamorphic 1.33x - Drifter Character Intro
Robert Hart replied to Bulent Ozdemir's topic in BlackMagic Design
Bulent Osdemir. You will most likely end up with a bad porthole vignette. A rear-anamorphic adaptor slightly crops the field-of-view and its exit pupil is far too small for the 2x front-anamorphic adaptor. If I was filming a serious project with a budget, my personal preference would be to rent good anamorphic lenses. What I am doing is really only a cost-reduced workaround with old equipment I already have. -
BMPCC 4K Anamorphic 1.33x - Drifter Character Intro
Robert Hart replied to Bulent Ozdemir's topic in BlackMagic Design
I gave the "sandwich" another try this evening with a genuine Nikon 50mm f1.4 lens. Apologies for the handheld shake. That part of the near neighbourhood is not renowned for being a safe place at night so I went handheld, darted out, took a quick glimpse and got on my way again. I processed in 4K this time round in Resolve. Am still trying to get my head around BRAW. The focus was on the front of the parked white car. The front anamorphic was a bit skewed. If you want tack sharp, you will not get it with this combination as the Century adaptor was originally built to meet standard definition television requirements not 4K. I imagine a superior result would be obtained with 1:33 anamorphic lenses mounted to the Laowa 1:33 adaptor in its PL-Mount form. -
BMPCC 4K Anamorphic 1.33x - Drifter Character Intro
Robert Hart replied to Bulent Ozdemir's topic in BlackMagic Design
For sake of curiosity and to test a broken Ursa Mini Pro I have resurrected at the same time, I shot a rough test using front and rear anamorphic adaptors additively to make near-to 2x cinemascope. Youtube does some weird stuff unless the uploaded clip is exported correctly, something I have yet to learn. The colours are a bit off because I have yet to learn BM RAW. -
BMPCC 4K Anamorphic 1.33x - Drifter Character Intro
Robert Hart replied to Bulent Ozdemir's topic in BlackMagic Design
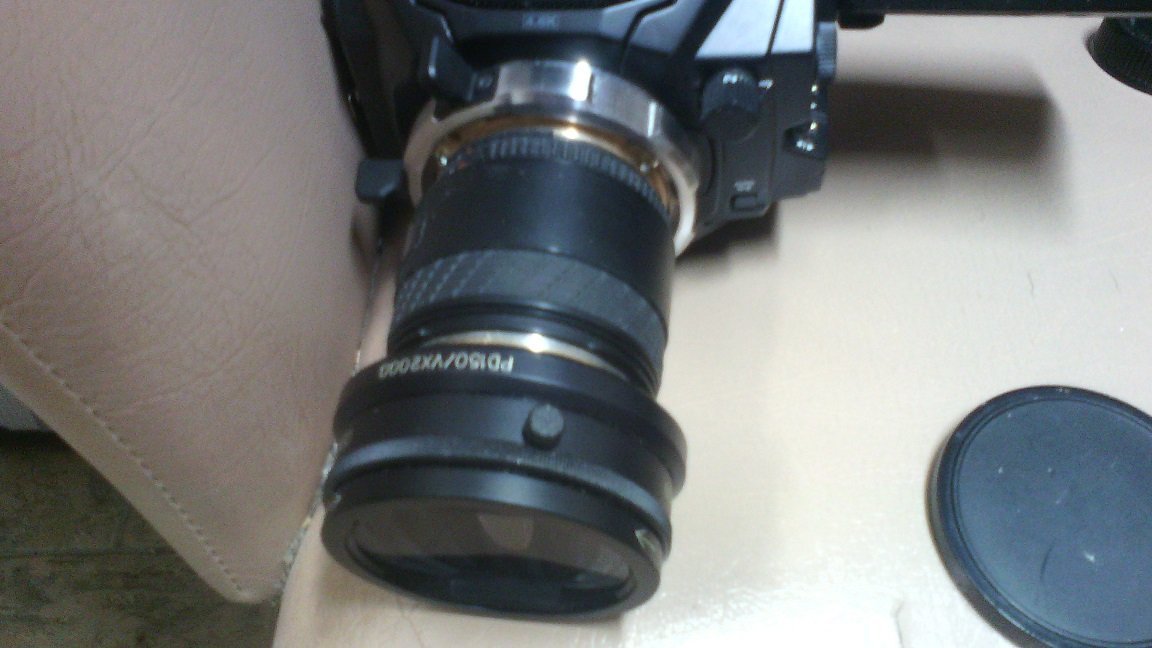
Further to my previous responses, I changed the mount on the Mini Pro to PL so that I could offer up the "sandwich" of the Laowa 1:33 rear anamorphic adaptor -> Nikon lens > Century 16:9 front anamorphic adaptor. This combination will work with a lens as wide as a Sigma-for-Nikon 28mm f1.8 to the Mini Pro sensor without vignette with the aperture wide-open. I have not tested it outdoors. Chances are that the iris may cause corner brightness falloff when closed up. The Century adaptor has to be mounted as close to the front of the Nikon lens as you can get. Even then, the PL-Mount in the Mini Pro has to be shimmed forward by 0.50mm to restore correct focus. I forgot to mention that the Laowa adaptor I used is a one-off remanufacture with a Nikon F-Mount on the front. The standard Laowa rear anamorphic accepts a PL-Mount lens on front and the rear attaches to a PL-Mount camera. To do the same experiment you would need to use a 1:33 anamorphic prime lens like SLR magic with a PL-Mount tail on it. Since Laowa will be making a 2x anamorphic lens set, the experiment is probably now pointless.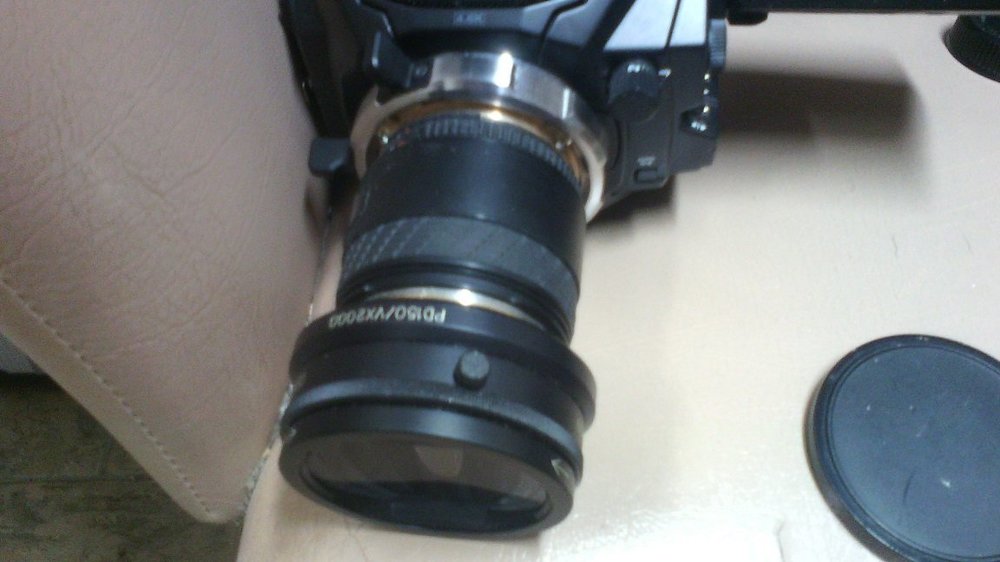
-
BMPCC 4K Anamorphic 1.33x - Drifter Character Intro
Robert Hart replied to Bulent Ozdemir's topic in BlackMagic Design
In this test, at timecode 0:30, the Century 16:9 anamorphic was fitted. You will observe a loss of contrast and sharpness compared to the following shots. One of the following shots looks a bit soft also. That was a Nikon 35mm f1.4 which had been serviced at some time in the past and had been incorrectly set up. I have since fixed it and it is now sharper. -
BMPCC 4K Anamorphic 1.33x - Drifter Character Intro
Robert Hart replied to Bulent Ozdemir's topic in BlackMagic Design
Here is another older test shot with a Super16mm sensor camera. Please forgive it being yet another "cat" video. -
So long as you liked your light to be a hint of cacky green/grey, "cold arc lamps" which were a form of HMI were okay. Tight-arsed cinemas ran them until they stopped. Carbon arc-lit film projection is the absolute best but if you haven't seen it, you don't miss it. They were no longer practical when large platters and mutts near-to automated the biobox as there remained no opportunity to replace the rods during the changeovers.
-
useful bits you can DIY with a welder
Robert Hart replied to Johanan Pandone's topic in Grip & Rigging
You might like to examine bridges which allow two cameras to be mounted to a single tripod head. I made one out of 7/16" aluminium flatbar with plain holes for the camera base screws and a threaded hole in the centre for the tripod head's own thumbscrew/tensioner. Captive waisted base thumbscrews for the cameras would be better. For that you would need to used 3/8" flatbar, threaded camera base screwholes and a half thickness clearance for the threads of the screws in the top halves of the holes. My application was to use it to mount a wide-view sighting camera and a narrow-view camera with a 1000mm lens for agile display aircraft in flight. Other folk might use it to mount a lamp and camera. -
Gun Oil to renew old helicoid grease?
Robert Hart replied to Johanan Pandone's topic in Lenses & Lens Accessories
Oil on iris blades can be fatal to the iris. The blades may gladwrap to each other, tear apart or pop the tiny rivets which are their pivot axles. You will not feel any resistance in the iris ring when you move it and discover a "goat's-eye" iris later. -
David. What are your thoughts on camera angles and lens focal lengths with respect to psychological influences upon audiences?
-
Any new developments with the FilmFabriek HDS+?
Robert Hart replied to Daniel D. Teoli Jr.'s topic in Post Production
It does look rather magnificent. I always had a soft spot for steam trains, a childhood dwelling-in-the-past thing I guess. What lens were you using for the retreat zoom at the end of the clip? It had an amazing reach. Old Kodachrome correctly exposed, comes up sweetly on the Retroscan. I am battling with neg inversion though. -
Any new developments with the FilmFabriek HDS+?
Robert Hart replied to Daniel D. Teoli Jr.'s topic in Post Production
16mm film does not resolve much better than original interlaced standard definition television. Years back, Super16mm film was being promoted as meeting HDTV requirements. Higher resolution scans will yield more detailed grain. The sequence of motion images will appear sharper due to the randomness of grain. 4K for 16mm? I wonder though, how sharp do the consumers of end-product really want their film grain to look? -
The battery pins poke out of the camera's casework in the battery dock and can be easily found.
-
Any new developments with the FilmFabriek HDS+?
Robert Hart replied to Daniel D. Teoli Jr.'s topic in Post Production
Timber might be okay if horizontal mounting planks attach through cladding to uprights but a single course of internal brick wall might fall in on you. -
That is interesting. On the paper diagram and the PCB here, that trace is entire on the "E" and "F" revisions. I would be interested to know where that blue wire starts and ends on the rear of the board. It may have been a workaround for a partial failure of one of the hybrid circuits or a later revision to update an older circuit to a newer design. Paul Hillman at Visual Products would know. The red sync light should normally illuminate when you button on, then turn off after the camera spools up to sync speed. What chances are there that you might have accidentally buttoned-on the camera whilst the battery was off the camera? An intermittent connection at a battery pin whilst the battery was being fitted in might have been enough to false-trigger the parking circuit to permit a run. Whichever, so long as there are no other issues, I would be wary of messing with the motor control board. It does not take much to kill them off. My next port of call would be to check the battery pins and the sockets in the battery. With wear on the pins and on the socket surfaces, the connection pressure on the surfaces might not be ideal. The pins are slotted to create semi-elliptical springs. With a very fine jeweller's screwdriver tip dressed to a sharp edge, the slots in the little brass pins can be spread open to restore contact pressure but only just a little or you may break the pin.