Dom Jaeger
-
Posts
3,369 -
Joined
-
Last visited
Everything posted by Dom Jaeger
-
Why is there slack on my film stock?
Dom Jaeger replied to Stefan Lindenblatt's topic in Film Stocks & Processing
You need to be more clear in your description. What slack? If you mean the loop, which you measure to the line when loading, then that’s meant to stay constant. That’s how a film camera works. Just don’t latch the film onto the gate until you’ve fed through enough and wound it onto the take-up core. With the loop still free from the gate you should be able to turn the gear and the film will move through from feed side to take-up, with the loop staying the same size. Only then, latch the film onto the gate, centre it and load the mag, Then manually inch or use the test button to slowly advance the film until the claw catches a perf. You can usually hear it catch. Read the manual thoroughly to understand your camera. If it’s still not working properly after that, you might need a tech to look at it. -
Which light sealant to buy in the UK for Bolex?
Dom Jaeger replied to Chloe Charlton's topic in General Discussion
Silicone is a pain to remove, and won’t just crack apart when the camera needs to be opened for service. Use a black caulking compound gap filler instead. -
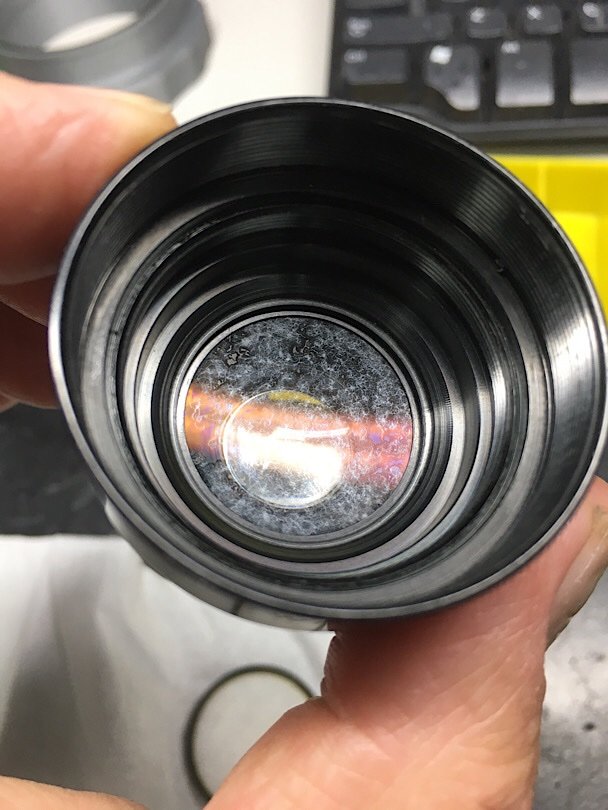
Yes, that glass is the reflex prism, a beam-splitter which diverts about a quarter of the light up into the viewfinder. It should be kept clean because the other three quarters goes through to the film to form the recorded image. It’s a bit hard to tell from that photo but it looks like the line on yours is a bit of separation, meaning the join between the glass pieces that make up the prism is starting to seperate. It might not have any effect on the image, but you’ll need to shoot some film to check. If you remove the filter holder and rotate the turret 180 degrees out of the way, you can flip the prism out in order to clean the back surface if necessary, and observe the ground glass surface on the top where the viewfinder image is formed. You can use a bulb blower to blow off any dust specks on there. This should be described in the manual.
-
Arri 16SR - Use daylight reels directly or re-spool onto cores?
Dom Jaeger replied to Bernhard Kipperer's topic in 16mm
No that's not a camera problem, that's how an SR mag works. The gear ratio for the belt that drives the take-up is such that the sprockets feed 18 frames or about 14cm of film through for each revolution of the take-up spindle. This means the minimum diameter for a take-up spool to snugly wind on the film is 14/π or about 4.5cm. A daylight spool hub is only around 3.2cm in diameter, so it won't wind on tightly until quite a bit of film has gone through, causing potential cinch marks. The solution is not to use a daylight spool for the take-up, but to use the removeable core that comes with SR mags, which happens to be about 5cm in diameter. -
Cooke speed Panchros: Fungus cleaning
Dom Jaeger replied to omar robles's topic in Lenses & Lens Accessories
If your friend is not very experienced with working on lenses, and the lens is in any way valuable, then get it properly cleaned by a professional. Lens service is not something you can generally DIY unless you don't care about the lens and you want to learn. But I wouldn't be practicing on a Speed Panchro worth thousands. Start with junk lenses that cost nothing. Depending on the age of the lens, the coatings may be soft and easily damaged. The lock rings may be hard to undo, making it easy to slip and scratch the glass. To properly access every element you usually need to dismantle the optical block from the focus mechanics, which is not a job the average person should undertake. There may be cemented doublets with haze or fungus in the join, which will not be cleanable without splitting, which is definitely not a DIY job. -
When does the film first jam, when it starts to enter the sprocket, or when it enters the gate, or when it gets to the claw? If the sprockets aren't properly aligned with the claw when the loopformers are closed it can cause problems with the auto-threading. Once threaded you should open the loop formers to see how it goes - does it move the film now? How does the loop looks - does it stay centred, or shift up and hit the loopformer edge? There may be other issues causing too much load for the motor - are you fully winding the spring so it's at its strongest or running the camera just before the spring runs down? Does the camera slow down when you run the spring all the way down? (Hold the take-up spindle to replicate the load of film being wound on). Has the camera been serviced by a decent technician recently? If not it could be that the mechanism needs a CLA, or the claw is not in tolerance, or the sprocket guides are too tight, or the film guide is deformed and making it hard for film to move through the gate, etc.
-
This guy has modified Kinamos with modern motors: https://www.instagram.com/kamera_doctor/?hl=en
-
I think probably one of the main differences comes from how well the viewfinder system allows the operator to accurately focus, which is a combination of magnification, clarity and accuracy in the ground glass setting. Then in terms of using lens marks to focus, you have things like accuracy of the flange depth setting, accuracy of the lens back focus and quality of the lens - including mechanical consistency as well as focus throw and accuracy of the marks. In those terms, professional cameras like an Arriflex or Aaton with a mirrror shutter and high end optical finders using professional lens mounts like PL will be superior to a Bolex with a C mount, or even something in between like an Eclair. Then you have the mechanical aspects of the film transport which determine image quality - things like steadiness, scratches or light leaks, flatness in the gate, etc. These settings might be stable or they might be more susceptible to wear or physical knocks. An Arriflex will usually be more durable than an Aaton or an Eclair, a Bolex will usually be more durable than a Beaulieu, etc. It can of course come down to how well a kit is maintained and serviced. As Simon mentioned, different shutter angles can subtly change the quality of motion capture too. Certain cameras can have common issues that can sometimes cause image quality to suffer - using a reflex Bolex without RX lenses, Scoopics creating pulsing exposures, butterfly shutter CP16s causing smeared highlights, cameras that need exactly the right size loop or they cause problems etc. But in general, a camera is only the box holding the film, the stock and the lenses and the cinematographer are what really make the image. A high quality camera just tends to allow those factors to reach their full potential.
-
Fabulous little cameras, I started a thread about them many years ago now after discovering one where I worked. I documented pulling it apart but alas those photos are gone now. It has the most ingenious spring motor drive gear that increase the gear ratio as the spring winds down, in order to try and maintain speed. Regarding the buttons and levers, it’s been a long time but I think I remember some. 1: I think this releases the lens 5: I think this disengaged the spring in order to use the hand crank 7 and 12: These were a basic framing guide, the back one was a lever that lifted up with a centre notch to align with the front part, which was a wire frame that swivelled up I forget the others, but I’m sure playing with one you could work them out.
-
Looks like a B4 mount.
-
Bolex H16 Reflex shutter stopping in slightly open position?
Dom Jaeger replied to Tom Doolittle's topic in Bolex
So the claw and shutter have been properly timed relative to each other, but the position of the shutter relative to the stop pawl is out. Probably someone had it apart. The shutter can be removed on those models and repositioned - three screws so three positions plus some adjustment. Just need to remove the viewfinder and front, then remake the light seal on reassembly. Otherwise you will get a flashed frame between each shot, which is more annoying than unusable. -
Either replace the 3/8" camera screw with a shorter one, or space out the gap between support and camera base with something. I often use hard rubber sheet since it also acts to help keep the camera secure and absorbs vibration.
-
does this lens have fungus on it?
Dom Jaeger replied to Bruce Herbert's topic in Lenses & Lens Accessories
Yes it will lower the contrast a little and make the lens a bit more prone to flaring, otherwise it shouldn’t be too big a deal. -
You could buy some cheap out of date film, or ask the AFW folks or ask Neglab or if you buy film from Cameraquip they might have some spare 16mm lying about. I have a little but I use it all the time when I test cameras in for service.
-
does this lens have fungus on it?
Dom Jaeger replied to Bruce Herbert's topic in Lenses & Lens Accessories
This is fungus:
-
does this lens have fungus on it?
Dom Jaeger replied to Bruce Herbert's topic in Lenses & Lens Accessories
Looks more like lots of fine coating scratches. Fungus has a tendril or spiderweb sort of look. -
Hi Bruce, Melbourne has a fantastic 16mm community, check out the AFW if you don’t already know about them. Werner from Neglab will be going on a two month holiday very soon, so you won’t have any local (Australian) processing options for a while unfortunately. Memorylab are a great local scanning option. Regarding the spools, you can absolutely load in low light (they are called daylight spools) and only the first few layers will be flashed. Small sacrifice for the confidence that you’ve properly loaded the camera, definitely a better way to load when you’re a beginner. If you can practice with some dummy film first and observe how the loop looks it will be very helpful. The cameras should auto-thread but you should check that they are working properly. Make sure to read the manuals and get familiar with how the cameras work. Here’s a REX 4 manual: http://www.vintagecameras.fr/images/MonSite/BOLEX/H16_Reflex/_Doc/Bolex_H16Reflex_Manual_en_Revu.pdf For the Supreme I haven’t found any English online manuals, but you can use an earlier manual, just disregard the exposure time listed (the shutter angle changed) and you’ll notice the pressure plate and claw are different in your camera. Otherwise they’re pretty similar: http://www.vintagecameras.fr/images/MonSite/BOLEX/H16_Leader/_doc/Bolex_H_Non-Reflex_ac1953.pdf I service all things cine including Bolexes and their lenses here in Melbourne if you need anything looked at. Contact me via cinetinker at gmail dot com. With exposure, just meter 1/60 sec for the Supreme and 1/80 sec for the REX 4 (at 24fps), or the closest settings to those. Err on overexposure. I would just shoot one spool for each camera rather than go through all the trouble of rewinding. But if money is tight it’s an option, just check with dummy film that the reverse claw is working properly so you don’t scratch the film. You don’t want the loop to start hitting the loop formers. Have fun!
-
Bolex H16 Reflex shutter stopping in slightly open position?
Dom Jaeger replied to Tom Doolittle's topic in Bolex
If the shutter stops open then it’s mistimed. Do a shutter timing check to make sure. Mark some dummy film with a long squiggle that goes across the film width and load it in the camera. Remove the lens so you can look through the front port. Disengage the motor, lock the run switch, and use a rewind lever to slowly advance the film. The film should stay perfectly still when the shutter is open, the sharpie mark helps to see it. If the film moves at all, the timing needs to be reset. -
There are a few cheap options for measuring the shutter speed of film cameras, including DIY Arduino builds or smartphone apps (these need a phone that has a headphone jack for the photoplug accessory), but the simplest way is to shoot slo-mo on an iPhone at 240fps, pointing at the lens with a light shining through the gate. You can then analyse the footage and count how many frames the light is visible, 6 frames means the shutter speed is around 1/40 sec, 7 frames and it's around 1/35 sec etc. Or any still camera repair shop should have a shutter speed tester.
-
S16 K-3 lens mount adapter question
Dom Jaeger replied to Skyler Carrico's topic in Lenses & Lens Accessories
M42 to PL is a very common adapter, as long as the one you buy is good quality and accurately machined your flange depth should be OK. I don’t have experience with Ironglass adapters, but their products seem well made. Adapters just space a lens out to the adapted mount standard, so in this case the 45.46mm flange depth of M42 needs to be spaced out to the 52.00mm depth required for PL lenses. The best way to check it is to mount a zoom you know is good, focus at the long end and check that the focus stays sharp as you zoom out to wide. -
lenses designed for digital or black and white capture
Dom Jaeger replied to Deniz Zagra's topic in Lenses & Lens Accessories
My understanding is that it’s because sensors use micro lenses above each photosite, which gather the light but can cause problems when the rays are too angled. I’m sure googling sensor design will tell you more. Colour fringing, or chromatic aberration, is a common aberration in many lenses, especially older wide angles. It’s a seperate thing to the colour fringing caused by photosite crosstalk on a sensor. -
lenses designed for digital or black and white capture
Dom Jaeger replied to Deniz Zagra's topic in Lenses & Lens Accessories
The main thing a lens specifically designed for digital sensors will be is telecentric (or more correctly near-telecentric), which just means that the light rays coming from the rear element are fairly parallel. Film emulsion doesn't care what angle a light ray hits it, whereas a sensor photosite does. Older lenses from the film era with tiny rear elements and shallow exit pupils (often wider angles) can induce colour fringing or vignetting when used on digital sensors. You can quite happily use modern lenses with film, the only issues are when the rear element protrudes too close to the film plane and can hit a reflex mirror, but despite a brief dalliance with this sort of design in lenses like Angenieux's DP zooms or Panavision's Primo Vs, most manufacturers have gone back to allowing more clearance for 35mm format lenses. Large format lenses however are now often designed with shorter flange depths, since the cameras are almost all digital, and they can utilise shorter flange depth mounts like Arri's LPL or Panavision's SP70. The irony of companies releasing "digital" lenses is that many people prefer to use older lenses that were designed for film anyway. As far as lenses designed for B&W goes, I don't see what specific attributes you might want in a B&W lens that you wouldn't also want for colour. Many lenses from before the 50s were probably designed with B&W film in mind, which is possibly what Joe Dunton meant, but they could certainly still be used with colour film. As lens design progressed, you had aspheric or APO lens designs which better corrected for a larger range of wavelengths, but they will also make a B&W image sharper. -
More to the point, does anyone still have spare imperial focus rings for all those focal lengths, with the matching scale letters (the small letters next to infinity that determine the spread of the scale, which is matched to each lens)? Last I checked, Zeiss had very few spares for these lenses.
-
All the MOS Arriflex cameras - 2C, 3C, 35-3, 435, 235 - can run in reverse with most mags, also the Arriflex 535 and Arricams. Mitchells will run in reverse too. You can use a hand crank to rewind a Bell &Howell Eyemo, but only a few feet as the feed spindle does not rewind the film and you are also winding up the spring when reverse cranking.
-
Bolex - switar - are these correctly adjusted?
Dom Jaeger replied to Bruce Herbert's topic in Lenses & Lens Accessories
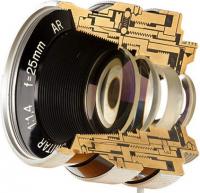
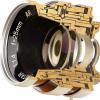
Only the 10mm is RX, the 16mm and 25mm are described as AR.