


Gregg MacPherson
-
Posts
2,602 -
Joined
-
Last visited
Everything posted by Gregg MacPherson
-
Help needed - Eclair ACL Losing Loops
Gregg MacPherson replied to Aaron Yang's topic in Camera Operating & Gear
Aaron, Assuming that the equipment is OK...... It's a good idea to control the loop sizes, and the position of the perf in the film gate, and the position of the claw. The mirror parking will leave the claw always in the same place. The manual mirror motor, you will have a routine that leaves the mirror and claw almost the same. When loading, while setting the loops, shift a perf in the gate so it's just below the claw. The claw will catch it every time, quiet starts and you will keep your ideal loop sizes. Like Dom says, manual inching to engage the claw is best. Make it part of your protocol. Get some clean scrap film to practice loading. You can run the loop tests/scratch test with the door off. Adjust your loading protocols as above and check that your method works. Then you can pull mags as often as you need without any concern over the loops. If you have any doubt about your mag or method, after mounting a fresh mag on the camera just pull the door and run a few frames. Have fun. -
new ALCS compact crystal motor for Eclair NPR
Gregg MacPherson replied to Aapo Lettinen's topic in Eclair
Really interesting work Aapo. How is shoulder mounting with the common view finders? There must be more space to include a shaped shoulder pad. -
Cinematography.com's David Mullen wins ASC award
Gregg MacPherson replied to Jeff Bernstein's topic in General Discussion
Well deserved David. -
Thanks Dom, this is going to be a good reference thread. Duncan, The generic Arri-B/S to TS adapter in my prev pic above......Lens inserts to the flange, then twist a few degrees 'till it locks with a click. The metal button that releases the bayo lock also retracts the little tabs that hold the groove in the Arri-S mount. If the lens orientation feels off to the operator or focus puller maybe it's OK to rotate the rear of the adapter. The machining one assumes is perfect and there will be 4x90deg increment positions.
-
This is the common (generic) Arri-B/S to TS adapter I've had and seen photos of. Best I can do for now. It's cut from the pic on the cinemarketplace that I pointed to. The bayonet locks. It has a metal release button on the far side. When Sam Riley resurfaces he might take some better pics for us. One of the common industrial lens projectors uses the same adapters, I'm fairly sure. So that is a source of info, and maybe used adapters, so anyones guess on the supply and demand there.
-
You are a busy beaver. I'm sure that is not the standard Arri-B/S to TS adapter that was sold (contemporaneously) with the original cameras. I've had one or two and seen a few photos on the web or brochures. It has a plain, simple front face. I can't easily find a good photo, but there is one included in the ACL II kit I previously advertised on the Fleamarket. Not a close up, but you get the idea.. https://cinematography.com/index.php?/forums/topic/91893-eclair-flea-market/page/2/#comments So I don't know who made that one. Looks like a studious piece of work. Gregg.
-
Hey, well done. A thought on the rewinds...Most old ones had simple gears enclosed that gave quite a high rewind speed. Very useful. Not sure on the ratio, guessing maybe 3 or 4 to 1. You could make all that with your 3D printer maybe. Steel for the shafts and spindles. The gear teeth would be quite coarse.
-
Meant to add...Keep the PL mounts and screws, may be very useful later, and the lenses are more valuable with PL mounts. If someone is buying the good aftermarket PL mounts to convert, they're almost USD400 each.
-
I had to figure this out a while ago (screw length on Arri-B vs PL mount). In the end the simplest thinking was best. I measured the screw length from a factory PL mount on a 16mm format lens as 6mm. The screw for Arri-B was I think 5mm long. There isn't much thread engagement length at 6mm for the PL mount, but at about 7mm the screw is bottoming out. If you have 6mm screws, it may not be safe to use them on the Arri-B mounts. The screws are DIN 920 standard, M2 with coarse pitch=0.4mm. They have a 2.8mm diam cheese head, narrower than normal screws. Zeiss were helpful but didn't work out. ACCU in the UK sold us 50 stainless screws for about 25 Pounds, similar shipping. Very hard to find in small quantities. There may be lots of used 5mm screws left over from all the conversions from Arri-B to PL. The people selling you the mounts may have them. If you are searching, the screw spec will look something like DIN 920 M2x5, then maybe something specifying the steel and finish. Trimming the screw length is pretty easy for those with skills, familiar with tiny screws. Good luck.
-
Heikki, have you been through those web pages and scavenged for useful contacts etc, like on the camera service techs page..The first one I explored seemed a bit problematic, but there were some new names (for me). Steven, those ACL S16 conversion kits, I'm sure were intended for camera techs, not for DIY. (so I think we agree) Gregg
-
Making a new HD SDI beamsplitter video tap for the Eclair
Gregg MacPherson replied to Geffen Avraham's topic in Eclair
Andrzej is really busy. I had to wait a couple months for him to service two motors. But it's worth saying, he put it in his que and he was on time with the execution. Not bad really for a highly specialised (one man?) business. Re the shipping costs. You can strip down to the bare minimum that he needs -
Eclair Flea Market
Gregg MacPherson replied to Gregg MacPherson's topic in Marketplace Listings Under $200 / €200
I think I remember Jean-Louis Seguin may have made those before. He may have some Jaeger connectors or an easy source. Anyone good at making up cables could probably make one, though I would choose someone experienced who knows the cameras and the specs well. The 4 pin Jaeger can be trickey if one doesn't have skill or experience. The standard cables with 4 pin Jaeger/Canon XLR4 I have seen in two versions. One with a coiled cable about 400mm long with connectors, and one with a straight cable about 250 long total, for the on board battery. For the length, copy a standard length, or consider it carefully. Andrzej at AZ Spectrum, commenting on current draw and V drop at higher fps, advised to keep cables short. So I guess one should also have adequate copper section area (cable size). The spiral cables are really useful though. I like the idea of the off board battery, and with the XLR4 connector on the camera, really robust, the old concern about stressing up the Jaeger connector is gone. Gregg. -
New to the ACL II and need help loading in the 400-ft mag
Gregg MacPherson replied to Skyler Carrico's topic in Eclair
It's good to emphasise the importance of properly fitting screwdrivers. Gunsmith sets are an interesting idea I never thought of. They are a bit expensive here. I used to have a specialist tool shop nearby and I could buy a selection of expensive good quality small size screw drivers. Since then I have found inexpensive, quite good quality sets of hollow ground screw drivers at the budget hardware and auto supply shops. Have a look at the shape of slothead screw drivers online....normal vs hollow ground etc... One problem is that the slothead screws on the ACL often have quite narrow slots , so without the perfect driver set, one sometimes has to use a smaller driver so as to fit the slot. Obviously a driver that fits the slot perfectly and is the width of the screw head is ideal. -
New to the ACL II and need help loading in the 400-ft mag
Gregg MacPherson replied to Skyler Carrico's topic in Eclair
I have sometimes taken a cheap screwdriver that was a little too big or thick and carefully ground it to size. Incorrect or inexpertly ground screwdrivers can easily cause a little damage. The screw on the feed side needs to be tightened, with the idler assembly in the correct position with the spring relaxed. Les Bosher might have experience with these mags. Any camera tech could fix the idler mounting, though he will wonder what the correct spring pre tension should be. Some experience may be required if there is a troublesome issue with the take up wind being loose or not tracking straight. As well as the possible causes for take up problems listed earlier, add... - Take up arm pre tension. There is a means of adjusting that on the feed side. Really needs a custom tool to rotate it. I have done it without that but sometimes scratched it. Needs a little skill, expertise. - The take up platter and guides on the door. The factory mags had 200' sized platters, and with a properly maintained mag the 400' roll takes up straight without the bigger platter to sit against. But if there are any tracking problems due to the rubber take up tyres then the bigger platter could help. But it's better to have the rubber tyres working properly. (Edit)..You platter is odd. Looks like the film might catch or scrape on the surface, especially if the take up tracking was not true. Where are you located? -
New to the ACL II and need help loading in the 400-ft mag
Gregg MacPherson replied to Skyler Carrico's topic in Eclair
So I had a look and one can, leaving the whole pully and idler assembly in place, adjust the spring pre tension by releasing the screw on the feed side. Rotate the assembly to the correct relaxed position, then tighten the screw. Very simple. Sorry I did not check earlier. I have a faint memory of having done it years ago also. I'm not sure what the correct spring pre tension is. The techs would have had a torque spec and a rule of thumb for the relaxed position of the assembly. I think I just guessed and was happy when the take up worked. Did you fix it? -
New to the ACL II and need help loading in the 400-ft mag
Gregg MacPherson replied to Skyler Carrico's topic in Eclair
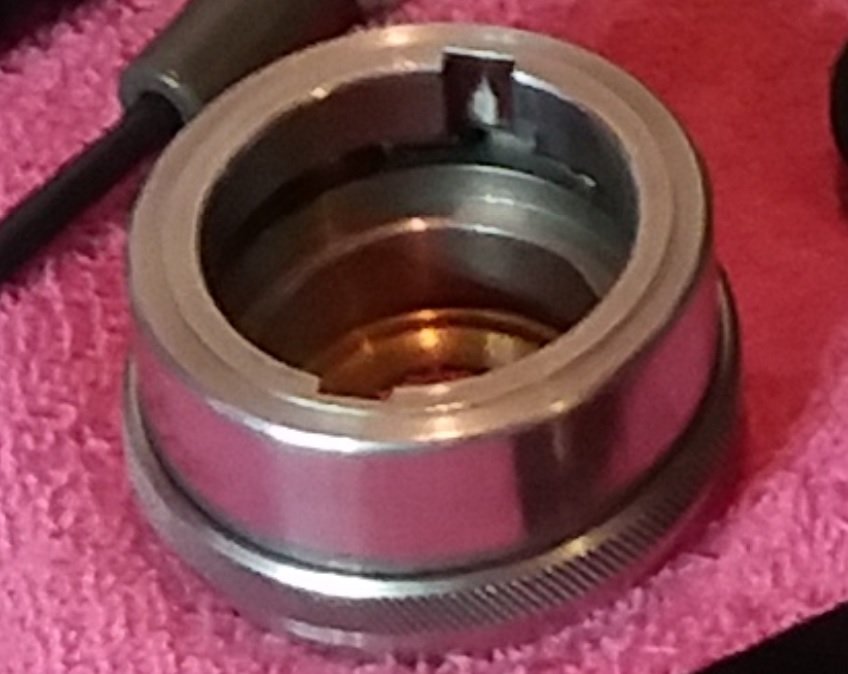
Sorry, I;ve been a bit sloppy in my description and that made it harder for you. The idler assembly with the big pully sits on a spindle. The spring sits inside the big pully and the spring anchor goes into a hole in the flange on the spindle (not the mag body). I left the spindle in place. Removing the slotted screw the idler assembly , pulley, spring just lifts off. See this photo... https://www.dropbox.com/scl/fi/if8um8sdoboc060hdm9sn/take-up-idler-assy.jpg?rlkey=u7w5v9zwxed08jvy2bm6oo8pb&dl=0 I don't know if adjusting the spring tension is possible by loosening the screw on the feed side. I can't remember doing that, but I'm not sure. I left the spring tension as is. Did you try. The spring pre tension on mine was given by a 180 degree rotation. So if you re mount the whole assembly with the spring relaxed, idler rotated 180 degrees from the tensioned position, it's done. IE, one is adjusting the spring pre tension by rotating the entire assembly. Give it a try. The spring pre tension can affect the take up wind, and I suspect the idler spring pre tension required is not that much. Years ago I fixed take up problems on a mag and may have adjusted spring pre tension, but I just can't remember. Sometimes you have to solve unfamiliar problems by accurate observation, analysis and a little experimentation. Just try not to do any damage. Note that all the plain bearing surfaces need lubrication, CLA at some interval. Gregg. -
Thanks. Looks really interesting. Gregg.
-
New to the ACL II and need help loading in the 400-ft mag
Gregg MacPherson replied to Skyler Carrico's topic in Eclair
Without a drawing to refer to I just want to be clear on what I am referring to as the idler roller assembly...It's the largest visible roller on the take up side, with a little roller on a short swing arm. If the slotted screw is removed the big pully and the swing arm assembly can be lifted off. The spring is inside the central housing with the swing arm attached. You will see where the spring anchor (the bent end of the spring) will sit in a hole in the mag body. If the spring anchor is out of its hole then tightening the slotted screw could jam it against the mag body, giving a semblance of correct spring function. Remove the assembly and refit with the spring anchor sitting in the hole. Might as well clean and lubricate while you are in there. -
New to the ACL II and need help loading in the 400-ft mag
Gregg MacPherson replied to Skyler Carrico's topic in Eclair
The Eng 400' mag was designed to have a low current draw so it would run ok with the small original ACL motor. They do work fine with any ACL, but they have a couple extra maintenance protocols and without that care they can give trouble with take up. The best long term solution if you haven't got a tech that knows them is to sell the mag to someone with a small motor, and use French mags. I did fully service two or three Eng 400' mags but it was a lot of work. I'm not a trained tech, just patient and technically minded. Average person is not. Who is the nearest camera tech to you..? Gregg. -
New to the ACL II and need help loading in the 400-ft mag
Gregg MacPherson replied to Skyler Carrico's topic in Eclair
First, the idler spring...tightening the slotted screw attaching the idler should have no effect on spring function. perhaps the spring anchor is out of its hole. Hold the take up arm well out of the way, then...Remove the idler, note where the spring anchor goes into a little hole in the mag body. refit the idler, trying to drop the anchor into the hole. There is a small cover plate at the root of the take up arm that may get in the way a bit, but I managed to remove and replace the idler while that was left in place. My drive sprocket assembly with its mounting plate was already removed, but I don't think that will get in the way. Now the take up problem...I'm assuming that all your toothed belts are good. They seem to be indestructable, 40 years old. The most likely source of a problem is that the tractor tyres on the end of the take up arm are not working properly. They look like they have been replaced with an O ring or something like that. The tyres should be a rectangular section, snug fitting the "hubs", and both the same, so that the function is equal, both sides. I'll try listing the possible problems... - Tyres deteriorated. - Tyres incorrect section shape, so slipping on hubs (but O rings may work, I never tried it). - Tyres too big (so slipping) or too small, so incorrect outer diameter. - Hubs not cleaned properly when tyres changed (so tyres not fitting properly). - Tyres slipping on hub (stray lubricant or slippery surface). You can have the rubber tyres made, quite cheap, by people who make rubber washers by simple stamping process. There may be a little furryness on the edge, but just sand paper that off. Gregg. -
New to the ACL II and need help loading in the 400-ft mag
Gregg MacPherson replied to Skyler Carrico's topic in Eclair
Hey Frank, The French 400' , 200' mags and I think the Eng 200' mags take up with emulsion out as in the photos you show above, but the Eng 400' mag takes up emulsion in. There's a Dropbox link to a threaded Eng 400' mag photo in my post above. The Eng design engineer had no restraint when adding complexity to solve design problems, so I guess adding a gear to change the direction of rotation was inconsequential. I'm not expert in the minutiae of small design changes in ACL (Boris Belay might be), but I know there was a small threading change in the later French mags. An extra roller as the film arrives at the drive sprocket, and a partitioning barrier between the feed and take up film at that point. I think this later ver is shown in the ACL 1.5 manual. Here's a photo... https://www.dropbox.com/sh/ycbv8azk5q3xih4/AABZgXIWIb7vXemO_QQtr8sOa?dl=0&preview=FR3+7.jpg On some S16 conversions, these mylar collars/washers appear, but they don't change the thread path. https://www.dropbox.com/sh/ycbv8azk5q3xih4/AABZgXIWIb7vXemO_QQtr8sOa?dl=0&preview=Pat1+7.jpg I always made sure that the cans to the lab were labeled EI or EO. In your photo with the thread path drawn in red above. I don't think that is correct. It threads around an extra (non existent) roller. It should exit the guide shoe roller (5), then go under roller (3), then over roller (2), oui..?. There will be some videos on youtube hopefully. We need some mag loading vides somewhere easy to find on the forum, maybe in the Notes for New ACL Users thread... Gregg. -
I don't see the harm, but my thoughts about the ideal loaded V are still there. The regulated 12V will be lower than the fully charged NiCad/NiMh. Need to compare the current draw at high fps. If it's useful, you might find a 14V regulator. Maybe one of the camera techs or electronics guys will chime in... You could buy an XLR4 connector from the electronics supply store. You don't need to cannibalise a cable.
-
Indipro say that one has a 3A board, but they have some other ones with 8A max. You would have to solder your own XLR4 on. . I'm sure you can find a regulator with adequate capacity and just add the connectors you need. There were some facts about battery voltage given in answer to Jean-Louis' thread above, but I'm not sure if they were talking nominal V or measured max output V. A NiCad/NiMh battery of nominal 12V (nominal just meaning we name it that) is almost 14V fully charged, so exact specification is important. I have been thinking about 12V regulated V-lock, Li-Ion (for 16mm cameras), and I wondered if the current draw from a fresh NiMh might be less, if the loaded V is still higher. So one could go for a regulated 14V using the Li-Po packs. Gregg.
-
Adapting a CP-16 viewfinder to an Eclair ACL
Gregg MacPherson replied to Geffen Avraham's topic in Eclair
You may be able to approximate the ideal position of the CP VF mounted to the ACL. This assumes that the optical path in the CP-16R is not significantly shorter than that in the ACL. - Unscrew the mount plates on the ACL and the and the CP-16R. - Place the CP VF with mount plate on the ACL body and check the eyepiece diopter range to see if it focuses at any point. Note where it focuses (+ or - diopter setting). - If you can't find focus, centre the diopter adjustment and try incrementally lengthening the optical path. You can just hold the VF and shift it, that may give an initial idea. You can add crude shims either side of the VF port. If you can find focus, measure the shim thickness. I'm assuming that the screw holes for the ACL and CP do not magically match. If adding a shim you can use that opportunity to offset the screw holes. The CP VF mount screws to the shim, and the shim screws to the ACL body. If the existing optical path is too short for the above, you could try adding a + diopter. Cheap reading glasses work for quick experiments. Small + and - diopters are cheap on eBay, if you can find one small enough, and you probably can. Gregg. -
Sorry, hasty language...I meant reflect, not deflect...