Paul Robertson
-
Posts
28 -
Joined
-
Last visited
Everything posted by Paul Robertson
-
-
Hi Phil, Thanks for the reply. Stabilization of the images are taken care of in Film9 as a GUI, using VideoFreds scripts for AVIsynth. I just couldn't handle learning another code this winter and found Film9 a pretty easy to use interface. I am getting some pretty incredible results, it's almost like being in the room back in the 60's at some moments. When my Dad got the exposure just right on the old Eumig back in the 60's, it really shows what this puny little 8mm film is capable of, it just blows me away how clear some of this material is. I have learned so much in the last few months, it's incredible. And I have seen the image you posted a few posts back of the macadam ellipse, on several different web sites, I am slowly getting a handle on light, colors, exposure and such. It's a whole new world for me, optics that is, electronics I have been involved with my whole life. Cheers
-
And here is the telecine machine description video. https://www.dropbox.com/s/04av6756fnki248/IMG_6425.avi?dl=0
-
Not sure is anyone is following this thread anymore but thought I would add another update with some samples of what I have achieved so far. Unfortunately the clips aren't as good as the original as I split them using Movie Maker :blink: :rolleyes: ( still haven't learned Resolve) Would appreciate your thoughts on the quality so far. The clips are all from 1965. Yup, that's me, the little 2 year old kid. Thanks https://vimeo.com/321419125 https://vimeo.com/321420393 https://vimeo.com/321422403
-
So I had a bit of a mental setback yesterday, got frustrated with myself in that I couldn't figure out how to run scripts in a windows shell, get any RAW data converted to TIFF or other usable formats, get Resolve working properly or ImageMagik (couldn't get command line stuff working) so I thought I would take a break and do some more reading. In the meantime I have discovered that with the Allied Vision camera capture software, there are limited formats in which I can capture frames and I am now thinking I may have to ditch Allied software and go with OpenCV or ??? to do the capturing in the most efficient way, which of course means learning yet more stuff. Here is what the Allied software can output. The camera is native 12 bit. RGB 8 bit YUV422 TIFF 8 or 16 bit RAW 8 or 16, in 16 bit mode, 4 MSBs are written as zeros The software can't output a RAW 12 bit, or any 12 bit image. This is why I am wondering if I might be better off using a different capture method. ?? I can output the RAW16 files just fine, which are about 10M each, certainly managable, I just can't get anything to work to get them to an editable format like TIFF or DNG etc. What I have used for my first attempt at a compete film, is saving RGB8 as TIFFs, about 5M file size each frame. Here is a link to one of those files, as it came out of the camera. https://www.dropbox.com/s/tf1rr505k7vqbtg/FILM%201%20196500461.TIF?dl=0 I used these 29,000 frames to make a 15 minute finished product, using Film9 which uses VirtualDub and AviSynth for processing, and even though it is WAY better than what we had with the project and scan from 10 years ago,I think it can still be better, particularly in the black detail and color depth. Would appreciate your input on what you think of the quality. Maybe I am trying to hard for perfection. Here is a frame from the finished film. https://www.dropbox.com/s/6b810a93w27mccs/00761.tiff?dl=0 In the meantime, I am going to continue trying to either figure out another capture method, or a way to get RAW converted to a usable format. Any and all help greatly appreciated. Thanks!
-
Hi Perry, Well you have pulled me from the digital ditch and I appreciate the guidance. Okay I will dig into Resolve and learn it. I have been working with Allied tech support trying to get the images out of the camera correctly and I now have it working very well, although my only options for outputting debayered images are 8 bit or 16 bit, which as noted are insanely huge files. I know I can output RAW16 files, I will have to try it to see how big they are. Again the Allied camera although is 12 bit, I think will only output 8 or 16 through their software so I may have to rethink the whole capture process, I was really hoping to avoid learning another machine language so I can use OpenCv or one of the other capture programs. I will ask Allied this morning, he is in Germany but is still there right now if there is any way to get just 12 bit images through their software. I found a site in my search for gamma and blk lvl that referred toCinemaDNG, I'll go back and dig into that a bit more as well. Now finally, gamma and black level, could you please give me your 1 minute lesson on it? I am still reading about it on the web, but I think your input with regards to film capture may be more relevant. Thanks again! Cheers
-
So I downloaded both programs and discovered there will be a HUGE learning curve for me, on either, so I have continued working with the Allied capture software, and installed a new graphics card, overclocked my PC and now at least I can process a bit faster. I also managed to get the latest Allied Vimba software working correctly, and can now save RAW16 debayered TIFF files at about 2 fps, damn things are 30MB each file so will need about 900GB drive space for one 400' reel, going to be a L O N G process to get all of these reels processed. I have 6 of these 1T drives in the computer but most are half full. Also finished the mechanical side of the project, and it works awesome, all 1/4" plate aluminum with fine thread adjustments...I will post some pics when I get around to shrinking the files to fit the 300K limit of this forum. I have made a couple of preliminary tests of capture images, processing with Film9, and saving as H.264 type files, and the results are amazing, can't believe how good it looks compared to the original copy. Now one thing I found out today, I need to correct the image capture coming right out of the camera, before I even process it, and found it's a tricky balance between Gamma and Black level, probably easy for those of you that have been doing it for years, but for me, new concept. Is there a preferred ratio, or way to setup gamma vs blk lvl? The image looks pretty good with gamma set at max (1) and blk level at 0, looks a little better with gamma at .5, and blk lvl at around 125 to 150. I know these numbers are arbitrary but would appreciate some guidance. I have over 40,000 hits in a google search so will do some more reading as well about this. Anyway, that's the update for now. Cheers
-
Thanks boys, I will try ImageMagick and Resolve, which Perry also recommended, and see which one I prefer. I currently am using VirtualDub, which seems to work fine, but always willing to try other options. For whatever reason, which I can't figure out, I can't get the Allied Vision capture software to capture in debayered RAW, but it will output decent TIFF files in many formats, YUV422, RGB8 etc. but it would be nice to get the full 12 bit resolution out of the camera. I still need to do some more reading and testing of the software. I picked up a new belt for the projector so I can now continue testing. The first film I have processed turned out okay, way better than our original dubs we did with the video camera shooting a white screen back in the 90's. I am using Film9, which is a basic GUI that uses AviSynth scripts and VirtualDub and seems to do a decent job. It has saved me from learning yet another code, (will probably have to some day if I am going to perfect this). It's really easy to overdo the settings so I am going to go back and try again with more subtle processing. To test, I am using films that I found at a thrift store, bought them for $4 as they were all loaded on a nice 400' metal reels in cases with a portable steel case, however I have no idea what camera was used or what the film stock was. It seems pretty well exposed and has some good challenging scenes with snow and lots of variety. Funny watching someone else's home movies, they seem to be all from the late 60's. All of the optical components are hear now as well so I can complete the mechanical side of things, biggest challenge is building the stand to mate the projector to the camera and bellows with enough adjustment for image size and focus. I'll post some pics and describe the final project after I perfect the design. It's been a lot of fun building this and learning many new things. I am an electronics tech, not a cinematographer so there is a lot to learn about that side of things, optics, colors, formats etc. Cheers

-
No I haven't looked at it (yet)
-
Well another big step forward today. I dug into the software for the camera and technical manual and figured out which pins are the external trigger, then modified my Arduino code to drive a TTL pulse for the camera, sync'd to the magnet on the shutter wheel, and YES! It captures frames perfectly, currently saving them as 2M TIFF files but I can set it for just about any format. I ran it up to about 3 fps and it captures just fine. It's going to take a lot of drive space to digitize all the reels I have. :unsure: I still need to re-read the software manual, I think there may be a way to have it record frames into a video file of sorts, not sure. Otherwise there are many ways to stitch all the image files together. And the Allied Vision software has all of the color correction and gamma and gain and brightness and WB all available to set automatically if I choose. Cool! Just not sure if it will be able to keep up with 2 or 3 fps. I may just lock it in and do all that in post. Just wanted to update you on the progress. Still waiting for some critical optical components to arrive, but it's coming together nicely. Cheers
-
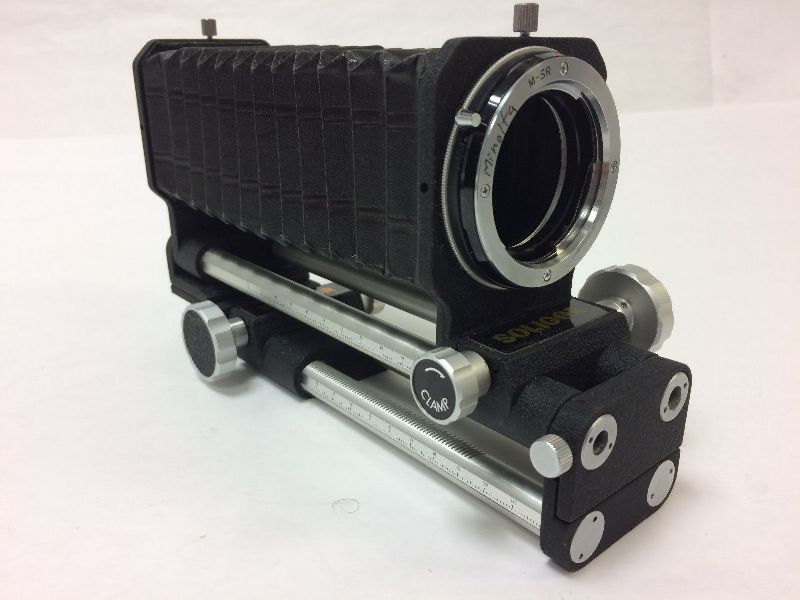
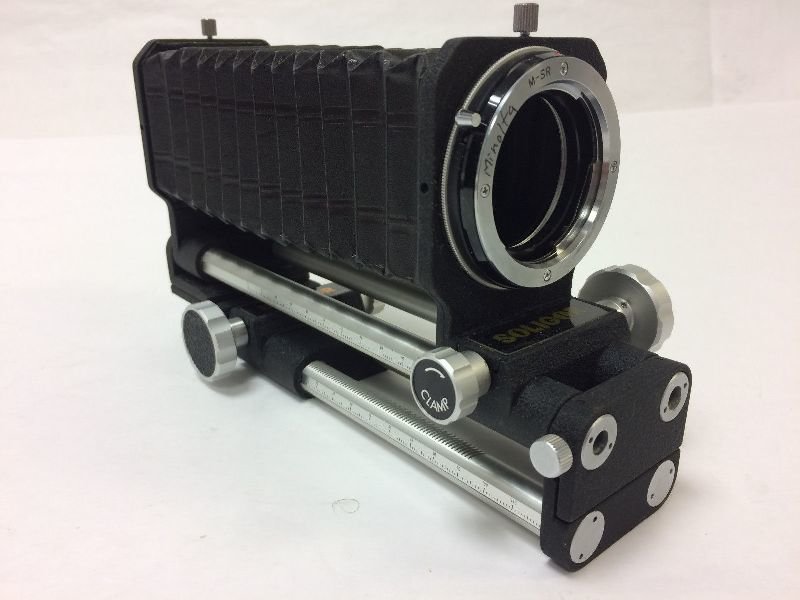
This should allow me all the adjustment required...
-
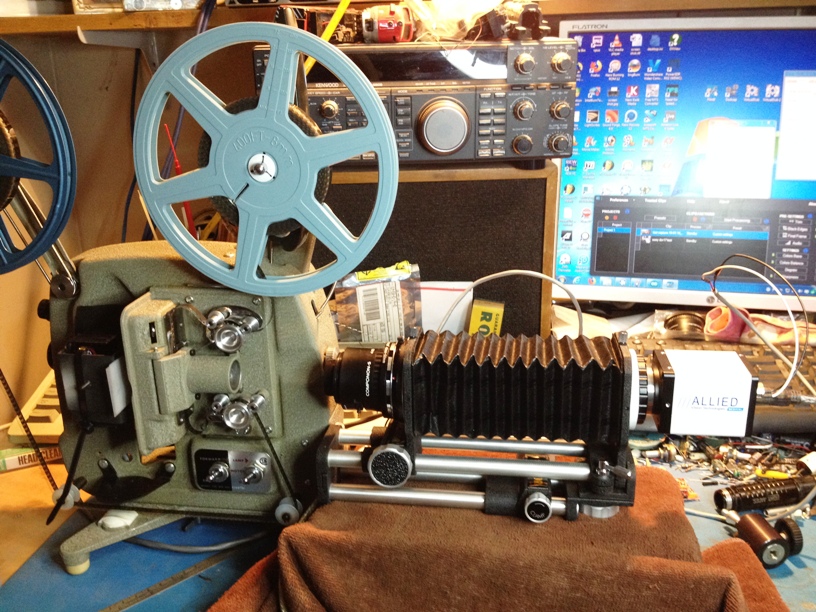
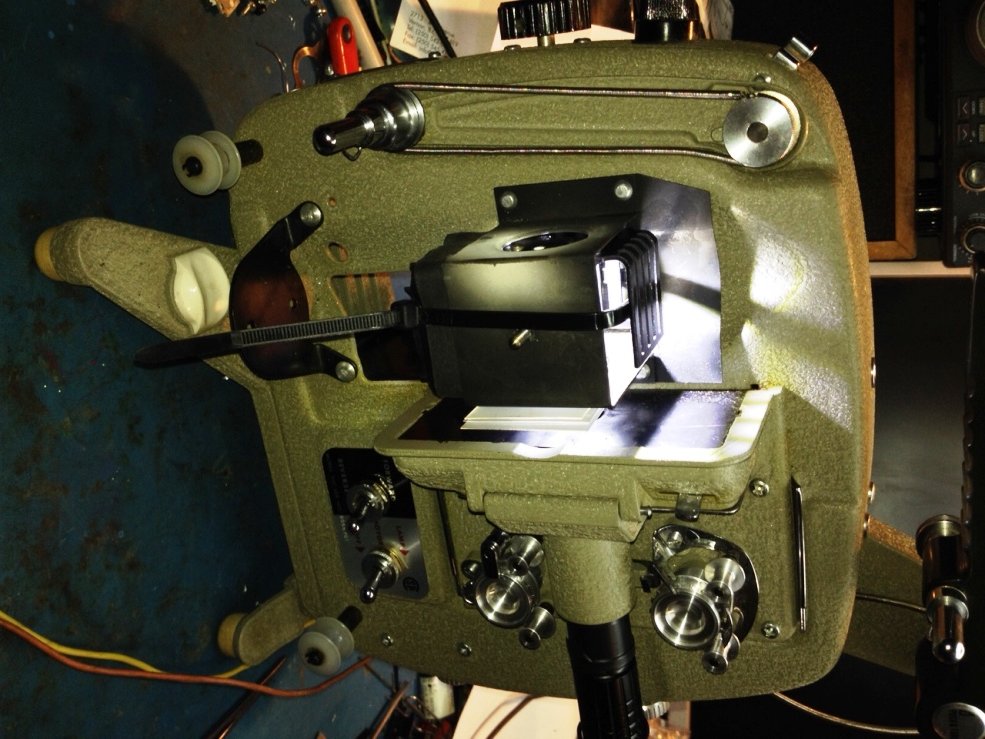
This probably isn't noteworthy for the rest of you, but it's been a bloody wreck of a week here, -23C with -50C wind chill, all we can do to keep the house heated and the cats warm. But today, a landmark day in the project, OSCAR has arrived, and I connected him to the computer and low and behold, my $50 take a chance on an "as is" camera, worked out, it works, and what an amazing camera!!! It came with a C-nikon adapter, and I just happen to have about 12 Nikon lenses as that was my film camera system, put everything together and updated the firewire drivers and Shazamm! We have a beautiful image from it, or should I say images, it streams beautifully. You can see the camera at the bottom, bunch of proto wires on the left, computer monitor on the upper right....cool. And that is ony 1280x960, on 2558x1900 the wires completely fill the screen. Anyway, there are a TON of settings I need to got thru, then get my Schneider enlarger lens mounted on it, and wait for the wonderful old school Soligar bellows to arrive..... Lots still to do but it's coming together. WOW!

-
Hi Perry, Well that sounds awesome, I will PM you for a little code guidance thanks. I have been studying the libraries and code reference page for the last 2 days, getting my head around it, a bit, but still a ways from getting something communicating. My Allied Vision software is installed but it won't open up firewire until the camera is connected and the camera is still within the postal system. Today I will try to get something working over the serial lines to confirm I can make it work. I would like to implement your code in there as well. Now, that 100W COB LED, that will be a monster. I contemplated some of those for my new shop lighting, but chose to use the same ones I am using for this telecine project, as I found them in bulk for $.45 each. You sound like are quite technical as well, but if you need any help with heatsinks for that beast, let me know. For sure a fan based cooling system, big heatsink etc. Look forward to hearing and seeing more about it. Chat soon. Cheers
-
They say, a picture is worth a thousand words. Well I say a video is worth 10,000 words. Here's my first attempt at HD Youtube from my iPhone video, not bad for first try. Tremendous progress yesterday, learned to write code for Arduino, have the Hall sensor triggering the light and soon frame capture on my machine vision camera which is slowly making it's way thru the postal system. This is pretty cool and am very impressed with the Arduino uControllers, I still have lots to learn, but it's fun. COOL! :D I have an Allied Vision machine vision camera on the way, it's a 2500x1500 pixel camera that can take 4 FPS at that resolution, has remote trigger capability as well as capture thru the software. I am still working on the macro lens arrangement but won't be able to do much until the camera gets here. Enjoy https://www.youtube.com/watch?v=ZYYnS2sfhAw&t=
-
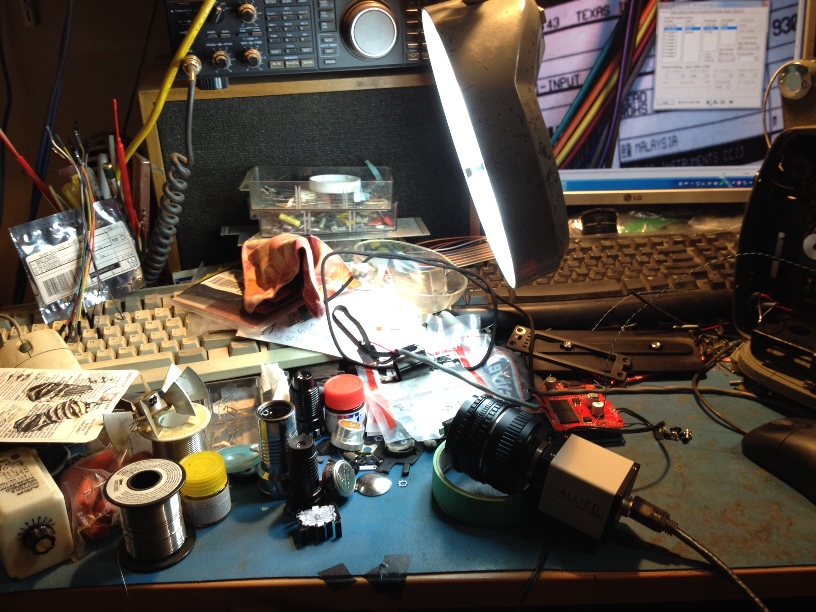
One more pic. The light and fan are currently wired to the original 3 position switch, which in the end will be for setting up the camera and exposure etc., then it will switch over to PWM computer control for brightness adjustment. That's the theory anyway. Cheers
-
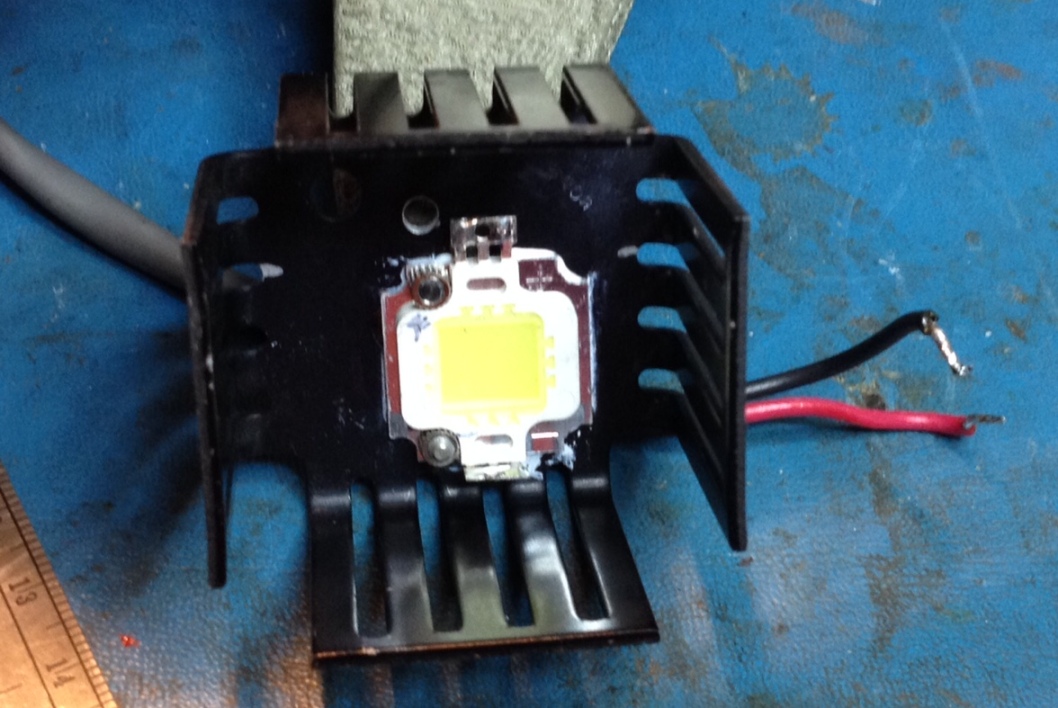
Well the COB LED is amazing! Crap is it bright. 10W of 4000K light, and it is installed in the projector, complete with large heatsink and cooling fan, should have left the big blower in it. :rolleyes: With 4 layers of diffusion material in front of it, there is a nice even illuminated panel behind the film gate. Going to be playing with Arduino and some software to see how I can control the brightness with feedback from the capture software, should be fun.

-
WoW! Phil, that is amazing, and quite amazing how such variance can be detected, or not detected by human vision. It's like audio volume, takes almost 3dB before we can tell there is a change, even though that is a doubling, or halving of power. This is such a fun learning experience for me, thanks everyone for the help. Arduino package arrived today...will be playing this weekend...after I finish rebuilding a computer for a friend's business..can you believe I am reinstalling WIN98 on a computer...yup still have the install disks, yikes! never throw anything away. :rolleyes: Cheers
-
OKay cool, well there are about 20 with a CRI of 97, and anywhere from 500mA to 4A and 1000-7000Lm, nice neat rectangular packages, easy to mount. Some of them are labeled as "3 level Mac Adam Eclipse", no idea what that means. I have 2 different frosted diffuser sheets, and one sheet, which I think is holographic as when I hold it up to a light, I get a funky 3D prismatic effect, neat stuff. I also have the original little 1" condenser lens from the projector which I could re-install if need be. So you have given me lots to work with, thank you. I'll get them ordered and start playing after work today. Cheers
-
Well that is very cool. I just looked at Digikey and they have about 500 different ones in stock, various shades of white. So with your experience, what color temp should I pick, an ideal, and then a range in case the ideal isn't in stock? Then what size? Enough to cover the entire gate opening and then some I would imagine? And a CRI minimum of xx? Box of Arduino stuff and sensors and LEDs are out for delivery, be here soon, and Digikey can deliver for tomorrow if I get my order in soon. I can play all weekend with this. Cheers :D :lol:
-
Thanks Perry, That's the sort of info I needed to get my head around lighting. I have OpenCV, but haven't played with it yet. I have written some computer code, years ago, actually ladder logic for PLCs, RS Logix I think, and I have read in this thread what has been done with OpenCV. I was following the recommendation to get the levels close to max for each color so that the CCD sensor is happy and dynamic range is good, before the image is written. I think to start, to at least get moving with this, I will use the white LED source and balance that, then once the system is working continue playing with RGB. I probably shouldn't be jumping in too deep to learn code for too many things without a digital life jacket. :D In the package that is due to arrive today, there are white LED arrays, square, and some single high power LEDs I can mount multiples of to a cct brd. I have a 120vac single high power LED in there now for experimenting with lenses, and produces a nice even illumination with all the diffusion material I have installed. What are your thoughts re: auto white balance in the camera? What about auto exposure? This Allied Vision camera is loaded with many options and variables including LUT, binning, frame buffer etc. Thanks again. Cheers
-
Hello Pav, That it an interesting system you have built, very different from what I am doing, but achieves the same goal. Cool design. So I need some high level help here, understanding the RGB lighting concept. As mentioned I am going to use the Arduino controller, and am planning on using an RGB LED square array behind some diffusion material, but what I need some help in understanding, is what is the controlling sensor that says hey we need more green, or you reds, sit down a bit. Is it the capture software that sees the image being captured? If so, how does that control the Arduino to dim the reds or bring up the green? I know the Arduino uses USB for programming but is it programmable on the fly? I don't think it works that way does it? I have read thru this thread multiple times and I know Josh shared his code, but I couldn't see where there was any feedback to control the brightness of each color channel. This is my first exposure to programming a ucontroller, but I am an electronics eng of 40 years but it's been all analog and RF. My bits n bytes training was back in 1981-83. So far, my plan is to have the DC motor PWM controlled by Arduino and operating the projector slowly, about 2-3 fps with all original shutters, sprockets and pull down pin, so there should be sufficient time for a good capture at that rate. Planning on triggering the machine vision camera with either Hall sensor (magnet on shutter wheel) or light sensor (LDR or Perry's Omron recommendation) shining thru the rectangular holes in the shutter wheel. So in this design, the Arduino is just supplying a fixed PWM signal for the motor controller and lighting the LED array, the capture is strictly electro-mechanical to the camera which triggers the software to capture a frame. Maybe I could just use a nice daylight LED and let the cameras' auto WB do the work, same for the exposure, would be a lot blinkin' easier. Lot's of experimenting to do when the camera arrives. Anyway, thanks for helping me to understand this lighting feedback loop thing. Cheers
-
Woo Hooo! Look what I found. http://www.adept.net.au/cameras/avt/pdf/OSCAR_F_510C.pdf TONS of features, many aren't listed on the poop sheet. It's a bit dated, discontinued 2014, but I think it will work quite well for my application. I downloaded all the software for it and user manuals, should be here in a few weeks. Now I need to find a C mount lens that will work, but first some research to determine what focal length etc I need. What do you think? Cheers
-
Mmm, I think I may have lead you astray when I said continuous motion. What I meant was the motor would be running continuously to operate at about 2-3 fps, but with all the original mechanics in place, so yes the sprockets still pulling the film through, the pin moving the film through the gate with it's 3 hole shutter and inherit pause, so yes, I will leave it all intact and continue on with my original plans. I was planning on either hall sensor with small magnet on the shutter wheel, or light sensor shining thru holes in the shutter wheel, either way I have both parts on order, be here Thursday. Cheers
-
Well shoot, I may be stuck with frame by frame, slow mode, as I just discovered the 3 hole shutter is an integral part of the projector, it is also the drive pulley for the main shaft, so can't be removed. It will make capturing a frame a bit of a challenge for a moving film stock. More later.
-
Okay thank you again, really good info. I am going to look into the difference between rolling and global shutter as I know nothing about this yet. As for my projector method, I can certainly make it stop-start, it's easy with the Arduino and a sensor on the wheel, if that is what I need to do to make it work. Currently I have about 15 or so 400' reels to record of standard 8, then I will be getting my Beaulieu 4008ZM4 and 5008 out of the closet, rebuild my darkroom and start shooting and developing my own film again...it's been over 30 years. Will be fun, but that is another subject. Cheers