


Martin Baumgarten
-
Posts
363 -
Joined
-
Last visited
Posts posted by Martin Baumgarten
-
-
The BEAULIEU has a fast shutterspeed of 1/80th due to the up and down design of the Guillotine shutter. A low light camera it is not. Also, on the BEAULIEU the cartridge notch means nothing since it has its own ASA/ISO dial on the control side of the camera. I would opt for using the CANON since it is a low light camera, thus the "XL" designation, faster shutter opening of 220 degrees versus the very small opening time on BEAULIEU. Of course, make sure the CANON is working okay. As for the cartridge notch on the CANON, it will read up to ASA/ISO 400 and that's close enough as the slight overexposure will work in your favor, IF there's the opportunity for such. If you prefer the BEAULIEU, then I suggest going to where the venue will be and take some meter readings to see if it will work. I mean, some events are so well lit, that you may not need an "XL" camera. That being said, the CANON's viewfinder is a bit brighter and the camera is easier to use generally speaking. Lastly, if the camera gate aspect ratio isn't any trouble, since you mentioned that the BEAULIEU has the Super 8W gate (Super 8 Wide is what this was branded by it's inventor in Switzerland, Ruedi Muester......not Max, not Super Duper...that last one sounds so childish) anyhow, check the lighting/illumination levels, check the CANON for working condition (let the motor run for a minute at least and check the meter and other settings you will be using), and make your decision. Actually, IF you had time, and the equipment to do so, you could unload the Super 8 500T Color Neg and reload an empty Single-8 cartridge, albeit you'd only get 40ft to 44ft into it. Good luck on your shoot however you decide!
-
 1
1
-
-
Okay, sorry to have opened up a can of worms here. As a camera repair technician with over 45 years experience as well in 8mm, Super 8mm, 9.5mm, 16mm, 65mm & 70mm(later on), I've known all about the Super 8mm cartridge design. I just didn't want to get into such great detail since this topic has been explored and explained before by some of our very experienced and knowledgable folks on this group. That one threat went on for ages, but it was good!
So, yes, the Super 8 cartridge does NOT have a true pressure plate, its just a pressure pad, to create a thin channel with minimal friction so the film passes thru etc etc. I've experimented in the past with grinding down the pressure pad support nibs on the film gate, and reducing the pressure pad tension in the cartridge (since I have opened thousands of these in processing film, and saved hundreds for reuse, so I'm quite intimate with the design from a practical point of view). But, this type of reworking is for experimenters since the reality is, we have to work with the design the way it was setup. I doubt the new KODAK Super 8 can be much different in the gate since it will be designed to work with the existing cartridges.
When I first experimented in slitting down and reloading DS8 FOMAPAN to load into the Super 8 cartridge, I noticed the considerably thicker film and was worried a bit by the increased friction in the "channel" since it would be thicker than the space alloted. Via some silicone wiped on the gate and on the pressure pad in the cartridge, the film ran thru fine. FOMAPAN is now available in the Super 8 cartridge from some vendors having been custom ordered that way for those that are interested. Anyhow, while there is that "breathing" room for the Super 8mm film to glide thru the "channel" setup, it is truly a very tiny amount. I have noticed over the years that various Super 8mm cameras have a different width/depth to this "channel" created by the pressure pad resting on the nibs on the film gate. Some have the top nib higher to allow for an angled entry to the gate, and of course, most of the metal gates are better than their plastic counterparts in other cameras. So much of this is all part of that other thread which was a precursor to before the LOGMAR camera was introduced. So, perhaps enough said on that. I do wish to thank everyone that has chimed in here with valuable comments both for practical use as well as the technical side.
I do hope that once EKTACHROME 100D is released, we will see it again in Double 8mm, DS8mm, 16mm (maybe in 9.5mm also from those that can slit and perf it) as well as in Super 8mm and 35mm slide film which are the first ones that it will appear in. Hey, long live film!
-
Just want to chime in here. Super 8 cartridges DO have a pressure plate. It's actually quite substantial which a thick spring behind it. I am amazed at how durable this disposable cartridge is. I have kept a couple around for over OVER 30 years which I have reloaded and they have run fine every time. So much for a cheap piece of plastic; it's well engineered despite some of it's drawbacks. Lastly, keep in mind THIS is the SUPER 8 part of the Cinematography dot com site....so those respected folks that want to bash the film for whatever reason, please just go to the format you love best. And please stop telling us fans of this format to use Standard 8mm or 16mm etc.......we KNOW all that....we KNOW the limitations of this format, and this is what we chose and want to share information to help each other out in keeping Super 8mm film alive and using it to the best of our abilities. We also KNOW that IF the format had been designed differently for film transport it could be better, steadier, stabler, more professional etc, but it is what it is. I mean, none of us are going to the 16mm and 35mm sections of Cinematography dot com and telling those fine venerable folks to not do this or that, or that using their format or certain cameras is total crap etc. Let's be reasonable, so, add to this site to support Super 8mm or just not say anything negative (unless of course, you're discussing negative filmstocks). Just my opinion, I don't want to step on any toes here, but....this IS the Super 8mm area.
In all my years in working with Super 8mm (aside from other formats all the way up to 70mm), it has always been fun. I have seen some incredibly sharp films on various filmstocks in Super 8mm. Some of my own films that I had shot in CinemaScope using an Anamorphic lens and projected onto screens up to 24ft wide, had to be pretty steady in image registration and projection otherwise viewers would get sick. Some simple cameras have also produced very nice sharp images, such as the very basic ones made by Haking in Hong Kong for GAF, Halina and others using a manual exposure setting via the Waterhouse Stop wheel method.
There is so much you can do in Super 8mm, and KODAK realizes this, thus all their work in getting a camera back into the market. I would've like to see perhaps a much lower cost camera as well, in addition to their electronic hybrid one that's coming out soon. However, they probably feel there's a glut of such cameras remaining in the hands of most of us, so they are putting all their sticks in one basket here for now at least. This camera will have some similarities to the LOGMAR, but it will NOT be a LOGMAR. And the LOGMAR has some similarities to the former MEKEL Super 8mm pin registered camera that was custom made in California, had C-mount lenses and a similar film path where the film was pulled from the cartridge and hand threaded thru sprockets, rollers and the film gate. The new upcoming KODAK camera is designed to make filming fun and easy via their long running Super 8 Cartridge design. Only time will tell how well the new camera will sell. More importantly for many of us, will be having Color Reversal EKTACHROME film to use. So, let's keep this Super 8mm section, for Super 8mm. Thanks.
P.S. Perhaps there should be a Double 8mm (aka Regular 8imm, Standard 8mm, Normal 8mm) section....and one for 9.5mm since eventually there will be film available for Nine Fivers again, as we're all hoping.
-
2
-
-
The CANON 1014 Auto Zoom is a complex camera to repair. The complexity involves that film rewind system coupled to the variable shutter mechanism, and the display windows. I suggest trying to thump the camera while running it against a well folded towel in one hand. Don't smash it, but hit it a little bit harder than a gentle slap in the face. Do this first to the left side of the camera as you are holding it. This the main control side where you are having problems. If it still doesn't free up, try it again, perhaps a little harder. If still nothing, then the only other option is repair. I do not suggest attempting this yourself due to the complexity of this camera. It is very easy to gets components out of adjustment or over disassembling the camera. The film backwind/rewind mechanism is where many Super 8mm cameras fail as they age due to a variety of reasons (different with each maker's camera). Good luck with it, hopefully it's just stuck and will free up for you.
-
You could always try to talk him down. $10 would be a deal to try and tinker with it. The meter battery cap is difficult to remove on many of the older cameras, both movie and still cameras. Sometimes it requires drilling two small holes so you can use a pin nose pliers or camera lens ring spanner wrench to remove them. They can stick really bad even without any real corrosion since the batteries leak fumes which will cause some metal corrosion. This can be cleaned of course. As for the batteries today not being the correct ones, you can make due. You would need the meter mechanism to function to use the manual exposure setting since it requires electrical power to set the lens aperture. The price is low enough though that if the camera runs, it can be used for certain shots and tasks without having to endanger a really nice camera; those shots where its on railroad tracks, or taped to a car or bike etc, or tossed with a small parachute for various shots. Or to begin a camera collection. The Chinon made GAF Anscomatic 100 and up series cameras have a physical manual aperture setting that doesn't require battery power to adjust. The GAF ST-111 also allows you to do manual fade in/out and still set the lens manually and work from that setting. The higher ST-601/602/801/801 models also have the 24fps setting which the lower models do not. Always something to look for out there, and bring batteries with you so you can try out cameras on location where they have flea markets (bring a piece of fine grit sandpaper also). Good luck!
-
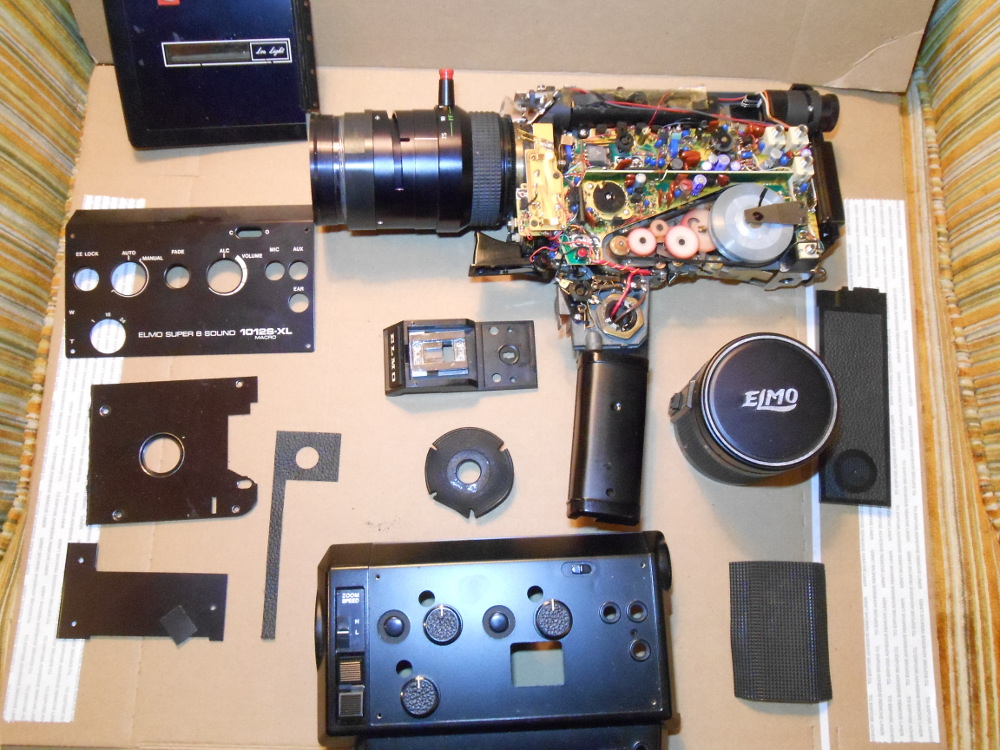
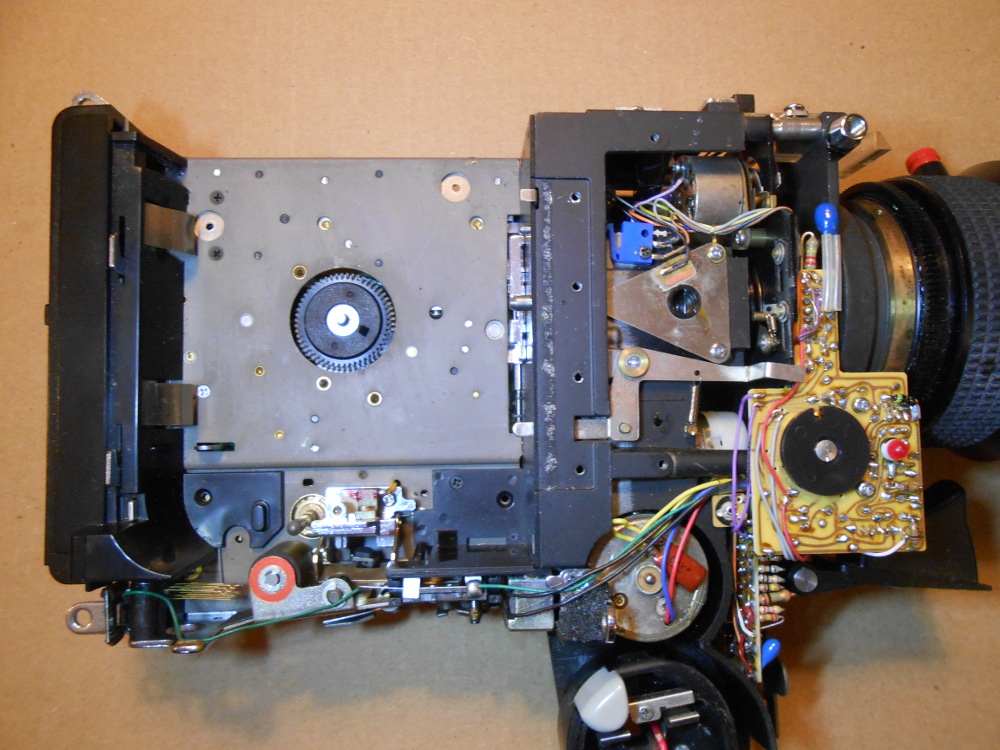
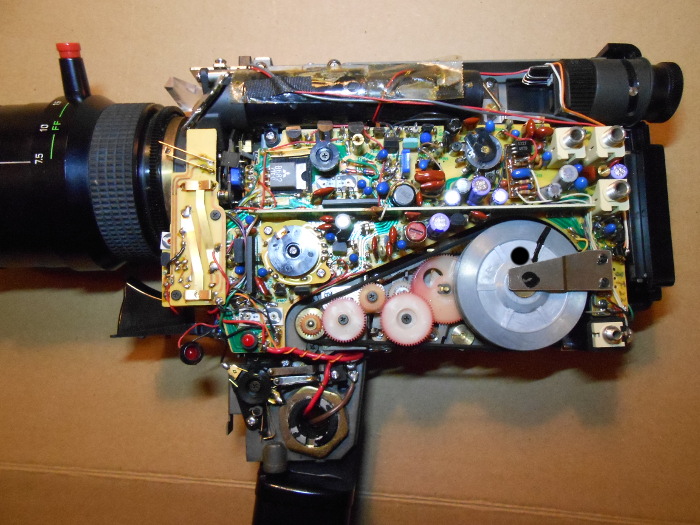
ELMO 1012 XLS disassembly showing body shells.

-
ELMO 1012 XLS Right Side

-

Left Side of ELMO 1012 XLS
-
Hi Wayne. The ELMO 1012 XLS is a pretty complicated camera, even though is looks pretty basic externally, and has fewer features than many of its long zoom counterparts. I would only recommend attempting repair IF you are: a camera repair tech, audiovisual repair tech, electronics/computer repair tech, or have experience at attempting repairing any fine mechanical and electronic items using fine hand tools etc. This caveat aside, here's some information that might be useful. Try to determine what is not functioning or not functioning correctly on the camera. The various different camera sections can usually be repaired from their physical locations rather than completely dismantling the camera to its chassis.
Camera body shell screws are located in various corners of their respective covers, and most are underneath the leatherette covering which must be peeled back/or off to remove the screws. I suggest having a clean work surface to do this, and it's helpful to make notes to yourself as to what goes where. To help avoid losing the tiny screws, you can tape them down in groups onto a large sheet of white plastic where using a permanent type felt tip marker you can write notes as to their location points. The LEFT side of the camera as you hold it with the lens forward contains all the main function controls, with the respective circuit boards underneath [exposure adjustment module, camera speed control, sound recording electronics, Sound Capstan Flywheel and Belts etc]. The RIGHT side of the camera contains the Lens Aperture Control Unit, Zoom Motor Unit, Filter Switch and Filters, Film Cartridge Chamber with all related meter and filter indexing parts. The Top of the camera contains the Sound Recording Hot Shoe for Telescopic Microphone Input, Movie Light Socket and Filter Switching Mechanism etc. The Rear of the camera contains the dioptric viewfinder control and film use indicator mechanism etc. The Front of the camera contains the Zoom Lens module of the camera which interfaces with the zoom drive motors, aperture and filter mechanisms (NOTE: Do not remove the lens focusing shell off the lens unless you are familiar with resetting the lens correctly to its Infinity and Focusing Range again since it very easy to mess this up).
I have photos, but can't figure out how to upload them into this window from my computer. Email me at Super8mm@aol.com and I'll send them to you or tell me how to upload photos.
-
There will be a grain and contrast increase, as well as a color bias shift towards the red/orange range. I would first take a light meter reading of whatever subject matter was lit by the lighting and see what Exposure Index [iSO equivalent] range it falls into. For example, if there was a person in the scene, put someone in that spot, meter the light falling on the subject with a hand held light meter or 35mm SLR or DSLR and see what exposure range you have at ISO 200, ISO 400 or ISO 800. Anything in the scene that falls below the threshold of the film's ability to record it in low light, will not have anything anyway. By pushing film you are increasing whatever is actually being recorded on the film to bring the image density to a more desirable range. Once you have determined this, you can then go ahead and push process the film, either 1 Stop, 1.5 Stops,2 Stops or even 3 Stops if necessary. [Note: a 3 stop push would be extremely dramatic and needs some careful consideration, but up to 2 Stops should be fine]. I have often pushed the now discontinued EKTACHROME films similiarly and gotten good results, with the caveat of the grain and contrast increase, and under tungsten lighting a very warm color bias. For what I was working on, I was pleased versus having a very dark unusable image. If you doing your own processing, I always recommend shooting a few feet of the scene that you might want to push, and then remove that strip and process it and evaluate it to see if the push is necessary. You could do that from the end of your film, but you'd have to sacrifice a second or two of runtime of your film for that purpose. Only you can determine if it's worth it to you. Good luck!
-
I'm very sorry to hear about this. Totally unprofessional service on the part of Ritter Media. IF they do not want to use foam, they could still use cardboard filler which would have offered similar protection. They answer to the packing issue is so silly, it sounds like a child would say that. I've had my share of bad repair experiences with a variety of places, and being a repair technician as well, I can easily spot poor work. I had a SANKYO repaired under warranty just 2 months into it, and the camera worked somewhat better. I ended up dismantling it myself and found that the solder points were extremely poor. Once I redid all those, the camera worked fine. Seemed it was a rapid and sloppy board replacement. Of course, these days, we can't just drive to a repair shop any longer (aside from the few that might live near one of course), and not everyone is able to learn how to repair their own equipment (and even if they could, there's still the issue of parts). Sad story indeed, and I do hope you get that fine machine back into full service.
-
 1
1
-
-
Many good points brought up. For technical clarification, I never said to spray silicone into any Super 8mm camera. I did state that to avoid jamming and sticking especially in hot humid areas, "wipe" the Super 8mm film gate with a soft white cotton flannel cloth that had been sprayed with some silicone spray (the kind not harmful to plastics!) and time allowed for the propellant to first evaporate since it is a solvent. This will help prevent the film from sticking. I have received and continue to receive old and new film here for processing that has never been exposed! And it's due to the film sticking initially; upon critical examination of the film emulsion with a loupe, one can see a small rut or groove in the emulsion from the film claw trying to pull the film down, and once this rut has been made, the film will remain without moving. This can be fixed easily by pulling the film downward an inch as it will free the emulsion that has stuck to the cartridge shell above the film gate and held in place firmly the the Super 8mm builtin pressure plate. I have always achieved very steady Super 8mm footage over the years this way, and mind you, many films I have shot in full CinemaScope using a 2x anamorphic lens......so when that wide footage is projected on a huge screen, you want it to be steady. Actually, we all want our footage to be steady!
-
In most cases regarding older projectors, especially any that have sat for a long time, the belts will usually need replacing. The rubber only remains supple for so many years or so many hours of use. That SANKYO is a fairly well made projector and should serve you a long time. New belts, clean the entire film path and track and film gate, and wipe the path again with either movie film cleaner with lubricant or a silicone lubricant intended for safe for plastics (spray a clean white cotton flannel cloth, allow propellant to evaporate and then wipe the film gate, pressure plate and film path. You can use a small piece and move it around using soft wooden skewers or cotton swaps. If you use the cotton swaps alone, you might end up getting small fibers in the film gate and they could show upon projection. Also, make sure your films are clean and lubricated so they will glide thru the projector smoothly; this will minimize wear and tear on the films. Best of luck.
-
If the other remote control you have for the CANON is a simple electrical release switch 3.5mm mini plug, then yes it will work. The BEAULIEU 6008 must have it's Run Control locked and the switch will then allow the camera to operate once activated to the On setting. You can also use an old cheap microphone, just break off the microphone tip, and use the smaller remote tip that remains (such as a tape recorder mic or the cheap mics that came with many Super 8mm Sound Cameras). This is a good time to bring up how important it is to have the owner's manual for whatever camera you use. Even one tip will make having the manual worthwhile. Good luck best of success on your project!
-
Hi, sadly the HANIMEX Loadmatic M200 is a very basic camera made by the Haking Camera Corp in Hong Kong, and was made under a variety of names: GAF, Sears, Montgomery Ward, Chinon, etc. It was also sold under the Australian Hanimex company world-wide. This is the somewhat upgraded version of the fixed lens model since this had a manual zoom lens added (non-SLR) viewfinder type. It's built in light meter was intended for use only with Tungsten 40/Daylight 25 (with Filter) filmstock, which was available from KODAK (Kodachrome), AGFA(Agfachrome 40), ANSCO (Anscochrome 40) and some others). In the right lighting situation, you could use TRI-X 200 in it, but you'd have to use a separate light meter to know that you are within exposure range. The camera's shutterspeed at 18frames per second is about 1/40th second, and factor in the lens being at wide open, F/2.2 I believe but examine your camera for that. Setting a light meter for ISO 200, you can film once the light levels show an equivalent exposure range of 1/40 @ F/2.2. You could also cover the external meter window with black tape so the lens will stay fixed wide open, and use Neutral Density Filters over the lens to decrease the light to equivalent exposure F/Stop levels of F/4.5, F/5.6, F/8 etc....but it would be far easier, better, and better image quality to just find a much better Super 8mm camera. Best of luck, hope this helps shed more light on the situation for you.
-
Forgot to add, do not forget to filter your chemistry! This is very important and can be done quite easily with cheesecloth and/or various water filters. Once strained clean, the chemistry will be fine for reuse.
-
It truly is much easier to just remove the remjet after processing when using manual methods. Just soak the film in a Borax solution warmed to the same as processing temperature. Let the film soak for at least 5 minutes. Use at least 2 tablespoons household Borax per Liter, more if the backing seems to stubborn. Due to the low cost, I use a fresh batch each time I process any film with remjet backing. Anyhow, it really helps to have a few sponges, photo grade or equivalent on hand and a film rewinder or set of rewinds. I have them mounted onto a 2 x 4inch board about 4 feet in length so it can be clamped to a work table or lab sink with a large C-Clamp. After the film has soaked, I transfer all the film from the developing reel to a 50ft projection reel. This reel sits in a small tank or tray also with a Borax solution. This way, the remjet will come off physically and less will get onto your reels and equipment.
I manually wipe off the remjet the first few feet so I have enough slack film to wind onto the film reel on the Rewinder. Then, I have a large sponge soaked with the solution placed so the film will run over it remjet side down. With another solution soaked sponge folded over the film, I slowly wind the film onto the takeup reel on the Rewinder, and every few feet I rinse out the sponge in a bucket and resoak it with solution again and continue. Keeping an eye on the large sponge the film runs over, I wringe out that sponge as well and resoak it. Once the film has wound onto the takeup reel, I then switch places and do this again. The second pass will get anything not removed the first time. Only thing left is then to Wash the film once again 2-4 minutes to remove all traces of Borax solution in the emulsion. Then to soak the film in a Stabilizer/ Drying agent prior to hanging it or winding onto a Film Drying Rack to dry.
For equipment cleanup, you can use old toothbrushes (soft bristle ones work best) and some Borax or Washing Soda solution and soak in a bucket, light scrubbing with the brush in the reels, and a good rinse off, and then wipe dry which will get off other residue onto the towel.
Once you have done all this a few times, you'll establish your own work habits for it and it goes quickly. Good luck!
-
1
-
-
Cropping the tiny Regular 8mm frame would increase visible grain, but it is doable. A lot depends on the grain and image quality of the film stock you use. However, going Anamorphic Widescreen works great also. There were several 1.5x compression anamorphic lenses made in the 1950s to 1960s that are small and compact. The most expensive is the BOLEX Moeller 1.5x lens, which coupled with its dedicated lens holder mount is very nice. The lower cost alternatives were: Yaschica, Elmo, S.T.O.P. Hypergonar 1.75x(which now seems to be very expensive), KinoScope, VistaScope (made by Delrama in Holland)iand others. These were all small lenses originally intended to fit the Regular 8mm camera lens, some with lens adapters or using a small tripod socket mount.
Some other lower cost 1.5x compression lenses were the Palamorphot 1.5x and the MagnaScope 1.5x.
If you don't mind the 2x compression format (yielding a 2.66:1 aspect ratio) then rigging up anyone of the many affordable 2x anamorphic lenses out there would work. It might look a little odd with a large lens rig on such a tiny camera, but I've done it many times, and works great. Consider the affordable KOWA 16D or F, and the very affordable often under $100 LOMO lenses from Russia or Ukraine on eBay.
Then there's the new tiny I-PRO anamorphic 1.33x lenses being made for cellphones which should easily fit the tiny 8mm camera lenses from Moondog Labs and other similar type attachments (not the Wide Angle lenses you see sold!), B&H Photo's price is $175 and they also make a 52mm filter adapter for it. This lens will yield the 'modern' 16:9 aspect ratio format which all modern Televisions and digital video cameras are set for.
-
For cement splicing the BOLEX 8mm/Super 8mm dual format splicer is one of the best out there. It makes a beveled edge splice that runs through the projector smoothly. There is a bit of getting used to it at first, but once you get used to it, it's great to use. HAHNEL made a nice beveled edge splicer that many consider perhaps the best type of Cement Splicer. I have used these also and they are great but run on batteries and you have to be mindful of the fine grinding dust as well as knowing that the grinding wheel will wear out eventually. Replacements are harder to locate. The BOLEX splicer uses the same grinding block as it's 16mm counterpart, so one from a 16mm version could be switched out if it were to wear out.
For tape splicers, the WURKER is well made and easy to use. While many types were made, avoid any that use a wrap around splice, since that can be finnicky in some projectors. I used to just shave off the wrap around part with a single edged razor blade when I did use one many years ago. I would only consider this type for film repair these days. The KODAK PressTape ones work well, and are preferred by those having to repair sprocket hole damage, but they are long and easily visible. The WURKER splice, is fast and small if using the 2 frame ones. I used to buy the 4 frame ones and cut them in half to become 2-frame tapes, both the 8mm and Super 8mm ones. But once I got used to cement splicing using the BOLEX splicer, I have stayed with it. The CIR Italian made splicers are nice, but can get gummed up since they perforated the tape. I have one also, and decided to only use it for film repair. In the end, you have to use what works best for you, of course.
-
Those 3 inch diameter fat rubber bands that various office supply places sell work great for the 50ft reels. I put a twist on one while placing it on the film and it makes it easier to grab the rubberband to remove it. I do suggest the film be snug on the reel and not loosely wadded up of course. The tape suggestions are good too. You can get a bag of rubberbands for pretty cheap though and they are reusable as well.
-
That's terrific news Vincent, thanks for sharing. I looked up the specifications on the Ilford PQ Developer, and it is a high contrast strong working developer. It's chemical makeup seems sufficient to produce good results and thus would make a viable alternative for anyone processing that was using the now discontinued KODAK D-19 Developer (which is available being made by Photographer's Formulary but at $25 per gallon mix and sold by others such as Freestyle Film and B&H Photo etc). Nice to see others processing their own cine film these days.
-
1
-
-
Usually the earlier pre-1982 manufactured film which requires prehardening is the more expensive to process. The EM-26 films while costing a bit more are still not out of this world to get done, with rates at $25 each 50ft cart at PPS. There's a vendor on eBay selling out of date Super 8mm sound film of both KODACHROME 40A and EKTACHROME 160A versions, stating that they have all been stored refrigerated. If so, the KODACHROME should still process well as B&W or Sepia Reversal, and the EKTACHROME might still yield some tolerable color. If it had been kept frozen, it would be very good. I was going to get a roll of each to test out, but have many other projects in line here anyhow. Even with long out of date expired film, and the results in color being virtually all green, it can be fun to play around with a single system sound camera. The other options of processing such old film as B&W Negative and scanning it in afterward to a positive and still having synch sound is nice. It's amazing how much unexposed film is still out there from decades ago. As for the mag stripe being affected by any of the process methods, all films have been unaffected regardless how I processed them here: Color Reversal, B&W Reversal, B&W Negative or Sepia Tone Reversal. The mag stripe is stable and fine. This was KODAK's Sonotrack Coating, a liquid paste stripe track, not a laminate one, so it bonded chemically to the film base. Their long discontinued post sound striping was the same and very good. I for one, will continue to shoot single system sound film using any one of my sound cameras when I want lip synch sound or just plain location sound, especially in home movies. As long as the camera is working well, the capstan belt is intact and snug, and you're careful with recording just like you would be with any audio recording methods, the results should be good, even at 18fps.
-
Also, don't forget, www.dwaynesphoto.com still has the AGFA 200Daylight film available under the Wittnerchrome 200D name. This is Color Reversal E-6 process film for $38 each cartridge, which they also process for $12 each. Since this film is much more light sensitive at ISO 200 than the former KODACHROME 40A (rated at ISO 25 in Daylight with the Filter), you'll have to use a Neutral Density filter on the front lens to cut the light down. A 4x ND filter will knock it down to where you need it for bright light. You could also use a Polarizing Filter if you have one available, as that will get you within a decent exposure range as well. Most of those era BAUER Super 8mm cameras had either a 49mm or 52mm filter thread, and there's plenty of low cost filters and step up adapters if needed, available on Ebay.
Hopefully, in due time we'll have EKTACHROME 100D color reversal film back from KODAK, and also another 100 Daylight film from FERRANIA. Good luck and have fun with the camera, nice viewfinder on it too.
-
If the KODACHROME film is in good shape, thus of late manufacture and under 12-15 years old and stored well, or regardless of vintage and cold stored frozen since new, it should work fine and can be reversal processed as Black & White or Sepia, or as a either a high contrast negative or continuous tone negative (for those only wanting a negative film for transfer to a digital format). I had begun working in sound striping Fomapan a few years ago so that I could have a B&W filmstock to shoot in Single System Sound Super 8mm, but there's so much KODACHROME still in existence in the hands of many filmmakers, with much of it cold stored either refrigerated or frozen, it's easier to just use that.
At the moment, there is a seller on eBay selling off his entire stock that has been kept refrigerated, both KODACHROME Sound, and EKTACHROME 160A Sound (as well as silent varieties) for $18 each, a bargain if they are truly usable compared to what it would cost privately to custom manufacture something similar. All my film processing tests on my own stock of frozen films dating back to the late 1970s still show pretty good to very good color on the EKTACHROME films, and nice B&W results on the KODACHROME films. NOTE: B&W or Sepia Reversal processing of KODACHROME requires Push Processing to yield normal density for those films exposed at ISO 40(without builtin 85 Filter) or ISO 25 (with builtin 85 Filter), so there will be some grain and contrast buildup, depending on scene brightness range etc. The only way around this is to expose the films at about ISO 15(w/o Filter) or ISO 10(with Filter). Since it's easier to use the camera's metering system, as well as the advanced features allowing lap dissolves and fades on my SANKYO XL620 camera or Braun NIZO 6056 and similar cameras, I just use the cartridge indexing and push the films to compensate to gain normal density.
Before I get to image samples below, please allow me to add, that while enjoying the Super 8mm forum of this Cinematography group, I have to say, there has been far too many negative type comments from more seasoned professional cinematographers who in all reality are using 16mm and larger formats. Unless what you have to say supports and helps the Super 8mm users or those desiring to use this film gauge despite whatever one's perceived bias is for or against it, don't post it here. Consider sticking to the forum that is relative to what you are passionate about and are using for cinematography. No offense is intended here, but those of us involved in Super 8mm should be helping each other, not someone who doesn't really care about this gauge and wants to just bash it because it's small, or doesn't have the high quality they desire etc etc. I'm sure you all understand what I'm referring to. Anyhow, thank you in advance for your consideration for this forum.
Those that are into processing their own Super 8mm cine films, and wish to do their own 'good' KODACHROME as Reversal or Sepia, it is quite doable at home [since virtually all of my custom lab cine film processing here is done via manual processing methods]. Many desire using older filmstocks for the unpredictability of results, or purposely for aging effects, as well as those wishing for predictable results with good quality. Personally, I'd rather have B&W Sound Film than no sound film at all. And there is still so much of it out in the form of KODACHROME.
I hope this helps answer some questions those of you might have being able to use older sound films.
Below are some image samples taken directly from Super 8mm frames to show relative results from processing KODACHROME outdated film as B&W and Sepia Reversal.
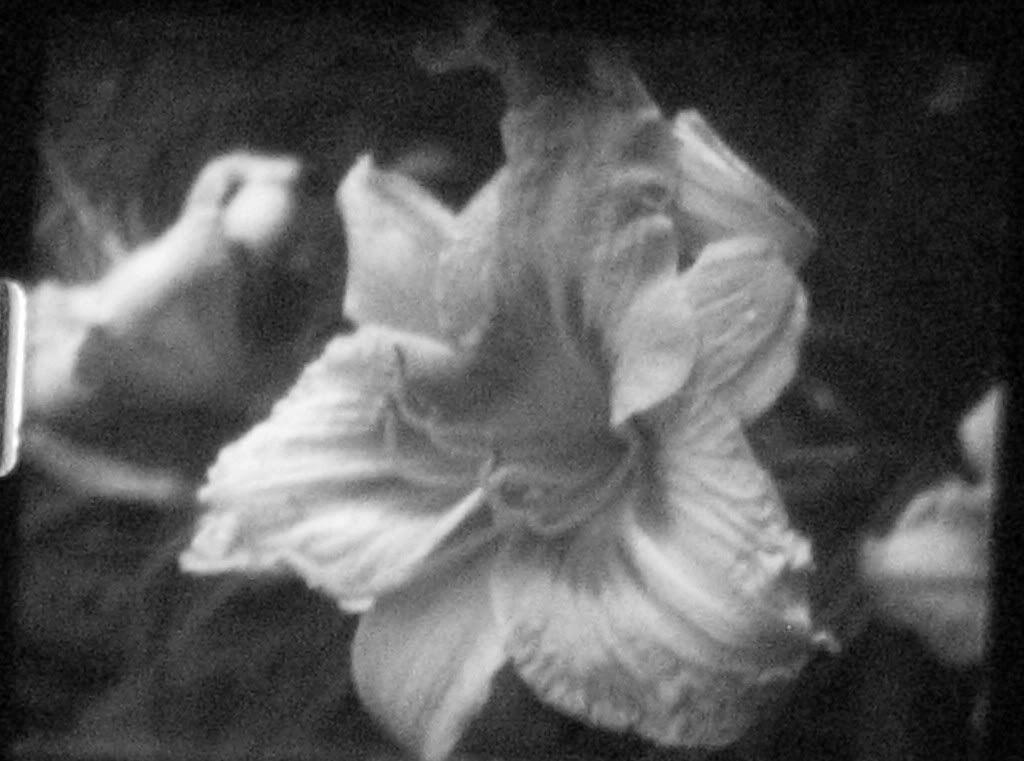
BELOW: KODACHROME film cold stored original expiration 1981, B&W Reversal Processed.
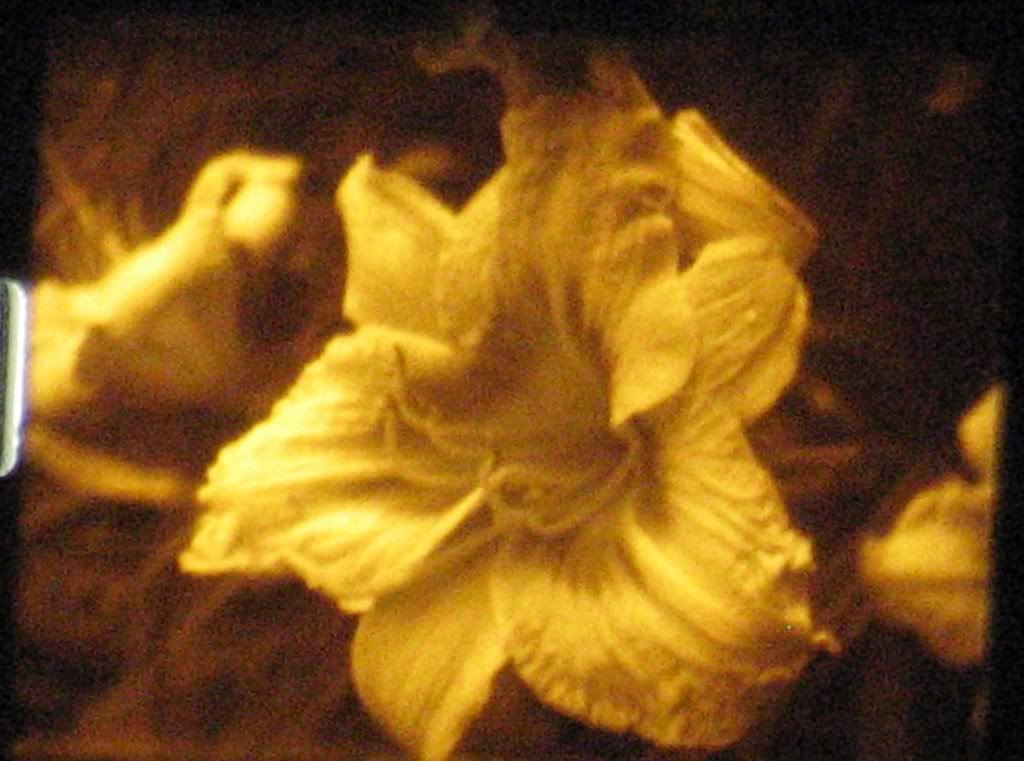
BELOW: Same batch of cold stored KODACHROME Sepia tone Reversal Processed, expiration 1981.
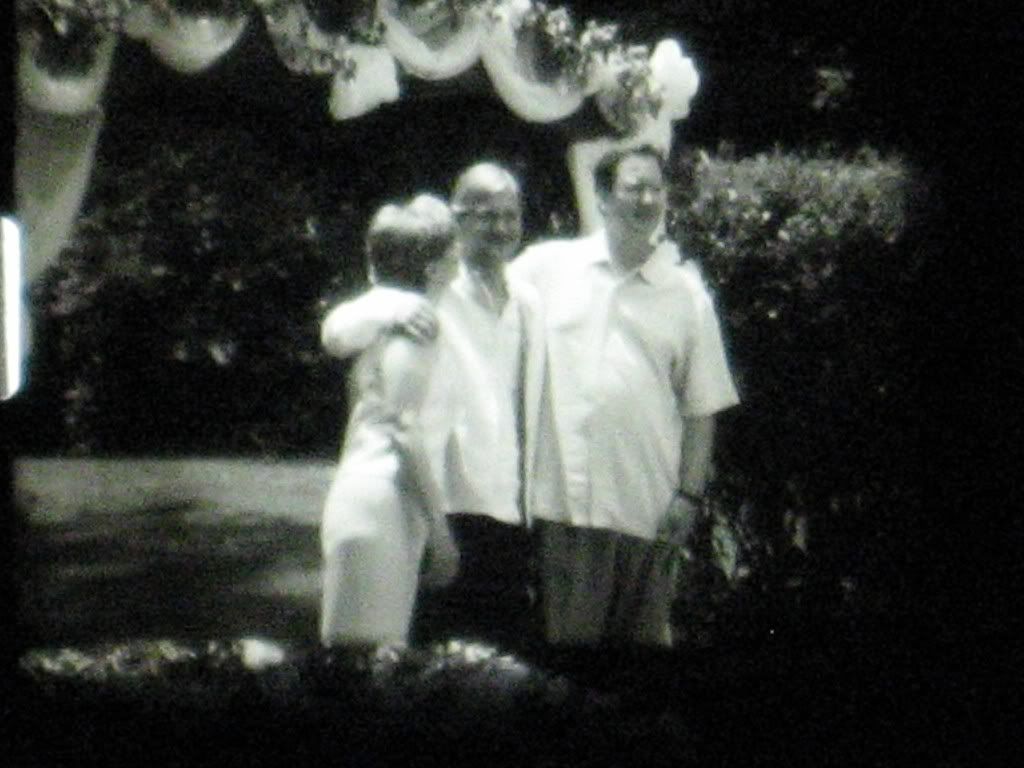
BELOW: KODACHROMEcustomer's film that expired about 2005 and was processed as B&W Reversal 2015, thus 10 years past expiration, only room temp stored.
Beaulieu dark viewfinder
in Super-8
Posted
This is another reason why it's a good idea to always have a copy of the instruction manual to refer to. Anyhow, there is a small silver cap on the rewind shaft on the left side of the control panel side of the camera. Unscrew this and you'll see the slotted shaft. Just gently rotate the shaft until it stops, and you should be able to see clearly again. The guillotine mirror has moved a bit thus the viewfinder going darker on you. Good luck with the camera!