Ville Pakarinen
-
Posts
44 -
Joined
-
Last visited
-

Minus green as a lens filter?
Ville Pakarinen replied to Ville Pakarinen's topic in Lighting for Film & Video
Yeah. It's like an infinite equipment storage. Just need to be careful not to let things get out of hand :) -
Minus green as a lens filter?
Ville Pakarinen replied to Ville Pakarinen's topic in Lighting for Film & Video
BTW, here's a pre-visualization of the lighting scheme I'm going for. Luxrender in Blender is an amazing tool for planning since it's very close to real physics.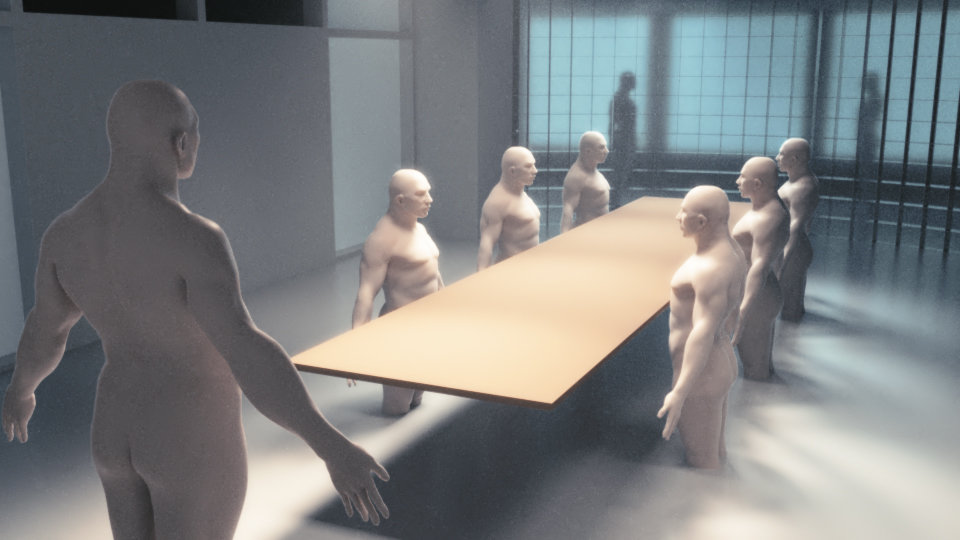
-
Minus green as a lens filter?
Ville Pakarinen replied to Ville Pakarinen's topic in Lighting for Film & Video
Hard to give any feedback without knowing the limitations you had. But I would have tried to somehow dim down the practicals if the frenels weren't very strong. Maybe flagged the background. Without the fresnels, how many stops underexposed would his face be? I would have tried to leave the practicals maybe three or even four stops underexposed. But that, of course, depends on what kind of look you were after. -
Minus green as a lens filter?
Ville Pakarinen replied to Ville Pakarinen's topic in Lighting for Film & Video
Charlie, what sort of white balance options does the pocket camera have? -
Minus green as a lens filter?
Ville Pakarinen replied to Ville Pakarinen's topic in Lighting for Film & Video
Oh yes! Didn't realize the magenta-green axis was referred to as hue. I meant exactly that: moving the color wheel in Resolve (although it's not exactly a wheel in Resolve) so that greens shift towards cyan/blue. This, of course, shifts skin tones towards yellow, so the lights on the talent should be shifted towards red - probably no more than 1/4 stop loss? -
Minus green as a lens filter?
Ville Pakarinen replied to Ville Pakarinen's topic in Lighting for Film & Video
What about shifting hue in post? I got this idea of using the green to our advantage: I could correct only the lights above the talent with minus green gel and leave the background lights uncorrected. Then shift the hue of the high CRI lights a little bit so that when I shift hue in post, I'd get slightly bluish background and correctly balanced light on the talent. -
Minus green as a lens filter?
Ville Pakarinen replied to Ville Pakarinen's topic in Lighting for Film & Video
Hmmm... yes. Doing it in camera would be better. I'm using my BMCC and as far as I know, there's no option for adjusting color on the green-magenta axis. I know this is possible with my Canon 60D DSLR. But since it's raw, how would a custom white balance help since it's not "baked in"? Wouldn't there have to be some kind of digital filter before the raw was even recorded? -
Minus green as a lens filter?
Ville Pakarinen replied to Ville Pakarinen's topic in Lighting for Film & Video
Didn't understand any of that :) -
Minus green as a lens filter?
Ville Pakarinen replied to Ville Pakarinen's topic in Lighting for Film & Video
Man... Always love to have my intuitions confirmed. Thanks! -
When shooting in an office where changing a lot of tubes is both impractical and too expensive, is it possible to correct green with a minus green filter in front of the lens, then add some green to any additional high CRI light's you use?
-
Faking windows indoors
Ville Pakarinen replied to Ville Pakarinen's topic in Lighting for Film & Video
That is true too if there's nothing obscuring the view. I guess it simply comes down to aesthetic preference, not what the audience will find realistic or unrealistic. Personally feel like the ceiling getting too much light is a distraction. -
Faking windows indoors
Ville Pakarinen replied to Ville Pakarinen's topic in Lighting for Film & Video
Interesting, I guess it simply isn't and dried. Depends on so many factors. -
Faking windows indoors
Ville Pakarinen replied to Ville Pakarinen's topic in Lighting for Film & Video
Something about it hitting the ceiling just seems wrong to me. Maybe because I'm imagining this place on a floor of a highrise where most of the light comes from above. Closer to the ground, there's more bouncing of daylight from all directions and thus more light hitting the ceiling. I think it gives away the fact that it isn't in fact a highrise. -
Faking windows indoors
Ville Pakarinen replied to Ville Pakarinen's topic in Lighting for Film & Video
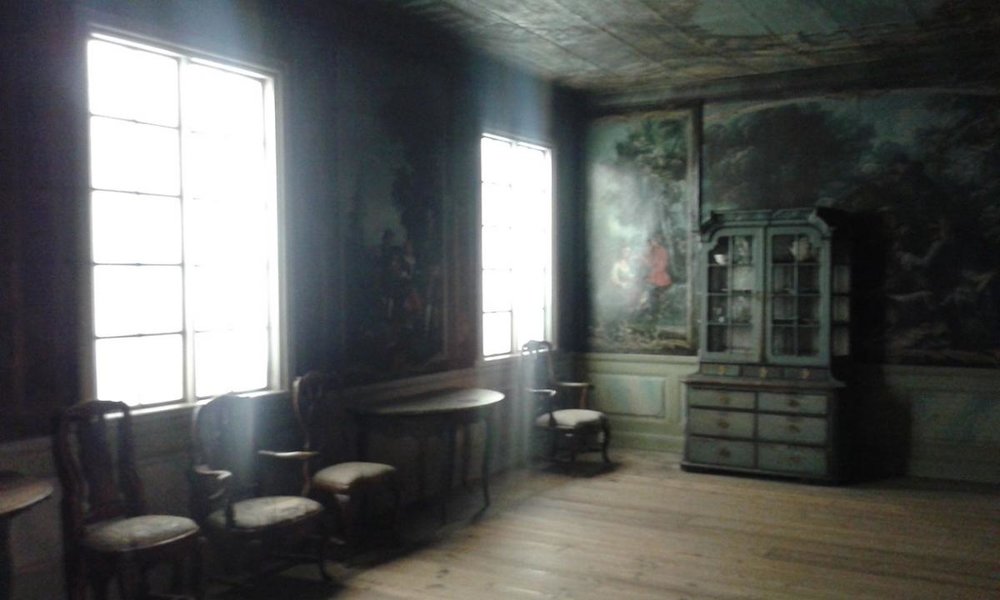
The windows in the museum were covered with some heavy diffusion material that clearly makes the light spread way too much vertically. -
Faking windows indoors
Ville Pakarinen replied to Ville Pakarinen's topic in Lighting for Film & Video
Thanks, David! Yeah, was thinking the same about those small windows. The ceiling itself looks quite neutral white/light gray, at least in that photo. Also, seems very matte surface, which could work very well by itself as bounce material for the skylight. Then, using some warmer fresnels as direct sunlight through light diffusion on the window could be the ticket. Incidentally, I encountered this very lighting challenge in the Finnish national museum today. And like I said, it doesn't look right if the light hits the ceiling too much. That's what I strive to avoid.