


Sam David Zhang
-
Posts
12 -
Joined
-
Last visited
-
Thank you for the suggestion! I will look into a handheld option like IGEBA or the Mole Fogger to help cover areas the other two fog machines on the ground cannot. Honestly, I've just never had to cover such an open area... so I am worried that on the day the fog won't hang on long enough for the wide shots.
-
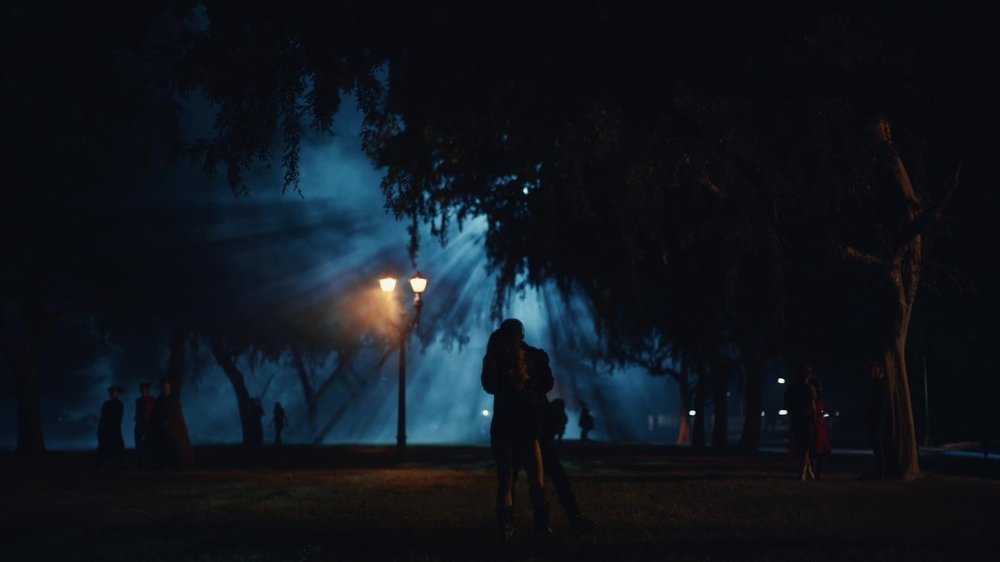
Hey everyone! I am prepping a short film for school that includes a big night time exterior set in a park. I have a general plan for getting the big light out back high and far enough, as well as what I require for the softer fill light near the camera. However, I have no idea how to get enough fog to allow the godrays to shine through. Reference photo of the type of setup we had in mind attached below... I have done a horror film night exterior that used tubes of death, a fan, and a big DF-50, but this was mostly handled by the SFX artist. For something like this that needs to cover a decent area for the godrays, can I get away with 1 or 2 Rosco Hazers OR Fog Machines scattered in the background? Link: https://us.rosco.com/en/product/vapour-fog-machine Thank you.
-
Thank you for the link. I checked out the sample photos of this plugin. A bit hard to gauge just how effective it is at isolating the highlight regions that would display the streaks best. My classmate/editor just took a swing at taking a stock photo and applying an effect. Mask layer that isolates the brighter highlight regions that directional blur works on, and a finished product. It kind of runs into the same issue as what you mentioned with streak filters. The line runs ACROSS the highlights rather than a single direction up/down. I think I'll try to finesse in after effects to see if there's a way to reposition the anchor point of the streak layer upwards to offset the bidirectional nature of "directional blur" in Adobe.... Can't scratch my brain and think of another way to achieve this using the stock FX in Adobe suite. Might have to go into expressions and the formulas for after effects...

-
Robin, thank you for all your insight! This is a great resource for me to start digging into. I think I'll loop in my editor to see how heavy a lift the rotoscope job may end up being. I'm assuming that the gate weave in the scan will be a non-issue. AFI hasn't had much problems with the scans Fotokem gave them for 2nd year films.... yet.... I just want to reiterate so I know I'm on the right track. It's background plate first, then the rotoscoped/keyed take of the actor crawling through. However, if I want to get fancy, I can also layer in the shadow in its own isolated layer somewhere in between? Would it benefit to "glue" it all together with some very subtle grain layer to make everything feel mixed in? Kind of like a glue compressor in the audio world operating on mixed together dubs/tracks to make it sound like they're unified.
-
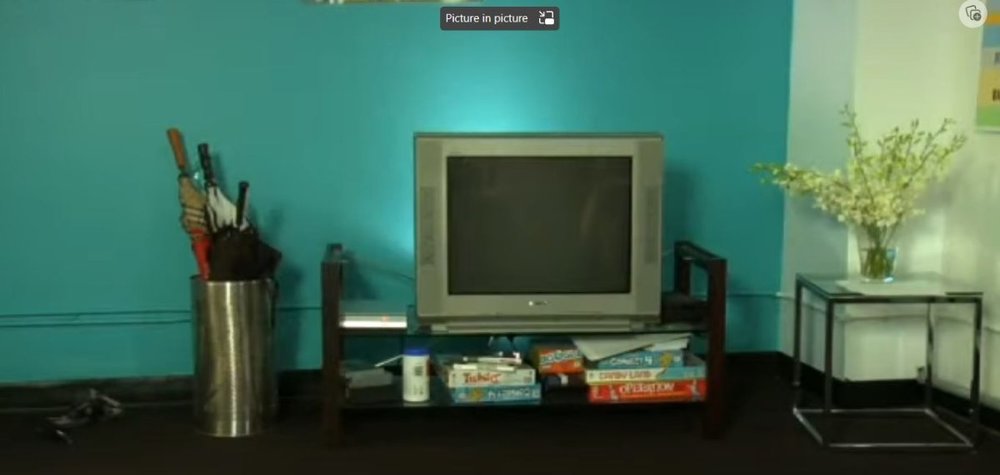
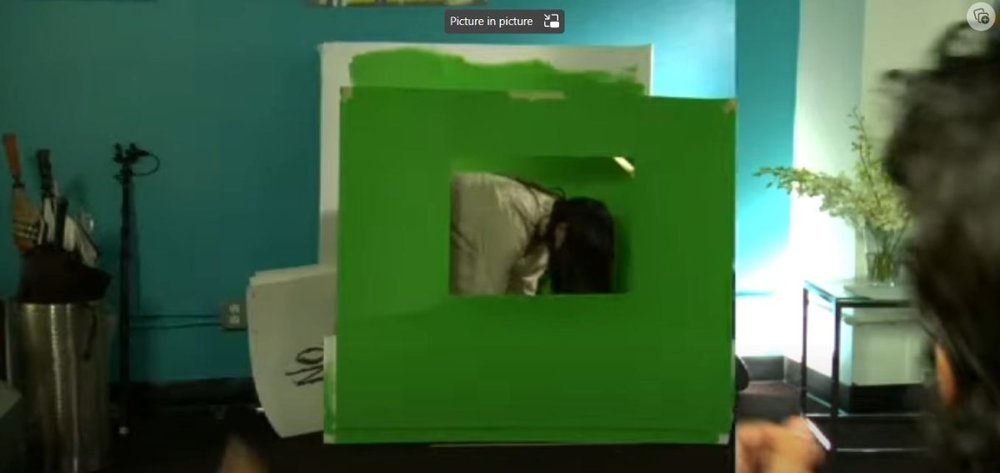
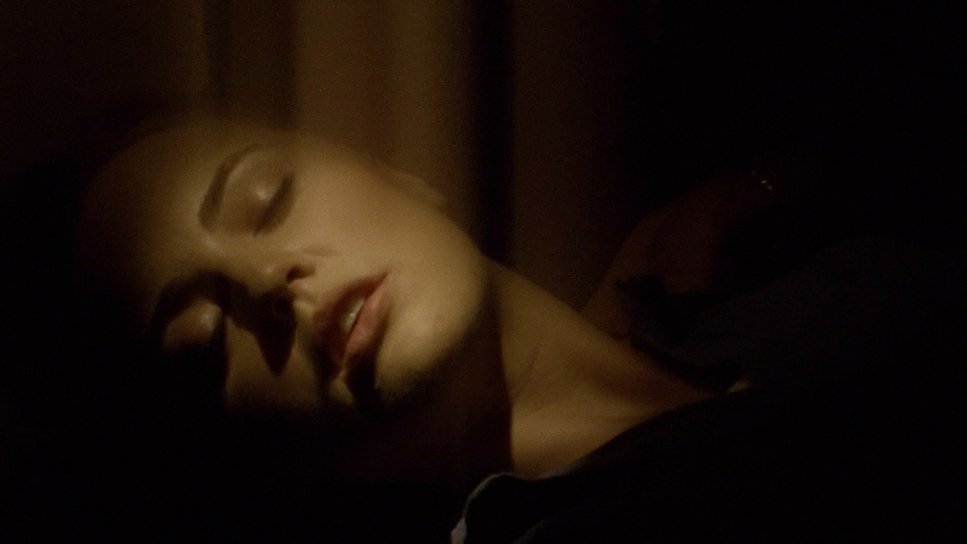
For a 35mm short film project. Horror. Very similar to the money shot from Ringu (1998) where the woman crawls out of the television set. I am designing a shot where a character crawls into the television set, following the general guidelines for the setup described in this YouTube tutorial: The Ring VFX Television Basically, shoot a plate shot of the television set in the space. Then replace it carefully with a green cutout that the actor can crawl through. Composite in post. Cleanup. Sample images attached below from the tutorial. This all tracks with me, but I have a question concerning exposure and cleanup. Wouldn't an actor crawling through a green cutout cast horrible shadows that affect the key? And since I have to swap out the TV for the green screen cutout, I probably have to keep the room lighting similar in order to make the composite match. Doesn't this mean I won't be properly exposing the green screen cutout? Seems tricky and messy to me. Probably something that can be cleaned up with ease in the digital realm, but the trouble here is that I am shooting on 35mm for school. Worse still, I haven't had a chance to shoot green screen footage on film. I was planning on 4-perf 5213 200T for a finer grain acquisition for VFX. But I'm not quite sure if there are other tricks in the trade to make the VFX workflow better for something like this. How do I balance properly exposing the green screen with maintaining the moodier tone of the scene? How do I hand off the best quality image in terms of VFX compositing and cleanup? Thank you all as always.
-
Ah that's what I figured. Thanks, my director and I'll give a talking to the post side of things to test it out. Not really achievable by other means practically right? I'm spit-balling here, but anyone have experience doing something like vaseline smeared in one direction to get a similar effect? Sounds a bit messy in terms of image quality.
-
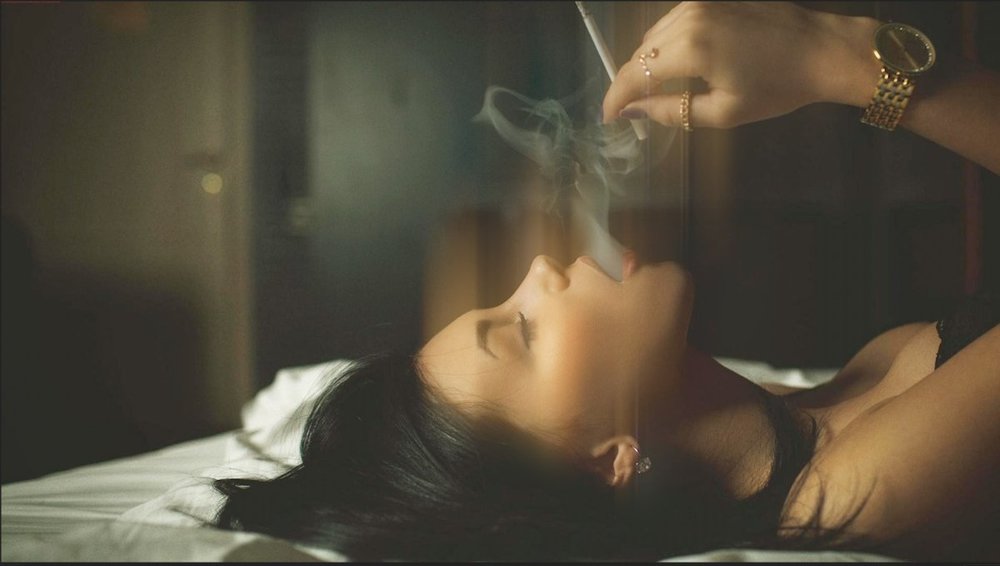
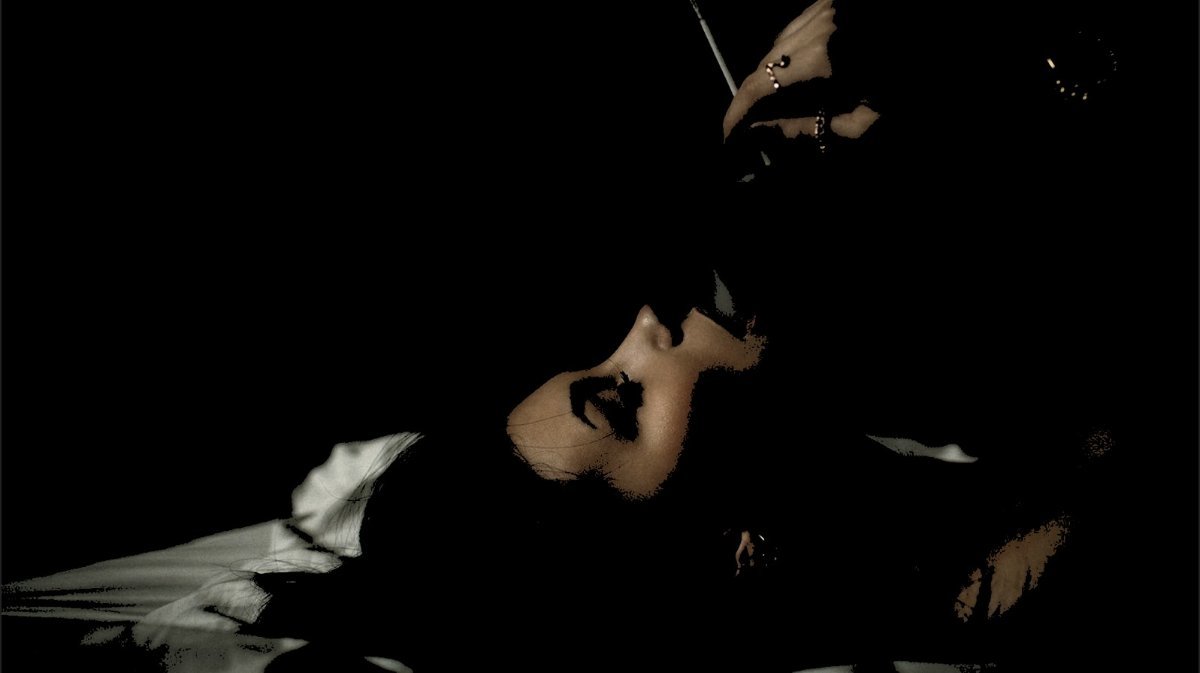
Hey all, Talking to a director about achieving an effect similar to what was done in Saving Private Ryan where the film camera's pull down claw is mistimed with the exposures to get vertical streaks of light. Similar to this image from the movie Limey (off of Shotdeck). Don't know if this is achievable with digital cameras. Is there a way to emulate this? Or would this have to be a purely VFX thing done in post? Thank you!
-
Hey everyone, I am currently doing a research paper for my school, and I am tasked with answering the question: “Reading the film stock curve and selecting a stock based on their color & contrast representation.” I’ve done some preliminary research into the subject, reading Kodak’s Sensitometry Workbook along with a handful of film manuals at the library, and have interpreted the essay prompt as “How can the characteristic curve and spectral-sensitivity chart inform a decision on how a film stock will perform?” I decently understand the concepts of contrast/gamma, how to feel out latitude of a stock from a quick glance at its D logE cuve, and the differences in sensitometry between reversal and negative stocks. However, I wanted to reach out to the community and ask any cinematographer who has worked a lot with film – or is currently working with film on a show – how reading the spec sheet has informed your decision on a film stock. What did you do with the information? How has it led to your testing phase? Is it even important in the end versus real life testing? In addition, I had one technical question that deals with the RGB curves in the D logE chart when it comes to normal process vs push/pull process. As an example, let’s take a look at Kodak 200T listed at this pdf link below: https://www.kodak.com/content/products-brochures/Film/VISION-200T-Sellsheet_US_4PG-EN.pdf In the contrast curve (named “sensitometric curve”), it appears that Blue and Green curves are slightly steeper when compared to the Red curve. I want to confirm that this means the gamma of the individual channels for blue and green are higher, meaning there is “higher contrast in those colors.” Practically, this means that I can expect more Blues and Greens as exposure go up into the highlights, versus the shadows? (is this right?) Furthermore, say I push this stock by 1-stop. If I charted the resulting sensitometric curve of the developed negative, the toe would remain the same… but the shoulder would be lifted by that 1-stop compensation. Does this 1-stop push get evenly spread across the RGB channels? If so, does that means the steeper gammas of Blue/Green compared with the Red channel becomes even more exaggerated? In theory, I would expect some more blue/green in the highlights? Please let me know if I have this concept wrong. Also, would love to hear any of your personal experiences or thoughts on this topic as a whole. Thank you Sam
-
Wonderfully explained. I actually reached out and emailed Roland from photosynthesis.co.nz which is a wonderful resource for cataloging Nikon lenses and has a lot of info regarding older vintage lenses like serial numbers, tech specs, etc. He said the following: Hi Sam, Lens coatings are very thin layers applied to the glass. The layer is ¼ the wavelength of light thick, and works by destructive interference to reduce reflections. If you imagine light striking the lens. Some light is reflected off the air/coating surface but most passes through. Then some more light reflects from the coating/glass boundary. The light reflecting from the glass surface is now ½ wavelength out of phase with the light reflecting from the coating ( ¼ in plus ¼ out). Because the two reflected rays of light are ½ wavelength out of phase, the peaks of one coincide with the trough of the other, which cancel each other out – destructive interference, which reduces the amount of light reflected. Because coatings cause destructive interference for a particular wavelength of light, reflections from other wavelengths (colors) are more obvious, which gives the coating its color. Coatings only work well with one wavelength (color) of light. Multilayer coatings have layers of different thickness so each layer works with a different color to give better suppression of reflections across the visible spectrum. Coatings work best if the light passes at right-angle through the glass. When it passes through at an angle the distance it travels between the air/coating layer and coating/glass layer becomes bigger so no longer causes destructive interference for that wavelength (it would work for a longer wavelength). That is why coatings are not so effective from light coming at extreme angles. This also explains why coating change color when you view them from a different angle. Nikon apply different coatings to each lens to optimise the performance of the lens as a whole, which is why different lens surfaces often have reflections of different colors. I hope that helps! Roland
-
Picture is from someone on mflenses.com, not mine, but it's a great example of the title. I do however have a small set of Nikkors that I use for stills and video use. I was cleaning them and noticed that some had a blue-purple sheen associated with the coating, while one of them had a greenish one. I know that Nikon switched up the coating colors along the way of manufacturing many different lenses in their Nikkor line, but what really did the different colors mean and why did Nikon opt to switch it up? Was it just a manufacturing/engineering reason or maybe inventory? I'm sure the coatings, even if they were differently colored, were pretty much identical in function and design up until Nikon switched to their modern coatings. I'm just suddenly very curious about this topic and thinking about the possibility of rehousing my Nikkor set in the future. My OCD wants to have identical colors so that the lens set looks really sexy together. But, I understand that this is a bit much, hahaha.
.thumb.jpg.f9da819bd36a34d1cea7e0a0a937e47c.jpg)
-
Looking back at the video, you can hear the audio track have a noticeable cut/edit right around the timestamp I give for when he talks about it. Maybe two sentences that were out of context with each other got spliced together with the magic of editing. I think it could have been a weird decision by the editor to just frame the sentence that way. While it did make English sense, it doesn't make much lens sense. Deadlines and etc who knows what happened. I like Shane he's got mountains of experience and wisdom. I'm betting that the video got pressed to tape fast, and Shane didn't edit the video himself.
-
Sam David Zhang joined the community
-
I was watching Shane Hurlbut compare lenses in the Cooke, Leica, Canon, and Rokinon lines using a pretty standard comparison setup. He mentions something at 08:45 in the linked video below about how the vintage Cooke lenses were able to retain circular globes of bokeh even when stopped down when shot on film. However in the digital age, sensors will show the more angular bokeh on lenses like these with a lower number of iris blades. I understand the relationship between the shape of bokeh and the iris blades and aperture, but I couldn't wrap my mind around the physics of why a stopped down lens would retain globe shapes on film versus a digital sensor. Does anyone have a nifty wiki article or an explanation about this phenomenon? Shane Hurlbut explains stop-sign bokeh on older lenses on digital vs film


.jpg.923c9f65f94266ae1b1c8a012f3da16b.jpg)