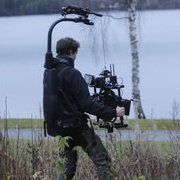
John-Erling Holmenes Fredriksen Posted May 14, 2008 Share Posted May 14, 2008 I'm an aspiring cinematographer based in Oslo, Norway, and I recently shot a commercial on green screen. The shot went fine, I've done some greenscreen work in the past, and I had the post production guys on set to check on the screen, so I'm not worried about that. My question deals with the issues of shooting stuff close to, or towards the ground on greenscreen. This is an issue that I face everytime I shoot stuff like this, and I'm just wondering if anyone have a better solution than I have been able to come up with. I'm including some uncorrected screengrabs from the shoot to illustrate what I mean. (The studio was less than ideal on this particular shoot, and I had to light the screen a bit darker than I usually would to control spill, but the post guys OK'ed it). It's easy to handle on the images where you don't actually see the ground (close up of her face while crouching down, close up of her overarm), I just put her on black fabric, or some white foamcore if I want a bit of fill from below. But then there are images like the close up of her hand approaching the ground, and the one where she is crouching down. Basically, I have just found two ways to handle this, either just live with the spill and let the post guys correct it, or shoot partially without screen, like I did for the hand, putting her on top of a flag, and letting the post guys deal with the rotoscoping in post. In this case the post guys preferred dealing with rotoscoping instead of dealing with spill. I guess mainly because this is a quite short sequence. But there has to be a better way to do this? Does anyone have a trick they like to employ in situations like this? For instance when shooting a film like 300. Do they just calculate a lot of post processing to handle issues like this? Hoping for some smart tricks. Oh, and the video was shot in 720p on a Panasonic HPX500 with the Canon HJ21 cinestyle zoom lens, if anyone is interested. Link to comment Share on other sites More sharing options...
John-Erling Holmenes Fredriksen Posted May 14, 2008 Author Share Posted May 14, 2008 So, images didn't show up, try this: Link to comment Share on other sites More sharing options...
Premium Member Michael Nash Posted May 14, 2008 Premium Member Share Posted May 14, 2008 Using a brighter digital green material might help, especially if you can keep everything except the green where the subject touches the screen lit a little darker to control green spill and reflections. Also with shadows, sometimes compositors do two mattes; one for the lit screen and one for shadowed screen. You'd have to check with your post guys though. Link to comment Share on other sites More sharing options...
Premium Member Walter Graff Posted May 14, 2008 Premium Member Share Posted May 14, 2008 The dilemma of shooting chromakey is trying to light two things in one space. One, the screen. Most folks are very confused about this and believe you need a lot of light. Actually all you are trying to do is get the green as close to its true color as you can. Green usually needs about 40-60 Fcs of light to register properly on a waveform/vectorscope. Some folks incorrectly think you need 160. You did that quite well with the screen as I see it although I would be wrong to look at exposure on these photos presented here as completely accurate. The second part is of course lighting the subject. It's clear you tried to create a nice look with the person. But sometimes doing both in one space is difficult. Of course softer general lighting means softer shadows but what if you want your subject to have kicks like you do? It means one has to use more than simply sift globes, and that creates shadows. I don't think there is an answer to shadows. There are better solutions, but no answers. Sort of like saying I want to remove the floor but need to have a person stand where the floor was. The fact that you had good communication with the post end is key (no pun intended). The reality with doing composites is it IS a team effort and what you can do best you do but what you can not do easily is often solved by the other side of the team. In your case they suggested that rotoscoping would be their solution. That sounds to me like they have experience because as much as you try, sometimes you just can't clean up even the best lighting scenarios with chromakey and shadows. One truth is universal, if your talent approaches the screen in distance, shadows have to fall somewhere. At that point it's a balance of lighting the talent the way you want to and having to deal with the results on the screen. Sometimes you have to find a happy medium if you want it to be the best it can form a production side, and a better way is to get what you want in production and know what post can do to solve any issues you create. Of course you could light it all soft with china balls, etc, but then you've lit for the chromakey and not for the front and back plates. One thing I might have considered for your shoot would to use blue over green. You have lots of skin in your shot so lots of potential contrast of bluescreen. Green is closer to skin in color and closer in luminance to greens luminance. Many folks are unaware that with today's keying software's that luminance differences are as important to good keying as color. Blue would have done two things. One it doesn't show softer shadows as much. And two, it is a better contrast for what is more skin than darker clothing so would make for easier methods of rotoscoping and keying in general. Link to comment Share on other sites More sharing options...
Brian Dzyak Posted May 14, 2008 Share Posted May 14, 2008 Oh, and what is HER number! ;) Link to comment Share on other sites More sharing options...
John Holland Posted May 14, 2008 Share Posted May 14, 2008 That green screen is so underlit its scary i have always liked blue over green ,whack some light on that screen pull the artist away as possible from screen and good luck. Link to comment Share on other sites More sharing options...
John-Erling Holmenes Fredriksen Posted May 14, 2008 Author Share Posted May 14, 2008 That green screen is so underlit its scary i have always liked blue over green ,whack some light on that screen pull the artist away as possible from screen and good luck. The screen is a bit underlit, but bright enough for this project (the post guys did a fine key on it). This is due to the studio not being the studio I requested (it's actually not a studio at all). I didn't have the space I normally would to pull the talent away from the wall, and flagging the screen-lights off the talent was a bit hard for the same reasons (all the lights are on the ground). But principally I agree, the green approaches her clothes a bit, and with such a low IRE there is a bit of extra noise in the screen. Link to comment Share on other sites More sharing options...
John-Erling Holmenes Fredriksen Posted May 14, 2008 Author Share Posted May 14, 2008 The dilemma of shooting chromakey is trying to light two things in one space. One, the screen. Most folks are very confused about this and believe you need a lot of light. Actually all you are trying to do is get the green as close to its true color as you can. Green usually needs about 40-60 Fcs of light to register properly on a waveform/vectorscope. Some folks incorrectly think you need 160. You did that quite well with the screen as I see it although I would be wrong to look at exposure on these photos presented here as completely accurate. The second part is of course lighting the subject. It's clear you tried to create a nice look with the person. But sometimes doing both in one space is difficult. Of course softer general lighting means softer shadows but what if you want your subject to have kicks like you do? It means one has to use more than simply sift globes, and that creates shadows. I don't think there is an answer to shadows. There are better solutions, but no answers. Sort of like saying I want to remove the floor but need to have a person stand where the floor was. The fact that you had good communication with the post end is key (no pun intended). The reality with doing composites is it IS a team effort and what you can do best you do but what you can not do easily is often solved by the other side of the team. In your case they suggested that rotoscoping would be their solution. That sounds to me like they have experience because as much as you try, sometimes you just can't clean up even the best lighting scenarios with chromakey and shadows. One truth is universal, if your talent approaches the screen in distance, shadows have to fall somewhere. At that point it's a balance of lighting the talent the way you want to and having to deal with the results on the screen. Sometimes you have to find a happy medium if you want it to be the best it can form a production side, and a better way is to get what you want in production and know what post can do to solve any issues you create. Of course you could light it all soft with china balls, etc, but then you've lit for the chromakey and not for the front and back plates. One thing I might have considered for your shoot would to use blue over green. You have lots of skin in your shot so lots of potential contrast of bluescreen. Green is closer to skin in color and closer in luminance to greens luminance. Many folks are unaware that with today's keying software's that luminance differences are as important to good keying as color. Blue would have done two things. One it doesn't show softer shadows as much. And two, it is a better contrast for what is more skin than darker clothing so would make for easier methods of rotoscoping and keying in general. Thank you for your long reply. Allthough I was more specifically looking for tricks to handle shots where you have your talent close to the ground, and the ground is in the picture, you make lots of good points (as always). And maybe there are no tricks. You are probably right that for this kind of job, blue would be better. I didn't really have a choice this time, but I guess blue spill would also look a bit prettier than green in situations where you really cannot avoid it. Anyway, it was really nice to have the post people on set to make sure they got the material they needed. It really is a team effort, and what we couldn't accomplish on set this time, will be handled just fine in post. I'm just looking for ways to take even more work off the post end :) Link to comment Share on other sites More sharing options...


Recommended Posts
Create an account or sign in to comment
You need to be a member in order to leave a comment
Create an account
Sign up for a new account in our community. It's easy!
Register a new accountSign in
Already have an account? Sign in here.
Sign In Now