Hi Andy,
I know your post was a while ago, but I hope you've still got your 518, because may have a solution for you. I had a similar problem with mine, but my camera seems to have been a little worse than yours; it showed the same symptoms of shooting for a bit and then jamming, without being able to move the R/L button. I figured, since it's broken anyway, why not take it apart and see how much damage I do ;) Turns out, it's actually super easy to repair this issue, at least it was on my example.
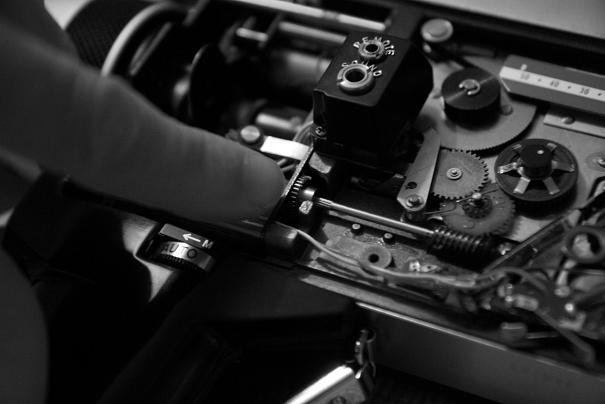
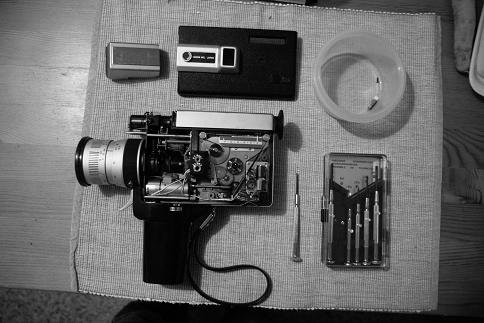
There's a little shaft with a worm gear that drives the film take-up and footage indicator; all I did was take it out, lubricate the little brass thrust bearing on the end of the shaft and the camera worked perfectly! You could probably do the repair in 10 or 15 minutes with nothing more than a small Phillips precision screw-driver and a little light oil, say sewing machine oil or something like that. Either 6 or 8 screws, depending on how deep you want to dig.
First you need to take off the top front aluminum cover, the one right above the lens. That's two screws. Next you want to take off the left hand body panel; one of the screws is right above the lens, under the cover that you just took off. Next, open the film door and take out the three little screws that you're looking straight at. Now you can just pop off the left side panel, taking care not to lose the battery test buttons, which are loose. Disassembly complete! Now you're looking at the guts, including the aforementioned little shaft, with a spur gear at the (now that the camera is lying on it's side, handle towards you) left end and a worm gear at the right end. The bearing you want to oil is at the extreme left end of the shaft, next to the spur gear. I made life difficult for myself by taking out the shaft completely, by just taking out the two screws holding the right hand end of the shaft, but you might not even need to do that. Just put a drop of oil on that bearing, slap the camera back together and Robert will be your father's brother. Seriously, the hardest part was getting the cover back on with the battery test buttons in the right place. My camera has been purring along with no problems ever since. Let me know if you want to do the repair and have any more questions!
Cheers,
Dave