


Lav Bodnaruk
-
Posts
245 -
Joined
-
Last visited
Recent Profile Visitors

-
anamorphic flare by a filter - create a filter
Lav Bodnaruk replied to Lav Bodnaruk's topic in Lenses & Lens Accessories
just a quick update on the shoot whilst i am yet to check out the rushes proper, judging from the onboard monitor on the day (and some split footage) we certainly had flares where we wanted them and yes, they flared horizontally as we placed the fishing line vertically. the main problem however was in how they flared... since the fishing line is on the rear of the element and not the front (it doesn't work when on the front of the lens), we had to have a light in SHOT to get a flare... all the ideas of shooting lights into the lens of screen were straight away abandoned. Another issue was 'stringiness' of the flares... yeah, a strange term to use but not sure how to better explain it. basically, the flares were there but they were a bit stringy on occasion - you can see 5-6 lines inside a flare (that make-up the flare). This is not a trademark of an anamorphic flare so it certainly gives it away as a 'fishing line' trick straight away when viewing. Anyway, I am hoping that in post they can blur it out a bit to make it less obvious and more anamorphic flare like... we will see. Overall, it was easy to apply, easy to do and fun. It worked and got the job done. Different colour and size fishing lines, flare different. I ended up using a very thing, white (see through) fishing line on most of the shots as it gave the 'cleanest' line... least stringy. Thanks again for all the suggestions Cheers, Lav -
anamorphic flare by a filter - create a filter
Lav Bodnaruk replied to Lav Bodnaruk's topic in Lenses & Lens Accessories
hey guys, i did a test tonight - i just put some thin white fishing line behind a 'zoom lens' of my canon 30d stills camera... so obviously, not the result ill get with red and cookes but it was good enough to give me an idea. Anyway, i merely tucked the fishing line over the rear element of the lens and sort of held it when i put the lens into the mount. i can see that to do this proper I will have to tape the fishing line to the rear of the lens, and in saying that, i can see that this will have to be done rather carefully not to damage the lens or the red chip... but anyway, the image i took is attached - which is promising enough for me. ill give it a crack tomorrow morning with cookes and red ;) thanks again for the suggestions guys! cheers ps. it would be a horizontal flare if i had put the fishing line vertically... i had it on a weird angle, hence the line being as it is... but it works!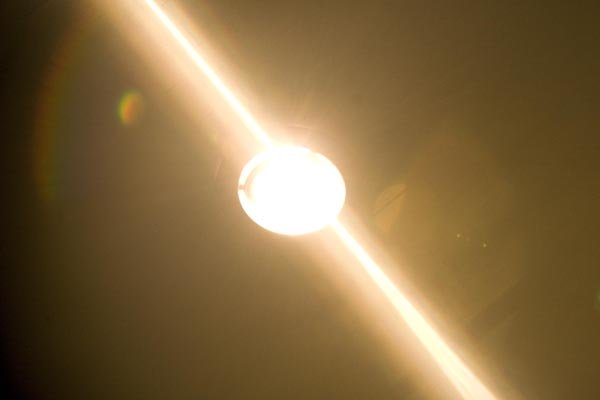
-
anamorphic flare by a filter - create a filter
Lav Bodnaruk replied to Lav Bodnaruk's topic in Lenses & Lens Accessories
this is an awesome idea! OK,no joke here...i went to bed last night after scratching two clear glass filters - one i made into a diamond 2star scratch and the other i pulled a horizontal line across. The result - vertical flare...on both! A total miss... Anyway, what i did learn from that is that i need a vertical line to get a horizontal flare... and i thought, as i lay there half awake in the bed for hours... i should try a fishing line!? Not only can i move it around in front of the lens (i.e. center, to the left, to the right) but i can choose colour, thickness, etc... To read your posts about the fishing line now is scary crazy! I must admit i am thrilled to hear someone here has already done this and that it works! As i will try it on Saturday... but i am slightly dissapointed it wasn't an original idea of mine, because when i thought of it... i thought it was not done before... Oh well, i probably read it somewhere long time ago or saw it on some behind the scenes and my unconscious waited till I was almost asleep to remind me. Thanks again guys, for all the suggestions! Ill try this out on SAT cheers! Lav PS: you reckon across REAR of the element? I thought to just tied a piece of fishing line onto a matt box filter holder, so the light hits it infront of the lens... you reckon rear of the element? -
hey guys, Perhaps this has been asked before but I just cannot find it by searching for it. please re-direct me to that thread if you know of it. i am shooting RED ONE on Saturday, with a set of Cook primes and wanted to try and do some horizontal flares in the shots. I don't dare say I want to do as many as Michael Bay is known for or even JJ Abrams (crazy stuff Star Trek) ... anyway, those are the flares in mind, but not as many as that I was led to believe that a filter by the name of Cokin 2 star A058 may do the trick. Unfortunately, this is NOT something I can find in Brisbane Australia 4 days before the shoot. Photocontinental (a still camera place) has one, but not in stock.... and the order would take too long and it wouldn't get here before the shoot. Their filter is also a screw on, 77mm i believe, which is great for 5d mk2 work but not for Cooks that are 110mm in diameter. So, can i create this myself? Can I can smear vaselin? How, vertically, horizontally? how thick? Onto a CLEAR filter in the matt box... Can i SCRATCH a filter ?! I've got a couple of clear plastic filters, given to me by an AC... 5.5x4 inch large. I can scratch any line on them to try it out... i've searched for the Cokin filter to see the pattern on them and have found that it is not as simple as the line, but rahter, diamond shape pattern - see below Any tips on what i should do? Lav
-
a rather slow year ... with nothing but r3d all around...
-
Hey Mark, I got myself a Sekonic L-508 a while back, so im good - but hopefully someone here would be interested and if not, then there is always eBay ;)
-
howdy, all of it is very likely - I was just told this when buying the camera. the funny thing about it is that I wasn't told this to make me buy it, i had already gotten it, and was told that on delivery... regardless, I am going to put this camera up for sale, as I am not shooting with it, and whilst I think this camera looks fantastic in the corner of my 'studio' room, I think it is best I let it go for someone to make some films with ;) Cheers,
-
the great reel dilemma of 2008
Lav Bodnaruk replied to David litz's topic in Jobs, Resumes, and Reels
this is an interesting question... im leaning towards suggesting that you do it yourself on the FCP, make the new MacBook work for you. What i would do in this instance is use that favor at the post house to transfer all the footage you have on an external HDD - i.e. buy a Lacie 500GB with FireWire 800 connection. This will be handy to have for any work you plan to do on your MacBook. Then learn the software and cut the real in your own time. Of course, this will not bring you any closer to having it on-line. QuickTime is good, and my personal favorite, but Flash in FLV format can also be very good and can usually get more clearer images on something that is 'more' compressed and 'smaller' in size... so one would tend to favor this format. Having said that, you would need to have a server and a web site to host this on, and if you are planning to do this on some sort of a 'share' thing - like YouTube, then it really is no need for the discussion as they will turn it into the format they want and compress the hell out of it... Anyway... that format battle is one you are going to have to fight at a later stage when you know where it is going exactly and how big in the size you want it to be (MBs). You know, you could still get the posthouse to import all the footage for you, dump it on an external HDD and get it to an editor (freelance) who can cut it and export it for you in the right format in no time... this would be cheaper option and one you can opt. to do if you go insane after a month of trying to do it yourself :) Oh and i should mention that if you were not going with external HDD option, you could get it all onto DVCAM or MiniDV and have it imported into your computer by using a camera - so if you can get your hands onto that easier, you do not need a deck :) cheers, EDIT: typo -
Keep us updated if this sells. I am not in the right moment to get this right now but would certainly love to... so keep us updated and if it doesnt sell, i might be in touch in near future ps. any pics available of the condition of the camera? ps2. 3perf? ps3. - just saw your post on mandy - with pics and all... so no need to post them up here. thanks
-
lighting w gels - short film (toilet scene) 35mm
Lav Bodnaruk replied to Lav Bodnaruk's topic in Lighting for Film & Video
Hey guys, here is the still taken with my canon 30d on the day - as we were still setting up .. the end result would be close to this I think that once we are in the telecine and able to do a colour grade (on film) it will look exactly like what we wanted ;) we used many green and yellows in this film, with almost every scene lit in this bizzare way... (some of the long shots on open locations were particularly challenging to get that much colour into). cheers L -
lighting w gels - short film (toilet scene) 35mm
Lav Bodnaruk replied to Lav Bodnaruk's topic in Lighting for Film & Video
Hey mate, i'd love 0 spil, which might make it look like a bit of a 'green screen' but the subject will be moving in and out of that space - s3d space, as the walls go around the wall you are looking at and they are green too. Perhaps it still might look like green screen if done well, but i presume i will never get rid of all of that green - Ill definitely post some fotos i will take whilst on set tomorrow.... I wish i had a chance to do some tests with only magenta lighting the room - colour correcting it in post - proper tests, not just my one light with stills camera test. thanks! L -
lighting w gels - short film (toilet scene) 35mm
Lav Bodnaruk replied to Lav Bodnaruk's topic in Lighting for Film & Video
hey mate, that is a great idea, which i wanted to test out but never got around it. i tried it in my stills camera and photoshop but no matter how much magenta i tried to punch in, colour correcting it in photoshop was not giving me that 'green' that i wanted - but rather just a washed out, lime kind-a green... I certainly wish i had another opportunity to do this test again, as i do think it could work... cheers mate, L -
lighting w gels - short film (toilet scene) 35mm
Lav Bodnaruk replied to Lav Bodnaruk's topic in Lighting for Film & Video
hey mate, thanks for that. yeah, the light that is on his face is actually MAGENTA - which i think is the complimentary colour of green. The gel is actually labeled 'minus green' so that sort of explained itself to me in the title of the gel. I guess my main worry is the wide shots, like you said... but perhaps I am being to anal about it and I ought to accept that in wide shots the skin colours won't be as relevant as my CU's and that I will have to live with what i can get. I am trying to get more spot light action (with MAGENTA gel on them) happening from the ceiling of the toilet so that my subject can walk from one pool of magenta light into another... he will be 'green' in between, but hopefully (fingers cross) this won't be too much of an issue ... In CU's I should be OK. Today I went to Bunnings, trying to get a 2ft tube that I can wrap in Magenta and use for just above camera as my 'soft' light that might just help with those skin tones... this will be interesting shoot no doubt... ill report on how i got on after the weekend (shooting this scene on SAT). thanks again JB! -
lighting w gels - short film (toilet scene) 35mm
Lav Bodnaruk replied to Lav Bodnaruk's topic in Lighting for Film & Video
oh wow, i walked right into that one - asking questions about the toilet with a name like that... for the record, my name means LION in Serbian ;) good to see hear from you mate! Hope you are keeping busy. The short looks great! Unfortunately, we cannot build the set nor can we leave the toilet premise and i got no one to talk into cutting the scene out since i am co-directing it as well ;) Couple of scenes take place there, but they make up some 20% of the film in total, so we won't be there for too long. I do want it to be that green tho... I know it looks wild and different, but we are going for something 'extreme' in this film and are hoping to use colour to tell the story, so the stronger the green, the better. It is a surreal world our main protagonist is in.... away from reality. \ Sure, it will look odd and no doubt we will all get a headache after a while, but the colour in those stills is really what im hoping to get onto 35mm. My main worry is that that much green will always spil onto the subject. The idea of using a small soft box on the camera is good. i might consider that. i do have some wide shots there - like the initial stills of the toilet (that exact framing, but in 2.35:1 ratio) that would be harder with softbox on it, but for CUs it might work... I recently did a short that Paul Seipel shot, you can see it here AFFAIR that had that 'light' green tones brought into it in the grade... Your grade reminded me of it a bit... But this one is meant to be very very green. Any thoughts on neutralising that hard of green colour? the rest of the film is wack too - uses heavy yellow gels and more green... but other scenes are huge, with locations across 2 different UNI campuses, a studio, church, etc... so we get more space to separate the background lighting to foreground. Thanks John! -
Hey guys, I am about to start a production (in 3 days time) on another short film, on 35mm, and am having some difficulties figuring out the lighting in one of the scenes. the scene is set in a toilet, a very SMALL toilet, and we want to make it look 'different' in a way it looks, by using heavy gels in our lighting set-ups and colouring background walls different colour to the subject. the problem is the location, since it is so small, the colour from the back walls is spilling onto the subject too much and neutralizing it is becoming a nightmare of a game. I thought I run the scenario pass you and see if anyone has any suggestions... So, we want the walls to be GREEN - heavy GREEN, and yet, we want the skin colours to be natural... (odd ha?). i tried couple of different hings, but since the space is so small, i am finding it difficult to HIDE the lights anywhere. The best I could come up with is to use the toilet's two 4 foot long tubes on the ceiling and gel them up green. (hoping i wont get any flicker at 25fps). I put 2-3 green gels on each. That gave me a green look for the entire room as you can see in the photos... then I thought i use minus green (magenta) gels to put onto the keno flow (4 x 4ft long kenos) that are going to be stuck to the auto polo that scratches above the subject. The test i did with the photos below are with two (2) 4ft kenos on just a c-stand. Unfortunately i will have to remove the tubes from the housing to tape to the autopolo direct, and do some skirts to prevent spilling too much (just point downwards). Do you have any ideas on how else i could light the walls green and the subject to stay colour balanced correctly? i dont think i have any room for the lights that are bigger then keno flows suspended from the ceiling. i could position any light i want next to the camera, but that will cast shadows and look ugly (and limit space aroudn the camera as i doubt i can do any traces or similar in that space too)... it is really cramped any suggestion would be most welcome someone suggested that i maybe try and use magenta only and fill the whole room with it and then colour correct it in a grade to get it to work!? apparently the walls would become green then?! thanks!