

Guy Holt
-
Posts
680 -
Joined
-
Last visited
Everything posted by Guy Holt
-
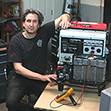
I agree that you shouldn't have an actor drive and act at the same time - neither is done very well if they do. Towing a car on a platform as Stephen suggests doesn't have to be expensive. For very little money you can rent a “car carrier” from U-Haul and tow it behind a pick-up truck. A number of commercial productions I have worked on have done this with great success. You usually need to do some lighting of the car interior because it tends to be a very high contrast situation. I don’t recommend that you try to power lights with an inverter through the lighter socket. Car lighter sockets are only capable of handling a couple of hundred Watts at most and you usually require at least a 400W HMI to provide fill during a day lit shoot. To run a small HMI you can use a "Battverter" - which is a Battery/Inverter system. A "Battverter" system consists of a 12V DC power source (usually Marine Cells), a DC-to–AC True Sine Wave Power Inverter, and a Battery Charger. Wire these components into a Road Case or milk crate and you can put it on the floor in the back of the car. Here are some production stills that show you two Battverter systems I built to run lights in vehicles at various times. The first is a 750W "Battverter" rig wired into in Calzone case. To maximize the running time on the batteries, I made up a "jumper cable" that we attached to the leads of the pickup truck's battery. That way the engine alternator charged the batteries as they were being discharged by the light. Tie–ing the Battverter into a vehicle engine will extend the running time on your Battverter batteries so much that they may never run out of power. The production stills below show a more elaborate 1800W Battverter system that we built to run 16 - 4’ kinos tubes inside the airport shuttle bus. Use this link for details on how we wired it into the shuttle bus. (Kino Flo 4x4s rigged to an exo-skeletal frame of a Shuttle Bus and powered by an 1800W Battverter) If you don’t require a lot of light, a Battverter will even enable you to use a car engine as a generator. Use the engine to run the lights through the Battverter as described above during set up and rehearsals. When it comes time to shoot a take, simply shut off the engine and continue to run the lights on the Battverter alone. Running the vehicle engine between takes charges the batteries so that they will run lights all night. (Custom 1800W BattVerter powers 16 - 4' Kino Flo single tubes rigged in the interior and on the exterior of an Airport Shuttle) When building these rigs, keep in mind that when voltage goes down, amperage goes up. Wire that carries 12V DC has to be much larger than that which carries the same load at 120V AC. For instance to supply 12 volts to the 1800W inverter used on the shuttle bus required that we run 2 ought feeder to the buses' alternator. Also be sure that the alternator is large enough to take the load without burning out. Finally, You have to be really careful when choosing a DC-to-AC inverter for film production because there are three basic types of inverters and not all of them are suitable for all types of motion picture lights. For more information on what type of inverters to use with different type of lights I would suggest you read an article I wrote about portable generators that is available online at http://www.screenlightandgrip.com/html/emailnewsletter_generators.html. Since inverter generators use the same three types of inverters, the information in the article is applicable to stand alone DC-to-AC inverters designed for use with batteries as well. If you don’t want to tie batteries into the car’s alternator, you should consider using a small portable generator. But, you don’t want to use a generator, like the Honda 2000, that has a gravity feed for fuel. The fuel sloshes around and causes the generator to run erratically. I suggest you instead use a generator that has an electric fuel pump like our 7500W modified Honda EU6500is Inverter Generator. The fuel pump assures that not only will the engine receive a continuous feed of gas, but also that it won’t run out of gas in the course of a production day. The EU6500 is so quiet that you will not hear it in the car with the windows closed and, as you can see from the picture below of another rig, it is cable of powering large HMIs for daylight fill. A 7500W modified Honda EU6500 powering a couple of 2.5HMI Pars on a car rig. If you have any questions about using inverters or generators, I would suggest you read an article I wrote on the use of portable generators in motion picture production. Harry Box, author of “The Set Lighting Technician’s Handbook” has cited my article in the just released Fourth Edition of the handbook. In addition, he has established a link to it from the companion website for the Fourth Edition of the Handbook, called “Box Book Extras.” Of the article Harry Box states: "Great work!... this is the kind of thing I think very few technician's ever get to see, and as a result many people have absolutely no idea why things stop working." "Following the prescriptions contained in this article enables the operation of bigger lights, or more smaller lights, on portable generators than has ever been possible before." If you haven't yet read the article, or looked at it in a while, it is worth reading. I have greatly expanded it to be the definitive resource on portable power generation for motion picture production. Use this link to read it on-line for free. Guy Holt, Gaffer, SceenLight & Grip, Lighting and Grip Rental & Sales in Boston.
-
It is true that you are limited to the rated output of the 20A U-Ground Edison Outlets on the EU2000s when you use the Honda Parallel cable kit to parallel two of them. Honda makes a special version of the EU2000 with a 30A receptacle that when paralleled with the standard EU2000 will give you 30Amps from a single outlet, but these non-standard EU2000s are hard to come by. We offer two parallel kits. The first combines the output of two EU2000s for a maximum load of 33.4A (pictured above.) The second combines the output of two EU3000s for a maximum load of 50A. Both are configured with the industry standard 60A Bates receptacle so that you can power larger HMIs or use standard Bates splitters, extensions, and breakout boxes to distribute power around your set. The 30A kit bolts onto the front of one of the EU2000s and includes an amp meter so that you can monitor the load on the generators so that you do not exceed 4000W (33.4 Amps) between them. Guy Holt, Gaffer, SceenLight & Grip, Lighting and Grip Rental & Sales in Boston.
- 1 reply
-
- 1
-

-

Car Scene / HandHeld camera / Need some advices
Guy Holt replied to Laurent Navarre's topic in General Discussion
I agree that this shot was a little more complicated. It is pretty clear that the driver is not actually driving the car and that it was on a process trailer. This type of set up doesn't have to be expensive. For very little money you can rent a “car carrier” from U-Haul and tow it behind a pick-up truck. A number of commercial productions I have worked on have done this with great success. IMO the clip from "The Pusher" could have used a little day light fill - especially when they come to a stop at the end. I don’t recommend that you try to power lights with an inverter through the lighter socket. Car lighter sockets are only capable of handling a couple of hundred Watts at most and you usually require at least a 400W HMI to provide fill during a day lit shoot. To run a small HMI you can use a "Battverter" - which is a Battery/Inverter system. A "Battverter" system consists of a 12V DC power source (usually Marine Cells), a DC-to–AC True Sine Wave Power Inverter, and a Battery Charger. Wire these components into a Road Case or milk crate and you can put it on the floor in the back of the car. Here are some production stills that show you two Battverter systems I built to run lights in vehicles at various times. The first is a 750W "Battverter" rig wired into in Calzone case. To maximize the running time on the batteries, I made up a "jumper cable" that we attached to the leads of the pickup truck's battery. That way the engine alternator charged the batteries as they were being discharged by the light. Tie–ing the Battverter into a vehicle engine will extend the running time on your Battverter batteries so much that they may never run out of power. The production stills below show a more elaborate 1800W Battverter system that we built to run 16 - 4’ kinos tubes inside the airport shuttle bus. Use this link for details on how we wired it into the shuttle bus. (Kino Flo 4x4s rigged to an exo-skeletal frame of a Shuttle Bus and powered by an 1800W Battverter) If you don’t require a lot of light, a Battverter will even enable you to use a car engine as a generator. Use the engine to run the lights through the Battverter as described above during set up and rehearsals. When it comes time to shoot a take, simply shut off the engine and continue to run the lights on the Battverter alone. Running the vehicle engine between takes charges the batteries so that they will run lights all night. (Custom 1800W BattVerter powers 16 - 4' Kino Flo single tubes rigged in the interior and on the exterior of an Airport Shuttle) When building these rigs, keep in mind that when voltage goes down, amperage goes up. Wire that carries 12V DC has to be much larger than that which carries the same load at 120V AC. For instance to supply 12 volts to the 1800W inverter used on the shuttle bus required that we run 2 ought feeder to the buses' alternator. Also be sure that the alternator is large enough to take the load without burning out. Finally, You have to be really careful when choosing a DC-to-AC inverter for film production because there are three basic types of inverters and not all of them are suitable for all types of motion picture lights. For more information on what type of inverters to use with different type of lights I would suggest you read an article I wrote about portable generators that is available online at http://www.screenlightandgrip.com/html/emailnewsletter_generators.html. Since inverter generators use the same three types of inverters, the information in the article is applicable to stand alone DC-to-AC inverters designed for use with batteries as well. If you don’t want to tie batteries into the car’s alternator, you should consider using a small portable generator. But, you don’t want to use a generator, like the Honda 2000, that has a gravity feed for fuel. The fuel sloshes around and causes the generator to run erratically. I suggest you instead use a generator that has an electric fuel pump like our 7500W modified Honda EU6500is Inverter Generator. The fuel pump assures that not only will the engine receive a continuous feed of gas, but also that it won’t run out of gas in the course of a production day. The EU6500 is so quiet that you will not hear it in the car with the windows closed and, as you can see from the picture below of another rig, it is cable of powering large HMIs for daylight fill. A 7500W modified Honda EU6500 powering a couple of 2.5HMI Pars on a car rig. If you have any questions about using inverters or generators, I would suggest you read an article I wrote on the use of portable generators in motion picture production. Harry Box, author of “The Set Lighting Technician’s Handbook” has cited my article in the just released Fourth Edition of the handbook. In addition, he has established a link to it from the companion website for the Fourth Edition of the Handbook, called “Box Book Extras.” Of the article Harry Box states: "Great work!... this is the kind of thing I think very few technician's ever get to see, and as a result many people have absolutely no idea why things stop working." "Following the prescriptions contained in this article enables the operation of bigger lights, or more smaller lights, on portable generators than has ever been possible before." If you haven't yet read the article, or looked at it in a while, it is worth reading. I have greatly expanded it to be the definitive resource on portable power generation for motion picture production. Use this link to read it on-line for free. Guy Holt, Gaffer, SceenLight & Grip, Lighting and Grip Rental & Sales in Boston. -
I suggest you go to U-Haul and rent a “car carrier” to tow behind a pick-up truck. A number of commercial productions I have worked on have done this with great success. I don’t recommend that you try to power lights with an inverter through the lighter socket. Car lighter sockets are only capable of handling a couple of hundred Watts at most and you usually require at least a 400W HMI to provide fill during a day lit shoot. To run a small HMI you can use a "Battverter" - which is a Battery/Inverter system. A "Battverter" system consists of a 12V DC power source (usually Marine Cells), a DC-to–AC True Sine Wave Power Inverter, and a Battery Charger. Wire these components into a Road Case or milk crate and you can put it on the floor in the back of the car. Here are some production stills that show you two Battverter systems I built to run lights in vehicles at various times. The first is a 750W "Battverter" rig wired into in Calzone case. To maximize the running time on the batteries, I made up a "jumper cable" that we attached to the leads of the pickup truck's battery. That way the engine alternator charged the batteries as they were being discharged by the light. Tie–ing the Battverter into a vehicle engine will extend the running time on your Battverter batteries so much that they may never run out of power. The production stills below show a more elaborate 1800W Battverter system that we built to run 16 - 4’ kinos tubes inside the airport shuttle bus. Use this link for details on how we wired it into the shuttle bus. (Kino Flo 4x4s rigged to an exo-skeletal frame of a Shuttle Bus and powered by an 1800W Battverter) If you don’t require a lot of light, a Battverter will even enable you to use a car engine as a generator. Use the engine to run the lights through the Battverter as described above during set up and rehearsals. When it comes time to shoot a take, simply shut off the engine and continue to run the lights on the Battverter alone. Running the vehicle engine between takes charges the batteries so that they will run lights all night. (Custom 1800W BattVerter powers 16 - 4' Kino Flo single tubes rigged in the interior and on the exterior of an Airport Shuttle) When building these rigs, keep in mind that when voltage goes down, amperage goes up. Wire that carries 12V DC has to be much larger than that which carries the same load at 120V AC. For instance to supply 12 volts to the 1800W inverter used on the shuttle bus required that we run 2 ought feeder to the buses' alternator. Also be sure that the alternator is large enough to take the load without burning out. Finally, You have to be really careful when choosing a DC-to-AC inverter for film production because there are three basic types of inverters and not all of them are suitable for all types of motion picture lights. For more information on what type of inverters to use with different type of lights I would suggest you read an article I wrote about portable generators that is available online at http://www.screenlightandgrip.com/html/emailnewsletter_generators.html. Since inverter generators use the same three types of inverters, the information in the article is applicable to stand alone DC-to-AC inverters designed for use with batteries as well. If you don’t want to tie batteries into the car’s alternator, you should consider using a small portable generator. But, you don’t want to use a generator, like the Honda 2000, that has a gravity feed for fuel. The fuel sloshes around and causes the generator to run erratically. I suggest you instead use a generator that has an electric fuel pump like our 7500W modified Honda EU6500is Inverter Generator. The fuel pump assures that not only will the engine receive a continuous feed of gas, but also that it won’t run out of gas in the course of a production day. The EU6500 is so quiet that you will not hear it in the car with the windows closed and, as you can see from the picture below of another rig, it is cable of powering large HMIs for daylight fill. A 7500W modified Honda EU6500 powering a couple of 2.5HMI Pars on a car rig. If you have any questions about using inverters or generators, I would suggest you read an article I wrote on the use of portable generators in motion picture production. Harry Box, author of “The Set Lighting Technician’s Handbook” has cited my article in the just released Fourth Edition of the handbook. In addition, he has established a link to it from the companion website for the Fourth Edition of the Handbook, called “Box Book Extras.” Of the article Harry Box states: "Great work!... this is the kind of thing I think very few technician's ever get to see, and as a result many people have absolutely no idea why things stop working." "Following the prescriptions contained in this article enables the operation of bigger lights, or more smaller lights, on portable generators than has ever been possible before." If you haven't yet read the article, or looked at it in a while, it is worth reading. I have greatly expanded it to be the definitive resource on portable power generation for motion picture production. Use this link to read it on-line for free. Guy Holt, Gaffer, SceenLight & Grip, Lighting and Grip Rental & Sales in Boston.
-
Bingo. I worked as a day playing electric on "Shutter Island" and can personally attest that the scene was lit almost exclusively with Par Cans (you can see them in the background of this shot.) The scene was filmed in the basement of a building at a decommissioned State Pysch Hospital in Medfield, MA. Since it was the basement there was only about 12' clearance. The Par Cans were rigged on speedrail that spanned from column to column, which put the lamp at no more than 10' off the ground. They were lamped with 1kw Par 64 Wide lamps, so they were screaming on the talent. At only a distance of 3', I am still surprised that Leonardo DiCaprio's hat didn't catch fire. There were cots with white sheets and blankets set up through out the basement to dress it as a hospital ward. If I recall correctly the bounce of the Par Cans off the cots and off of Ben Kingsley's white lab coat is all the bounce there was. What you see reflected in Kingsley's eye is the cot that they are standing by. Guy Holt, Gaffer, ScreenLight & Grip, Lighting Rental and Sales in Boston
-
Sekonic C-500 Color Meter and CC value interpretations
Guy Holt replied to Chad Terpstra's topic in Lighting for Film & Video
According to Konica Minolta’s website, the 200A is not intended for measurement for photographic corrective purposes but rather for LED billboard quality control and maintenance. If LED modules that are side by side on LED billboards have different color tones (because of lumen depreciation and color shift), the billboard will look mottled. By providing a means of measuring the chromaticity and color of LED modules using Δuv readings, the CL-200A enables billboard developers and maintenance personnel to assure billboard uniformity and clarity of color. To be useful in photography, a color meter must measure the color of light and present the data in terms that a photographer can use. Unfortunately, the Δuv readings that the 200A provides do not translate to CC (green/magenta) or LB (CTB/CTO) gels. For this reason the 200A cannot be used for photographic corrective measurements. Unfortunately there is no color meter that provides a valid means of color correcting LED luminaries for photographic purposes. The CC (Color Compensating) and LB (Light Balancing) scales used by color meters are not calibrated for the discontinuous spectral output of LEDs, but only continuous spectrum sources like tungsten, HMI, & Fluorescent. The typical color meter has three sensors that measure specific wavelengths of red, green or blue. The assumption is that all three of these wavelengths will occur naturally in a black body radiator, which is a theoretical source that radiates light across all wavelengths and changes color temperature as it is heated. When we talk of a 3200k or 5600k light source, what we’re referring to is the color of light emitted by a black body radiator that is heated to 3200k or 5600k. It’s true that 3200k light is warmer than 5600k light, but that doesn’t mean that the black body source has stopped radiating at certain wavelengths. What has changed is that some wavelengths are being radiated more than others—in the case of 5600k light, more blue is being emitted than red, but red is never completely eliminated. The problem with the discontinuous spectrum of LED sources is that certain wavelengths are deficient or absent all together (use this link for details.) Using a color meter with these sources can result in faulty correction, as colors are typically presented as ratios (orange to blue, green to magenta) and only one half of the equation may not be present. Guy Holt, Gaffer, ScreenLight & Grip, Lighting rental and sales in Boston -
Without a doubt LEDs are the best light source to use on batteries, but battery powered LEDs are not the best source IMHO to “flood” an alley way with light. The traditional approach to lighting a street or alley is to wet-down the pavement and rake the alley from an oblique angle with a large HMI or tungsten fixture. Smaller fixtures are then used to light the foreground action area. Where there is no LED fixture in existence that can match the output of a 4k HMI or 5k Tungsten Par in this application, you would be better served by renting a generator than using a number of battery powered LEDs. And, given the cost of renting film style battery powered LED fixtures ($125-$135 each + batteries), using a generator and inexpensive tungsten fixtures may even be more economical if you rent a portable generator rather than a movie blimped tow generator. Honda EB10000 with Voltage Select 84A Transformer/Distro and 14 Gallon Fuel Caddy Portable gas generators have come a long way. Honda has just come out with a 10000W generator (the EB10000), which can be modified to use an external fuel tank (you will no longer have to refuel every 4hrs) and can provide 84 Amps of power in a single 120V circuit when used with a transformer/distro. That 84A/120V circuit cannot only power larger lights, but also more, smaller lights than was possible before on a portable Honda. A feature film production powered by a Honda EB10000 10’000W is just enough to power a good size HMI (say a 4k) to light the deep background and have enough power left over to power not only talent keys but also backlights, rim lights, and kickers to edge light your talent. A lot of productions hesitate to use non-blimped industrial generators like the new 10kw Honda EB100000 because of the noise they make. Whether you pick up generator noise on your audio tracks comes down to how you use it. Campfire scene on the beach powered by a Honda EB10000 A common problem with open-frame industrial generators like the EB10000 is that by the time you move them far enough off set that you don't hear them you have significant "Line Loss" (often referred to as "Voltage Drop") from the long cable run back to set. To the problem of line loss, you have the added problem that as you add load to small generators, their voltage drops (it is not uncommon for a generator to drop 5-10 volts under full load.) The combination of voltage drop on the generator and line loss on a long cable run can cause voltage to drop to the point where HMI and Kino ballasts cut out unexpectedly or won't strike at all. Low voltage can also cause problems such as reduced efficiency and excessive heat in equipment, unnecessary additional load on the generator, and a dramatic shift in the color temperature and in the output of tungsten lights. For these reasons, portable gas generators are typically operated too close to set where they are picked up on audio tracks. Left: Honda EB10000 operating out of grip truck (note set at distance (bright spot on right side.)) Center: 84A Full Power Transformer/Distro compensates for Voltage Drop over 400ft cable run. Right: Beach Set with 120v full line level 500ft from power source. The trick to recording clean audio with the EB10000 is to use the generator with a boost transformer that will enable you to operate the generator at a distance where it won’t be heard, yet maintain full line level on set. A boost transformer will enable you to add 300'- 400' of larger gauge 250V twist-lock extension cable between the generator and the Transformer/Distro. This is usually enough cable to place the generator around the corner of a building, or to run it out of a van or truck - which is usually all the additional blimping you need with these generators. The heavy-duty 250V twist-lock cable eliminates multiple long cable runs to the generator and minimizes line-loss (eliminating the severe voltage drop you would have using standard electrical cords.) And, by compensating for the unavoidable voltage drop you will have on a fully loaded generator, a boost transformer will assure full line level (120V) on set. Left: Beach Set lit by two 1800W Arrimaxes. Center: Secondary side power distributed with standard 100 Bates Gang Boxes. Right: Set viewed from generator (note: distance and extent of set power distribution.) The indie films “Paralava” and "Gasp" (pictured above and below) are good examples of how the voltage boost capacity of a Transformer/Distro makes it possible to record clean audio tracks with the EB10000 even under the worst of conditions. “Gasp” takes place at an idyllic beach house and its’ surroundings including a campfire on the beach (likewise for “Paralava”.) To record sync sound without picking up the noise of a generator, on both films the crew ran a modified 10kw Honda EB10000 out of their grip truck 500 ft from their beach set. To assure full line level on set, the productions used the boost capacity of a 84A Transformer/Distro to compensate for the line loss over the long cable run. Opening scene of the feature film "Gasp" From the Transformer/Distro they then ran 4/3 Bates Extension to set where they broke out to 20A Edison receptacles using 100A gang boxes. On “Paralava”, the crew ran the generator near full capacity with a lighting package that consisted of two 1800W Arri M18 Baby Max HMIs, several Tegra 400s and assorted Litepanels and Quartz Fresnels. Even with a sizable load, they experienced no appreciable voltage drop on set even after a 500' cable run because the Transformer/Distro compensated for both the line loss of the cable and voltage drop of the generator under near full load. With nothing more than a Honda EB10000 and house power the crew of "Gasp" was able to maintain the look and feel of a sunny summer day even when filming in the midst of a hurricane in October. By comparison, had the crew of "Paralava" run 500' of standard 14 Awg electrical cord they would have experienced a line loss alone of 24.5V. To avoid having their 1800W Baby Maxs cut out from low voltage, they would have had to move the generator closer to set where it would be picked up on the audio tracks. On “Gasp” the crew ran a 6k Par to light the deep background, as well as an assortment of smaller tungsten fixtures to simulate the firelight. To light interiors of the beach house, the crew of “Gasp” used the Honda EB10000 to power two 4k Pars coming in from the outside, and house power to power an assortment of smaller HMI and Kino fixtures. This approach (combining house with generated power) gave them enough power to maintain the feel of a sunny summer day even through the crew was hit by a hurricane half way through production. Left: Ready for rain on the set of "Gasp." Center: Two 4kw Pars operate on a 10kw Honda EB10000 Generator through our 84A Full Power Transformer/Distro. Right: 100A Shock Block GFCI downstream of Full Power Transformer/Distro offers Ground Fault Protection for entire 100A distro system. These two films clearly demonstrate how the boost capacity of transformers can enable you to not only place the generator further from set where it won't be heard, but also assures that the supply voltage on set does not drop too low (use this link for information about Line-Loss and how to combat it.) Unless you have to shoot in a moving car, battery powered LEDs are usually not your best bet. Guy Holt, Gaffer, SceenLight & Grip, Lighting and Grip Rental & Sales in Boston.
-
I second David’s advice. Don’t try to light your talent with only practicals. After exposing for the light they throw on the talent several feet away, the practicals themselves will blow out. Not only is supplemental lighting almost always required to light your talent, but practicals must be treated to make them look realistic. I find that practical lamps never look convincing unless one treats the lampshade as well as boost the bulb wattage. That is because if you stop down to keep the shade from burning out, the output of the practical, on the table it sits on or the wall its on, looks rather anemic. I find you get a more realistic look if you boost the wattage of the bulb and line the inside of the shade with ND gel. It is a delicate balance to obtain. You can obtain this delicate balance without a monitor, by using the old school method with incident and spot meters and a selection of practical bulbs including PH 211, 212, and 213 bulbs. Years ago Walter Lassaley, BSC, instructed me to balance practical’s such that an incident reading of the direct output one foot away from the bulb is one stop over exposure. I have found that rule of thumb gives a realistic output to the practical - the light emitted downward onto the table top and upward onto the wall or ceiling is realistic. After establishing the practical’s output using an incident meter, you then use a spot meter to determine how dense an ND gel is needed to line the inside of the shade so that the shade does not become too hot. After treating your practicals, use them as motivated sources to edge light objects in the frame. Use reverse keys for talent and underexpose flesh tones by at least two stops or more. As long as you define the contours of your subject with subtle underexposed edges, don’t be afraid to let your talent fall off into black. The scene above from “Millers Crossing” lit by Barry Sonnenfeld is a good example. The table practical appears to be the only source of light in the scene, but clearly it takes more than just the table practical to light the room realistically. For a good explanation see David Mullen’s analysis at http://www.cinematography.com/index.php?showtopic=55891 is a good example. Guy Holt, Gaffer, ScreenLight & Grip, Lighting and Grip Equipment Sales and Rentals in Boston.
-
Sekonic C-500 Color Meter and CC value interpretations
Guy Holt replied to Chad Terpstra's topic in Lighting for Film & Video
Use this link for a table that correlates CC (Color Compensating) values and Color Correction Gel (plus and minus greens.) The reason for the discrepancy is that different imaging tools will see a discontinuous spectrum in different ways. Film is much more sensitive to blue and green, which is why fluorescent lights will photograph with a severe green/cyan cast. The same lights seen through an HD or video camera may appear fairly neutral. They may look a touch green, but nothing that can’t be easily corrected. A typical three-chip camera doesn’t have the same wide gamut that a film stock does, so it won’t see certain colors as strongly. In such a case, color correction that works for film may be overkill for a digital imager. Fortunately, when shooting digitally, we can see what we’re doing. Guy Holt, Gaffer, ScreenLight & Grip, Lighting rental and sales in Boston -
Another option is to convert the power supplying the indoor practicals and your movie lights to DC. Any tungsten lamp can operate DC as well as AC. In response to a DP’s recent posting on the CML, where he was looking for some way to power a chandelier flicker-free for a high-speed commercial shoot shoot (pictured below), I built him a 120V AC to 120V DC power converter so that he could power the chandelier and other practicals flicker free at high speeds. He shot with it several weeks ago and reported that it “performed beautifully” and at “2,000fps was rock solid.” The one I built for him could handle up to a 1000W tungsten load, but I have since scaled up the design to handle a Jr. with CXZ lamp. The larger converter (pictured here) will accept input AC voltages from 90-140V, and 190 – 250V and put out a constant 120V DC. It can operate at both 50 and 60 Hz. It also has a series LED display to indicate the total load put on it between multiple tungsten Fresnels and incandescent practicals. And, as you can see in the picture above, it is a lot smaller and lighter and more easily concealed on a set than ten 12V deep cycle marine batteries, wired in series, which has been the traditional approach to powering tungsten lights with DC on stages. Guy Holt, Gaffer, ScreenLight & Grip, Lighting and Grip Rental & Sales in Boston.
-
Litepanels new Sola/Inca 12 346w LED fresnels
Guy Holt replied to Mark Kenfield's topic in Lighting for Film & Video
IMO he doesn’t. What Pat is conveniently glossing over is that no LED (remote phosphor included) will produce the same repeatable result that you get from gelling a continuous source (tungsten) because their spectral output is discontinuous - consisting of peaks and valleys. What he is failing to appreciate is that all gels (party, effects and color correction) are a part of a finely calibrated imaging system that involves a highly specific light receptor (film emulsion or video sensor), light sources, and color correction or effects gels calibrated for both. Where that exists between film emulsions/video sensors and tungsten and/or daylight sources it is possible to mix dyes in a gelatin materials to create desired effects (it has taken decades to hone this system.) To use the available gels (listed above) on the discontinuous spectrum of LEDs is a misapplication of a finely tuned system designed for continuous spectrum light sources only. This is true of even the best color rendering LEDs out there (and Litepanels are not among them.) While there is no green spike in the output of a Cineo Trucolor 3200 (as there is in the Litepanels), as you can see from the spectral distribution graph above for the Cineo Trucolor 3200 (black line), there exists a definite green/cyan bump, as well as a spike in the blue range that does not exist in the continuous spectrum of a tungsten light source (green line.) The greater proportion of blue and green/cyan in the Cineo Trucolor 3200 will result in an unexpected and undesirable result if a color correction (CTO, CTS, CTB), or color effect gel (Congo Blue, Bastard Amber, etc.) calibrated for the continuous spectrum of tungsten light is used on this discontinuous spectrum. The same is true of the Cineo Trucolor with the 5600K panel above. The quite prominent blue spike (black line) will likewise result in an unexpected and undesirable result if a color correction, or color effect, gel calibrated for the continuous spectrum of a continuous daylight source is used on the discontinuous spectrum of a 5500K remote phosphor LED. Someday, Rosco, Lee, or Gam, will come up with gels calibrated for LEDs but I doubt it will be any time soon given that there is no standard spectral output to LEDs. Perhaps, in the future, when LED technology has become standardized, a system of calibrated gels will be developed; but for now no such color system exists as it does for tungsten sources. Where there are no gels calibrated to correct the discontinuous spectrum of LEDs (remote phosphor included), and the existing color correction gels have undesirable consequences when used on LEDs, the ability to color-correct LEDs is very limited (see camera test results demonstrating this with a Lightpanel 1x1 Daylight Spot.) Hal Smith summed it up very eloquently in a post on the CML when he said: “… If I light with tungsten, I know what the result is going to look like …. Yes, they're hot; yes, they're bulky; yes, they draw a “poop pot” full of electricity but dammit...I know what the result is going to look like...and don't have to give some post pro a bagful of money to straighten out what the LED's screwed up.” Guy Holt, Gaffer, ScreenLight & Grip, Lighting & Grip Equipment Rental and Sales in Boston. -
Sekonic C-500 Color Meter and CC value interpretations
Guy Holt replied to Chad Terpstra's topic in Lighting for Film & Video
What types of lights do you plan to correct with this meter? Guy Holt, Gaffer, ScreenLight & Grip, Lighting Eq. Rental & Sales in Boston -
Wrapping Light in Meet Joe Black
Guy Holt replied to Stuart Allman's topic in Lighting for Film & Video
BINGO. Having worked on the party set as a day playing electric, I can personally attest that Brad was lit with a 12x12 just outside of frame. Guy Holt, Gaffer, ScreenLight & Grip, Lighting Rental and Sales in Boston and occasionally on the Rhode Island Shore where Meet Joe Black was shot. -
Phil and David are spot on about the difficulty in shooting something like this day-for-night. But I am surprised that no one mentioned the option of shooting the wide establishing shot dusk-for-night and then doing the close coverage night-for-night. The advantage to shooting dusk-for-night over day-for-night is that you can incorporate set practicals like window or porch light, car headlights, or even streetlight or moonlight raking the side of a building in wide establishing shots. But in order to get the balance right requires the right location and careful planning. The key to success in shooting dusk-for-night is choosing the right location. To get the subtle separation of the night sky from a dark horizon, you don’t want to shoot into the after glow of the setting sun. Instead you want to find a location where you will be shooting into the darker eastern sky. After the sun has set, you have maybe a thirty-minute window of opportunity to shoot the wide master so you have to have everything planned out, rehearsed, and ready to go. In order to get the balance right between the practicals and the ambient dusk light in the limited time you have to shoot the establishing shot, you have to start with larger fixtures and be prepared to reduce their intensity quickly. For instance if you want the glow of an interior practical light raking the lace curtains in a window, start with a PH213 in the practical and a bare 2k Fresnel on the lace. Wait until the ambient dusk level outside has fallen to the point where it looks realistic and then roll. To get a second shot or take, open the camera aperture a half stop and drop a single in the 2k head, dim down the PH213, and wait again until the ambient dusk level outside has again fallen to the point where it looks realistic and then roll. If you continue in this fashion with nets after you have exhausted your scrims, and a PH212 when the dimmed PH213 starts to look too warm, you will be able to get multiple takes out of the diminishing dusk light. Likewise with a streetlight or moonlight raking across the front of a house. To create a moon dapple on the front of a house against a night sky, all you will need is a good sized HMI set on a high oblique angle so that it will rake across the front of the house. Break it up with a branch-a-loris and wait. When the ambient level of the dusk sky has fallen to the point where it looks realistic against the moonlit house and the practical lit interior - roll. You can even add a car pulling up to the house, but you have to be prepared and have enough manpower standing by to dim the practicals, net the lights, and scrim the car’s head lights very quickly. The final touch is to use a graduated ND filter on the lens to darken the sky and balance the camera between daylight and tungsten so that the ambient dusk light filling the shadows is cool and the practicals and tungsten lights motivated by them remain warm but not too warm. Once dusk is past, you shoot the close coverage night-for-night when a package consisting of what you can run on a portable generator will suffice. If you use one of the new modified 7500W Honda EU6500is generators, as was done in the production pictured below, you will be able to use a 4k HMI for your moonlight at dusk. In this story of mistaken identity, a pivotal scene takes place in the middle of a near vacant parking lot of an all night convenience store. The establishing shot of the wide-open expanse of the empty parking lot at night was shot dusk-for-night and then the close coverage night-for-night. Left: Scene in parking lot. Center: Transformer/Distro hidden behind newspaper box (set 200' in distance.) Right: Generator baffled by truck (Transformer/Distro 300' in distance.) With no building or other sound barrier within a reasonable distance to block the sound of the generator, the Gaffer had no recourse but to put it behind their grip truck as far from set as possible. This was only possible because he used a transformer to step down the 240V output of the generator, and in the process compensate for the voltage drop they experienced over the 500’ cable run to set. If the 4k has one of the newer dual wattage electronic ballasts, you can even swap out the 4k globe you used for the dusk-for-night shooting, for a 2.5k globe as they did on this production. The 2.5k globe was all they needed to light the deep background for their doubles and singles around the car and the 8 Amps they saved went a long way toward powering additional lights. Knowing how to shoot dusk-for-night can be worth more than all the grip trucks, tow generators, and large HMIs in the world. Guy Holt, Gaffer, Screenlight and Grip, Lighting rental and sales in Boston.
-
The other thing to keep in mind is that in reality moonlight is the weakest of lights in that as soon as a room light is turned on it vanishes. For this reason it should only be seen in deep shadowed backgrounds. In that case you might consider rigging mirror or stiff mylar panels on your pole cats instead. If you than shoot a small HMI Fresnel or Blue Baby into the mirror panels, you can then redirect that hard blue light into the shadows in the background. Guy Holt, Gaffer, ScreenLight & Grip, Lighting and Grip Sales and Rentals in Boston
-
The color and lumen depreciation of LEDs are the dirty little secret of LED lighting manufacturers. I have nothing against using the LED equivalent of quartz halogen work lights as long as you know what you are getting for your money. What I object to is manufacturers of LED fixtures for film/video lighting making clearly false claims about their products or glossing over their shortcomings. One of the worst offenders in this regard has got to be Cool-Lights. Cool-Lights says about their Bi-Color LED Panel on their website: “Cool Lights CL-LED1200 Bi-Color model (is a) dimmable light which is about equivalent to a 1000w tungsten Fresnel.” Talk about misleading. Notice how they don’t say how it is “about equivalent” to a 1000w tungsten Fresnel? Is it equivalent in output? According to their website their Flood LED1200 Bi-Color has an output of 2200 lux at 6 ft. with a flood angle of 50 degrees, where an Arri 1k Fresnel with a 55 degree flood angle has an output of 4563 lux at 6.5 ft. With less than half the output at a shorter distance and a narrower flood angle, their Bi-Color model is clearly not equivalent to a 1k Fresnel in light output. Is it equivalent in versatility? An Arri 1k Fresnel has a 5:1 spot to flood range (11 to 55 degrees) with a spot output of 30’500 Lux at 6.5ft, giving it a lot more versatility in output than their CL-LED1200 Bi-Color model. The Arri 1k Fresnel has the ability to render crisp shadows, which makes them ideal for creating gobo effects like window or branch-a-loris patterns – the Cool Lights CL-LED1200 Bi-Color model cannot. The ability of Fresnels to render clearly defined cuts also enables their light to be precisely cut to set pieces and talent – the light from a CL-LED1200 Bi-Color cannot. And, the light from a 1k Fresnel can be made softer by simply adding one of a variety of diffusion materials. Nothing will make the output of a CL-LED1200 Bi-Color harder. Where the CL-LED1200 Bi-Color has none of these characteristics that make a 1k Fresnel extremely versatile, it is clearly not equivalent in versatility. So then how is the CL-LED1200 Bi-Color “about equivalent” to a 1k tungsten Fresnel? As far as I can tell the Cool Lights CL-LED1200 Bi-Color is only equivalent to a Tungsten 1k Fresnel in that it generates photons and not very good ones at that. Guy Holt, Gaffer, ScreenLight & Grip, Lighting and Grip rental and sales in Boston.
-
No truer words were spoken. I have nothing against using the LED equivalent of quartz halogen work light as long as you know what you are getting for your money. Besides the obvious short comings in CRI and build quality, another drawback to inexpensive White Phosphor LED panels is that their color output is very inconsistent. That is because their color output is affected by a number of factors: the binning and manufacturing tolerance of their blue pump, the thermal management of the fixture, the ageing of the phosphors, and even the ambient temperature. For example, a one-degree shift in the junction temperature of the blue InGaN LED (pump color) in remote phosphor LEDs, will cause a +/- 2nm shift in the dominant wavelength. If compounded by the average wavelength variation of +/- 2nm of blue InGaN LEDs, a 5nm divergence from the prescribed 455nm wavelength of the pump color will create color inconsistency of 5 MacAdams ellispses. While not readily apparent to the eye, image capture systems will easily see this variation. And, as broadcast studios lit exclusively with Phosphor White LED panels are finding out their output depreciates overtime and their color shifts much faster than the manufacturers say (see illustration bove.) For more details regarding the issues surrounding the use of LED lights in motion picture lighting see our company newsletter. - Guy Holt, Gaffer, ScreenLight & Grip, Lighting Rental and Sales in Boston.
-
Unless the electronic ballast is Power Factor Corrected (PFC) you may do better with an older magnetic ballast. Power Factor Correction is very new in 1200W HMIs and so you will not find it in most used ballasts. In fact, I wouldn’t be surprised if you were not even familiar with Power Factor Correction in HMI ballasts. Since PFC is not mandated in this country, as it is in Europe for any electrical device that draws more than 75W, we are pretty much ignorant of Power Factor and effect that poor Power Factor can have on a distribution system. However, any film technician familiar with large HMI heads will be quite familiar with Power Factor and Power Factor Correction (PFC.) That is because after a false start back in the 90s, all major manufacturers now include PFC circuitry in HMI ballasts in the 6-18kw range. They do so by necessity. The early line of Lightmaker electronic ballasts were nick named by film electricians “Troublemaker” ballasts because they were not Power Factor Corrected and proved that PFC circuitry was absolutely necessary in large ballasts to reduce heat and returns on the neutral, and to increase ballast reliability (beware, some are still kicking around ebay). But, because of the added cost, weight, and complexity of PFC circuitry, ballast manufacturers in the US still only offer PFC circuitry as an option in medium-sized 2.5-4kw ballasts. And, until very recently manufacturers did not offer PFC circuitry in HMI ballasts smaller than 2.5kw in the US (in the EU PFC circuitry in mandatory in all HMI ballasts sold.) Part of the reason was that PFC circuitry did not offer a huge advantage when plugging into house power. A typical 1200W Power Factor Corrected electronic HMI ballast will draw 11 Amps at 120 Volts verses the 19 Amp draw of a non-PFC electronic ballast. While not a huge advantage when plugging into house power, the added efficiency of a PFC 1200 ballast can make a huge difference when powering a lighting package off of a portable generator. For example, when you consider that a Kino Flo Parabeam 400 draws only 2 amps, the 8 Amp difference between using a PFC 1200W electronic ballast and standard non-PFC 1200W electronic ballast, can mean the difference between running four additional Parabeam 400s on a portable generator or not – I think you would have to agree that is a major boost in production capability and pertinent to any one using a portable generator as their principle source of set power. Unfortunately, it is still the case that almost every 575 - 1200 W electronic ballast that you will find in a rental house or for sale used in North America will be a non-PFC electronic ballast. Depending on the type of filming you do, you may in fact be better served by an older magnetic ballast over a non- Power Factor Corrected electronic ballast. A 1.2kw electronic ballast draws 19amps (verses the 13.5 amps of a magnetic ballast) so it will always trip the common 15amp house circuit and will trip a 20 Amp circuit if there is something else, like a computer or light, on the same circuit. Where you can't always know what else is on the same circuit, or even if it is a 20 or 15 Amp circuit, a 1.2kw magnetic ballast drawing only 13.5 Amps is the safer bet since it can operate on a 15 amp circuit even with other things on the circuit. Non-Power Factor Corrected electronic ballasts are meant to be used on film sets where every circuit is 20 Amps and you know what is on the circuit because you are distributing the power yourself from a tie in or generator. If your style of shooting requires that you plug into wall outlets, you will be better served by a magnetic ballast. But that is not the only benefit to using a magnetic ballast over a non-PFC electronic ballasts. If you don’t have access to the newest PFC electronic ballasts, the older magnetic ballasts are in fact cleaner running on portable gas generators than non-PFC electronic ballasts. The harmonic distortion created by non-PFC ballasts reacting poorly with the distorted power waveform of conventional AVR generators limited the number of HMIs you could power on a portable generator. The primary factors limiting the use of HMIs on portable generators has been the inefficient use of power by non-PFC electronic ballasts and the harmonic noise they throw back into the power stream. The adverse effects of this harmonic noise, can take the form of overheating and failing equipment, efficiency losses, circuit breaker trips, excessive current on the neutral wire, and instability of the generator’s voltage and frequency. For these reasons it has never been possible to operate more than a couple of 1200W HMIs on a conventional 6500W portable gas generator. Harmonic noise of this magnitude can also damage HD digital cinema production equipment, create ground loops, and possibly create radio frequency (RF) interference. The increasing use of personal computers, hard drives, and microprocessor-controlled recording equipment in production has created an unprecedented demand for clean, reliable power on set. However, now that inverter generators, like the Honda EU6500is, do not require crystal governors to run at precisely 60Hz, magnetic ballasts offer a cost effective alternative to dirty non-PFC electronic ballasts because you can operate magnetic HMI ballasts “flicker free” on inverter generators. And as mentioned above, the smaller magnetic ballasts (575-2500W) offer the distinct advantage of being less expensive and draw less power (once they have come up to speed) than the commonly available non-PFC electronic equivalents (13.5A versus 19A for a 1.2kw.) Of course there are downsides to using magnetic ballasts. One down side is that you are restricted to using only the safe frame rates and shutter angles. But, when you consider that every film made up to the early 1990s were made with magnetic HMI ballasts you can see that being limited to the safe frame rates is not all that restrictive. Another downside to magnetic ballasts is that you can’t load the generator to full capacity because you must leave “head room” for their higher front end striking load. When choosing HMIs to run off portable generators, bear in mind that magnetic ballasts draw more current during the striking phase and then they “settle down” and require less power to maintain the HMI Arc. By contrast, an electronic ballasts “ramps up”. That is, its’ current draw gradually builds until it “tops off.” While older HMIs with magnetic ballasts are less expensive to purchase or rent, Power Factor Correction (PFC) makes the newest electronic ballasts worth the extra money when it comes to lighting with portable generators. The substantial reduction in line noise that results from using power factor corrected ballasts on the nearly pure power waveform of an inverter generator creates a new math when it comes to calculating the load you can put on a generator. In the past we had to de-rate portable gas generators because of the inherent short comings of conventional generators with AVR and Frequency governing systems when dealing with non-PFC electronic ballasts. The harmonic distortion created by non-PFC ballasts reacting poorly with the distorted power waveform of conventional AVR generators limited the number of HMIs you could power on a portable generator to 75% of their rated capacity (4200Watts on a 6500W Generator). But now, where inverter generators have virtually no inherent harmonic distortion or sub-transient impedance and power factor correction (PFC) is available in small HMI ballasts, this conventional wisdom regarding portable gas generators no longer holds true. Where before you could not operate more than a couple 1200W HMIs with non-PFC electronic ballasts on a conventional generator because of the consequent harmonic distortion, now according to the new math of low line noise, you can load an inverter generator to capacity. And if the generator is one of the new modified 7500W Honda EU6500is inverter generators, you will be able to run a continuous load of up to 7500W as long as your HMI and Kino ballasts are Power Factor Corrected. For more detailed information on HMIs I would suggest you read an article I wrote for our company newsletter on operating HMIs. This article is cited in the just released 4th Edition of Harry Box's "Set Lighting Technician's Handbook" and featured on the companion website "Box Book Extras." Of the article Harry Box exclaims: "Great work!... this is the kind of thing I think very few technician's ever get to see, and as a result many people have absolutely no idea why things stop working." "Following the prescriptions contained in this article enables the operation of bigger lights, or more smaller lights, on portable generators than has ever been possible before." The article is available online at http://www.screenlightandgrip.com/html/emailnewsletter_generators.html. Guy Holt, Gaffer, ScreenLight & Grip, Lightng & Grip Rental & Sales in Boston
-
lighting with candles and replicating the sun
Guy Holt replied to James Buckland's topic in Lighting for Film & Video
It is not too ambitious if you approach it the right way. On a budget there is really only one light to use to light a large master shot in the woods and that is the sun. This is one of those situations where scouting, choosing the right location, and planning your production day is worth more than all the grip trucks, tow generators, and large HMIs in the world, because nothing compares to the quality of that large plasma light in the sky. In these situations, the approach that I find works best is to choose a location that puts the sun in the backlight position for the establishing master shot that is required to bring out the shafts of light that make for an interesting shot and then wait until the optimum time to shoot that shot. Up to and after that point in time, shoot the close coverage under a full silk. Shooting the coverage under a silk offers a number of advantages. If the sun is in the wrong place for scene continuity, the silk takes the directionality out of the sun and knocks down its’ level by two and half stops. Now a smaller HMI light will have more of a modeling effect. Shooting into talents' down side under a silk, I find that a 4k Par through a diffusion frame is a sufficient key source for a medium two shot and it can easily be positioned where it needs to be to match the establishing wide shot when you eventually shoot it. To get shafts of light you will need to add “atmosphere” to the shot. That can be easily accomplished with some short of fogger (an old Mole “ramjet” fogger will eliminate having to run through the woods trailing an extension cord.) A good example of this approach is a scene I lit for a low budget feature that took place around a campfire in a small clearing surrounded by woods. Surrounded on all sides by woods, we knew that we would lose direct sunlight in the clearing early in the day and would need lights. We also knew that the scene was going to take all day to shoot because of its’ extensive dialogue, so we figured out where the sun was going to be throughout the day and where it would look best for our establishing wide shot. Where it was a two shot, mostly over the shoulder of one character talking to the second character that was standing with his back to the campfire with the woods behind him, we decided to wait until the sun had moved into a near back light position to shoot the establishing shot. So we shot our close coverage first with nothing more than a 4k Par and 1.2k Par under a 20x light soft frost on top of which we threw leaves. The 4k was heavily diffused and positioned so that it gave the talent the reverse key modeling that would be consistent with the wide shot but still attractive. The 1.2kw was used bare and was positioned as a backlight where the sun would be when we would eventually shoot the wide - this way there was always an edge in every shot for continuity. When the time came to shoot the establishing shot, the shadow of the overhead frame and stands were thrown forward and did not interfere with the wider framing. Since we were still shooting under the silk, we were wider open on the iris and so our exposure dug into the dark woods and brought out more detail. The smoke from the campfire drifted into the woods, creating shafts of light where the sun broke through the tree canopy. What would have been a high contrast scene without lights, turned into a beautifully lit scene, and was accomplished without a lot of amps. The whole scene was lit with nothing more than a 4k and 1.2k Par and powered by nothing more than a 60A/120 circuit from a modified 7500W Honda EU6500is/Transformer Gen-set. Guy Holt, Gaffer, Screenlight and Grip, Lighting rental and sales in Boston. -
Assembling a lighting & grip package, thoughts?
Guy Holt replied to Mark Kenfield's topic in Lighting for Film & Video
You don’t have to resort to outrageously expensive LED panels to light large interiors. If you need more power there are ways to get it short of generator trucks. One way to light big interiors in the US without generators is to use a 240V-to-120V step-down transformer/distro as I did on the iRobot shoot pictured below: Master shot of an iRobot commercial lit with a 4kw HMI Par (outside) & 1.8kw HMI Par (inside) powered from a 30A/240V dryer outlet through a step-down transformer/distro. Note: Sunny feel created by 4k Par on an overcast day. In addition to providing access to the full power of a portable generator, a Transformer can also be used to access more power on location from common 240v household outlets. With the appropriate adapter you can plug a Transformer/Distro into common 240V sources found on interior locations - including Range Plugs, Dryer Plugs, and special receptacles installed for Window Air Conditioners. Like it does with the 240V output of Honda portable generators, a step-down Transformer/Distros will convert the 240 volts supplied by industrial and house-hold 240V receptacles to 120 volts in a single circuit that is the sum of the two single phase legs of 30/50 Amps each. Left: Transformer/Distro plugged into a 30A/240V dryer outlet. Right: 4K HMI Par under rain protection powered by Transformer/Distro In other words, out of a "30A/240v" or a "50A/240v" circuit a Transformer/Distro will make a 60A/120v circuit capable of powering bigger lights, like 4kw HMIs pictured above. They will enable you to even power Quartz 5ks, mini brutes (5850W) as well. By giving you access to more "house power" through common 240V household outlets, a Transformer/Distros can eliminate the need for dangerous tie-ins or expensive tow generators (use this link for details.) Left: Arri M18 through 6x6 griff provides soft key as 4k Par provides sun splashes background. Right: Arri 4k and 1.8k electronic ballasts powered by 60A step-down transformer/distro. Outside of a car rig, I have never felt the need for a more energy efficient light source. But, now that I think of it I have never had a problem running 200W HMIs and Kino 4’- 4 Banks on car rigs either. I just don’t see the need for outrageously expensive LED remote phosphor panels. Guy Holt, Gaffer, ScreenLight & Grip, Lighting & Grip Equipment Rental and Sales in Boston. -
Assembling a lighting & grip package, thoughts?
Guy Holt replied to Mark Kenfield's topic in Lighting for Film & Video
The price argument holds water when you are honest about price comparisons. Using manufacturer’s suggested list pricing an Area 48 with just 3200K and 5600K panels is $2975 US. A Kino 4’ 4 Bank 3200K and 5600K tubes is $1545 US. Or, the Kino is roughly half the price of the Area 48 with comparable output. Another distinct advantage to Kino Flos over Area 48 panels is that their discontinuous color spectrum can be easily corrected with minus green (magenta) gels specifically formulated for that purpose. Where there are no gels formulated for the discontinuous color spectrum of remote phosphor panels, the Area 48 LEDs can not be color corrected. Which makes Kino Flos, in my opinion, a better key source because they will render flesh-tones better. I find that once I correct for the green spike of Kino-Flo’s True Match tubes with minus green gels, I get a much better flesh tone than what I have seen with remote phosphor LED panels. I think it is because the spectral distribution of the corrected Kino Flo is much more continuous and contains a greater proportion of the long wave length colors that are so critical to rendering flesh-tones accurately than a 3200K remote phosphor LED (use this link for more details.) Yes, it opens up possibilities, but at the expense of closing off others. Where there are no color effect gels specifically formulated for the discontinuous output of remote phosphor panels, you are severely limited with what you can do with them creatively. And where it is a rare job where a DP does not put a color gel on a light that is a big draw back in my opinion. Guy Holt, Gaffer, C.O.O. New England Studios @ Devens, Soon to be New England’s First Feature Stage Complex. -
Assembling a lighting & grip package, thoughts?
Guy Holt replied to Mark Kenfield's topic in Lighting for Film & Video
Certainly not CTO, but a combination of Rosco Tough MT2 (Cinegel #3102) and Rosco Tough Y-1 (Cinegel #3107) will give you a very close match. According to the Rosco website, MT2 used in combination with Y-1 (to absorb UV) will correct 5500K HMI to 3200K photographic tungsten with a combined Mired shift of +155. For the daylight balanced Kino you would use Rosco Fluorofilter (Cinegel #3310) instead of CTO. Again, according to the Rosco website Fluorofilter will correct 5500K fluorescent lamps to 3200K photographic tungsten as well as remove the excess green. My point is that even though not as continuous a source as tungsten, both HMI and Kino (once the green spike is removed) are more continuous than any LED source presently available. But, more importantly, gel manufacturers like, Rosco, Lee, and Gam have designed color correction gels specifically for that purpose. The same is not true of LED sources. No gel manufacturer offers color correction gels for LED sources. One might argue that the interchangeable remote phosphor panels serve that purpose. But, at a cost ranging from ($340-$420 each) that is an extremely expensive alternative to a $6 sheet of Rosco gel. The other point I was trying to make is that color effect gels give very different and unexpected results on Remote Phosphor LEDs than they do on continuous spectrum sources. For instance Bastard Amber will look very different on a Cineo Trucolor with a 3200K panel than it would look on a tungsten 1k because of the noticeable blue spike and green bump of the 3200K remote phosphor panel available for the Cineo Trucolor. I pity the poor gaffer that, when asked by the DP to put Bastard Amber on the sources, puts it on a Cineo Trucolor 3200 without the DP knowing he was using a LED Remote Phosphor source. The Gaffer and his kit are not going to be hired back by that DP again. Guy Holt, Gaffer, ScreenLight & Grip, Lighting & Grip Equipment Rental and Sales in Boston. -
Assembling a lighting & grip package, thoughts?
Guy Holt replied to Mark Kenfield's topic in Lighting for Film & Video
P.S. Don't believe everything you see on Vimeo or You Tube -
Assembling a lighting & grip package, thoughts?
Guy Holt replied to Mark Kenfield's topic in Lighting for Film & Video
In your zeal to sell everyone on the Area 48 LEDs, you are glossing over a major problem with all LEDs (remote phosphor included), which is that any gel (party, effects or color correction) on a discontinuous source like LEDs will not produce the same repeatable result that you’d expect from gelling a continuous source, i.e. tungsten. Interchangeable remote phosphor panels that limit you to only four Kelvin Temperatures, and at a cost of $340-$420 each, is a poor substitution for the hundreds of party, effects, and color correction gels that are available for tungsten lighting instruments. What you are failing to appreciate is that CTO, CTS, and CTB gels are a part of a finely calibrated imaging system that involves a highly specific light receptor (film emulsion or video sensor), light sources, and color correction or effects gels calibrated for both. Where that exists between film emulsions/video sensors and tungsten and/or daylight sources it is possible to mix dyes in a gelatin materials to create desired effects (it has taken decades to hone this system.) To use the available color correction gels (listed above) to correct LEDs is a misapplication of a finely tuned system of correction designed for continuous spectrum light sources only. While there is no spike in the green output of a remote phosphor LED, as you can see from the spectral distribution graph above for the Cineo Trucolor 3200 (black line), there exists a definite green/cyan bump, as well as a spike in the blue range that does not exist in the continuous spectrum of a tungsten light source (green line.) The greater proportion of blue and green/cyan in the Cineo Trucolor 3200 will result in an unexpected and undesirable result if a color correction (CTO, CTS, CTB), or color effect gel (Congo Blue, Bastard Amber, etc.) calibrated for the continuous spectrum of tungsten light is used on this discontinuous spectrum of a 3200K remote phosphor LED. The same is true of the Cineo Trucolor with the 5600K panel below. The quite prominent blue spike (black line) will likewise result in an unexpected and undesirable result if a color correction, or color effect, gel calibrated for the continuous spectrum of a continuous daylight source is used on the discontinuous spectrum of a 5500K remote phosphor LED. Someday, Rosco, Lee, or Gam, will come up with gels calibrated for LEDs but I doubt it will be any time soon given that there is no standard spectral output to LEDs. Perhaps, in the future, when LED technology has become standardized, and a system of calibrated gels exists, Konica Minolta will come out with a Color Meter suitable for measuring LEDs for photographic purposes; but for now no such color meter exists as it does for tungsten sources. Where there are no meters or gels calibrated to correct the discontinuous spectrum of LEDs (remote phosphor included), and the existing color correction gels have undesirable consequences when used on LEDs, the ability to color-correct LEDs is very limited (use this link for camera test results demonstrating this with a Lightpanel 1x1 Daylight Spot.) Hal Smith summed it up very eloquently in a post on the CML when he said: “… If I light with tungsten, I know what the result is going to look like …. Yes, they're hot; yes, they're bulky; yes, they draw a poop pot full of electricity but dammit...I know what the result is going to look like...and don't have to give some post pro a bagful of money to straighten out what the LED's screwed up.” I am not denying that remote phosphor LEDs are an improvement; but given what came before that is not saying much. Lets talk about the alternative. For a little under $600 I can buy a 1k Fresnel and put a $16 globe in it. That works out to something like 7 cents per lumen. With a sticker price of $2’295, the Area 48 is close to 14 times as expensive (98 cents) per lumen. Unlike a remote phosphor LED panel, a 1k Fresnel is an extremely versatile light. It offers a wide continuous spot/flood capability with an even field of light in flood – the Area 48 does not. A 1k Fresnel is capable of rendering clearly defined shadows and cuts – the Area 48 can not. Finally, a 1k Fresnel has sufficient output that the crispness of its’ shadow or the hardness of its’ cut can be varied incrementally by simply adding one of a variety of diffusion material to soften its’ output if desired – something the Area 48 does not permit. These are the characteristics of traditional 1k Fresnel that make them extremely versatile. Finally, the power consumption difference really isn’t important for these low-power units, whether tungsten or LED, unless you are operating them on batteries. But, how often is that really – not very. I just don’t understand your obsession with the Area 48 LEDs. Why spend $1’780 in phosphor panels ($340-$420 each), on top of a sticker price of $2’295.00 (for a total of $4’075.00) to get not even the output and versatility that a less than $600 tungsten 1k Fresnel and $30.00 in gels will give you. Why not take the $3400 you will save by buying a conventional tungsten Fresnel and invest it in other production equipment that will actually add production value to your projects – an Area 48 LED certainly won’t. Guy Holt, Gaffer, ScreenLight & Grip, Lighting & Grip Equipment Rental and Sales in Boston. -
Assembling a lighting & grip package, thoughts?
Guy Holt replied to Mark Kenfield's topic in Lighting for Film & Video
You have to be extra careful putting Color Correction gels on LEDs. Another problem with LEDs (remote phosphor included) is that color correction gels are not calibrated for their discontinuous spectrum and so you get unexpected results from their use on LEDs. Where you know what to expect when you put a color correction gel, say ¾ CTO, on HMI or Tungsten lights, you don’t know what you will get putting that same gel on an LED light. The reason is that because of their discontinuous spectrum, the use of CC gels on LEDs have unintended and undesirable consequences. 3/4 CTO gel passes only certain wavelengths (represented by the spectral transmission curve (center)) of daylight (left) to create the color spectrum approximating that of a 3200K tungsten light (right.) The same 3/4 CTO gel applied to a daylight LED (left) passes the same wavelengths (represented by the spectral transmission curve (center)) to create an unknown color spectrum that does not approximate a 3200K tungsten light. A good example of this is what happens when you try to convert the 5500K out-put of Phosphor White LEDs to 2900k with Full CTO gel. Where you can do it with some success with HMIs because there are long wavelengths in it’s continuous spectrum to pass disproportionately to the blue part of the spectrum to achieve a nominal 2900K, since LEDs don’t put out much beyond 625nm, there is not much for a filter to pass to rebalance the light output to 2900K, so the “corrected” light is too cool. Another undesirable consequence comes from the fact that Full CTO is designed to pass extra green (there is a bump in the spectral transmission curve of Full CTO in the green portion of the spectrum) and so it creates, given the amount of green inherent in Daylight LEDs to begin with, a disproportionate amount of green (creating an overall green bias) to the "corrected" light when used on Phosphor White LEDs. Here is a link to test results demonstrating this with a Lightpanel 1x1 Daylight Spot. The gel pack that eventually made the Lightpanel 1x1 Daylight Spot in the test marginally similar to a tungsten light, was only able to do so at the expense of two stops – so much for the greater efficiency of LEDs. Guy Holt, Gaffer, ScreenLight & Grip, Lighting & Grip Rental and Sales in Boston