Sebastian Bock
-
Posts
31 -
Joined
-
Last visited
Everything posted by Sebastian Bock
-
If somebody is in need of rear lens caps for Arri bayonet mount lenses (e.g. Zeiss 16mm lenses): I created some 3D printed ones for myself and uploaded the .stl files to thingiverse for fellow filmmakers. If you have access to a 3D printer, you could easily print them as hard shell (with PLA filament) or as rubber cap (with TPU filament). If you print with TPU, I recommend resizing the caps in the slicing software to 99.5% for a tighter fit. Here is the link: https://www.thingiverse.com/thing:6591059 Sebastian
.thumb.jpeg.b495930f0f4095e1eefb830f4e9634e3.jpeg)
-
New 400 ASA 16mm and 8mm film stock from Foma
Sebastian Bock replied to Sebastian Bock's topic in Film Stocks & Processing
It is probably the same emulsion as the 2023 released still film, so you'll find a couple of tests and images online. Since it is an orthochromatic film, it is less sensitive to the red spectrum and it has its highest sensitivty at the green wavelenghts. Here is the datasheet: FOMAPAN 400 (fomaobchod.cz) It is pobably not an "all purpose" film but it is really good news, to have a new tool in the toolbox... As far as I know, Foma sells 400ft rolls only as special order. Regularly they sell the motion picture stocks only on daylight spools. -
Good news: https://fomaobchod.cz/en/news/fomacineortho40016mm305bm1xperfo[14705]
-
Reduced to 1.500 €
-
Cinematography.com's David Mullen wins ASC award
Sebastian Bock replied to Jeff Bernstein's topic in General Discussion
Congratulations, David! And thank you for sharing your knowledge with us here on cinematography forum! -
The price is not carved in stone...
-
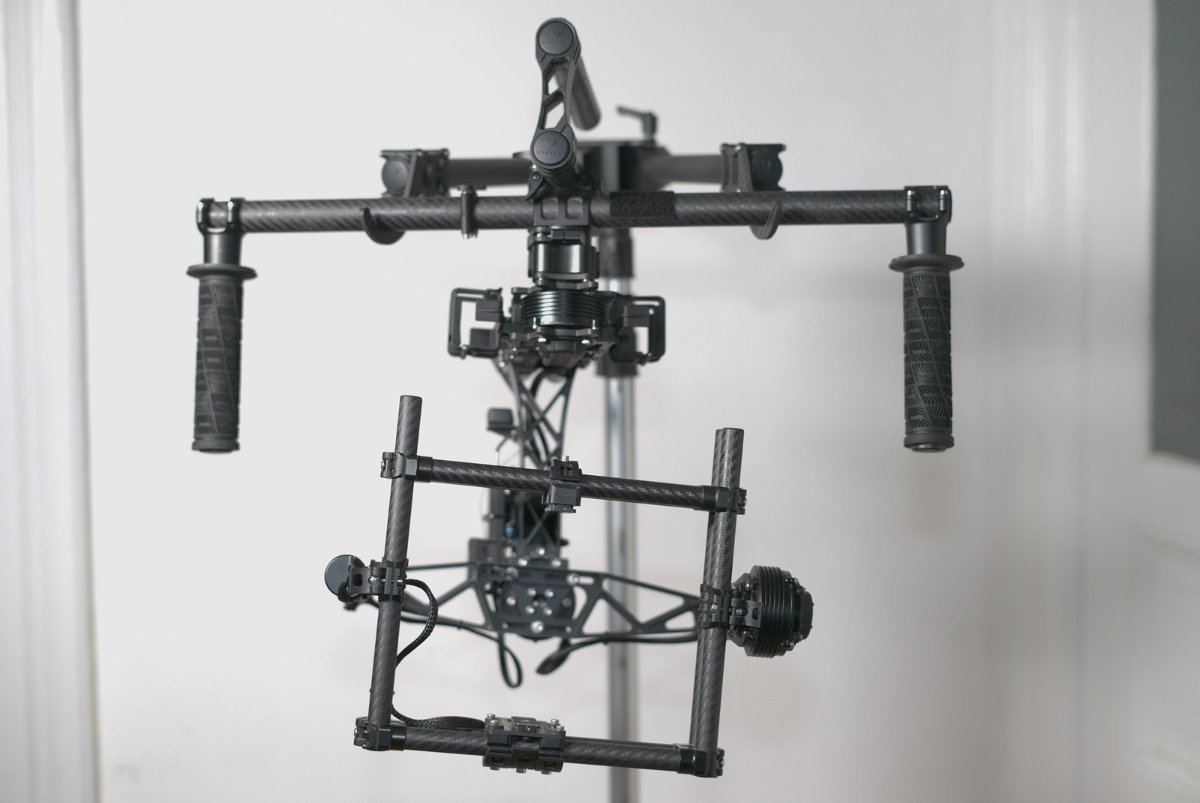
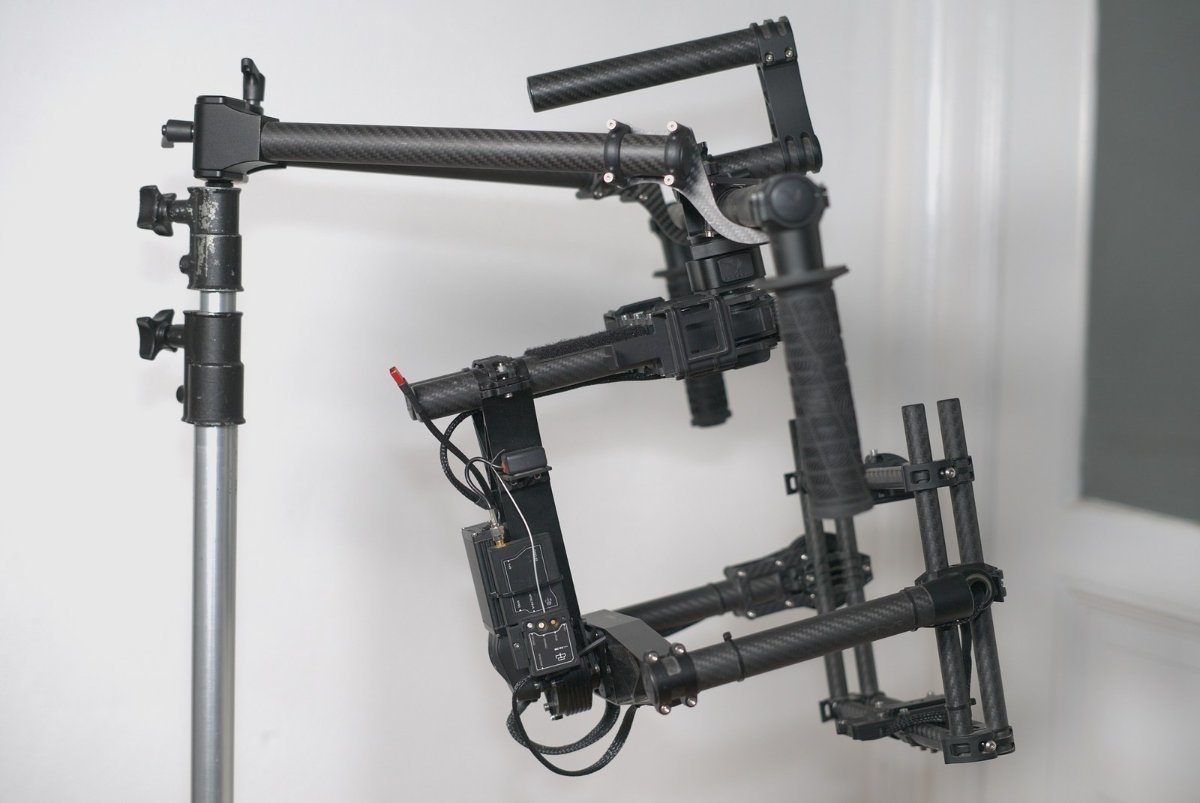
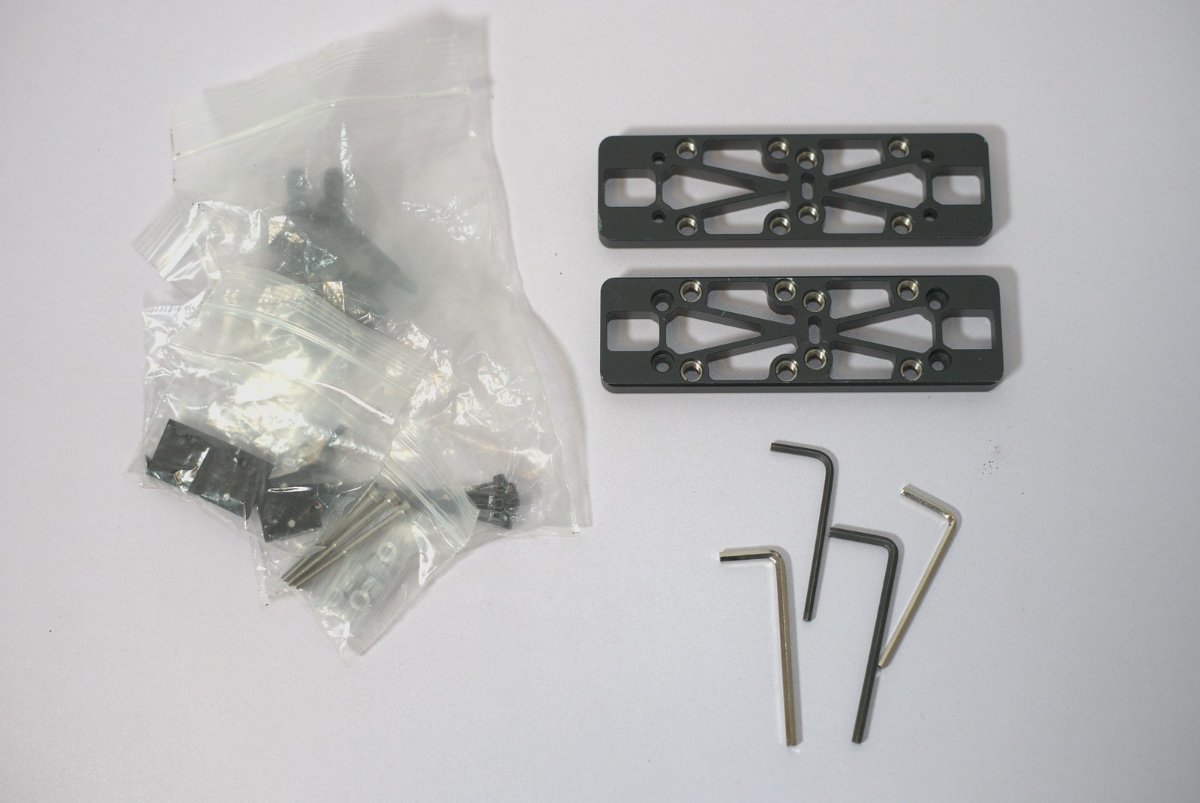
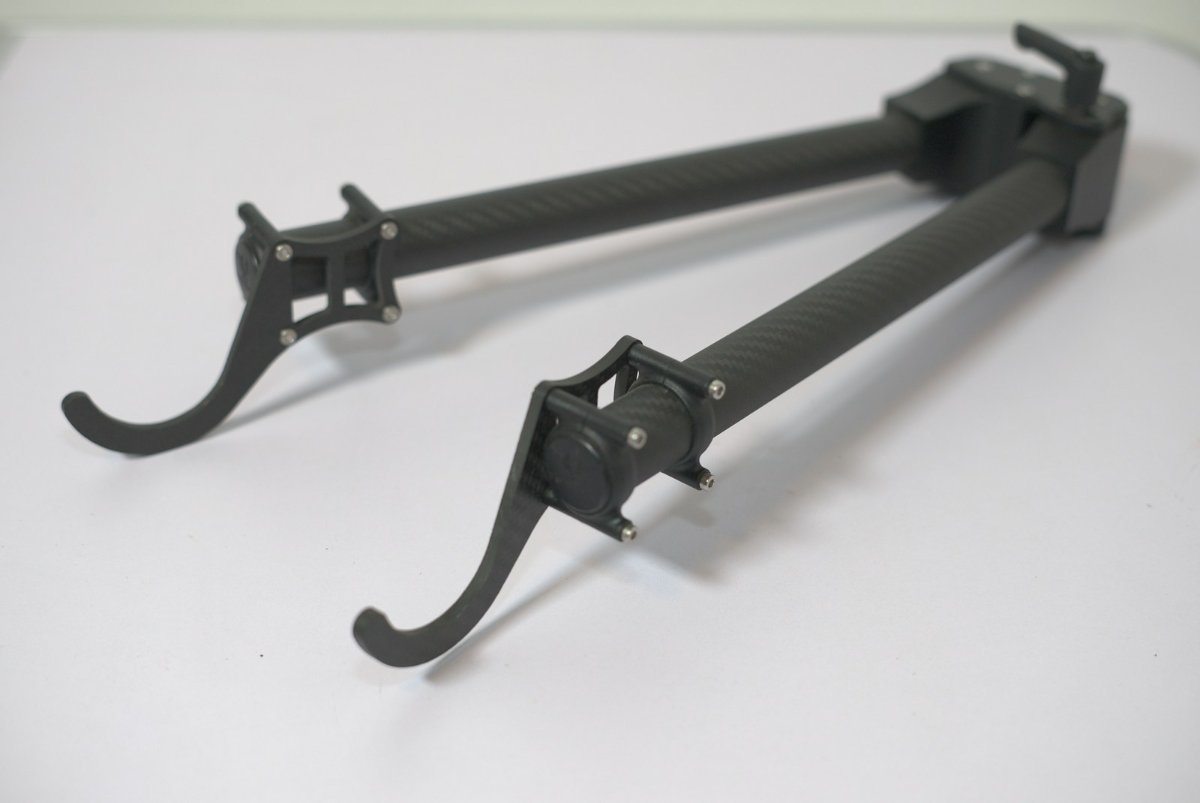
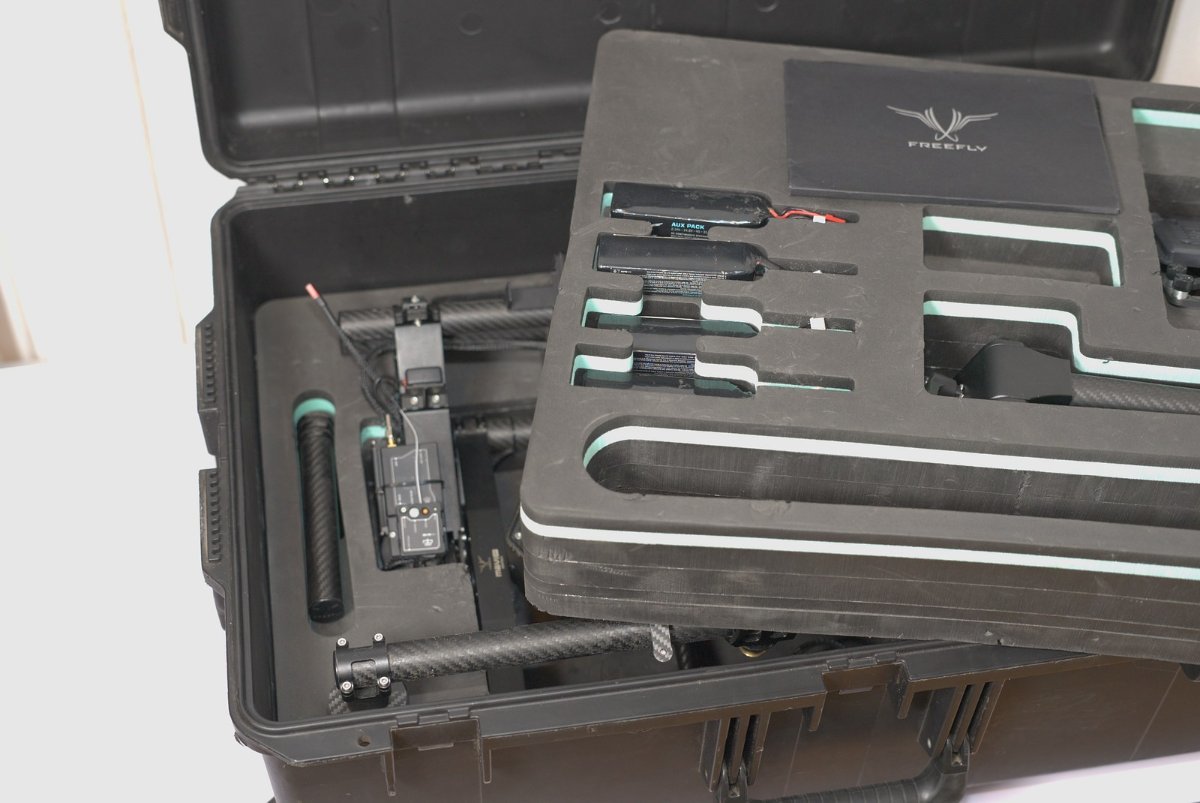
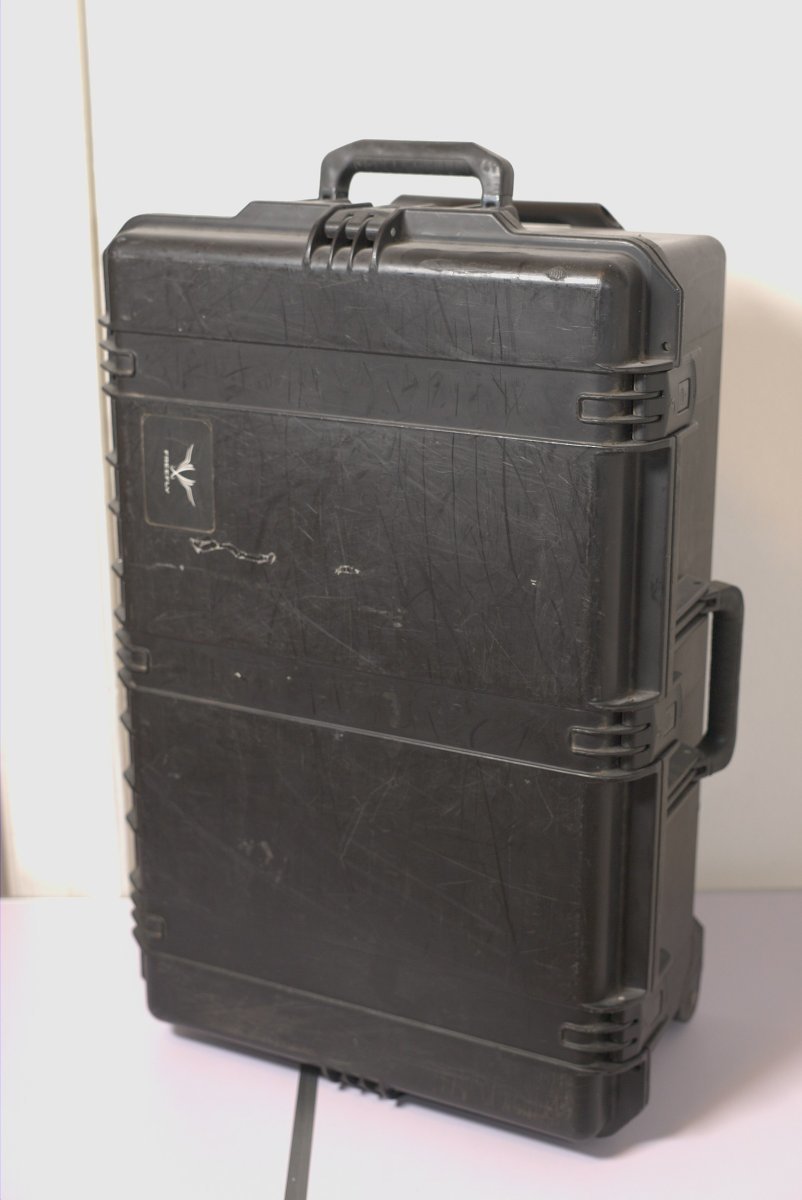
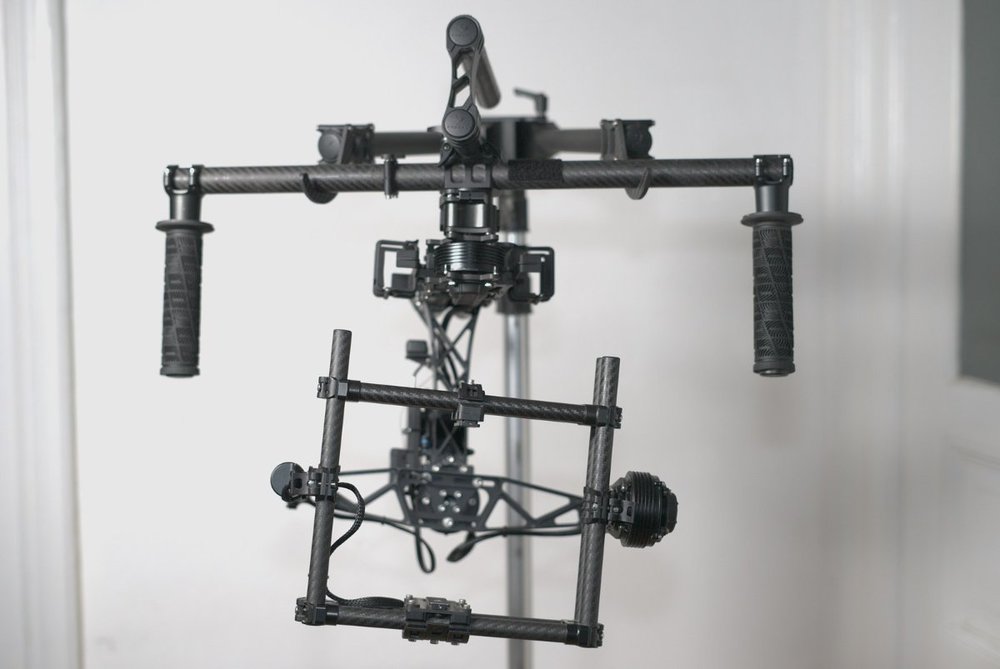
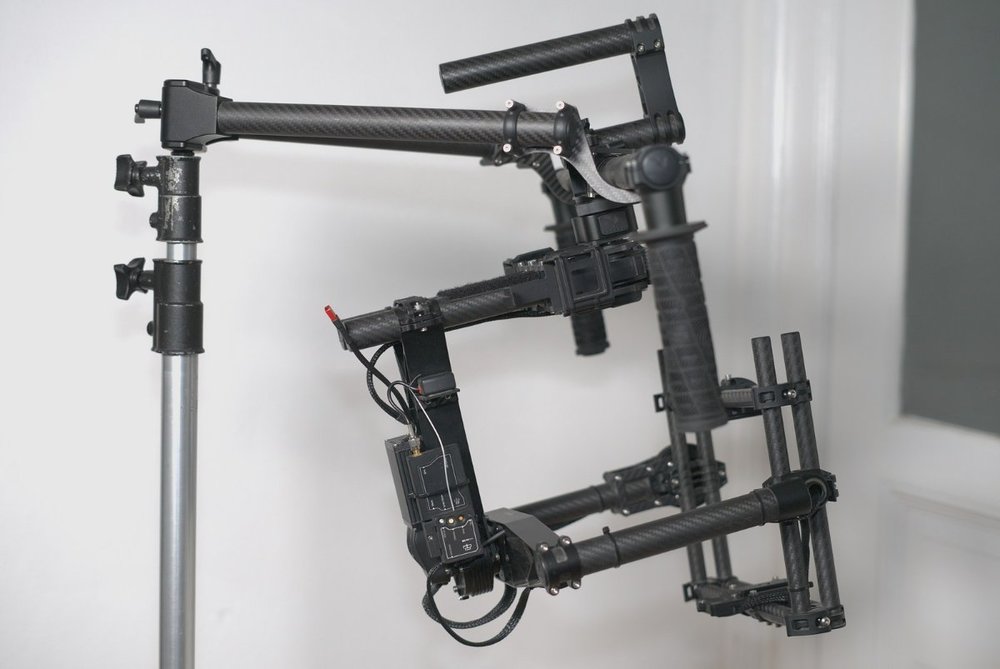
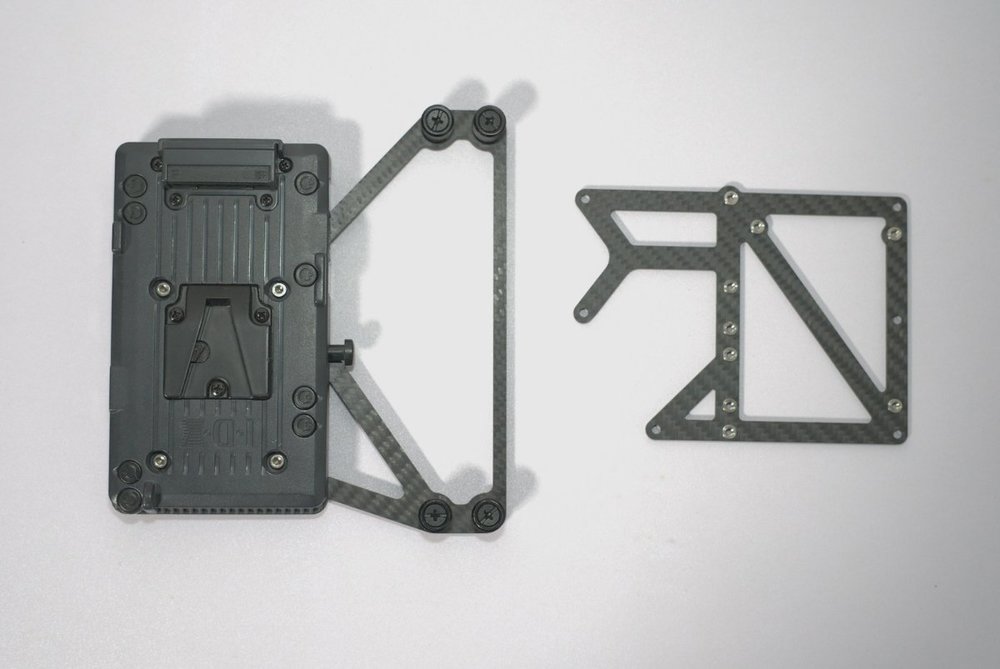
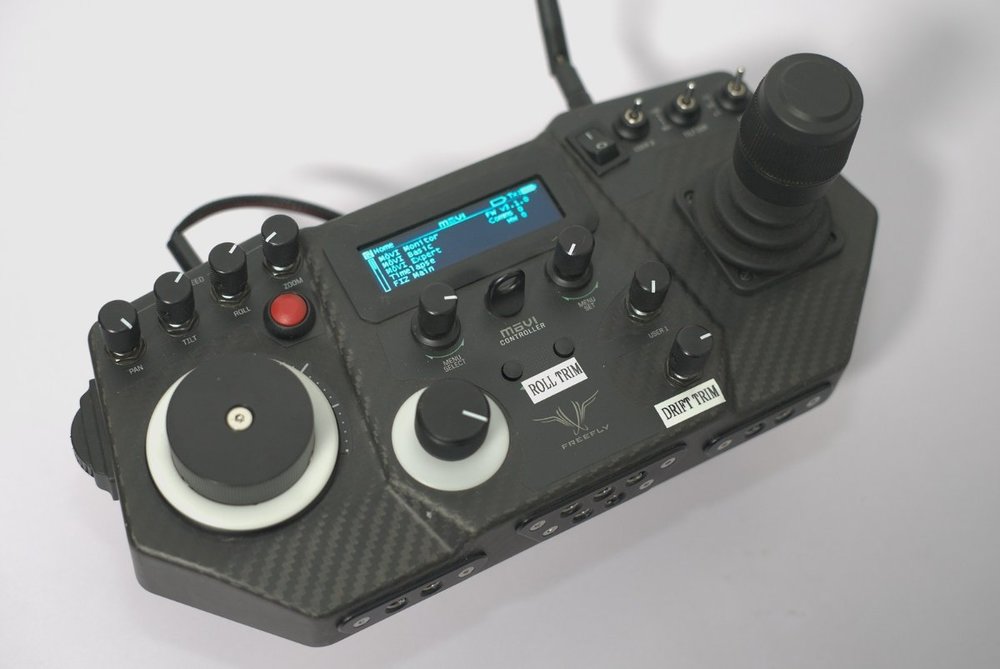
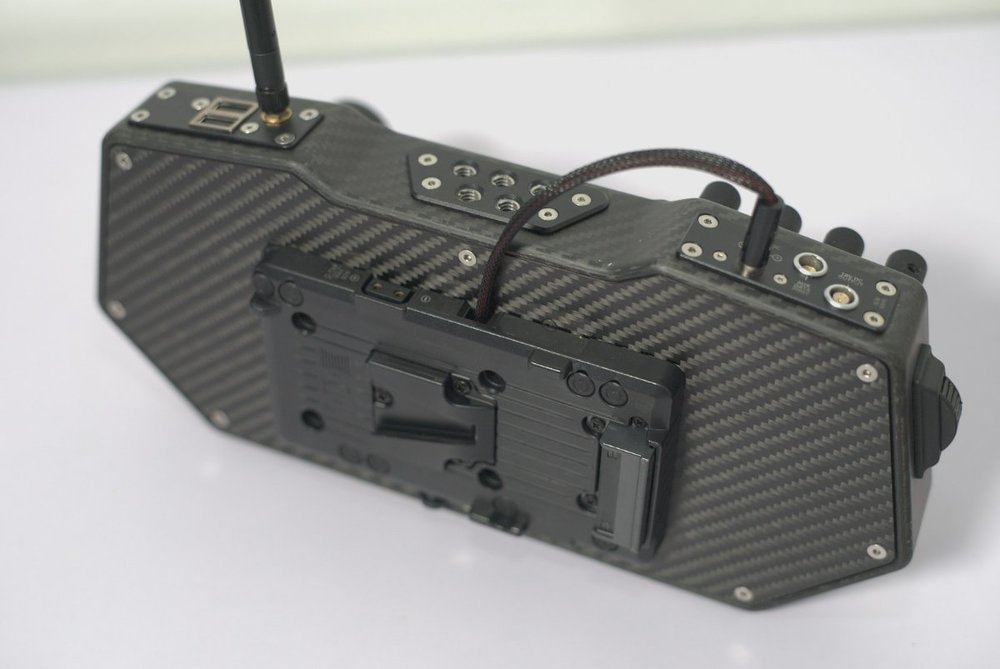
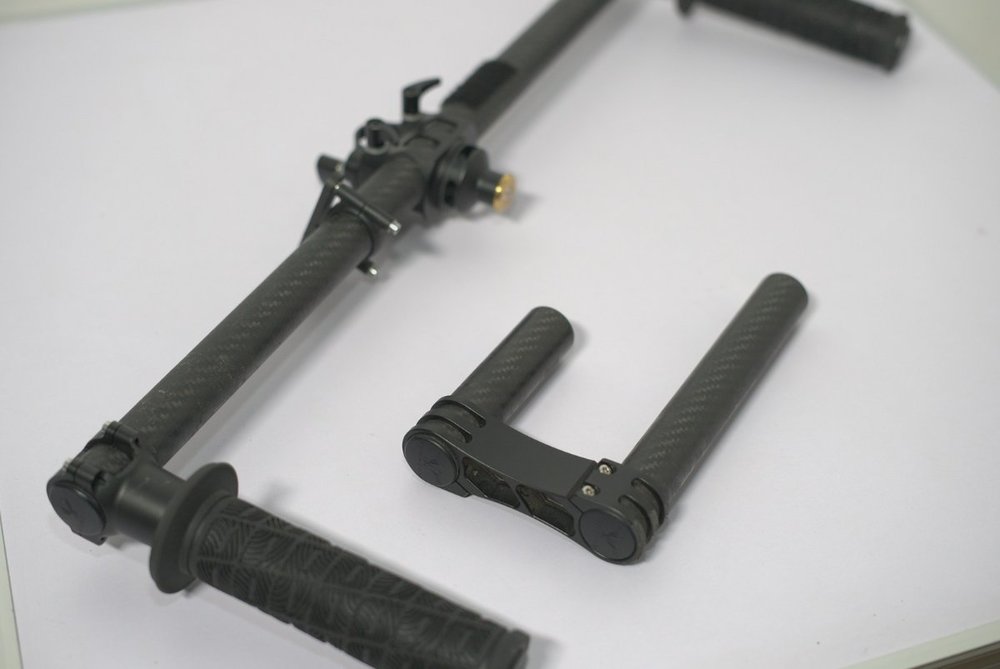
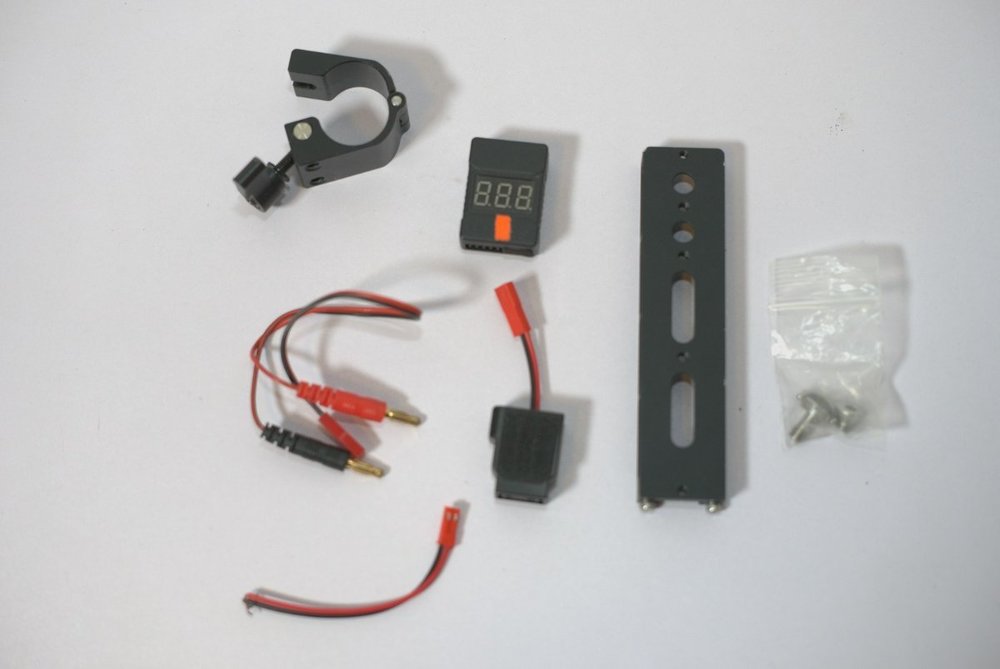
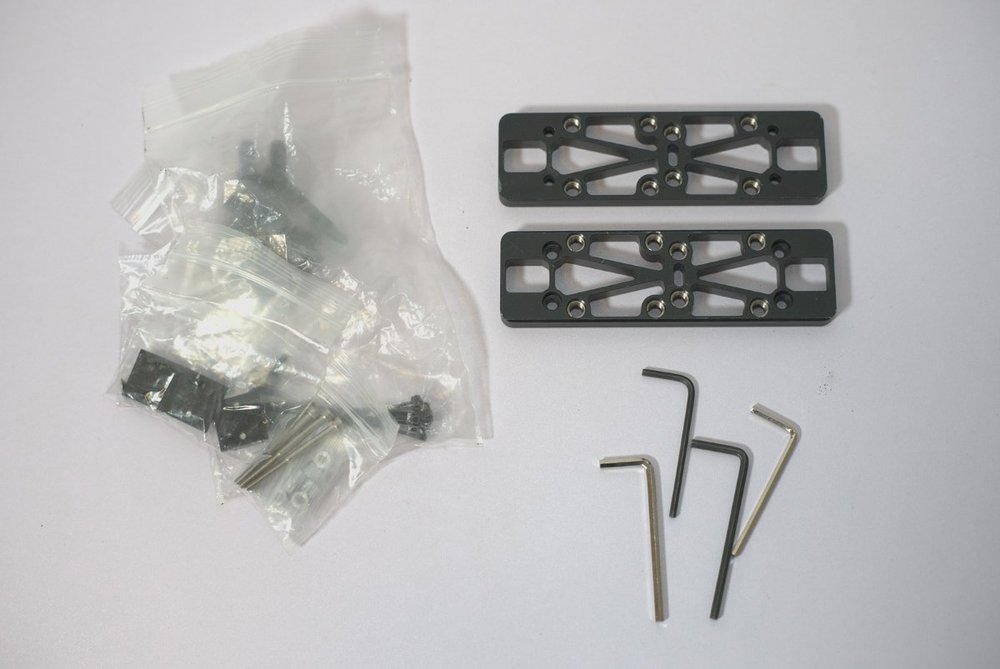
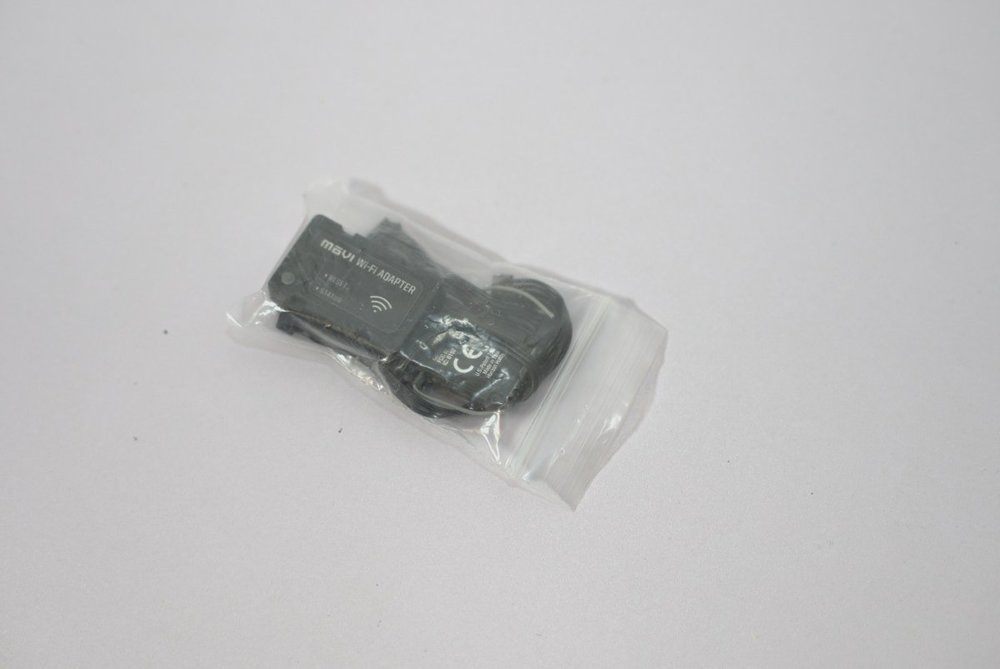
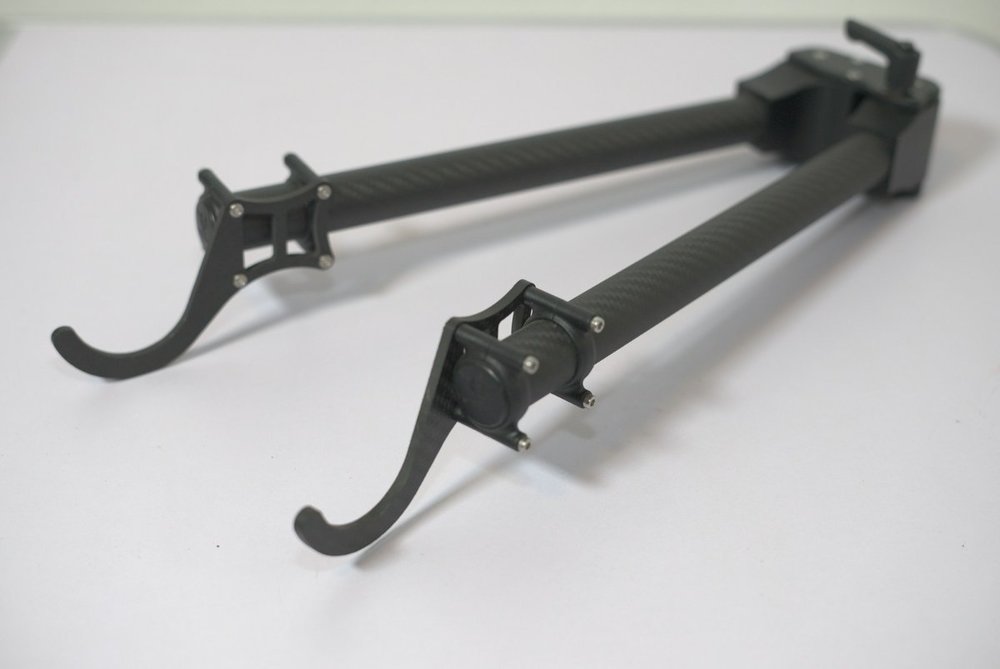
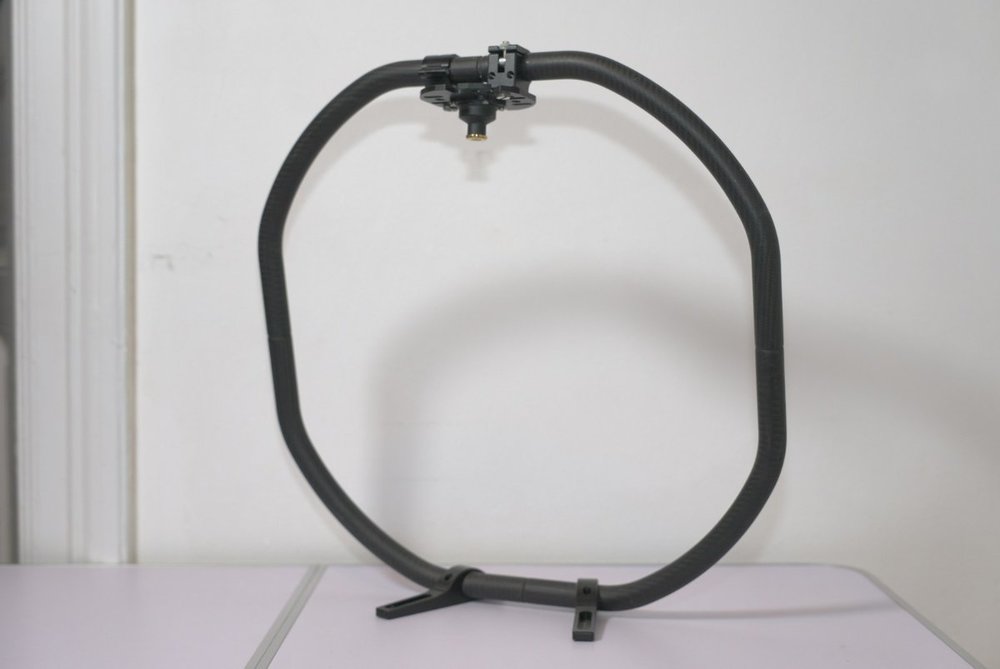
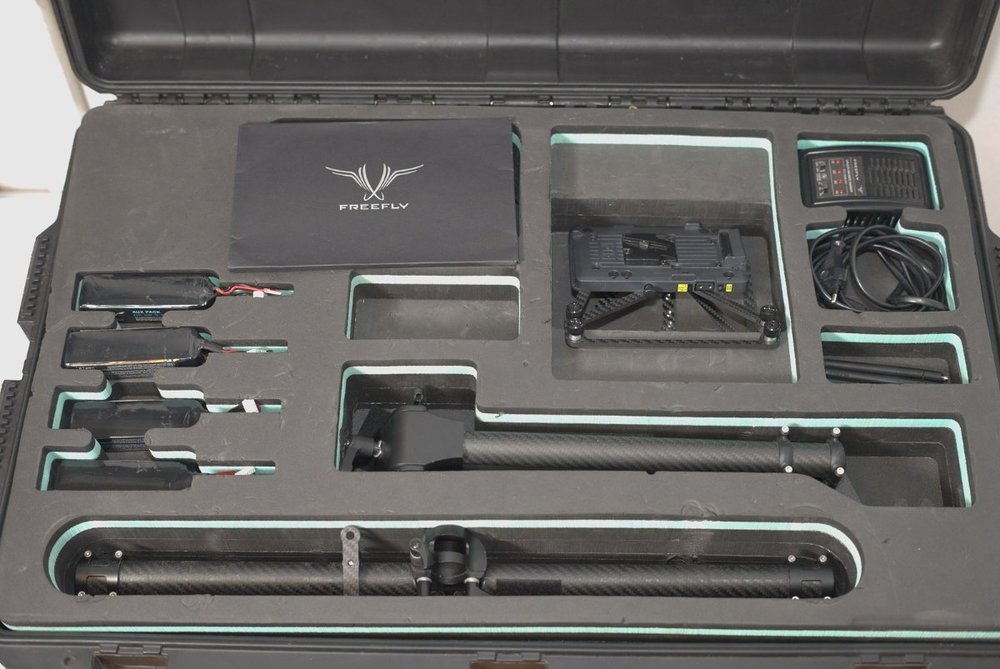
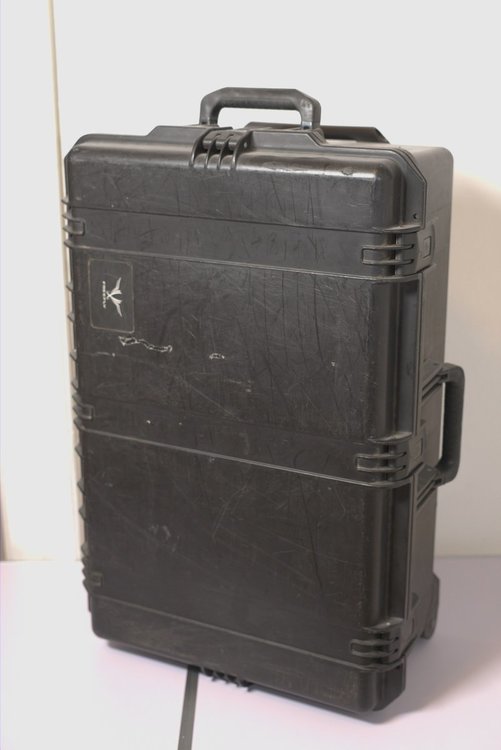
Selling my Movi M15 with remote controller and a lot of accessories for cameras up to 6.8 kg. I used it on a feature film 2 years ago and on a live show last year without any problems. Now it needs to go because it is sitting in the shelf, staring at me... Everything you see in the pictures is included (except the light stand). - M15 with sliding plate - remote controller with neck strap - can also be setup as mimic controller (very cool...) - handle bars with top handle and additional rod clamp for accessories (monitor, teradek, etc.) - ring with feet - tripod holder - side brackets for Alexa mini with IDX v-mount battery holder - side bracket for RED (don't know, which one - I never had a RED) - 4 batteries + charger + LED Lipo warning + battery to D-Tap cable (for accessories, powered by the 2nd battery) - spare parts and screws - wifi controller (never used it, because if you attach it, you can't use the remote control any more afaik) - quick start instructions At the antenna of the remote controller the thread ring got loose. I substituted the original Freefly antenna with an antenna from a D-Link router. I will send the original antenna for reference / in case you want to glue it. Because of the weight of the whole package and the battery shipping restrictions I am selling and shipping the complete set only in EU countries. (If you are from outside EU and really want it, I can only ship it without batteries and you are responsible for import duties / tax. A pickup flight to Germany might be cheaper than shipping...) Price: 1.750 € + shipping Item is located in northern Germany / Hamburg If you want to calculate shipping to your country: The big pelicase weighs ca. 17.5 kg, the ring needs to be shipped separately in a 2nd package because it doesn't fit into the pelicase. Any questions? Please ask.


-
4 lens prime set focal length choices?
Sebastian Bock replied to Hendrikus De Vaan's topic in Lenses & Lens Accessories
If you own the 40mm I’d say there’s no need for a 50mm. I use my 135mm lens very rarely. So if I were you, I’d consider to buy the 90mm macro instead of the 125mm. But of course this depends on your personal shooting Style and the type of projects. 25/40/75/90 macro would be my choice. -
More than 1 Eye Light Reflections?
Sebastian Bock replied to Wenqi Wei's topic in Lighting for Film & Video
I would say there‘s not THE correct answer. If you observe the number of eyelights in real life situations, you will see that they are dependent on the surrounding, no matter if indoors or outdoors. When I am sitting in a café, I can see the reflections of multiple windows, a candle and the ceiling lamp in my friend‘s eyes, depending on the position of the head. So multiple eyelights are a natural phenomenon. More important than the number is the shape of the reflections. If you are shooting a candle light dinner and the reflection has the rectangle shape of a Kinoflo, that might look weird. Worst for my taste are ring-lights. But honestly: If your audience starts thinking about the number or shape of eyelights in the actors faces you have a much bigger problem than your light setup… it‘s your story… -
Thank you very much for this detailed information. That saved me from a lot of try and error ordering.
-
Interesting interview with Jenkins. He really is the archetype of an independent film maker. https://www2.bfi.org.uk/news-opinion/sight-sound-magazine/interviews/mark-jenkin-bait-cornwall-fishing-village-tourists
-
Thanks! Have you seen his other film „Bait“? Also a recommendation - also shot on his Bolex and self-developed by himself.
-
Stitch shot inside to outside car
Sebastian Bock replied to John Russell Schmidt's topic in Visual Effects Cinematography
„Athena“ for example. -
Arriflex SR I light meter malfunction - am I doing something wrong?
Sebastian Bock replied to Sebastian Bock's topic in ARRI
Hi Dom! Thanks for taking the time to answer. You are right, the meter should only be activated, when the main switch is half down (metering position), not when a power supply is attached. My problem is definitely not a bent needle - it is moving without any distractions from zero position (no power supply) to the "+" section, as soon as a battery or power cable is attached. My camera has not been converted - it is still the bayonet mount. It is the version with auto exposure functionality. I disassembled the light meter today, to see, if I could do something. It's a very interesting construction with two gradual ND glass discs that affects the amount of light falling onto the light sensor regarding to the film speed and fps set on the dials. But this is only mechanical - nothing that gives me a clue about the malfunction of the meter. So I assume, my problem sits somewhere on the electronics board and since I am not familiar with electronics, I assume, I have to leave it as it is... although it bothers me... ? Yes, that is what I already adjusted. Still, the up/down tension is not affected by this. Thanks for your warning. I am aware, that some adjustments are not meant to be done by the user, but since it is nearly impossible to find a service technician in Germany who is still in business, I don't have much other options to get the camera serviced. And I am so fascinated by the machanical mastership of these old cameras that my curiousity almost always wins over the worry to damage something. If there's a screw easily accessible, I want to see what's behind it - this is part of me since my childhood... But I don't touch screws or levers that are sealed with a protection varnish. -
Kiev 16U & 16UE camera dismantle and re-assembly website
Sebastian Bock replied to Gareth Blackstock's topic in Russian Gear
When I read your last post, I remembered, that I once documented the servicing of the Kiev16 lenses. I put it together in a post here: -
Hello! I received an Arriflex SR yesterday (Yay!) and it seems to work ok. Except the light meter is not doing what I expect... When the camera is powerless, the meter needle is in its center position. As soon as I attach a battery (camera still turned off), the needle jumps down to the over exposed marking (+). When I turn the camera into "metering mode", the needle stays where it is. Adjusting the aperture doesn't affect the needle, also turning the ASA knob has no effect on the light meter. Am I missing something? Can I do something to get the light meter working as it should? And another question regarding the viewfinder: I adjusted the tension of the left/right rotation with the help of an Allen key, also the 25° in/out move of the eyepiece by cleaning the mechanism under the two round cover plates. But I didn't find a way to adjust the tension of the up/down axis of the viewfinder. This is very stiff and needs a lot of force to be moved. Forcing things is never good, so where can I service or adjust this? Thanks for your help, Sebastian
-
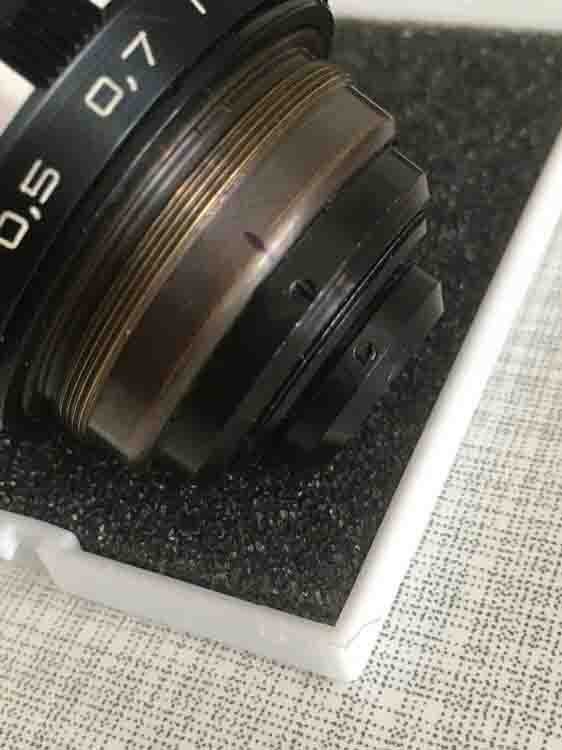
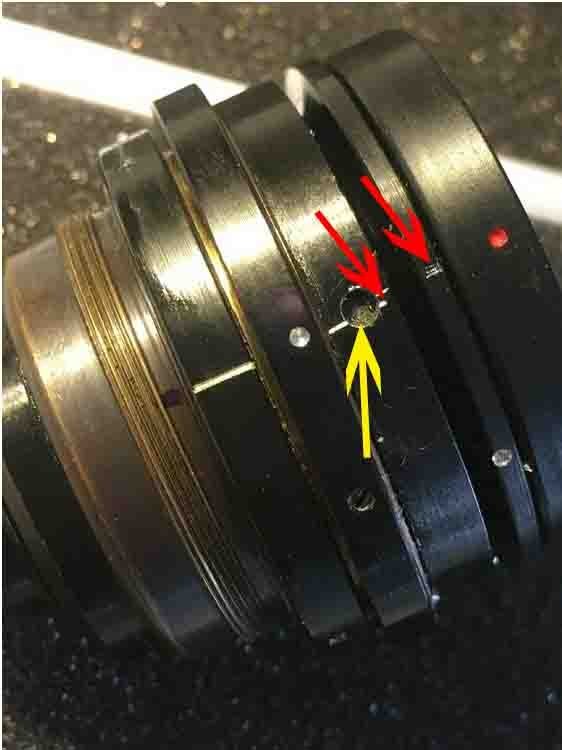
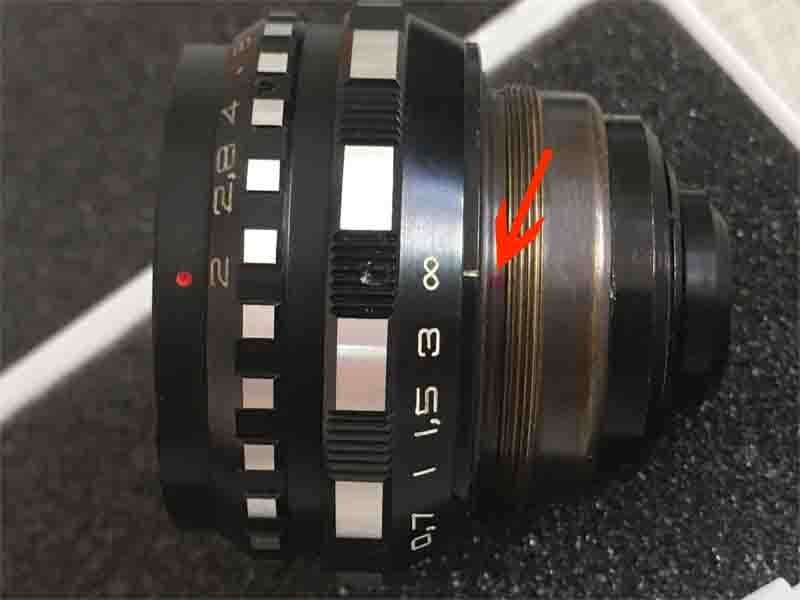
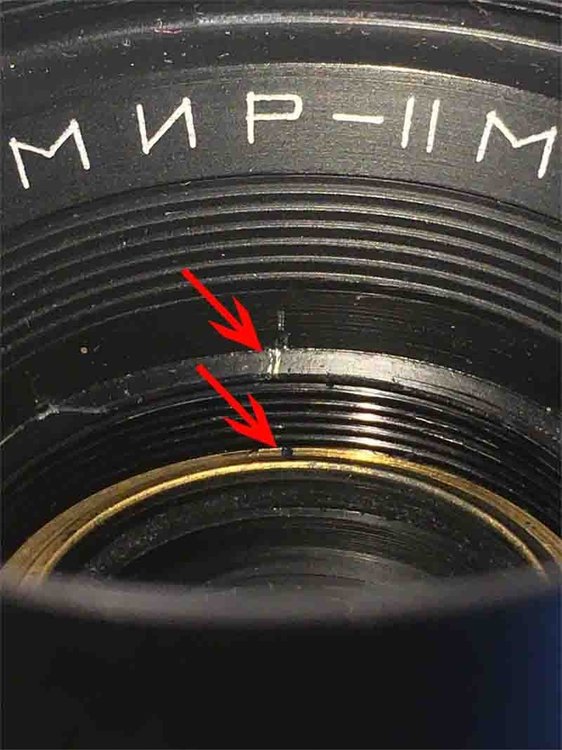
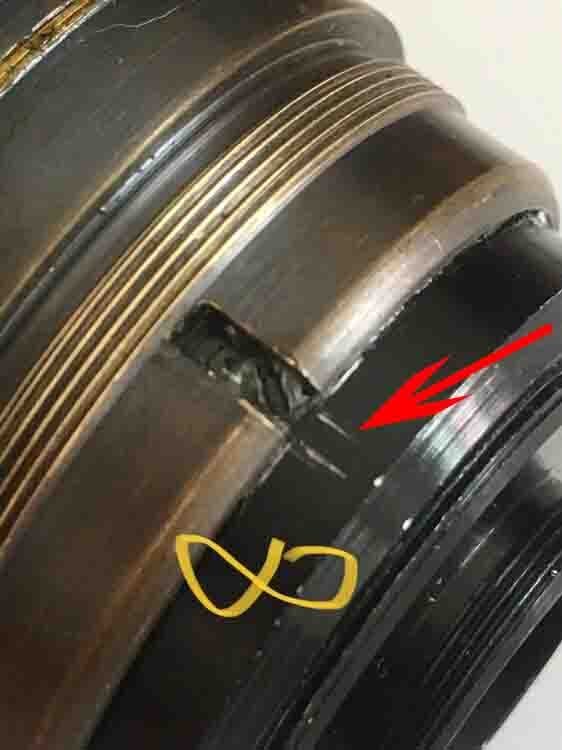
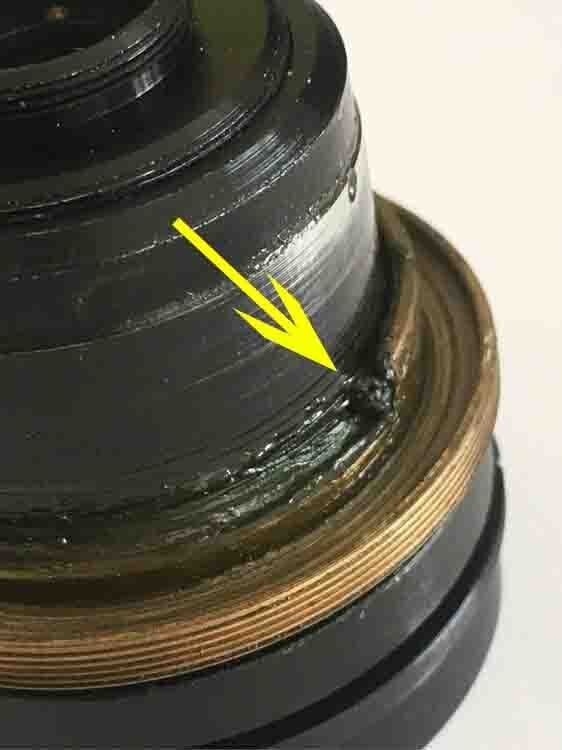
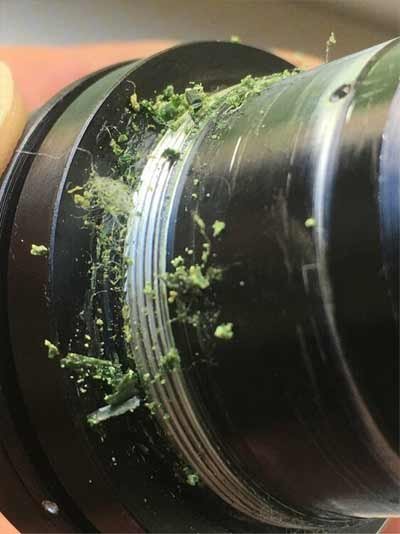
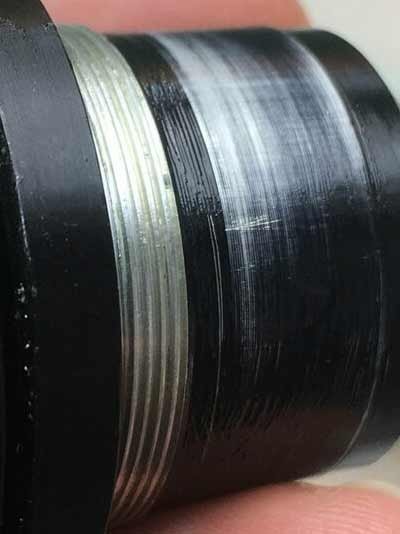
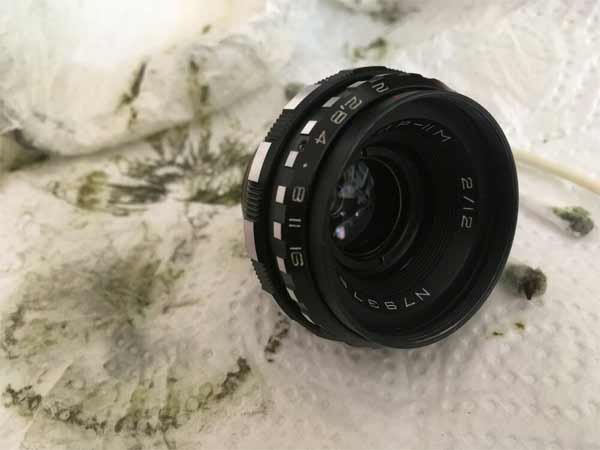
So here is an illustrated guide for the maintenance and cleaning of the Kiev 16 lenses. I'll just do this with the example of the 12mm lens. The other two lenses are very similar, and if you can do the smallest lens, you probably can do the other two as well. With all 3 lenses, the focus was extremely stiff and could only be moved with some effort. Since the lenses are relatively small and are quite close together on the turret, you only have the chance to turn the focus with your thumb and index finger while shooting. The aim of the overhaul was to make it possible to move the focus again without effort. First of all: since I didn't know at all how the lenses are built and how to get to the focus gear, I took apart everything that was possible. Also the lens elements. In retrospect, this was not necessary at all, you can get to the focus without taking the glass apart. In case someone needs/wants to clean the lenses from the inside, I'll mention the steps anyway. If you don't necessarily have to get to the glass elements, I would advise to skip this step. The lenses are very simple and you can get them together again without any problems, but it took me an extra hour to get it dust-free... Here we go: 1. Before you pick up a screwdriver, you should first mark all the important positions on the lens, so that you can get everything back together properly. To do this, I set the focus to infinity and the aperture to 2. These are the respective end stops. Then mark this position on the brass above the thread with a permanent marker (yellow arrow), so that in the end all elements are exactly as they were before disassemby. 2. Loosen the tiny screws from the focus and aperture ring. You don't have to unscrew it completely, just a few turns. This minimizes the risk of losing the tiny screws. Carefully pull the focus and aperture ring from the barrel and immediately mark the position of all rings again. In this case, I scratched a thin scratch into the paintwork (red arrows) because I was worried about removing permanent marker when cleaning. Be careful with the ball under the aperture ring so that it doesn't say goodbye (unless you want to "de-click" your aperture anyway). It is best to remove it with a magnetic screwdriver and clean the hole (yellow arrow). Then loosen the 3 screws slightly on the ring that was under the fucus ring (the last one before the thread, with the white line on it) and pull the ring backwards. [3. Optional: Remove lenses / can be skipped] Mark the position of the rear lens. I used the two screws as a marking. Loosen the rear screw, remove the ring and remove the two lenses. Be careful not to mess up the order of the lenses during disassembly. Before removing the front lenses, be sure to mark the position of the retaining ring on the housing (red arrows) with a little scratch. The retaining ring holds all three lenses together in the front part and has to sit in exactly the same place again at the end! The lenses have very little play in the tube and tilt slightly when reinserted, so that when screwing on and tightening the retaining ring, you might think that everything is sitting correctly again, even though you are only pressing the ring against a tilted lens element. The marking helps to see whether all lenses are really in the right place again. Loosen the retaining ring (be careful not to slip off...) and carefully tilt the lens forward so that the lens elements slowly slide out. All glass elements are encased in brass sleeves. Actually, not much can happen...) Again: remember the order. 4. Now remove the last black throw ring. It is only secured with a small screw, but the ring is secured with 50-year-old, hard grease. In short, getting the thing down was an act and was only possible with the use of cleaning spirit and gentle force. If you are looking at the lens from behind, the ring must be unscrewed COUNTERCLOCKWISE. 5. When focusing, only the position of the two rear lenses changes. The rear tube moves in and out minimally. The position of the tube is fixed with a small screw, which runs in a guide slot. I have marked the position of this guide slot and the position that the tube has at infinity position. 6. When you have disassembled the throw ring from point 4 and you take out this little screw, you can remove the rear brass tube. 7. All that's left now is to unscrew the small screw that blocks the Focus's end stop (yellow arrow). Then you can unscrew the last brass ring and wonder how hard grease can get... I scraped off the crust with a plastic spatula, and then cleaned, degreased and regreased all parts, both the threads and the inner running surfaces of the brass tube. 8. Assemble in reverse order. All the markings I made gave me the assurance that everything would fit as intended. When tightening the screws, it is important that you do not tighten them one after the other, but only a few turns all around, i.e. screw 1 a little, then screw 2 a little and also the 3. Then again screw 1 a little, etc. If you don't pay attention to this, the rings will sit crooked and or wobble. Finished:
-
@Tyler Purcell The footage looks amazing!
-
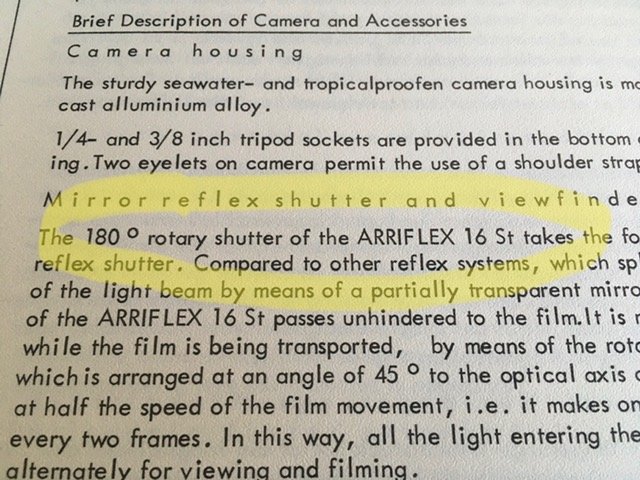
According to the original manual it is 180°
-
Real tungsten light shouldn’t be a problem. Only fluorescents, cheap LEDs and HMI without electronic flickerfree ballasts. So many productions have been filmed with the ARRIFLEX 16 in the last century with the wild motor without flickering…
-
Kiev 16U & 16UE camera dismantle and re-assembly website
Sebastian Bock replied to Gareth Blackstock's topic in Russian Gear
Hi Gareth! I just serviced a Kiev 16U with your brilliant tutorial. Now the speed stays constant again at it is MUCH quiter than before. Thank you so much for your efforts writing and picturing your service instructions. They helped me a lot. I have just one addition for people who also want to service their Kiev 16: I struggled with the screw inside the film chamber that holds the front with the turret from inside, probably because I didn't have the right tools (a very short scredriver) and it was corroded. But it is possible to skip that step. It is possible to slide out the interior assembly without loosening this screw. This screw, the turret and the front can be disassembled later, when the screw (is a little bit) better accessible. Have a nice weekend, Sebastian -
OK, I found a workaround, but I am pretty sure it wasn't meant to be that way I did it...
-
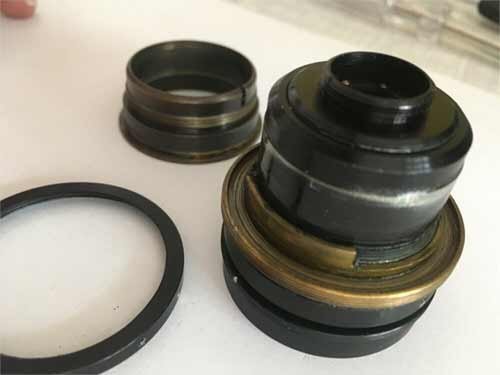
I have an Arriflex 16 on my table with a very sticky turret. Disassembling and cleaning the old grease was relatively easy. A forum search was also helpful about which type of grease to use for the turret. But now comes the problem: How do I reinstall the turret? How do I depress the 3 spring rollers at the same when I only have two hands??? There must be a secret trick. Does anybody know? Thanks for your help, Sebastian
-
Wow, this forum is really a great knoledge base! Thanks for the details.
-
Bringing Foma 200 to 16mm film
Sebastian Bock replied to Kamran Pakseresht's topic in Film Stocks & Processing
Great! Keep us updated please.
.jpeg.a22d701ea9830c3039fd858f9b54fb5e.jpeg)