Don H Marks
-
Posts
66 -
Joined
-
Last visited
Everything posted by Don H Marks
-
That is very nice, thank you for the link. I built mine to try time-laps to see if I like it before buying gear I might not use much.
-
A short video of the intervalometer in action:
-
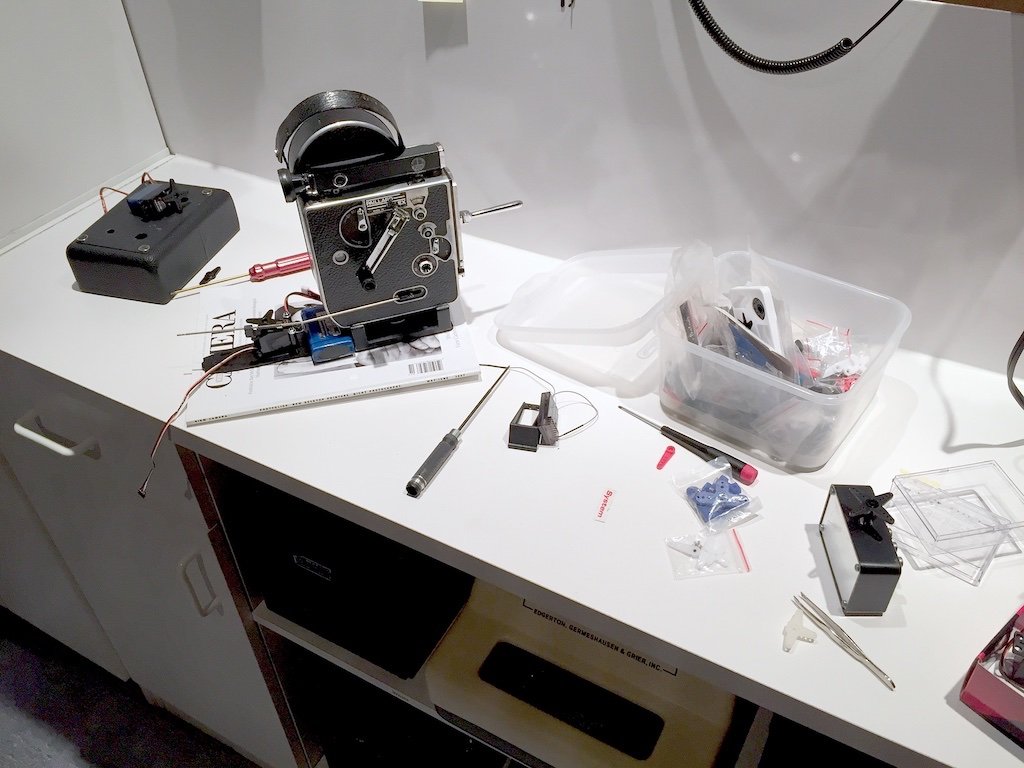
The servo cycles back and forth and pushes the frame release forward via a spring-loaded lever.

-
I put together a simple intervalometer for one of my Bolex cameras. The design uses a Radio Control Vehicle servo and a simple 'servo tester' box that cycles the servo at various speeds.

-
I did contact Rafacamera about adapters for these lenses. Based on that outer measurement of the threads he indicated the m28x0.5 to m52x0.75 adapter already in stock might fit. Also, may be able to custom make other sizes.
-
Maybe I'm not looking in the right place, but I find it hard to believe there is no big list of D-mount lenses compiled to a table or single website. I have collected some pdf files listing D-mount lenses but only for Kern, Berthiot and Wollensak. Even then, I think I have only partial lists.
-
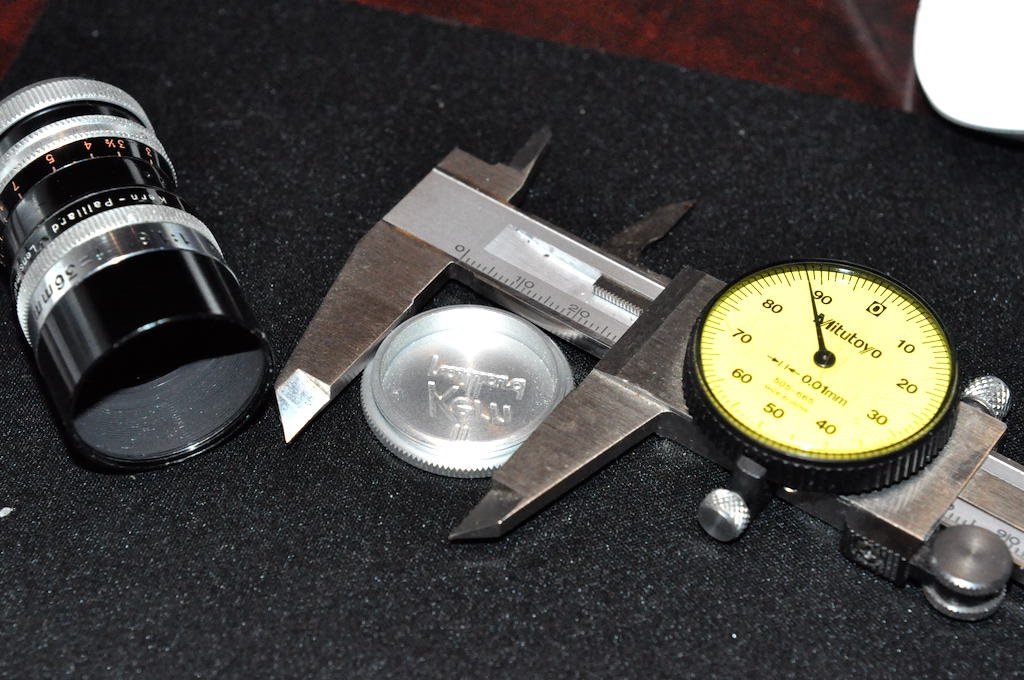
I do get 27.9mm when I measure the lens cap threads on the D-mount 36mm 1.8 Switar. Same size as the 13mmm 0.9.

-
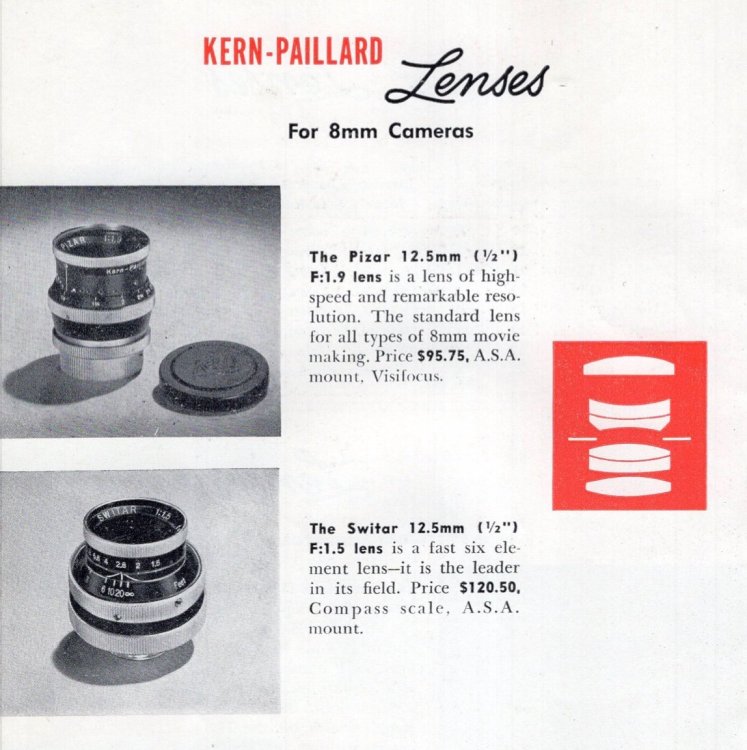
Without actually dismantling the Yvar 13mm 1.9, I'm a little suspicious if it is really six element, because in another catalog "February 1952" the same diagram is used for the Pizar and or Switar 12.5mm:
-
Thank you for the correction on the Switar 36mm 1.8 as being 5-element. I also found a Bolex catalog in my collection of physical documents. Its content is a little different from the PDF files I have collected. In that physical catalog (November 1952) it is showing the 12mm Yvar 1.9 as six-element. If so, that is the only six-element Yvar I have come across in my stash of Bolex literature. Most Yvars being 3 element with a few exceptions.

-
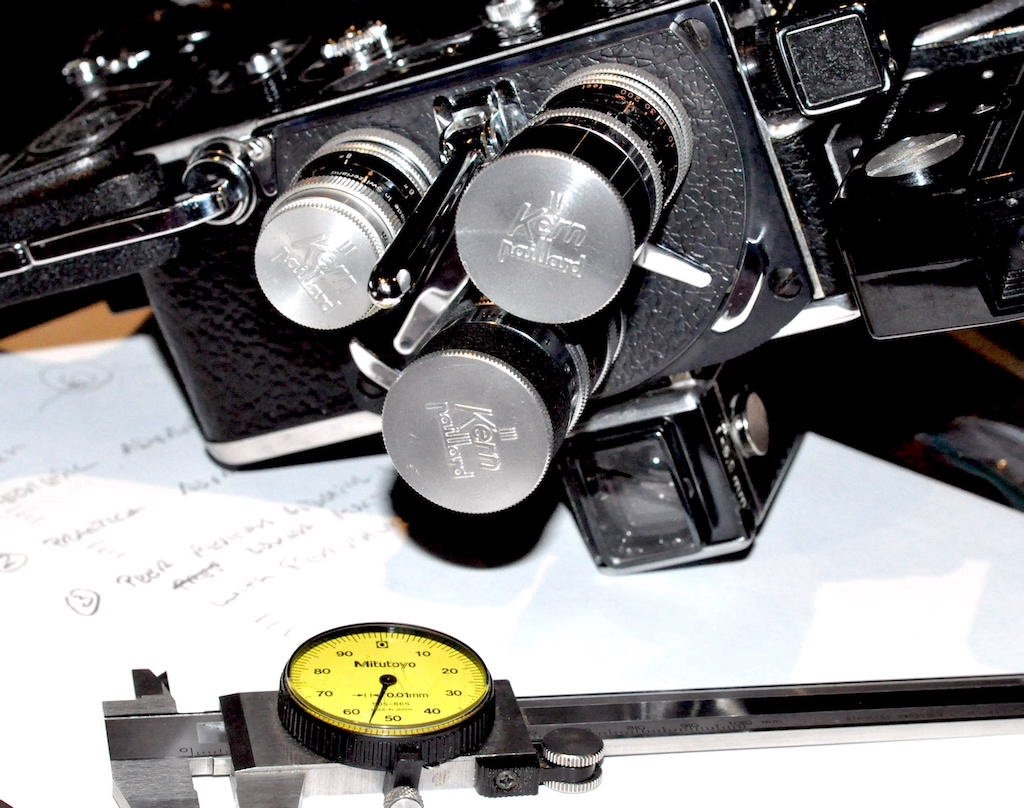
After years of searching I finally found a second 27mm lens cap. As far as I know only the Switar 36/1.8 and 13/0.9 used that lenscap and I only had one to share between the two of them. I don't think any of the other D or C mount cameras used that size. The way I found it was just scanning many images looking for the distinctive relationship between the Kern/paillard text and the size of the cap. It is uniqe none of the other caps look that way. The little Switar 5.5/1.8, however, takes the easy-to-find lenscap common to the Yvar D-mount lenses.

-
That post makes me feel like one of the youngsters. Those cameras were all from before I was born. Though, only by one year.
-
FAQ: Focal length, field of view and formats
Don H Marks replied to Laurent Andrieux's topic in Lenses & Lens Accessories
Another good rule of thumb is that one can't make a focused image if the subject and film are less than 4 focal lengths apart. -
C-mount lens to D-mount camera adapter?
Don H Marks replied to Aapo Lettinen's topic in Lenses & Lens Accessories
This is not my picture, I found it on the internet. But it does show what I have in mind. You can see the adapter on this one is a vintage piece. Though I can't make the letters other than U.S.A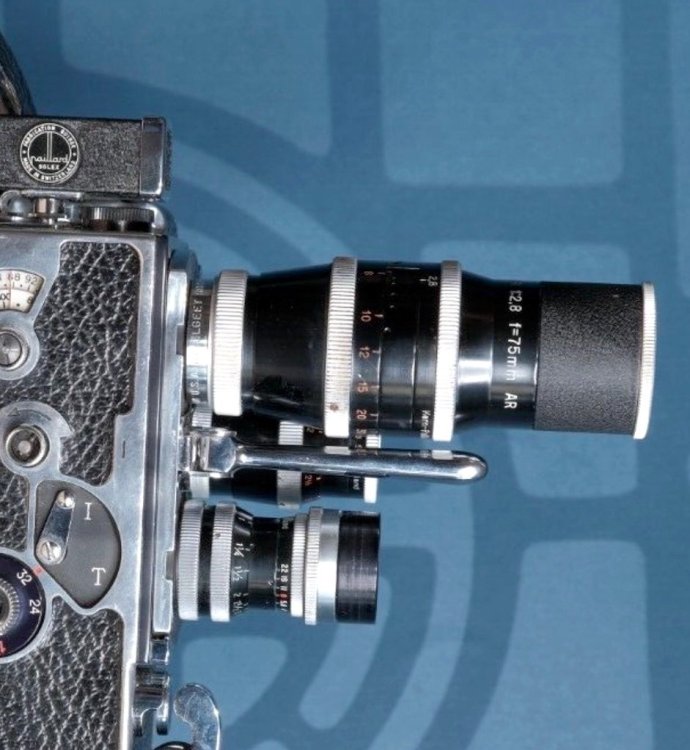
-
C-mount lens to D-mount camera adapter?
Don H Marks replied to Aapo Lettinen's topic in Lenses & Lens Accessories
Mine just came today. I don't have a standard C-Mount lens to test yet, but I did measure it and it will likely work. I got these numbers off the internet, not sure how correct they are. D-mount flange focal = 12.29 C-mount flange focal = 17.526mm Difference = 5.236mm I measured the adapter and it was about 5.18mm +/- some hundreths. The lens I have in mind is the 75mm Yvar, as my Octameter has a setting for 75mm. Another I was looking at was the 3" Wollensak. -
FAQ: Focal length, field of view and formats
Don H Marks replied to Laurent Andrieux's topic in Lenses & Lens Accessories
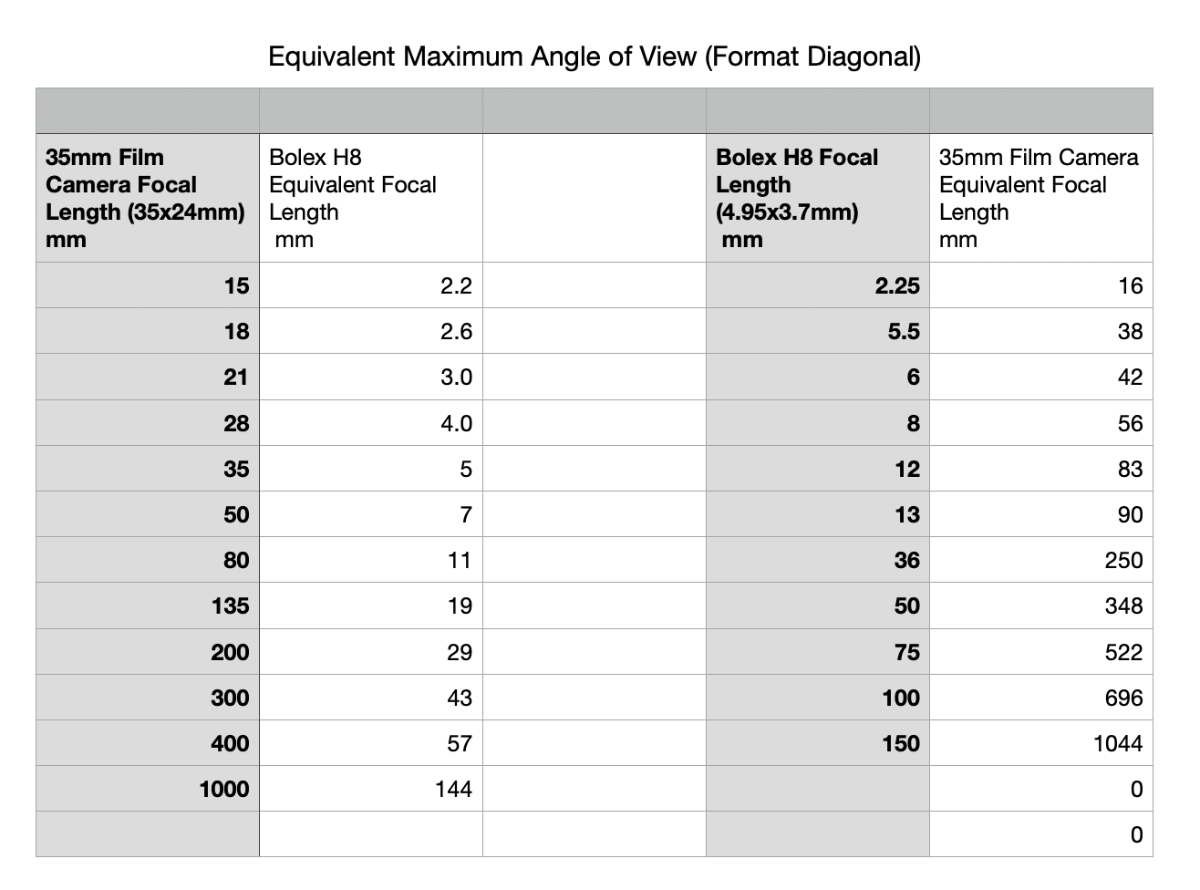
This is the table for Regular-8 to which I refer when focal length discussions come up. For simplicity the numbers are rounded and the field of view used is the diagonal of each format's film gate.
-
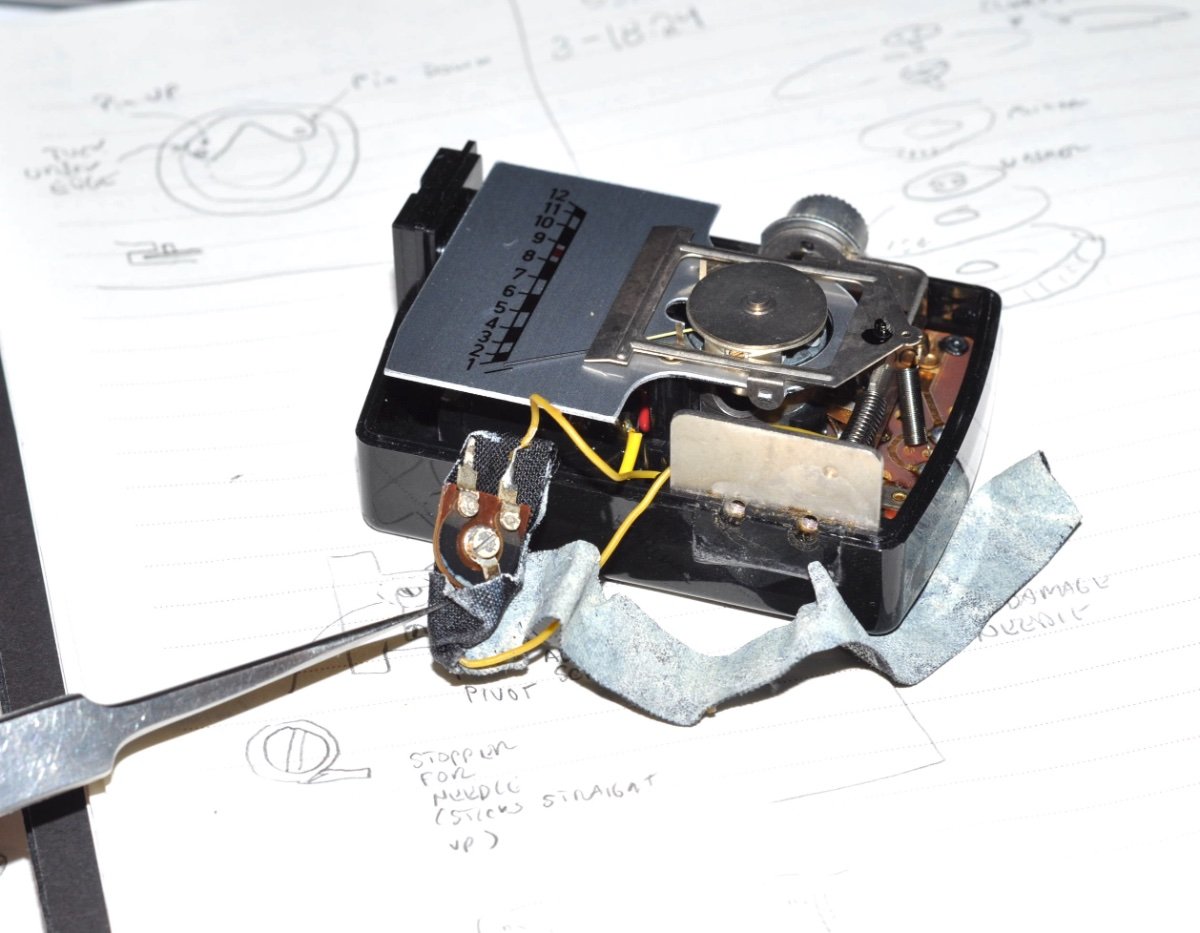
Taking it apart more than shown might involve removing the whole galvenometer movement. Something I'd rather not do. When re-assembling, the plastic wheel and the ASA disk are the only things that should rotate. The two fancy washers should be locked on the center shaft so they don't rotate. The screw on the shaft should lock the ASA window in place. It should not be hard to get this back to the same place. Since the rotating wheel locks in place at 1/2 stop intervals, the alignment of the ASA window's pointer with the correct line on the outer ring should be easy. If you are off by 1/2 stop it should be obviously crooked.
-
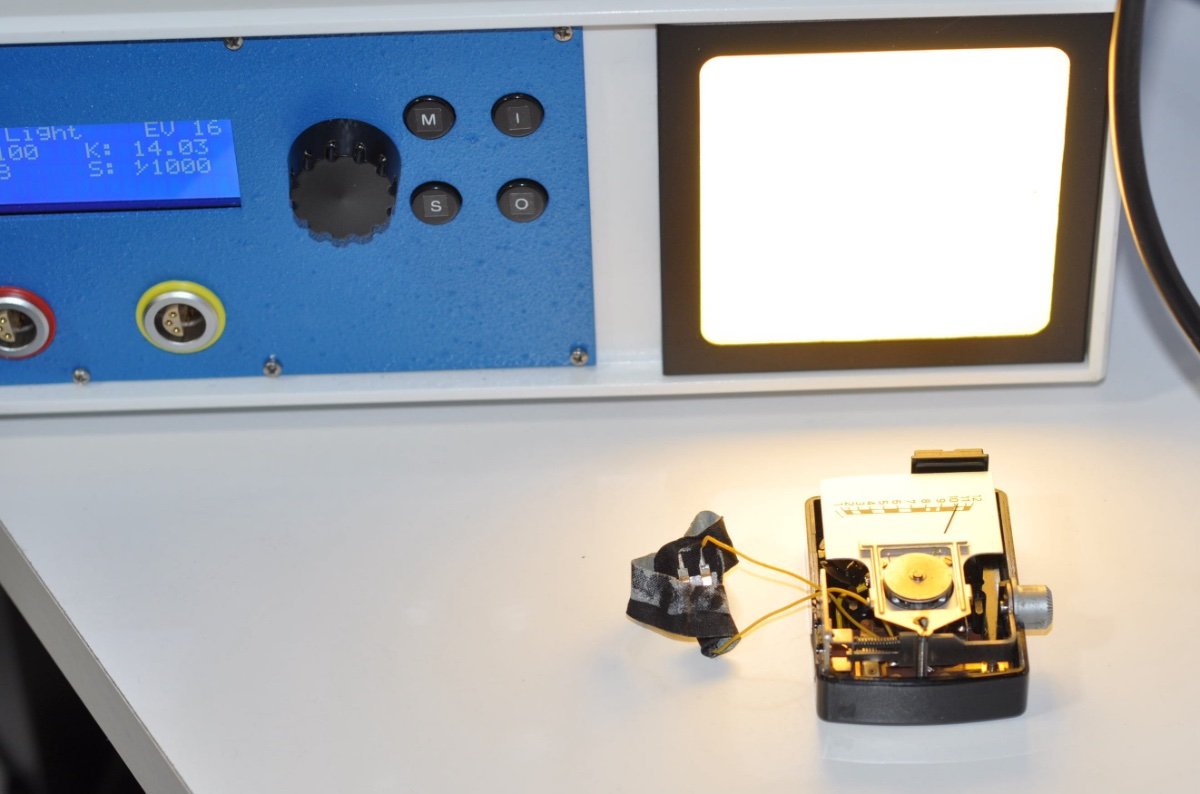
I was able to use the trimmer potentiometer to get it to read very well across its range with a calibrated light source. I used K=14.03. After getting it set to a good spot, the battery check now appropriately landed in the correct red zone.

-
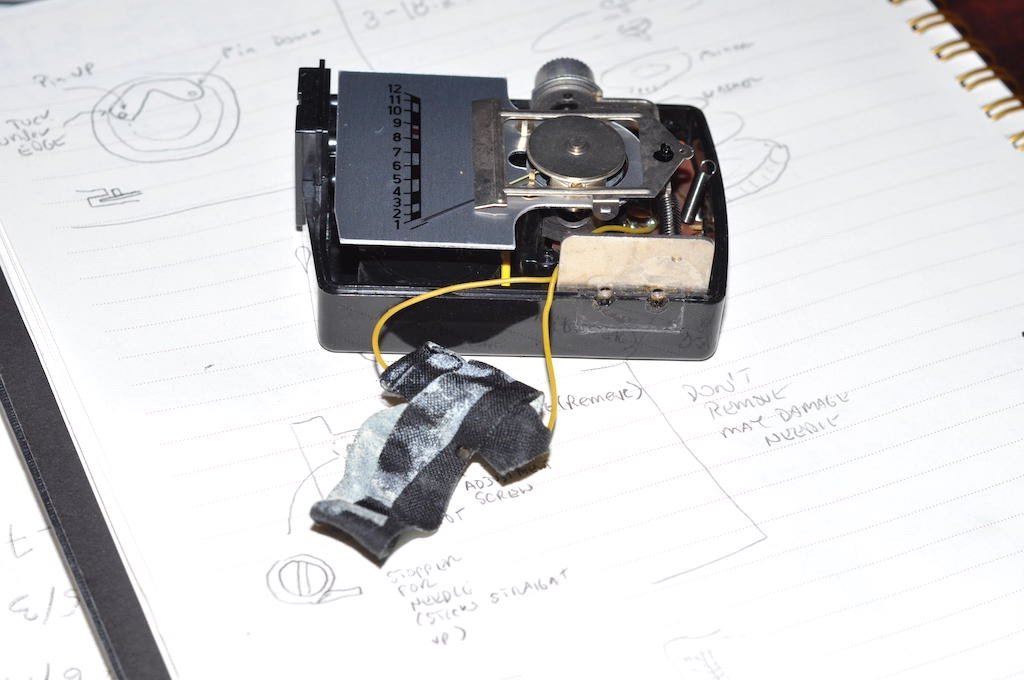
I found a single trimmer potentiometer. It was wrapped in black tape and stuffed under the meter face. They provided long enough wires that it can be pulled out and unwrapped without tearing the wires off.


-
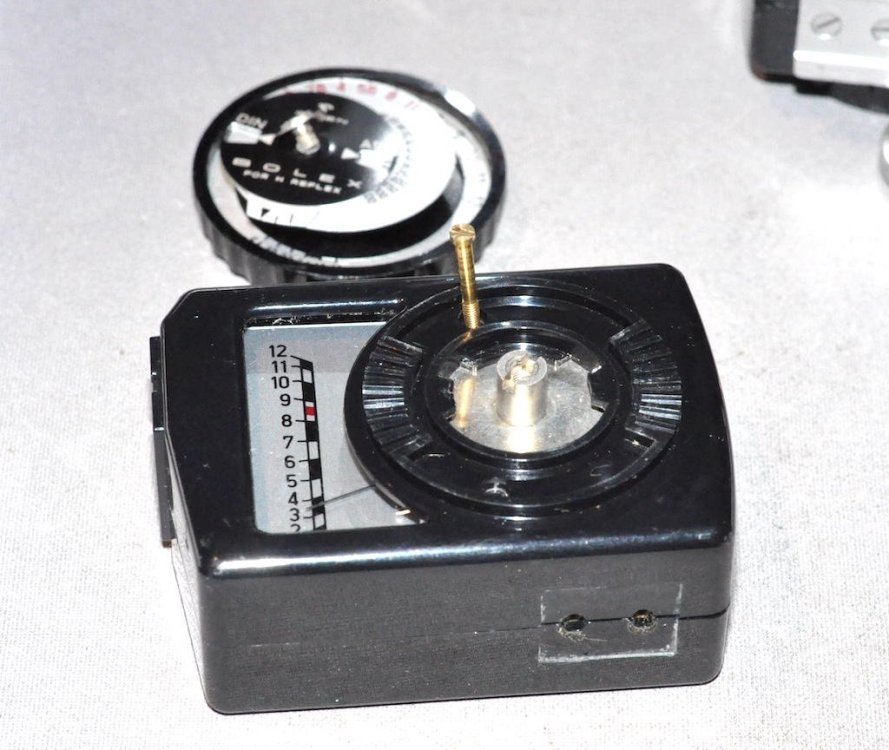
To get to the insides, the rotating wheel needs to come off. First unscrew the trim screw and then a flat blade screw driver can remove the screw that holds the wheel together. It is spring loaded and requires 3 hands to get it back together. Record the order that the parts come off. Trim screw, clear protector, fixing screw, ASA/DIN HOLE plate, fancy washer, ASA NUMBER disk, fancy washer (same as the other), spring, plastic wheel. With the plastic wheel off, the case is held together with two long brass screws. The cold shoe probably does not need to be removed.
-
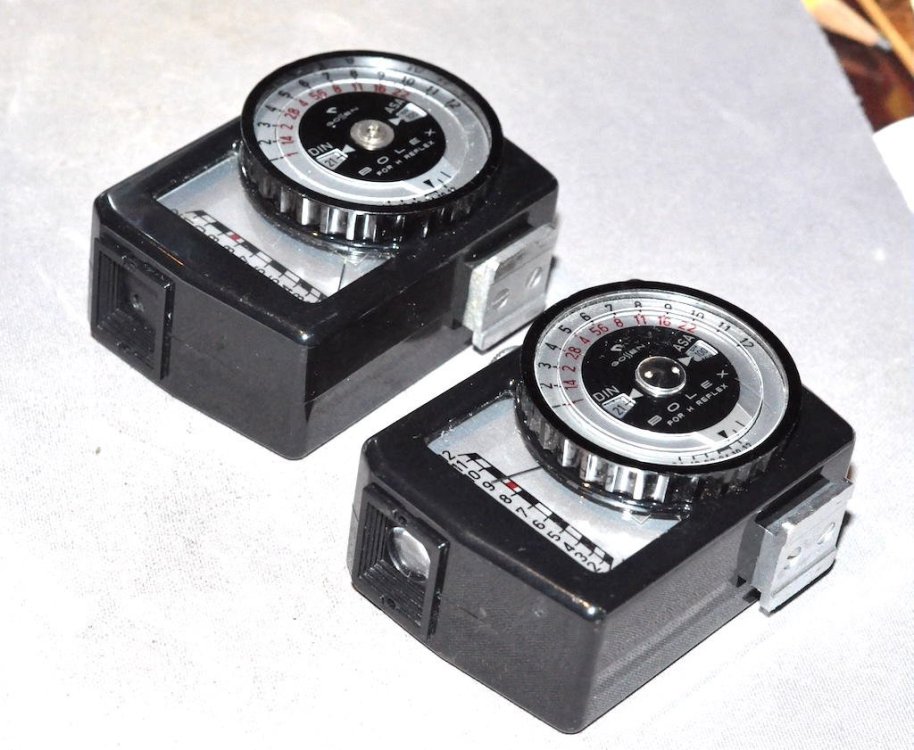
If one has never used these meters before, the manual (available on line) shows how to use it. Make sure you are using it correctly. The knob on the top has two settings: always ON and intermittent with pressing only. Setting the ASA is not intuitive. You need to pull up and rotate the wheel to set the ASA. The scale on the meter is calibrated to already account for light loss through the REX prism. For non-Rex cameras, add one DIN to the film speed, or 1/3 stop on the ASA scale. The circuit design calls for a mercury cell. One of the common mercury cell substitues is needed. I use zinc cells but there are other options, including small voltage regulators. The meter in question here was nearly off the scale when doing the battery test with a zinc cell. Time to open it up and see what is going on.
-
I got the light meter (top of picture) with a camera many years ago. It works well with the common zinc cells. However, it is an older model and it is missing the trim screw and protective clear plastic over the rotating scale. I recently picked up a newer one (bottom of picture) listed as 'parts only.' I was going to just steal its clear plastic cover for the other meter, but maybe it can be fixed.
-
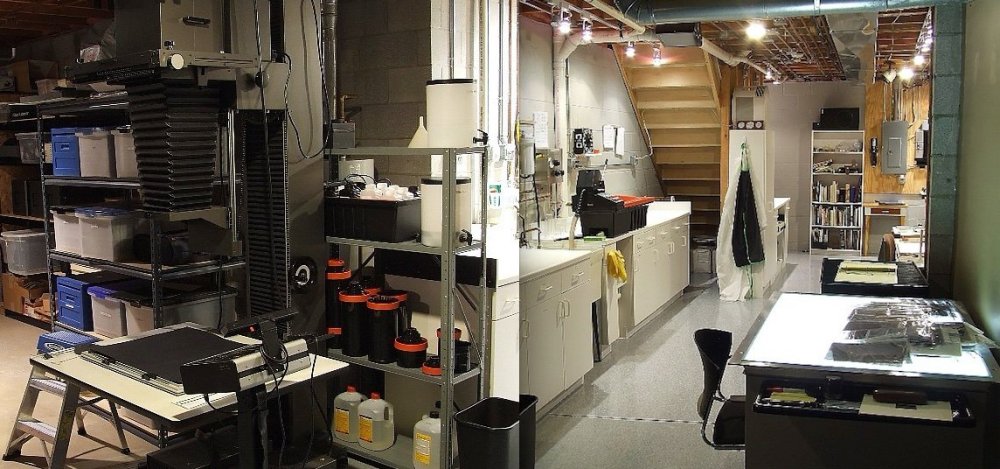
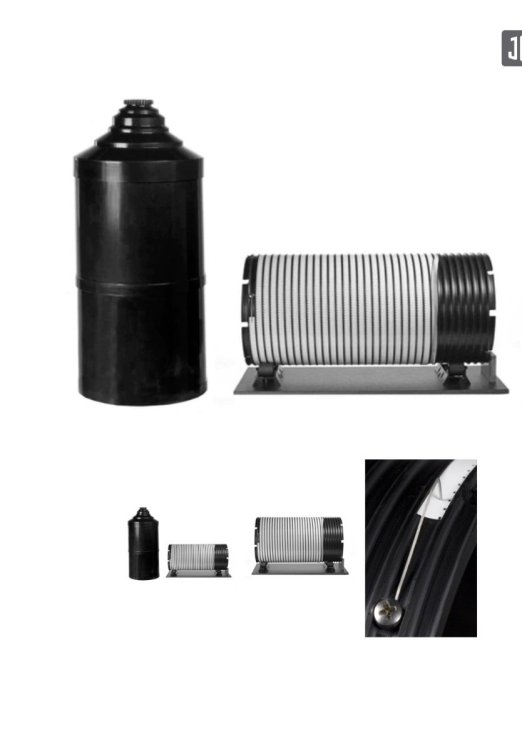
I have a state of the art full featured still photography darkroom. I currently send all my cine film out for processing and splitting. I wondered why I should not process the film myself. I wonder if anyone else is using the Jobo drum for cine film. Seems simple enough, but I'm not sure how I'd dry the film or split the film.
-
C-mount lens to D-mount camera adapter?
Don H Marks replied to Aapo Lettinen's topic in Lenses & Lens Accessories
I was looking for the same thing. Just got one on ebay here: 325678317500 -
Yes, one of my H8 RX even came with an Octameter attached. I'm still amazed by the Rex cameras. I got my first simple movie camera in 1972 and at age 11 I did not know much of high--end cameras. I really thought that seeing through the taking lens, like an SLR still camera, was science fiction. I could not even imagine how it would be accompished in such a small space.
-
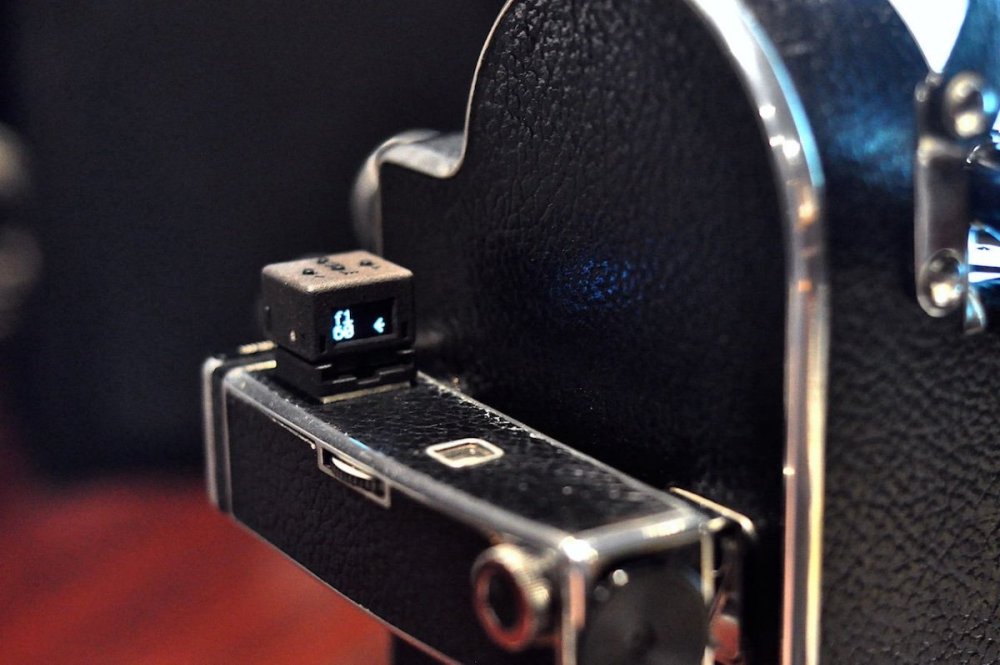
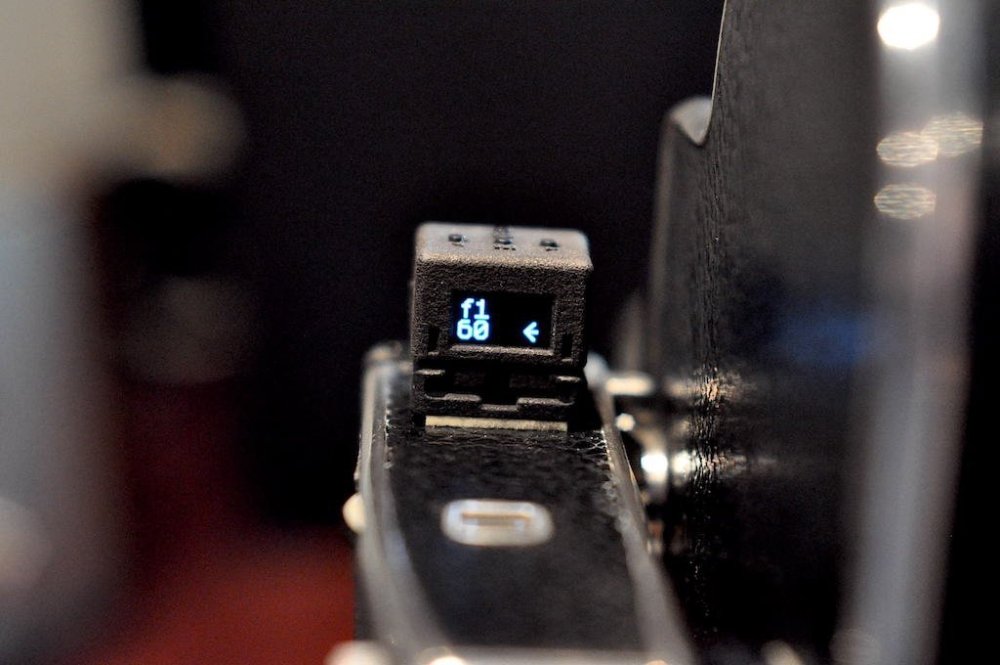
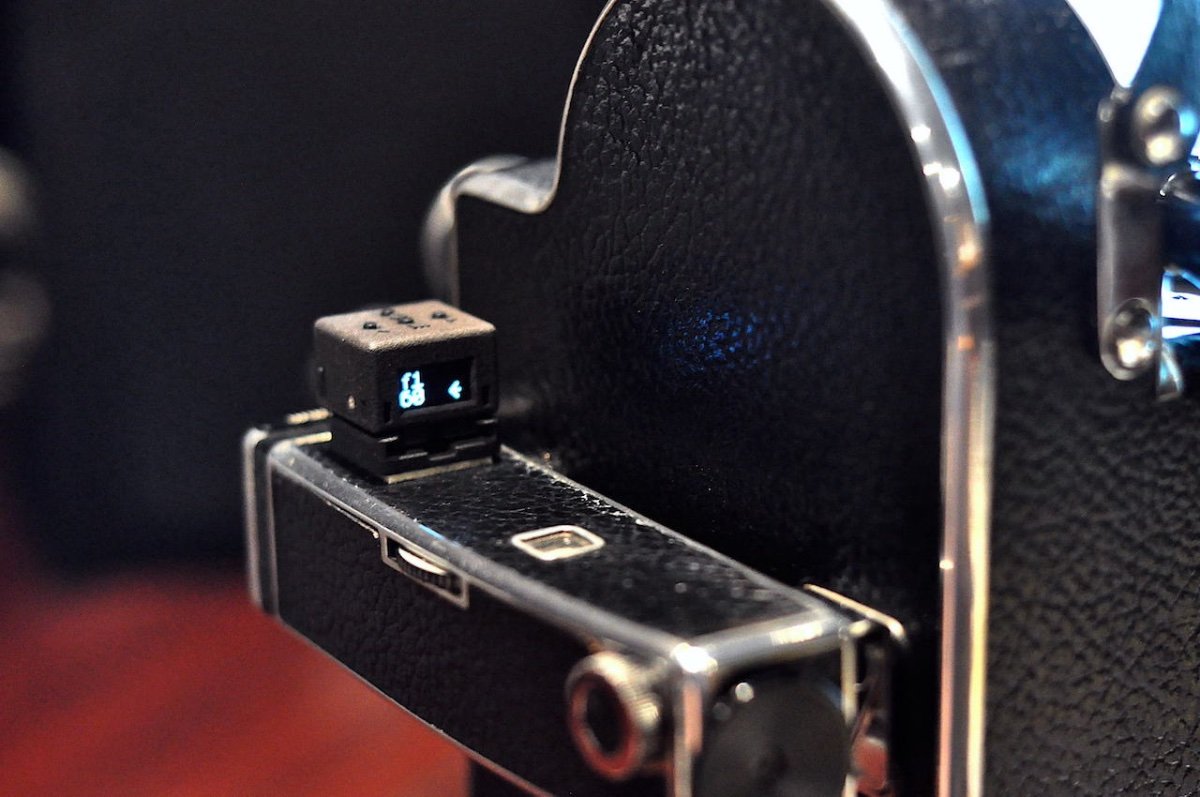
One more thing to make the camera more useable is a light meter. I mounted this little digital meter over the Octafinder. It won't read 1/50, but if I set the ISO 1/3 faster, I read off 1/60th. I run all my cameras at 18fps. So for Foma ISO100 I set the meter to 125 and read at 1/60. It is also nice the meter reads to f1 and below.