


Lars.Erik
-
Posts
175 -
Joined
-
Last visited
Everything posted by Lars.Erik
-
Basic Lighting Information & Tips Needed
Lars.Erik replied to Tom E. Pinkerton's topic in Lighting for Film & Video
As Dimitrios stated, it's difficult to give advice when we don't know the look you're gunning for. If you have no budget, you have no lights. If you want to make a $5 picture, the chances are high it will look like a $5 picture. You will need some money for lights. You can do it without lights, but it will probably look a bit better with some lights. But here are some tips... Indoor (at night): Use the practicals in the house. Exchange the bulbs with stronger ones. 200w and up. Make sure they're not on when your not filming. As regular household wires aren't built for these lamps. (may overheat) Go to IKEA. Get some china lanters. They should be the same size as a basketball. Use bulbs arounf 150w. This is a inexpensive way to get more light. Control the light with black plastic bags. Indoor (at day): Use the windows. Use reflectors. Exteriors (daytime): Use reflectors. Either white foam board as stated by Dimitrios or the LastoLite. Beware of the LastoLite though, if it's windy your fill light will be "moving" around. Stay clear of high contrast areas. i.e. walking in and out of sun and shadow. Exteriors (night): Look at Dimitrios tips. All good ones. For some more flashy pictures, try watering down a street with many shop windows in it. The wet streets will reflect the light from the shop windows nicely. One last advice. Study "Clerks". I know this is a film that's mentioned often, but it's a very low budget film, even though it's shot on film. -
If you dim the lights, the color balance will change. It will get warmer the more down you dim them. But if this is what you want then that's good. You might want to think about controlling the light with black wrap or black garbage bags. These balls spill like hell. But once you get control over the lights, it looks nice and soft.
-
16x9 chip vs. 16x9 Lens adapter
Lars.Erik replied to Stuart C's topic in Students, New Filmmakers, Film Schools and Programs
Agree with Tim. And often a 16:9 wide adapter will give you limitations both in f-stop and focus areas. -
help with a sequence
Lars.Erik replied to janin jay's topic in Students, New Filmmakers, Film Schools and Programs
Go and rent "Rope" by Hitchcock. The films basic idea is that it's all taking place in an appartement. One take. There are several places where he cuts the film. See it and you'll get some good ideas. Cheap, smart and basically great filmmaking. :D -
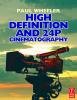
Also Paul Wheller's "High Definition and 24P Cinematography". http://www.theasc.com/cgibin/store/acsstor...catalogno=11151 Wheeler is a good writer of these books. Highly recommend him.
-
Try this one: http://www.sekonic.com/IncidentVsReflect.html and you might want to buy this book. It's been a great friend of mine anyway http://www.theasc.com/cgibin/store/acsstor...atalogno=401930
-
Fluorescent tubes also come in 5600K. You can also build chicken coops with dayligth balanced photoflood lamps. 500w or 250w.
-
Hello again. Now I now what progressive scan is. And interlace scan. But I'm unsure about progressive vs deinterlacing the footage in post. Pulling it down to 25p from 50i that is. Can someone please explain to me the difference in the two formats. Thanks. LE
-
It does.
-
HMI will give you a bit more light output than tungsten. Tungsten tend to be warmer than HMI. Making the studio a bit less comfortable. HMI will be a more expensive approach than tungsten. HMI lamps cost more. Are you going to see the window in any of the shots? If so, if you don't want any reflections, put on a Lee Scrim filter first. Then the ND/CTO. The scrim filter will take away a lot of reflections. The Scrim will eat about 1/2 f-stop. If it's a large window, you might want to think about using ND/CTO with these small balls of glue in them. When you press the gel to the window, the balls pop and place a glue to the window, making it stick. Did a 10-week shoot in a studio, with BIG windows, ND about 25 of those. With normal ND. Never again! It's a big issue making them stick for a long time. A word of caution on windows. They are not made with film and video in mind. Meaning some windows have a little magenta in them sometimes, other green. Seen this myself a few times. If they have this, you might need to colour correct your studio accordingly. And as John stated, with a window in this size, it's important to colour correct them. Good luck on your project.
-
decision making process to do or not do a job.
Lars.Erik replied to timHealy's topic in General Discussion
Good points have already been made. So I'll try and make this short. One thing you can do is kind of "challenge" the director. Ask him about the script, what certain scenes mean. Does he have a visual thought about it? What's the motivation of the different characters etc. You see where I'm going. If the director can't answer, or he/she has obviously no good points...well I'd stay clear of it. But if he/she has some good points and have a intersting way of visualizing it, then I'd probably do it. Also get your eyes on the production plans. Are the days way to unrealistic? And by God, get your hands on some of the things the director has done before! Because in the end, it's YOUR name that says DoP on the film you'll be making. And you will have to stand up for those shots you've done... What's your format by the way? Film, HD, DV? -
how would you do this effect?
Lars.Erik replied to Delorme Jean-Marie's topic in Lighting for Film & Video
What about the company that has designed lamps just for these purposes? http://www.lightningstrikes.com Turning on a HMI arc will give a greenish light at first, as you stated. -
For this I'm guessing you'll be best off with mirrors. Large ones could be good to use. If you have a mirror at home, just take a lamp home and try it out during the night. When bouncing, light will lose some intensity. And as you stated, you want the whole landscape filled. Don't know if 800w will do it. You might need 2k's. But not sure here.
-
If the tips Tim said don't work. Just reset the camera. You never know who used it before you and what they did. ALWAYS reset the camera before using it for the first time. Then set the settings in the menu to your likings. (only use if you know what they do)
-
You'll need extentions for your poles though. Longest are 3.7 meters. You can get extensions that will make them 2 meters longer. In this room it sounds like you also can use some stands for the wall lamps.
-
-
I've never shot with the XL1. But done tons of DV stuff. Both in 1/3" and 2/3" formats. Is there a knee or white clip function on the XL1? If so, use it. One thing I'd do is to take care that none of the actors have pale clothes on them. If they do have pale clothes this will make them blend in with the background, meaning it will lean more towards flat. The police lights sounds good. I'd watch out for using too much red on DV though. In my experience it doesn't respond too kindly to that colour. (When there is much of it in the frame) Especially when it hits faces and skin tones. But the blue should be nice with it. I'd try and go for a good matte box also. This because when you have a white room, lights will bounce off everywhere. This again will cause flaring into your lens. I don't mean those "cool" sun type flaring. I mean unwanted light will pass into your lens and make the picture seem flatter. A ordinary lens shader won't do the trick here. You want to light the scenes with direct light as I understand it? Some diffusion (at least 3/4 diffusion) might be smart to put on then, or the lights will come off very hard. And it will look ugly, I know this is what you want, but there is a difference between ugly lighting, and lighting a scene to make it look ugly. Maybe the 800w will be better to use then. Don't know how big your room is, so it's difficult to know how close you can place your lamps. If you can, a ceiling rig might be a good idea. This to motivate the light coming from for example fluorescent lights from above. Did you see the roof in 25th hour in the interview room? It had these square white boards. These can be taken off and you can place wooden planks here. Attach a baby mount to the wood and you can hang a lamp here quite safely. Remember to safely secure the wooden plank to the ceiling with some straps. If you can't use the ceiling like this, you can use auto poles. They come in different sizes and are very cheap to rent. You should be able to hang 2-3 redheads on them quite safely. Just use some strong tape under the wall attachments and you'll be fine. You should probably use some black wrap around the 800w as these tend to spill quite a bit. Be careful about making several shadows on the walls. Depending on the room, you probably need about 8-12 redheads if you want it to look similar to 25th hour. Don't know about wall spreaders. Don't know what it is actually. I'm Norwegian, sorry. The CU's in the interview room could be good to use some 650w with 1/1 full diffusion on them. Two redheads straight over the two actors sitting at the table could be good. About the cells. One way to do it is to kinda "create" 2-4 lamps in the room. By this I mean using the redheads. Have them pointing straight down. This will create a shadow under the actors faces. This will also make this room seem a bit darker than the interview room. Here again you could use the auto poles. One auto pole will cost around $5-6 a day. (US) Another way of doing it is bouncing the 800w off large white boards. This will also do the same effect, but with softer light.
-
Hey Finn. Doing the same thing at the moment. Have been shooting on and off since april. Shooting next week again. Used the HDV and support David's claim. Just shoot 50i and take it down to 25P in post. Works and looks great.
-
keeping it even in the real outdoors
Lars.Erik replied to laurababybird's topic in Lighting for Film & Video
Bounce cards are good, but won't do nothing but steal your time if it's overcast. You could use HMI as stated. Personally I never do outdoor scenes without HMI when shooting digital. Specially DV. These cams just aren't very nice in bright contrast. Some contrast yes, but filming outdoor with the sun pounding against you, you should try and get a HMI. The problem is that with a 12kw, you'll probably need some extra power. Generator. So if you are on a low budget this could be difficult. You could hire a couple of 2,5kw, and use them for the CU's. Can't be too far away though. Not like the 12kw. This will cost about the same as for just the 12kw. This is the place you will probably have the greatest problems anyway. One thing which you have to remember, is to keep the same f-stop on cutting CU's. The idea about the skies are good, but you might have a problem with cutting to just the skies. Might seem a bit odd. If you in some other way could show the changing skies, a wide angle shot with a window in the background which is reflecting the changing skies etc. Butterfly is a good idea. You should get one of these. But the one thing which is important, is that you should try and shoot the scene chronologically. For the wide angles, and I love to do this myself, I use mini magic arms. These I put close to the lens, all the way in to the glass, a couple of them. Attach them to the rods. When the arms are that close to the lens, they just look like shadow areas in the frame. Just gives the frame a better dynamic I think. -
What's your format? Film, HD, HDV?
-
When I'm doing wide angle shots interior, one of the most crucial elements I think of, and I keep reminding the directors I'm working with about this. Is that the wide angles have to be at a different angle than the CU's. This is because I tend to push in a lamp on these shots. And that's difficult to do with both shots in the same angle. This technique also allows me to work with different f-stops in the two shots. This is to, as you said, push the f-stop more open on the wide shots. I also have used ND with some success at times. Try and have the wide shots wide open. CU's between 2.8-4. (In general, always depending on what kind of story etc.) Using foreground is also a way to create DOF. But on wide angle it's more important to create DOF with light. That meaning having practicals, light vs dark in the shot etc. But this is a technique wich is very based upon the script.
-
Hello. Don't know if this will be good enough, but Paul Wheeler has written a book called "Practical Cinematography". The 2nd ed. is from 2005. Maybe someone with more film (film mostly digital) experience than me can say if it's a good replacement or not?
-
Hello there. I'm a DoP who been mainly doing digital. Now I have a new documentary (90 mins) which is to be shot on different formats. It will all be blown up to 35mm. 50% shot on HDV, 35% on DVCPRO or HD, (all digital on progressive mode) and the remaining on S16. It will be cut with film clips (16 & 35), from Italian films from the 60's and 70's. The HDV shooting will be done without any filters on the camera. Basically because we want to portrait the subjetc as he is without any diffusion. (He's got HIV and used to be a well known actor in Italy). The S16 shooting will be done by another DoP. (Inserts) The DVCPRO/HD will be done in Rome. Using a wide angle lens and a telephoto lens. (Haven't decided which yet. Budget is still being prepared.) I want this to be a look which is different from the HDV. Both picture wise and movement wise. I want to use a 1/4 Pro-Mist, add some Tiffen 812 and Polarizers, grads (SE) and maybe som Ultra constrast filters. I basically want the surroundings and the subject to look warmer and more healthy than in HDV. The film will be in both natural surroundings and tungsten/HMI lit surroundings. Some of the HDV might be b&w (post). Will then use a yellow or orange filter for this probably. My question is this: will the filters and menu settings be a not so wise choice when blowing up to film. I know that blowing up will make digital seem a little more soft than it is. So I won't be using any hard soft filters. But any menu settings I shouldn't use/or should use, when going to 35mm? If you have any experience in this, any tips and tricks will be appreciated.
-
I agree with most people here. A good film. You've chosen good music to the film. Most shots are well composed. This is a very good student film. I really don't have a problem with not hearing the enviroment sometimes, as someone stated. But I thought it was a bit long actually. Some parts I were thinking, "come on, get on with it". Some shots which clearly are on a tripod, sometimes move a bit, like it's a mistake. Have to agree with Meach, the pacing sometimes seemed off. Sometimes your shots aren't that well composed, the focus point of the shots seem a bit off. (But don't worry, most shots are of good composure :D ) The highlights of your film, street lights etc, they would have been great with a Pro-Mist 1/2 on them. But as you've stated, it was a no budget film. But maybe the after effects has some elements which you could have produced the same effect on? But congrats, this is a good film. Fun to watch. Good luck with your next project.
-
Yes, sorry. Got it backwards. Ratio of 5:1, I really meant 32:1, meaning a 5 f-stop difference.