

Guy Holt
-
Posts
680 -
Joined
-
Last visited
Everything posted by Guy Holt
-
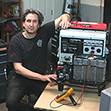
 Its time to revive this thread of indie-tricks-of-the-trade with one that makes it possible to create realistic artificial daylight on a tight budget. The problem to using natural light to create the golden look of sunset is that both the light level and color temperature of a natural sunset changes so rapidly that when you get back to your edit suite you find that your shots don’t match. It is such a problem that big budget productions move the scene onto a stage where they have complete control. When it comes to simulating natural daylight on a stage, it is important to remember that there are two components to daylight: hard direct sun and soft diffuse sky-shine. Because direct sunlight is a very hard source that creates crisp shadows, the traditional approach is to use a large Fresnel like a 20/24K to simulate direct sunlight. To create the feel of sky shine, the soft diffuse light bouncing off the atmosphere and back to earth, big budget pictures use large soft boxes consisting of 8’ Quasar Science LED tubes. Unfortunately this is also a very expensive approach. Left: 24kW Tunsten Fresnels create the feel of direct sun. Middle: Large soft boxes consisting of 8’ Quasar Science LED tubes creates the feel of sky shine. Right: smaller soft boxes consisting of 8’ Quasar Science LED tubes creates ambient light in the interiors of the set. It is less expensive to shoot on location and use an 18kw HMI to bring light in from the outside. The head is big enough to reduce the contrast between the exterior and interior, but it too comes at a high cost because 18ks require large generators. The cost of blimped studio generators has got to be one of the biggest hurdles to obtaining good production values in low budget digital cinema productions. Not only are blimped generators expensive to rent, but they also come with hidden costs. Since rental trucks like those from Ryder or Penske are not equipped to tow, you quite often have to hire the rental house's grip truck to tow them or pay extra to have them delivered. And, since most rental houses require that one of their employees drive their trucks (for insurance reasons), the production has to hire a driver at roughly $575/10hrs - which is probably more than anyone else on a typical indie crew is getting paid. All of this makes the use of a 18kw to simulate direct sunlight very expensive. This is another one of those situations where scouting, choosing the right location, and planning your production day is worth more than all the grip trucks, tow generators, and large HMIs in the world. The indie trick-of-the-trade is to choose a location with northern exposure so that the soft light coming through the window will be consistent through out the day. Given the low intensity of this soft sky-shine, a 4kw ARRIMAX M40 is all that is needed to create the feel of hard direct sunlight If you can’t find a location with northern light, the next best thing is to fly a silk outside the window in order to cut its intensity and take the direction out of the natural sunlight and then bring a M40 in from outside to create a consistent artificial sunlight. Since the hard direct artificial sunlight will be unflattering as a key light for talent, I suggest you use for the talent’s key source a smaller HMI, like a 1800W ARRIMAX M18, through a diffusion frame, upstage of the talent to create a soft reverse key. Diffusing the M18 will take the “source-i-ness” out of it and placing it between the talent and the window will give you a nice reverse key modeling of your talent and enable you to control its spread inside the room so that it doesn’t wash out the contrast of the scene. This indie approach will give you very high production values at a fraction of the cost of the big budget approaches described above because this combination of a M40 and M18 doesn’t require an expensive diesel tow plant. Another indie trick-of-the-trade is to use a small transformer to step-down the 240V output of a modified Honda EU6500 or EU7000 putt-putt generator to create a large enough circuit at 120V to run a M40 plus additional lights. A nice final touch is to fly a branch-o-loris just outside the window to create a little leaf break-up on the interior set. This combination of an ARRIMAX M40 and portable Honda generator has become the standard approach for indie movies because it eliminates the need for dangerous tie-ins or expensive tow generators. In fact, a milestone of sorts was recently set on the north shore of Boston. The feature film Abe and Phil’s Last Poker Game starring Martin Landau (Mission Impossible) and Paul Sorvino (Good Fellas) shot its’ principle photography with nothing more than a Honda EU6500is. Martin Landau and Paul Sorvino in a scene from Abe and Phil’s Last Poker Game. No low budget indie, Abe and Phil's Last Poker Game was produced by Peter Pastorelli, Marshall Johnson, and Eddie Rubin. Peter Pastorelli’s credits include the Netflix film Beasts Of No Nation, which he produced alongside Johnson, and The Disappearance Of Eleanor Rigby, which stared James McAvoy and Jessica Chastain. Johnson’s other credits include Blue Valentine and The Place Beyond The Pines with Ryan Gosling; Rubin’s credits include Love and Honor. Left: Honda EU6500is modified for 60A Output. Center 300ft cable run through the assisted living complex. Right: ARRIMAX M40 head creating sunny look on a rainy day. Abe and Phil’s Last Poker Game follows Dr. Abe Mandelbaum (Landau), who has just moved into a luxuriant assisted living facility with his ailing wife. After forming an unlikely friendship with a womanizing gambler (Sorvino), their relationship is tested when they each try to convince a mysterious nurse, played by Maria Dizzia (Orange Is The New Black), that he is her long-lost father. 60A HD Plug-n-Play Transformer/Distro powering ARRIMAX M40 and M18 on the set of Phil & Abe’s Last Poker Game. The principle location for the movie was a sprawling new assisted living facility in Newburyport Ma. At only 60% occupancy, the production was able to secure a whole wing of the facility, which was ideal except that the loading dock, where they could operate a generator, was on the other side of the complex. Paul Sorvino in a scene from Abe and Phil’s Last Poker Game. To compensate for the drop in voltage over the long cable run, the production used one of our 60A Transformer/Distros, which enables voltage to be stepped up in 5% increments. This feature enabled them to maintain full line level even after running out 300’ of cable between the Honda outside and set. To power additional lights off the generator, the production came out of the Transformer/Distro with a 60A Bates Siamese. They powered the M40 with one side of the Siamese. From the other side, they ran out 60A Bates extensions through out the wing, breaking out to 20A pockets to power smaller lights wherever they needed. Martin Landau and Paul Sorvino in a bar scene from the Abe and Phil’s Last Poker Game. This way they could run up to three 1.8kw Arri M80s, or a 4kw M40 when they needed a bigger source, without having to worry about tripping breakers. With ARRIMAX reflectors, these heads were plenty big enough to light scenes in the day room, dinning area, and lounge of the residence wing. ARRIMAX M40 powered by modified Honda EU6500 and 60A Transformer/Distro lights bar scene from Abe and Phil’s Last Poker Game. Using a small portable generator also enabled the production to save money by building out a rental box truck since they didn’t have to tow a large diesel plant. This also proved to be advantageous when the production went out on location in the streets of Newburyport. An old port city on the north shore of Boston, Newburyport is a warren of narrow streets through which it would have been difficult to tow a diesel generator. Abe and Phil’s Last Poker Game is, as far as we know, the first major film to take advantage of the combination of improved camera imaging, more efficient light sources, and Honda generators customized for motion picture production. Guy Holt, Gaffer, ScreenLight & Grip, Lighting rental and sales in Boston
 -
Using HMI with a regular generator? Questions
Guy Holt replied to Roger Alexander's topic in Lighting for Film & Video
There is a lot of misinformation on the web about running HMIs on generators because it is a complicated subject. It matters not only what type of generator you use but also what type of ballasts your lights use. The harmonic noise that magnetic and non-PFC electronic ballasts (both HMI & Kino) kick back into the power stream can have a severe adverse effect on the power waveform of conventional AVR generators like yours. The harmonic noise these light sources generate will not have nearly as bad an effect on the power supplied by an inverter generator. But, since the M18 ballast is power factor corrected it will not effect the power quality of either types of generators. You also don’t have to worry about the ballast drawing a lot of current when it strikes. Magnetic ballasts strike high and then settle down. Electronic ballasts like the one the M18 uses strikes low and then ramps up to its’ full load. But, since the 1800W rating for your generator is for a continuous load, and the 1800W M18 will operate continuously, you are right on the threshold of the generator’s capacity so there is no telling if it will work until you try. The worst that will happen is that the ballast will shut down from under voltage. For more details on what type of generator to use with HMIs and fluorescent lights read the article I wrote for our company news letter on the use of portable generators in motion picture production. This article is cited in the 4th Edition of Harry Box's "Set Lighting Technician's Handbook." Of the article Harry Box exclaims: “Great work!... this is the kind of thing I think very few technician's ever get to see, and as a result many people have absolutely no idea why things stop working." “Following the prescriptions contained in this article enables the operation of bigger lights, or more smaller lights, on portable generators than has ever been possible before.” The article is available online at http://www.screenlightandgrip.com/html/emailnewsletter_generators.html. Guy Holt, Gaffer, ScreenLight & Grip, Lighting Rental & Sales in Boston -
Building a studio. Advice selecting light.
Guy Holt replied to George Mills's topic in Lighting for Film & Video
I have never found mirrors in the grid very effective. Usually the lights you are using to light the table top are in the mirror as well and seldom do you want a direct overhead unless you are doing a cooking show. More often than not you want a 3/4 overhead shot. A camera jib will eliminate all the rigging and is much more flexible. The advantage of color changing LEDs with dmx is far outweighed by their disadvantages. They are expensive, heavy, and the color rendering is poor. Seldom do you need saturated colors in studio productions, and without the need to balance daylight, traditional quartz lights are, IMHO, still superior for studio production applications. They are cheaper, more reliable, offer a true fresnel quality of light, and better color rendering because of their continuous color spectrum. Guy Holt, Gaffer, ScreenLight & Grip, Lighting Rental & Sales in Boston -
Building a studio. Advice selecting light.
Guy Holt replied to George Mills's topic in Lighting for Film & Video
I operated a 40 x 40 studio for a number of year and I wouldn't waste money on HMIs for a studio package. After looking at your previous spots it looks like you will need to light a cyc wall. For that I would recommend a couple of 6k space lights. If you add a heavy diffusion (like 216) to the silk dot on the bottom they will give you a very even wash of the back wall, cyc, and floor, as well as a soft back light on your talent. I would have at least 2 each 300, 650, 1k, 2k Fresnels to light set elements. A 5k Fresnel will come in handy if you need a large hard directional source to re-create sunlight through a set window. The Arri S60s are good for talent keys but pricey for the application. You might consider the classic Kino Image 85 instead. Don't overlook the grip gear you will need. You will need probably 12 C-stands, Flags & Nets of various sizes, 4x4 Floppies, open frames and silks. A set of Apple Boxes and miscellaneous mounting hardware like baby offsets, side arms, baby wall plates, triple headers, and a couple of boom arms. It would be worth having an 8x8 frame with assorted diffusion if you want to make a large soft source with the 5k. For the 8x frame you will need a couple of high boy roller stands. You will definitely need extension hangers with stirrups to hang your lights from the grid. Use this link to a basic small studio package. There is a reason this is the basic small studio package that you will find in every market - it is the most versatile. Guy Holt, Gaffer, ScreenLight & Grip, Lighting Sales & Rental in Boston -
Cheapest Method For LOTS of Light?
Guy Holt replied to Max Field's topic in Lighting for Film & Video
One way to use large tungsten lights, or more smaller ones, is to step-down a 240V circuit to 120V with a transformer. Common household 240V circuits include Range Plugs, Dryer Plugs, and special receptacles installed for Window Air Conditioners. Like it does with the enhanced 7500W/240V output of our Honda EU7000 Generators, a step down transformer will convert the 240 volts supplied by these household 240V receptacles to 120 volts in a single circuit that is the sum of the two single-phase legs of 30/50 amps each. Now that you have a larger (60A or 100A) 120V circuit, you can operate larger tungsten lights, or more smaller ones, than you could otherwise. I regularly use transformers to power not only 5ks, but also big HMIs (2.5-4Kw) in situations where a tie-in is not an option and the budget doesn’t permit for a tow generator. For example, I have used this approach repeatedly at a historical mansion in Easton MA called the Ames Estate. Scene from "Unsolved History" powered from 50A/240V range outlet through step-down transformer/distro at the Ames Estate. A popular state fee free location, the Ames Estate, like many historical house/museums, does not permit tie-ins and the electrical wiring in the house is so antiquated that it is unusable. Fortunately, they have a 50A/240 volt circuit in the carriage house for a welder they use to repair the mowers they use at the park. Our standard mode of operation when shooting there is to run 250V extension cable from the welding receptacle to our 60A Full Power Transformer/Distro placed in the entry hall of the house. Using a 60A Siamese at the Transformer/Distro, we then run 60A 6/3 Bates extensions, down to the library, to the second floor, and back to the maid’s pantry. At the end of each run we put another 60A Siamese. A 60A snackbox on one side of the Siamese gives us 20A branch circuits. The other side we leave open for a large HMI or Quartz Light. Now we can safely plug HMIs up to 4kw, or Tungsten lights up to 6kw, into our own distribution anywhere in the house. Typhoid Mary in quarantine on an island in New York's East River. Note the view out the window of the East River shoreline at the turn of the century. To maintain continuity between shots on these dramatic historical recreations, we usually bring a 4kw HMI Par or 5k Tungsten Fresnel (depending on the effect we are after) in a window on one side of the room as a sun source and a 1200 par through a window on the other side as a northern light source. Lights positioned outside, we power off of our modified Honda EU6500is through a Transformer/Distro. We are able to power both lights off our modified EU6500is because our 60A Full Power Transformer/Distro steps down the enhanced 7500W output of the generator to a single 60A/120V circuit (for more details on how this is accomplished I suggest you read my newsletter article on the use of portable generators in motion picture production available on our website. And, since the Honda EU6500is can be placed right on the lawn, we are saved from running hundreds of feet of feeder back to a tow generator in the drive. The exterior of the actual location used for the quarantine island. A 30' blowup of a picture of the East River at the turn of the century was rigged outside the windows of a house in Arlington MA. We have been able to use this same basic distribution package (two Transformer Distros, 1- modified EU6500is) at numerous museums and historical houses throughout New England including Sturbridge Village. Fortunately for us, to make ends meet, many historical houses rent themselves out for events and weddings. For that reason, they usually have at least one updated service with 30 or 50 Amp 240 volt circuit for the warming ovens of caterers. By giving you safe and legal plug-in access to more house power through common 240V house outlets, a transformer makes it possible to use less expensive tungsten lights without the need for tie-ins or generators. Guy Holt, Gaffer, ScreenLight & Grip, Lighting rental and sales in Boston -
Lighting EXT Wide Shots - DAY
Guy Holt replied to Carlos Herrera's topic in Lighting for Film & Video
The approach that I find works best is to shoot the establishing master shot when the sun is in a backlight position. Up to that point I shoot the close coverage under a full silk. Shooting the coverage under a silk offers a number of advantages. If the sun breaks through the canopy, the silk takes the directionality out of the sun and knocks down its’ level by two and half stops. Now a smaller HMI light will have more of a modeling effect. Shooting into talents' down side under a silk, I find that a 4k Par through a diffusion frame is a sufficient key source for a two shot. If you wait to shoot the wide coverage until the sun has moved around to a back light position, your background is also back-lit so the discrepancy in exposure between the background and your talent to camera is not that great and so you can open up to gain exposure of your talent in the foreground without burning out the background. Also, when your background is back-lit, it does not over expose because of the discrepancy in levels under the silk and outside the silk – it helps to strike a good balance. Also, your background looks better because it is not flatly lit, but has some contrast. Finally, with the sun in a backlight position, if it comes through the canopy, the shadows of the silk frame and stands are thrown forward, which enables you to frame wider before picking up the shadow of the hardware. A good example of this approach is a scene I lit for a low budget feature that took place around a campfire in a small clearing surrounded by woods. Surrounded on all sides by woods, we knew that we would lose direct sunlight in the clearing early in the day and would need lights. We also knew that the scene was going to take all day to shoot because of its’ extensive dialogue, so we figured out where the sun was going to be throughout the day and where it would look best for our establishing wide shot. Where it was a two shot, mostly over the shoulder of one character talking to the second character who was standing with his back to the campfire with the woods behind him, we decided to wait until the sun had moved into a near back light position to shoot the establishing shot. So we shot our close coverage first with nothing more than a 4k Par and 1.2k Par under a 20x light soft frost on top of which we threw leaves. The 4k was heavily diffused and positioned so that it gave the talent the most attractive modeling. The 1.2kw was positioned as a backlight where the sun would be when we would eventually shoot the wide - this way there was always an edge in every shot for continuity. When the time came to shoot the establishing shot, the shadow of the overhead frame and stands were thrown forward and did not interfere with the wider framing. Since we were still shooting under the Frost, we were wider open on the iris and so our exposure dug into the dark woods and brought out more detail. As an unexpected added bonus, the smoke from the campfire drifted into the woods, creating shafts of light where the sun broke through the tree canopy. What would have been a high contrast scene without lights, turned into a beautifully lit scene, and was accomplished without a lot of amps. The whole scene was lit with nothing more than a 4k and 1.2k Par and powered by nothing more than a 60A/120 circuit from a modified Honda EU6500is/Transformer Gen-set. Guy Holt, Gaffer, Screenlight and Grip, Lighting rental and sales in Boston. -
Best way to immitate soft moonlight (max 10kW)
Guy Holt replied to Nojus Drasutis's topic in Lighting for Film & Video
If the torches set your exposure at f4 with a 250 ASA stock you will need more Foot Candles than you can get bouncing a couple of M18 into a 12x frame at a distance. You might look into renting an Airstar Gaffair 4k HMI balloon. A modified 7500W Honda EU6500is generator and 60A Full Power Transformer/Distro powering 4kw HMI and 8kw Tungsten AirStar Balloons at an IATSE Local 481 Balloon Seminar. It will be a lot easier to fly than a large 12x frame bounce, give you better results, and can be powered off a Honda EU7000 or EU6500 as we did for the IA training workshop pictured here. Guy Holt, Gaffer ScreenLight & Grip Lighting Rental & Sales in Boston -
LED lights theory - CRI x TLCI x GAI
Guy Holt replied to Jan Valis's topic in Lighting for Film & Video
CRI is not the best indicator to judge the color rendering capability of LED fixtures because it is a measurement that can be messaged by manufacturers to give high readings without giving good results. For a more accurate assessment of the color rendering capability of LED fixtures see The Academy of Motion Picture Arts and Sciences' “Solid State Lighting Technical Assessment" - a research project in which they systematically tested and compared the LED technology available at the time to Incandescent and HMI light sources. On their website they have posted not only side by side comparisons of chip charts exposed under each light source but also set pieces, wardrobe, and make-up. To maintain neutrality, no brand names are mentioned in their results, but they chose lights that reflect the various approaches taken by the major manufacturers of LED fixtures for motion picture applications. You can find a link to the Academy of Motion Picture Arts and Sciences’ “Solid State Lighting Project Technical Assessment", as well as other information regarding Mole & Litepanel LEDS on our website at http://www.screenlightandgrip.com/html/emailnewsletter_generators.html. Guy Holt, Gaffer ScreenLight & Grip Lighting Rental & Sales in Boston -
Lighting a Forest with No Budget
Guy Holt replied to Antonio Polito's topic in Lighting for Film & Video
With the increase in the sensitivity of camera sensors you can light a lot more than a student film with the Honda EU6500/7000 generators. Besides the Chevy Volt commercial I mentioned above, features are being produced with nothing more than Hondas. For example, the feature film “The Last Poker Game” starring Martin Landau (Mission Impossible) and Paul Sorvino (Good Fellas) shot its’ principle photography with nothing more than a Honda EU6500is. Martin Landau and Paul Sorvino in a scene from “The Last Poker Game” It is a milestone because “The Last Poker Game” is no low budget indie. It was produced by Peter Pastorelli, Marshall Johnson, and Eddie Rubin. Peter Pastorelli’s credits include the Netflix film Beasts Of No Nation, which he produced alongside Johnson, and The Disappearance Of Eleanor Rigby, which stared James McAvoy and Jessica Chastain. Johnson’s other credits include Blue Valentine and The Place Beyond The Pines with Ryan Gosling; Rubin’s credits include Love And Honor. Left: Honda EU6500is modified for 60A output. Center: 300ft cable run through the assisted living complex. Right: ARRIMAX M40 head creating sunny look on a rainy day. “Last Poker Game” follows Dr. Abe Mandelbaum (Landau), who has just moved into a luxuriant assisted living facility with his ailing wife. After forming an unlikely friendship with a womanizing gambler (Sorvino), their relationship is tested when they each try to convince a mysterious nurse, played by Maria Dizzia (Orange Is The New Black), that he is her long-lost father. 60A HD Plug-n-Play Transformer/Distro powering ARRIMAX M40 and M18 on the set of the “Last Poker Game” The principle location for the movie was a sprawling new assisted living facility in Newburyport Ma. At only 60% occupancy, the production was able to secure a whole wing of the facility, which was ideal except that the loading dock, where they could operate a generator, was on the other side of the complex. Paul Sorvino in a bar scene from the “Last Poker Game” Given the light sensitivity of the Red that they were shooting on, the production was able to get away with nothing more than one of our modified Honda EU6500is generators. To compensate for the drop in voltage over the long cable run, the production used one of our proprietary HD Plug-n-Play Transformer/Distros that enable you to step up voltage in 5% increments. This feature enabled them to maintain full line level even after running out 300’ of cable between the generator and set. From the Transformer/Distro on set the crew then ran out 60A Bates extensions through out the wing, breaking out to 20A pockets wherever they needed. Martin Landau and Paul Sorvino in a bar scene from the “Last Poker Game” This way they could run up to three 1.8kw Arri M80s, or a 4kw M40 when they needed a bigger source, without having to worry about tripping breakers. With ARRIMAX reflectors, these heads were plenty big enough to light scenes in the day room, dinning area, and lounge of the residence wing, everything else they plugged into the walls. ARRIMAX M40 powered by modified Honda EU6500 and 60A HD Plug-n-Play Transformer/Distro lights bar scene from the “Last Poker Game” Using a small portable generator also enabled the production to save money by building out 24’ rental box trucks to serve as their electric and grip trucks since the trucks didn’t have to tow a diesel tow plant. This proved to be advantageous when the production went out on location in the streets of Newburyport, MA. An old port city on the north shore of Boston, Newburyport is a warren of narrow streets through which it would have been difficult to tow a diesel generator. “The Last Poker Game” is, as far as we know, the first major film to take advantage of the combination of improved camera imaging, more efficient light sources, and Honda generators customized for motion picture production. If you want to see it, it is available from Amazon. Guy Holt, Gaffer ScreenLight & Grip Lighting Rental & Sales in Boston -
Lighting tungstens and flicker at 200fps
Guy Holt replied to Ale Capo's topic in Lighting for Film & Video
If you are bouncing or shooting your lights through diffusion, then you can eliminate flicker with small tungsten lights by shooting multiple lights into your bounce card or diffusion frame. The trick is to make sure the lights are on different legs of your electrical service. If you are shooting in a house, where your electrical service will be single phase, then you would shoot two lights into your bounce board. If each light is on a different leg of the electrical service, then one light will be coming up in intensity as the other light is diminishing in intensity. The net is effect is continuous light output and no flicker. If you are shooting in an industrial setting, where your electrical service will be three phase, then you would shoot three lights into your bounce board. Guy Holt, Gaffer ScreenLight & Grip Lighting Rentals & Sales in Boston -
Lighting a Forest with No Budget
Guy Holt replied to Antonio Polito's topic in Lighting for Film & Video
Using a low camera like the A7 will greatly reduce the number of foot candles required. Cinema 5D posted some pretty amazing demo footage shot in near total darkness with a Sony A7S II with a Sigma 20mm F/1.4 Art Lens. As you can see in the grab frames, at an ISO 50’000 the camera/lens combination is capable of getting an image under nothing but moonlight (use this link to see the complete video.) The low light capability of cameras like the A7 does not mean that you will not have to light night scenes. The problem with working with available light, including moonlight, is that it is not always what you want for a scene. A scene lit in a style that furthers the narrative is much preferable to shooting under available light, even if it is moonlight. This trend towards making pictures “without too much help from the electric department” is IMO troubling because the DOP is giving up authorship of the image. If his/her options are limited to what the great Gaffer in the sky happens to provide, the creative options are limited. And if by chance the available light does happen to coincide with what is creatively desired, it will invariably change in the course of the production, leaving the editor with a continuity nightmare. IMO, it is better to tame the available light, and use lights to create a consistent and aesthetically appropriate look that models your set and talent as you wish, than to limit yourself to what your dealt. Fast cameras like the A7 have a downside as well. At an ISO of 50’000 the moon is what the sun is during the day – something that has to be reckoned with. The moon rises and moves through the night sky, which means that you will need to chart its position in the sky and stage your action accordingly as we do with the sun. If not, you will need to fly overheads to diffuse or block moonlight as we do sunlight if it is not optimum for the effect you are trying to create. And, because it too will go behind a cloud, you would be better off lighting your scene for continuity. Set of Chevy Volt Spot powered by nothing more than a Honda EU6500 But it is pretty amazing what can be done with the new high ISO cameras. Something of a milestone was recently set when a commercial for the Chevy Volt was shot with nothing more than Hive Plasma lights operating on batteries and a 60A generator. Normally, sets for car spots are cluttered with diesel generators, large feeder cables and the multiphase distribution boxes required to power big lights, cameras, and basecamp trailers. A proof of concept spot for Hive, the spot was the first car commercial ever made where everything was powered by batteries and a 60A Honda EU6500is generator. Use this link to see the commercial and the behind-the-scenes “making of” video. Guy Holt, Gaffer ScreenLight & Grip Lighting Rentals & Sales in Boston -
Not a ballast but a transformer. Using a 240v-to-120v step-down transformer is without a doubt the most reliable way to power a 2k on wall out-lets. A transformer will convert the 240V output of a Range Plug, Dryer Plug, or the receptacles installed under windows for air conditioners into a single large 120V circuit that is more than capable of powering the 16.8A load of a 2k at 120V. If you outfit the transformer with a 60A Bates receptacle, it will enable you to use a real film style distro system that will minimize line loss over a long cable run, and provide a 20A circuit right at the light. Common 240V sources found on interior locations include Range Plugs, Dryer Plugs, and special receptacles installed for Window Air Conditioners. Use this link for more detailed information on successfully operating large tungsten lights up to 5ks on wall outlets. Guy Holt, Gaffer, ScreenLight & Grip, Lighting Sales & Rentals in Boston
-
Lighting a Forest with No Budget
Guy Holt replied to Antonio Polito's topic in Lighting for Film & Video
You can always take the approach that Shelly Johnson did in Wolfman: But instead of using large lights down an embankment to light smoke to separate the layers of trees and characters over a large area, use instead a ground row of highly efficient color changing LED lights, like the Color Kinetic ColorBlaze 72 fixtures. The 6' Color Kinetics ColorBlaze 72 RGB LED Each fixture is 6 feet long and can be strung end-to-end to cover a long distance. Use a location where the lights can be down an embankment as in these frame grabs from Wolfman. If you use the newer dmx four channel RGBA fixture, you will be able to dial in the color blue you want without losing output to color gels as you would tungsten lights. There is no 60A Bates modification for the Honda EU7000. The latest edition of the NEC mandates that any portable generator under 10kw with 240V output be GFCI protected. To make it code compliant Honda has put GFCIs on the new EU7000 leaving no room for the Bates modification on the redesigned power panel. Besides, that modification provided only a 50A/120V circuit, not a real 60A/120V circuit. The only way to get a full 60A out of the EU7000 or EU6500 is to use a portable transformer as a distro. This approach offers a number of benefits over the Bates panel mod, including voltage boost to compensate for line-loss, the ability to parallel two EU6500/EU7000s, as well as bring the EUs into OSHA compliance. It is an all around more versatile approach and given that many HMIs like the Jokers generate residual currents on the ground that will trip GFCIs, it is now the only means of using these lights reliably on Hondas. Using a small 7.5 kVA transformer to step down the 240V output of a modified Honda EU7000, you will be able to use up to 15 Color Kinetic ColorBlaze 72 fixtures to light haze - enough to cover 120 linear feet of woods. To use a larger generator requires running feeder cable through the woods (there is nothing worst than running cable through woods at night.) Guy Holt, Gaffer, ScreenLight & Grip, Lighting Rentals & Sales in Boston -
Gel, Transmission, and Colour Temperature
Guy Holt replied to Hirokazu Taka's topic in Lighting for Film & Video
Most color correction and color affect gels are designed for the spectral distribution of tungsten bulbs. Besides, the now well established deficiencies in the color output of LEDs, they also have the problem that, where you know what to expect when you put a color correction gel, say ¾ CTO, on HMI or Tungsten lights, you don’t know what you will get putting that same gel on an LED light. The reason is that because of their discontinuous spectrum, the use of CC gels on LEDs have unintended and undesirable consequences. 3/4 CTO gel passes only certain wavelengths (represented by the spectral transmission curve (center) of daylight (left) to create the color spectrum approximating that of a 3200K tungsten light (right.) The same 3/4 CTO gel applied to a daylight LED (left) passes the same wavelengths (represented by the spectral transmission curve (center)) to create an unknown color spectrum that does not approximate a 3200K tungsten light. A good example of this is what happens when you try to convert the 5500K out-put of Phosphor White LEDs to 2900k with Full CTO gel. Where you can do it with some success with HMIs because there are long wavelengths in it’s continuous spectrum to pass disproportionately to the blue part of the spectrum to achieve a nominal 2900K, since LEDs don’t put out much beyond 625nm, there is not much for a filter to pass to rebalance the light output to 2900K, so the “corrected” light is too cool. Another undesirable consequence comes from the fact that Full CTO is designed to pass extra green (there is a bump in the spectral transmission curve of Full CTO in the green portion of the spectrum) and so it creates, given the amount of green inherent in Daylight LEDs to begin with, a disproportionate amount of green (creating an overall green bias) to the "corrected" light when used on Phosphor White LEDs ( link to test results demonstrating this with a Lightpanel 1x1 Daylight Spot.) The gel pack that eventually made the Lightpanel 1x1 Daylight Spot in the test marginally similar to a tungsten light, was only able to do so at the expense of two stops – so much for the greater efficiency of LEDs. Guy Holt, Gaffer, ScreenLight & Grip, Lighting Rental & Sales in Boston -
Maybe because I make my livelihood lighting movies, this whole available light approach and lighting to the monitor really bothers me. I get it: lighting takes time, man power, and it isn’t cheap. The high cost of blimped studio generators has got to be one of the biggest hurdles to obtaining good production values on a low budget. Not only are blimped generators expensive to rent, but they also come with hidden costs. Since rental trucks like those from Ryder or Penske are not equipped to tow, you quite often have to hire the rental house's grip truck to tow them. And, since most rental houses require that one of their employees drive their trucks (for insurance reasons), the production has to hire a driver at roughly $575/10hrs - which is probably more than anyone else on a typical low budget crew is getting paid. All of this makes the creation of light expensive. It doesn’t have to be that way. I have used the approach described above (of using step-down transformers on 240V wall outlets and portable Honda generators) to eliminate the need for tie-ins or a tow genny on many of the historical documentaries I have gaffed over the years. For example, I have used a similar package repeatedly at a historical mansion in Easton MA called the Ames Estate. A popular state fee free location, the Ames Estate, like many historical house/museums, does not permit tie-ins and the electrical wiring in the house is so antiquated that it is unusable. Fortunately, they have a 50A/240 volt circuit in the carriage house for a welder they use to repair the mowers they use at the park. Our standard mode of operation when shooting there is to run 250V extension cable from the welding receptacle to a 60A Full Power Transformer/Distro placed in the entry hall of the house. Using a 60A Siamese at the Transformer/Distro, we then run 60A 6/3 Bates extensions, down to the library, to the second floor, and back to the maid’s pantry. At the end of each run we put another 60A Siamese. A 60A snackbox on one side of the Siamese gives us 20A branch circuits. The other side we leave open for a large HMI or Tungsten Light. Now we can safely plug 1200 - 4000W HMIs (or even a 5k Quartz) into our own distribution anywhere to create the lighting that is most appropriate for the scene. (Scene from "Unsolved History" using a 4k Fresnel powered from a 50A/240V range outlet through step-down transformer/distro at the Ames Estate) A good example of this is a show we shot at the Ames Estate for the show “Unsolved History” on presidential assassinations. The show called for a scene of Alexander Graham Bell using the metal detector that he invented to find a bullet that was lodged in President Garfield. Up to that point, the president’s doctors had used the somewhat medieval approach of probing for the bullet in the president’s torso with their hands. To emphasize the more enlightened scientific approach Alexander Graham Bell took we decided to use a strong light flooding the room at his back, as if he had pulled the curtain back to shed the light of scientific reason on the problem. This approach left the president’s attending physicians literally in the shadows, which was fitting thematically since their approach was from the dark ages. To create a crisp light that would cut the smoke in the room in a dramatic fashion, we used a 4k Fresnel in the hall powered through a 60A transformer/distro. In the screen grab above the shaft created by the scope Alexander Graham Bell holds in his hand directs the viewer’s attention to the president lying in the bed. You don’t find this kind of light – it can only be created. And given this approach, even with an Alexa you would still have to light the interior of the room to make sure the president’s attending physicians did not fall too deeply into shadow, or that Graham Bell’s assistant in the forground was not a total silhouette. And given the low budget and tight schedules of historical documentaries, we could only take this creative approach to lighting because I could light the scene with my meters while the cameramen was shooting elsewhere in the house. Guy Holt, Gaffer ScreenLight & Grip Lighting Rental & Sales in Boston
-
Here’s another example why working with available light hardly ever works except for the most basic quick shot. If by chance the daylight coming through the window just happens to coincide with what is creatively desired, it will invariably change in the course of the production, leaving the editor with a continuity nightmare. If it is a long scene that will take the better part of a day or, god forbid, several days, you will need to control the daylight coming in from outside rather than limit yourself to a window of opportunity. It is better to diffuse and take the direction out of the natural daylight by flying a silk or solid out the window, and then bring in your own consistent lighting. A good example of this approach is an American Experience program titled “The Most Dangerous Women in America” about Typhoid Mary that I lit for PBS. For part of her life Typhoid Mary was quarantined on an island in New York's East River. Typhoid Mary in quarantine on an island in New York's East River. Note the view out the window of the East River shoreline at the turn of the century. Because New York’s East River today looks nothing like it did when she was in quarantine, we used a 30' blowup of a picture of the East River at the turn of the century rigged outside the windows of a house in Arlington MA. We wanted to overexpose the exterior by one stop so that it would look realistic and hide the fact that the exterior was a blow-up. As you can see in the production still of the exterior of the actual location used for the quarantine island, we rigged a solid over the porch windows and the blow-up to keep the sun off both. That way we could light the blow-up and interior so that it remained consistent even though the sun moved on and off the porch in the course of the day. To take the edge off the blow-up, we used a single scrim outside the window to help throw it out of focus. The actual exterior of Mary’s cottage was the backyard of a house in Arlington Ma with a 30’ blow up of a picture of New York’s East River shoreline at the turn of the century. To maintain continuity between shots, we brought a 4kw HMI Par in a window on one side of the room as a sun source and a 1200 par through a window on the other side as a northern light source. We powered both heads off a dryer plug in the laundry room of the house using a 60A transformer/distro. The two 2.5k Par lights used outside to light the blow-up were powered by a modified 7500W Honda EU6500is through a second 60A transformer/distro. Since the Honda EU6500is could be placed right on the lawn, we were saved from running hundreds of feet of feeder back to a tow generator. Use this link for more production stills of PBS and History Channel historical documentaries where I took a similar approach. Guy Holt, Gaffer, SreenLight & Grip, Lighting Rental & Sales in Boston
-
That you can get a serviceable image with an Alexa with available light doesn’t mean that you don’t need to light a shot. The problem with working with available light is that it is not always what you want for a scene. This trend towards making pictures “without too much help from the electric department” is IMO troubling because the DOP is giving up authorship of the image. If his/her options are limited to what the great Gaffer in the sky happens to provide that day, the creative options are limited. And if by chance the available light does happen to coincide with what is creatively desired, it will invariably change in the course of the production, leaving the editor with a continuity nightmare. IMO, it is better to tame the natural daylight, and use lights to create a consistent and aesthetically appropriate look that models your set and talent as you wish, than to limit yourself to what your dealt that day and take your chances. For example, say the director wants to go for a noir look for his film. Classic noir lighting is high contrast with deep shadows and hard light patterns thrown on the set. The quality (color temperature and hard/softness) and placement of a light is motivated by a source (practical or window) in the scene that is upstage of the talent. Which means, the talent is generally lit with reverse keys motivated by these practical sources. It doesn’t matter how sensitive the camera is because this is not found light. You create it and it helps to have a meter to do so. Guy Holt, Gaffer ScreenLight & Grip Lighting Rental & Sales in Boston.
-
There is an old saying that applies here: A successful man has the ability to change what he can. Accept what he can't change. And, have the wisdom to know the difference between the two. Going into any lighting situation, I first assess what I can change and what I can't given the time and resources available. I then set my key tone to accommodate the one thing I can't change. If, in this case, the bare practical bulb was prominent in the shot and it was important that we see the filament of the bulb, then you would set your key tone to properly expose the bulb. Of course that probably means that you will have to stop the camera down, which means that you now have to throw more light on the rest of the scene. But, with the old school method, you can now send the camera crew off to pick up some B roll, while you light the set according to your meters. Guy Holt, Gaffer, ScreenLight & Grip, Lighting sales and rentals in Boston
-
Without meters you are tethered to the camera and the camera can be a real bottleneck when it comes to each department of a production (Electric, Grip, Camera, Wardrobe, Make Up, Set Dec, etc.) having to accomplish what they have to accomplish before the camera can role again. The value of meters, and knowing how to use them, is that they provide you the information you need to light a scene in your mind's eye and then translate that to reality. Rob Draper, when he was teaching at the Maine Film Workshops, used to call it the Zen of Cinematography and tell this story about how he works. He said he would always plot the lighting for a scene in advance on paper – specifying every detail down to the FC candle output from each instrument. This allowed him to pass off to his Gaffer all the details he needed when he arrived on set. Rob would then go off to craft service to get a cup of coffee. By the time he finished saying good morning to everyone (client relations are very important for a DP), and got back to the set, the lights were starting to come up. With a cup of coffee in hand, he possessed a clarity of mind that enabled him to now take the lighting to the next level. He found time within time to address the finer nuances of shading and color: the Zen of cinematography. This is what you lose when you tether yourself to the camera. The old school method was that the DP would choose the camera stop, which would establish the Key Tone - say T5.6 for deep focus. Having chosen his exposure he can then calculate how many Foot Candles (FC) he needs on different elements of the scene. To figure out how many FC you need for exposure, all you need to know is that it takes 100 FC to get an exposure of 2.8 with an ISO 100 film with a 180 degree shutter at 24 FPS (1/50th of a second shutter speed.) If your digital camera is 2 stops faster than an ISO 100 film, you will need 100 FC to get a stop of 5.6. Once you know how many FC you need for exposure you can simply calculate how many FC will give you the effect you see in your mind’s eye. Of course, it helps to have done a lighting test of what effect over and underexposing a subject will give. Such a lighting test for talent (you may also want to do one for key props or sets) would consist of testing in a systematic fashion the effect of Key, Fill, Back Light, Kickers, Hair Lights, and Liners that are over and under exposure. For example, to test the effect of your key light on flesh tones, set your exposure with two doubles and a single in your key light. Then remove them a half stop at a time (without changing your camera exposure setting or exposure of the chip chart), and systematically note on a slate in the frame what you are doing. Once you have removed all the scrims, your flesh tone will be two and a half stops over exposed (since you have not changed the camera setting.) Put all the scrims back in and now, using single and double nets, systematically under expose the flesh tone in half stop increments (remember rotating a net relative to the light source will make it "fatter" or "thinner", which will enable you to "dial in" the exact level you want from the light.) If you want to play on the lower register continue to under expose the flesh tone until it becomes a pure silhouette. Do the same for Fill, Back Light, Kickers, Hair Lights, and Liners in isolation and in specific combinations that you plan to use them. Having systematically tested each light, you can now see the effect that different ratios of each has on the scene and can even use the test as a reference on set when lighting the scene. An example of this type of pre-visualization would be say you are shooting a couple conversing at a bar. After working through in your minds eye that you want a low-key look with selective (shallow) focus you might settle on a stop of 2.8. Say the script calls for the guy to be somewhat mysterious and distant and the women to be very open and receptive, then you may choose to keep him in deep shadow with just enough of a liner to separate him from the subdued background of the bar. This type of lighting on him could be motivated by a practical fixture you establish behind him, which would be consistent with the more frontal key you want for her, since you would want to light her more frontally so that her character is clearly apparent, but not him to retain some mystery to his character. Having roughed out your style and light placement you can begin to set your levels and balance your lights based on lighting tests you have shot over the years. For instance, if your camera is two stops faster than an ISO 100 film, you will need 24 FC to properly expose your key tone (mid gray) at a T Stop of 2.8. 24 FC would then give you a “properly” exposed flesh tone on her. But this is a bar with subdued lighting, so you don’t want full exposure on her. You liked the feel of a half key (1 stop under) in your lighting tests so you would light her with 12 FC from a high frontal key. Again, because the scene takes place in the subdued lighting of a bar, you don’t want to over fill her. Going back to your lighting tests you like the look and feel of an 4:1 key to fill ratio so you would give no more than 3FC of fill light. You need to separate her from the dark background of the bar and so you might give her a backlight of 6 FC because that's what looked appropriate in the lighting tests to separate her hair color from a dark background without looking over-lit. You would want to make sure you flag her backlight off him since you want to play him in near silhouette and so have to keep any frontal light on him to under 1 FC because four stops under exposure was a near silhouette with just the right amount of detail in the lighting test. For the liner to separate him from the dark background of the bar you will need a fairly strong fixture capable of delivering 48FC from directly behind him since your lighting tests established you need to be at least a stop over exposure for the liner to read. Once you have figured out how many FC you need for the effect (a liner in this case) you can figure out which lights will give you that using the photo-metrics that manufacturers provide on their websites, or you can download Arri’s handy photometric calculator (be wary of the photo-metrics given for LED lights.) With a little experience you begin to develop a feel what light will give you what you need in different situations. You wouldn’t want to try to use the practical fixture that you are flying in behind him to motivate this lighting scheme as the source for the liner on him because, first of all it’s placement in the shot may not be far enough around his back to serve as a liner. But, also to deliver 48 FC on him, it would be screaming hot in the shot. For this reason it is better to use a separate light to light your talent and treat the practical so that it looks realistic in the shot. I find that practical lamps never look convincing unless one treats the lampshade as well as boost the bulb wattage. Unless it is completely opaque, you typically need to treat the shade to keep it from burning out (remember stopping down to keep it from blowing out will throw off the balance you have set with your other lights) You can put a lower wattage lamp in it, but then the output of the practical on the bar will look rather anemic. I find you get a more realistic look if you boost the wattage of the bulb and line the inside of the shade with ND gel. It is a delicate balance to achieve. You can achieve this balance without a monitor, by using the old school method with incident and spot meters and a selection of practical bulbs including PH 211, 212, and 213 bulbs. Years ago Walter Lassaley, BSC, instructed me to balance practical’s such that an incident reading of the direct output one foot away from the bulb is one stop over exposure which in this case would be 48 FC. I have found that rule of thumb gives a realistic output to the practical. After establishing the practical’s output using an incident meter, you then use a spot meter to determine how dense an ND gel is needed to line the inside of the glass shade. You can do all of this pre-visualization, setting of levels, and balancing based upon a location scout, blocking with stand-ins, and your lighting tests. In other words, almost everything can be worked out ahead of time so that when you arrive on set you know exactly what you need to do. This is especially helpful on low budget projects since, generally the time spent with minimal crew in scouting and blocking with stand-ins, is considerably less than the time wasted working these things out on set with a large crew and principle talent. Guy Holt, Gaffer, ScreenLight & Grip, Lighting Rental & Sales in Boston
-
To help make sense of my post above let's take the scene below from “Miller’s Crossing” as an example. It is a common fallacy that dark scene’s like this are “underexposed.” This scene is not underexposed, but rather the reflective values of the objects in the scene are carefully balanced (placed on the film’s characteristic curve) relative to the key tone by lighting so that most of the scene remains dark but serves up the full contrast range the film emulsion is capable of. In other words, even though the scene is correctly exposed, nothing in the scene is “correctly” exposed. The flesh tones are underexposed and the lampshade is over exposed in order to create the mood of the scene. In an instance like this, the DP would not use a meter (incident or spot) to find the exposure of the key tone; rather, he would choose the exposure of the key tone from the outset - say T5.6 for deep focus. And, having balanced the elements of the scene to that exposure using either his incident or spot meter, he will “lock it in” for lab timers or transfer colorists, by giving them the key tone (by properly exposing a chip chart with an 18% gray patch) as a reference at the head of the scene. Without providing the key tone, a timer or colorist will not know how dark the shadows should be or how bright the highlights should be because there is no other reference value at full exposure by which to calibrate the brightness of the scene. Here are a few techniques, all of which are evident in this shot, that one could use to balance the lighting to create a dark scene without under exposing it. 1) Edge light objects in frame. Use reverse keys for talent and underexpose flesh tones by at least two stops or more. As long as you define the contours of your subject with subtle underexposed edges, don’t be afraid to let your talent fall off into black. There is a scene beautifully lit by James Merifield in the “Deep Blue Sea” of Rachel Wiesz and Harry Hadden-Paton standing in a dark alley way. They are back light by a practical at the end of the alley. Their contours are defined by the rims motivated by the practical, but otherwise their flesh tones fall off to complete shadows. James Merifield probably used a spot meter and negative fill to make sure that their flesh-tone would fall off the emulsion’s characteristic curve and reproduce as a pure silhouette. Sonnenfeld probably did the same in this scene to assure large parts of the frame had minimal detail. 2) I personally believe you should always have a hot spot in a frame – a practical in the scene or something in the deep background. You can shift your overall exposure in the camera or in post to create a dark scene, but without a hot spot reference in the frame it will lack contrast and look underexposed. A hot spot in the frame serves as a reference point and creates contrast. Practicals should be close to clipping and appear to be the source of light in a scene. 3) Don’t try to light your talent with only practical’s because they will blow out – the hot spot in your scene has to look natural. Not only is supplemental lighting required to light your talent, but you must also treat the practicals to make them look realistic. I find that practical lamps never look convincing unless one treats the lampshade as well as boost the bulb wattage. That is because if you stop down to keep the shade from burning out, the output of the practical, on the table it sits on or the wall its on, looks rather anemic. I find you get a more realistic look if you boost the wattage of the bulb and line the inside of the shade with ND gel. It is a delicate balance to obtain. You can obtain this delicate balance without a monitor, by using the old school method with incident and spot meters and a selection of practical bulbs including PH 211, 212, and 213 bulbs. Years ago Walter Lassaley, BSC, instructed me to balance practical’s such that an incident reading of the direct output one foot away from the bulb is one stop over exposure. I have found that rule of thumb gives a realistic output to the practical - the light emitted downward onto the table top and upward onto the wall or ceiling is realistic. After establishing the practical’s output using an incident meter, you then use a spot meter to determine how dense an ND gel is needed to line the inside of the shade to place the brightness value of the shade on the characteristic curve of the emulsion so that it does not too hot and without detail. 4) Define the edges of your frame with a little detail. As long as you define the edges of your frame with a little detail, as Sonnenfeld does here, you can leave most of it black without it looking under exposed. 5) Soft sources like China Balls and Kinos are the wrong kind of fixtures for this kind of scene. You will need fixtures that you can easily control because you will need to cut them off large parts of your set. It will be hard to keep china balls and Kino Flos from spilling light all over the place and filling shadow areas that you want to keep dark. Fresnels with light diffusion inside the doors, cut with flags and nets, will give you the control you need. Spot meter readings of objects on the edge of the frame, like the upholstered chair on the left, will tell you if they are within the exposure range (characteristic curve) of the film. If they are not, use a little light to bring out detail that will define the edges of the frame as Sonnenfield has done here with the chair. Guy Holt, Gaffer, ScreenLight & Grip, Lighting and Grip Equipment Sales and Rentals in Boston.
-
This is a complicated subject. The key tone, or mid gray because it appears in the middle of a photographic gray scale, is the common reference point used by light meters, lab processors, and transfer colorists. A lab processor knows what density his processed emulsion should be to render mid gray and so he is able to adjust his processing accordingly. A transfer colorist, knows what gain will reproduce the luminance of mid gray so he is able to set his gain. Simply put it is the reference point to which we peg all other values on the characteristic curve of the film or digital format we are using. Meters are likewise calibrated for mid gray. For example there are basically two types of meters: incident and spot. Incident meters read the light falling on your subject. Spot meters read the light reflecting back from your subject. An incident reading gives you an exposure that after normal processing would render an 18% gray card as 18% gray (a specific density of the film) had you held it in front of the camera in the same light. Incident meters enable you to peg the key tone (18% gray) in this fashion even though there may not be a mid-tone in your scene. There does not have to be a mid gray tone (commonly called the “key” tone) in the scene to expose for. A spot meter is then typically used to take reflective readings to see how other objects will expose relative to the key tone that was pegged with the incident meter. The thing to remember about spot meters is that they want to expose everything as mid gray. For instance, if you expose a black piece of paper with the reading of a spot meter it will appear as mid gray after normal processing (not pushed or pulled) – likewise for a white piece of paper. But, if you place an incident meter down on the black piece of paper and expose for the incident reading the black paper will be black, and the white paper will be white, after normal processing because you exposed for the key tone by using the incident reading and thereby pegged the other values (white and black) relative to it. If you don’t have an incident meter, but want to peg the key tone under your subject's key light, an old trick is to take a spot meter reading of the palm of your hand under the key light and open up one full stop. This will give you a close approximation because the average Caucasian flesh tone is one stop more reflective than 18% gray. (The “Characteristic Curve” of a high contrast B&W Reversal emulsion. The object of exposure is to place the contrast range of the scene on the straight line portion of the curve so that the different luminances of objects in the scene are reproduced accurately on the film. Mid gray being the common reference point.) You use the reading from the spot meter to be sure that the object you are metering will be within the exposure range (characteristic curve) of the film stock you are using. If the stock has a nine stop range (five stops over before detail burns out, and four stops under before detail blocks up), and your reading of a dark object is six stops under your key tone, it will not be rendered on the film after it is processed normal (to reproduce mid gray as mid gray). (The contrast range of this scene exceeds the film’s exposure range, so when the image is exposed for the light outside the arch (Left Image), detail is lost in the archway. Likewise, if the image is exposed to hold detail in the archway (Right Image), detail is lost outside the arch. Pegging the key tone centers the contrast range of the scene on the straight line portion of the curve such that some detail is lost outside and inside the arch way, but the luminance values of most of the scene are rendered accurately.) Since in this situation the contrast range of the scene is beyond the exposure range of the film you have two choices. 1) You can open up and expose for the shadows (over exposing the key tone and blowing out your highlights more in the process) and print down to make mid gray mid gray again. In the end you have the detail in the shadows you want, but in the process you have lost detail in the highlights. Why? Because the contrast range of the scene was beyond the exposure range of the film, and you exposed for shadow detail, you burned out the highlights (no detail) so it is not there when you print down to mid gray. You can't bring it back. Is that bad - not necessarily. It's just another "look." (The contrast range of this exterior exceeds the exposure range (flat line portion of the “Characteristic Curve”) so shadow details, in his hair and the black felt under the MacBeth Chip Chart, that fall on the bottom of the ”toe” of the curve “block up” (max density) and detail in that area of the frame is lost. Likewise, highlights like the specular sun on the windshield and the white towel, that fall on the upper end of the “shoulder” of the curve “burn out” (min density) ) and detail in that area of the frame is lost. The object of lighting is to compress the contrast range of the scene so that it fits on the straight line portion of the curve so that the different luminances of objects in the scene are reproduced accurately on the film.) Or, 2) you can throw some light into the shadows to bring the reflective value of the dark object within the exposure range of the film (onto the straight portion of its’ characteristic curve) without changing the exposure of the key tone value (mid gray) or blowing out the highlights. In this fashion you fit the contrast range of your scene into the exposure range of the film emulsion you are using. Of course this is only the starting point. From this “correct” exposure a DP will further manipulate the relationship of the contrast range of a scene to the exposure range of the film stock to create a desired effect. This is old school film exposure theory, but it is a good conceptual framework for exposing digital video, especially now that you can record "raw" and apply "looks" to the raw data. (Post in this thread the problems in this image and how to fix them) A fun exercise is to shoot a frame with just available light and then think about how you can improve upon it through lighting. For example, identify the problems in the image above and then list how to fix them through lighting and wardrobe. Guy Holt, Gaffer, ScreenLight & Grip, Lighting & Grip Sales and Rentals in Boston
-
To get back to the original purpose of this thread: to share the tricks-of-the-trade that will add more to a film’s production value than all the big budget toys found on bloated Hollywood productions. No one tool on your grip truck will improve the look of your film more than what you see in your mind’s eye. Having a vision of what you want to accomplish and the analytic tools to realize that on set, will save you more money than any piece of equipment you can buy. Nothing is as important in film production as preparation. With the right analytic tools you can light a scene on paper down to a level of specificity that includes the choice of lights, their placement, and the Foot Candles they will project onto your subject or set. As a starting point choose the exposure of the key tone for the scene at the outset - say T5.6 for deep focus. Having chosen the exposure, one can calculate how many Foot Candles (FC) is needed on different elements of the scene. To figure out how many FC you need for exposure, all you need to know is that it takes 100 FC to get an exposure of 2.8 with an ISO 100 film with a 180 degree shutter at 24 FPS (1/50th of a second shutter speed.) If your digital camera is 2 stops faster than an ISO 100 film, you will need 100 FC to get a stop of 5.6. Once you know how many FC you need for exposure you can simply calculate how many FC will give you the effect you see in your mind’s eye. Of course, it helps to have done a lighting test of what effect over and underexposing a subject will give. Such a lighting test for talent (you may also want to do one for key props or set dressings) would consist of testing in a systematic fashion the effect of Key, Fill, Back Light, Kickers, Hair Lights, and Liners that are over and under exposure. For example, to test the over exposure of your key light on flesh tones, balance the output of your key light for an exposure of 5.6 (in this case 100 FC) with two doubles and a single in the light. Then remove them a half stop at a time (without changing your camera exposure setting or exposure of the chip chart), and systematically note on a slate in the frame what you are doing. Once you have removed all the scrims, your flesh tone will be two and a half stops over exposed (since you have not changed the camera setting.) Put all the scrims back in and now, using single and double nets, systematically under expose the flesh tone in half stop increments (remember rotating a net relative to the light source will make it "fatter" or "thinner", which will enable you to "dial in" the exact level you want from the light.) If you plan to play on the lower register in your film continue to under expose the flesh tone until it becomes a pure silhouette. Do the same for Fill, Back Light, Kickers, Hair Lights, and Liners in isolation and in specific combinations that you plan to use them. Having systematically tested each light, you can now see the effect that different ratios of each has on the scene and can even use the test as a reference on set when lighting the scene. An example of this type of pre-visualization would be say you plan to shoot a couple conversing at a bar. After working through in your minds eye that you want a low-key look with selective (shallow) focus you might settle on a stop of 2.8. Say the script calls for the guy to be somewhat mysterious and distant and the women to be very open and appealing, then you may choose to keep him in deep shadow with just enough of a liner to separate him from the subdued background of the bar. This type of lighting on him could be motivated by a practical fixture you establish behind him, which would be consistent with the more frontal key you want for her, since you would want to light her more frontally so that her character is clearly apparent. Having roughed out your style and light placement you can begin to set your levels and balance your lights on paper based on your lighting test. For instance, if your camera is two stops faster than an ISO 100 film, you will need 24 FC to properly expose your key tone (mid gray) at a T Stop of 2.8. 24 FC would then give you a “properly” exposed flesh tone on her. But this is a bar with subdued lighting, so you don’t want full exposure on her. You liked the feel of a half key (1 stop under) in your lighting tests so you would light her with 12 FC. To create the glamor modeling you are after you choose a soft source from a high frontal key position. To maintain the low-key effect you are after for the bar, you choose a baby soft light with egg-crate to control the spread of light. Again, because the scene takes place in the subdued lighting of a bar, you don’t want to over fill her. Going back to your lighting tests you like the look and feel of an 4:1 key to fill ratio so you would give no more than 3FC of a soft fill light. You need to separate her from the dark background of the bar and so you might give her a backlight of 6 FC because that's what looked appropriate in the lighting tests to separate her hair color from a dark background without looking over-lit. Since you want to play him in near silhouette, you choose for her backlight a small Fresnel with diffusion inside the doors, that you will be able to cut with a flag to assure it does not spill on him. That way no more than the 1 FC, that according to your film tests is required to keep him in silhouette, will fall on him. For the liner to separate him from the dark background of the bar you will need a fairly strong fixture capable of delivering 48FC from directly behind him since your lighting tests established you need to be at least a stop over exposure for the liner to read. Once you have figured out how many FC you need for the effect (a liner in this case) you can figure out which light will give you that using the photo-metrics that manufacturers provide on their websites, or you can download Arri’s handy photometric calculator (be wary of the photo-metrics given for LED lights.) With a little experience you begin to develop a feel for what light will give you what you need in different situations. In this case, a leko instrument is the best choice because it will deliver the Foot Candles needed while giving you the ability to easily cut the spill of the light. It is worth noting that in this example no one light gives full exposure (24 FC.) Instead, your light levels are pitched over and under the key tone to create the effect you are after. You can do all of this pre-visualization, setting of levels, and balancing of lights on paper. In other words, almost everything can be worked out ahead of time so that when you arrive on set you know exactly what you need to do. Such preparation is essential on low budget projects. The time spent with minimal crew in scouting and blocking with stand-ins, is considerably less than the time wasted working these things out on set with a large crew and principle talent. Guy Holt, Gaffer, ScreenLight & Grip, Lighting Rental & Sales in Boston
-
Simple lighting in an industrial space
Guy Holt replied to Francesco Marullo's topic in Lighting for Film & Video
A M18 book light won’t provide sufficient output to balance windows without treating the windows. Anything short of a 6k Par will require that you put Rosco Scrim or ND on the windows. For example we lit an episode of “Electronic Field Trip,” with then First Lady Laura Bush leading a 4th grade class garrisoned in the Mess Hall of the Navy Barracks overlooking the USS Constitution. Then First Lady Laura Bush leading a 4th grade class in a science experiment. Given the importance of their special guest and the scenic setting outside the windows, the show's producers wanted the USS Constitution to be seen clearly through the windows. Under the circumstances it was a difficult task to create flattering light on the First Lady, while balancing the interior lighting to the exterior, so that the USS Constitution would be seen clearly through the windows. Navy Mess Hall overlooking the USS Constitution and Boston Skyline seen clearly out the windows. What I did was rig Kino Flo Flat Head 80 fixtures (4’- 8 tube fluorescent lights) flush against the ceiling over each table as high frontal key lights for the participants around the tables. The lights were then dressed with black show card so that they looked as if they were permanent fixtures. Opposite wall of Mess Hall with Flathead 80s and book lights. To fill in this soft high frontal key light, we then rigged 6’x6’ book lights with 4k HMI Pars. A light source that large creates a wonderful soft light that doesn’t throw shadows, which was important because cameramen moved constantly back and forth in front of the book lights. Not only were the book lights very clean looking, with the light and hardware hidden from view, but if seen reflected in the large plate glass windows, they looked like a window on the opposite side of the room. The final ingredient for success was a layer of ND 9 gel on the plate glass windows overlooking the USS Constitution to bring the exterior levels down three stops and in line with the pumped up interior. A 4k HMI par bounced into ultrabounce and then through silk makes up a super soft booklight. Where it took a 4k Par book light to provide just a fill level after gelling the windows with ND9, you can see that you need a lot more light than you will get out of a M18 book light to balance interiors to exteriors. The problem with using larger HMIs (2.5-6kw) is usually powering them. If you know how, you can plug them into wall outlets that are available on most locations. Guy Holt, Gaffer, ScreenLight & Grip, Lighting Rentals & Sales in Boston -
It depends on the type of ballast. Because of the constant improvement in HMI technology over the years there are several types of HMI ballasts available and if you are not careful how you power them you can get stuck. In ballast design you have a choice between magnetic and electronic ballasts; and to complicate matters even more, you have a choice between Power Factor Corrected electronic ballasts and non-Power Factor Corrected electronic ballasts. Magnetic ballasts draw more current during the striking phase and then they “settle down” and require less power to maintain the HMI Arc. For this reason, as Phil suggests, you can’t strike them all at once because you must leave “head room” for their higher front end striking load. For the same reason you can’t load a generator to full capacity with HMIs with magnetic ballasts. By contrast, an electronic ballast “ramps up.” That is, its’ current draw gradually builds until it “tops off.” But, unless the ballast is Power Factor Corrected (PFC), an electronic ballast will draw more current than a magnetic ballast of the same wattage. Why ballasts of the same wattage will draw appreciably different current has to do with the Power Factor of the ballast. Since Power Factor Correction (PFC) is not mandatory in this country as it is in Europe, you will encounter many non-PFC HMI, Kino, CFL, & LED power supplies. And since, the adverse effects caused by a poor Power Factor go beyond an inefficient use of power, it is well worth understanding Power Factor and why it should be corrected. To learn more about HMIs I would recommend an article I wrote on the use of portable generators in motion picture production. Harry Box, author of “The Set Lighting Technician’s Handbook” has cited my article in the Fourth Edition of the handbook. Here is what he has to say about the article: "Great work!... this is the kind of thing I think very few technician's ever get to see, and as a result many people have absolutely no idea why things stop working." "Following the prescriptions contained in this article enables the operation of bigger lights, or more smaller lights, on portable generators than has ever been possible before. Guy Holt ScreenLight & Grip Lighting Rental & Sales in Boston
-
Thanks! I have reposted here a condensation of a thread on the alternative to using large tow plants to power large HMIs (the original thread can be found in its entirety here.) One of the biggest hurdles to obtaining good production values in low budget digital cinema productions is the high cost of the blimped studio generators required to power large HMIs. Not only are blimped generators expensive to rent, but they also come with hidden costs. Since rental trucks like those from Ryder or Penske are not equipped to tow, you quite often have to pay extra to have them delivered or hire the rental house's grip truck to tow them. And, since most rental houses require that one of their employees drive their trucks and operate their generator (for insurance reasons), the production has to hire a driver/genny op at roughly $575/10hrs - which is probably more than anyone else on a typical indie crew is getting paid. All of this makes the use of large HMI lights very expensive. The introduction of larger paralleling inverter generators, like the Honda EU7000is, makes the use of large HMIs more affordable and more accessible. While it requires a basic knowledge of electricity to distribute power from a large diesel generator, the use of a step-down transformer with a putt-putt generator can greatly simply powering large HMIs up to 12kw. When using large tow plants, it is the Best-Boy Electric’s job to carefully balance the lighting load over the legs of the generator and avoid voltage drop by using sufficiently large cable. With a transformer and a putt-putt you don’t have to worry about either. You don’t have to worry about balancing loads because a transformer automatically splits the load of whatever you plug into it evenly over the two legs of the 240V circuit of the generator. It balances the load so you don’t have to. A combination transformer/distro with a Bates receptacle will enable you to power larger lights (like 12kw HMIs or 10k Tungsten), and more smaller lights, than you could otherwise. It also enables you to use standard film-style distro equipment, like Bates extension cables, Siamese (splitters), and fused Bates-to-Edison Breakouts (snack boxes), to simplify the run of power around set. And the best part about transformer/distros is that regardless of how much distro you lay out, no matter where you plug in a light, the transformer/distro automatically balances the additional load. With a transformer/distro you simply plug in your lights until the load displayed on the iMonitor of the generator/s control panel reaches 7500Watts. An overload alarm on the iMonitor display will tell you if you inadvertently overload the transformer/distro. A transformer/distro will also enable you to record sound without picking up the noise of the generator/s by enabling you to move the generator/s off set (like you would a Crawford), but still provide plug-in pockets conveniently close to set. Two to three hundred feet of heavy duty 250V extension cable is usually enough to place the generator around the corner of a building, or to run it out of a van or truck - which is usually all the additional blimping you need with these generators. The heavy-duty 250V cable also minimizes the voltage drop you would have using standard electrical cords. To assure full line level (120V) on set, our transformer/distros are designed to compensate for the slight line loss you will have over an extended cable run by boosting the voltage on the load side (secondary.) For example, when the supply from the generator/s to the (primary) of the transformer drops to 228 volts because of line loss, 120 volts still comes out on the secondary side where you plug in the lights. This slight boost enables you to place the generator/s further from set where you won't hear then, yet assures that the supply voltage on set does not drop too low. A 60A Shock Stop provides ground fault protection for the 60A/120V circuit derived from a transformer/disto and a single Honda EU6500. Finally, one of the greatest benefits to using a transformer/distro with a Honda EU7000is has got to be the ability to meet OSHA requirements for the use of these generators on job-sites. So that GFCIs operate reliably, OSHA requires that generators used on job sites bond the Neutral and Ground. Honda EU7000s out of the box don’t. But, since transformers bond the Neutral to Ground on the secondary load side, they meet that OSHA requirement. To bring the Honda EU7000is into full OSHA compliance, now all you need is to add a film-style GFCI, like a Shock Stop (pictured above), downstream of the transformer/distro. With a Honda EU7000is and transformer/distro you don’t have to be an experienced electrician to provide clean, stable, and safe power on set. A feature film production powered by a Honda EB10000 A good example of how a transformer/distro simplifies set electrics and enables you to record clean audio tracks, even under the worst circumstances, is the independent feature “Gasp” which used a Honda EB10000 to film an important beach scene at night. Generating 72dbs at 23', the Honda EB10000 is more than twice as loud as an EU7000is. Campfire scene on the beach powered by a Honda EB10000 A common problem with open-frame industrial generators like the EB10000 is that by the time you move them far enough off set that you don't hear them you have significant line loss from the long cable run back to set (if you use regular cable.) To the problem of line loss, you have the added problem that as you add load, the voltage drops on portable generators (it is not uncommon for a generator to drop 5-10 volts under full load.) Left: Honda EB10000 operating out of grip truck (note set at distance (bright spot on right side.)) Center: 84A Full Power Transformer/Distro compensates for Voltage Drop over 400ft cable run. Right: Beach Set with 120v full line level 500ft from power source. The combination of voltage drop on the generator and line loss on a long cable run can cause voltage to drop to the point where HMI and Kino ballasts cut out unexpectedly or won't strike at all. Low voltage can also cause problems such as reduced efficiency and excessive heat in equipment, unnecessary additional load on the generator, and a dramatic shift in the color temperature and in the output of lights (use this link for a details.) Left: Beach Set lit by Arri M18 and 6kw Par. Center: Secondary side power distributed with standard 100 Bates Gang Boxes. Right: Set viewed from generator (note: distance and extent of set power distribution.) To remedy that problem the crew of “Gasp” used one of our 84A transformer/distros to compensate for the voltage drop they experienced running the generator out of the back of a box truck 500 ft. from set. With the transformer/distro close to set they then ran 100A Bates Extensions around their set and broke out to 20A Edison receptacles using 100A gang boxes in order to power an assortment of smaller tungsten fixtures to simulate the firelight and an ARRI M18 to simulate moonlight on the actors around the fire. To light the deep background the crew put a 240V Siamese in-line before the transformer/distro to power a 6kw HMI Par. Even with such a sizable load, they experienced no appreciable voltage drop on set after a 500' cable run because the transformer/distro compensated for both the line loss of the cable and voltage drop of the generator under near full load. With nothing more than a Honda EB10000 and house power the crew of "Gasp" was able to maintain the look and feel of a sunny summer day even when filming in the midst of a hurricane in October. The principle location for "Gasp" was an idyllic beach house right on the ocean. To light interiors of the beach house, the crew of "Gasp" used two 4k Pars outside, and an assortment of smaller HMI and Kino fixtures on the inside. The smaller fixtures were plugged directly into the house, while the 4k Pars were powered by the EB10000 running in the back of their grip truck. Left: Ready for rain on the set of "Gasp." Center: Two 4kw Pars operate on a 10kw Honda EB10000 Generator through our 84A Full Power Transformer/Distro. Right: 100A Shock Block GFCI downstream of the transformer/distro offers Ground Fault Protection for the entire 100A distro system. The indie film "Gasp" is a good example of how a transformer/distro can greatly simply set electrics so that you don’t have to be an experienced electrician to power a set. It makes it possible to record clean audio tracks with even generators as loud as the EB10000 even under the worst of conditions. Guy Holt, Gaffer ScreenLight & Grip Lighting Rental & Sales in Boston

