
Satsuki Murashige
-
Posts
4,560 -
Joined
-
Last visited
Everything posted by Satsuki Murashige
-
Critique some screens from shoot.
Satsuki Murashige replied to Steve McBride's topic in Lighting for Film & Video
The first two frames aren't bad at all. Obviously you were working with a real location but you found an attractive one and you made the best of it in terms of lighting, exposure, and framing. Sometimes it's best when you keep things simple. I like the 2nd composition a lot. Nice choice of focal lengths and lens placement. The skin tones are a little too red for my taste, I would probably grade the image cooler and crush the blacks. For the close up, I would probably cheat the key light so it was brighter and wrapped around the face more, probably a larger, softer source that gave an eye light in each eye. Then I'd use negative fill (like a large flag) to darken the opposite side of his face more - that way you have a nice flattering key and more contrast ratio at the same time. The cooler kicker on his dark-side cheek is nice, I'd keep that. I think the 2nd location just doesn't look good to begin with (at least from the angles you chose to shoot), so there wasn't a whole lot you could have done without a budget or crew. It also looks like you didn't have any control over the placement of extras in the frame. The composition of the wide shot is unbalanced - the right quarter of the frame is empty and you're cropping an extra on frame left in an awkward way. The red object in the background is distracting, as are the bright yellow shirts. The main actors, where you want the audiences' eyes to be drawn, don't pop. And I find the strong yellow-green tint to the image very unpleasant. I see what you were trying to do - creating a sense of depth by framing a foreground, midground, background and hiding the actors in the back. It's a good idea but poorly executed because of the choice of camera placement. I think the background behind the girl is the best looking side of the room, so I would have set up the master in that direction. It's hard to control the lighting of a wide shot in a real location - in a space like this, it usually means turning off all the lights that don't do what you want and setting up a lot of small lights to pick out and highlight the the areas you want to emphasize. For example, it looks like you were dealing with overhead fluorescents - I would have started by turning off half of them in an "off-on-off" pattern, row by row. If you can't turn them off, you can always cover the ones you don't like with duvytene taped to the ceiling. This would give you a "dark-light-dark" effect receding away from the camera and creating separation between fore, mid, background. Then I would place the extras in a staggered way so that they fell into the dark areas and the hero couple fell into the lit area. I would then use the reflective floor tiles and create a big soft reflection on them, a bright sheen - probably a big soft source up high from 3/4 back, which could be as simple as a few open-faced lights punched into the ceiling and carefully skirted to avoid spill. This would semi-silhouette the darker, unlit extras and furniture in the foreground. Then I would turn off all the lights above the walkway in the far background and add three or four controlled top lights above the frame to again create a "dark-light-dark" effect, but this time horizontally across the frame. You could have extras walk back and forth thru the light. Another thing to do if you had the time and crew would be to add chinese lanterns above each table, perhaps skirted with duvytene, and add white paper tops to the tables so that the light bounced back up into the actors' faces. I'll repeat, but the first step is that the location has to be built well and dressed well to even have a chance of looking good on film. A well-lit turd is still a turd. This doesn't mean it has to look good from every angle, but only from the angles that you choose to shoot. Another reason why the two-shot and the two close ups look staged is because of a lack of depth. You've set up in the master that the space is fairly busy and full of people. But the coverage only has the two actors. The two shot, besides having a boring background, needs extras (preferably out of focus or darkly lit) in the foreground and background. If you have control of the extras, stack them in front of the lens. Lastly, the eyeline in the actors' close ups is a too far from the lens axis. Again, this is a camera placement issue. I would also prefer a longer focal length for these types of shot, especially in a small format like 1/3" HD or dv, to keep the background out of focus. Wide and medium wide lenses on CUs have their place, but unless you've got great locations or sets, it's better to keep the background soft. Oh, and you crossed the 180 degree line in the close ups. That's the least worst thing, though. Well, that's it. Too brutal? :) -
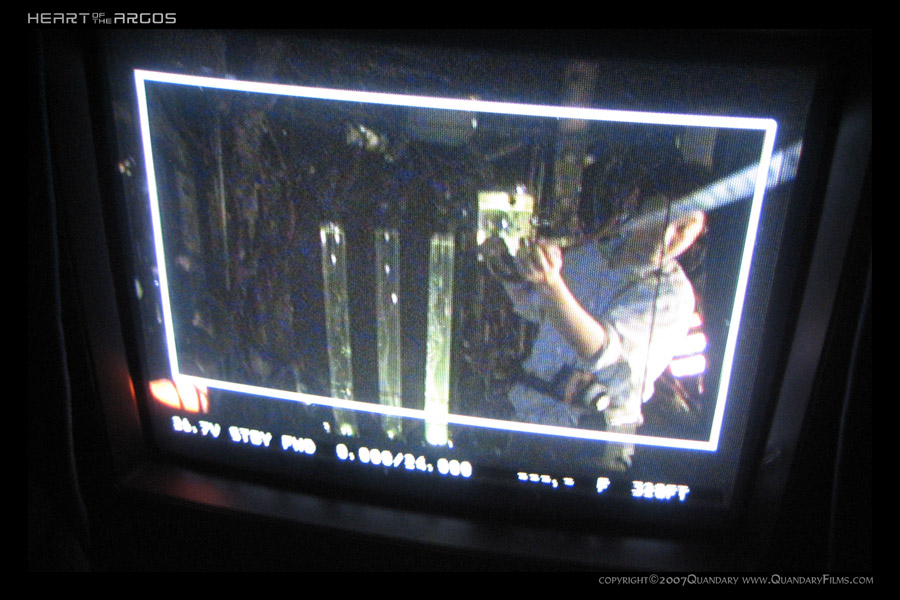
I have to agree Stephen. From a focus puller's perspective, those focus scales appear to be spaced like still lenses not cine lenses. I mean, "...80', 20', 10', 6'..." on a 95mm T1.9 lens?! Oh yes, THAT'S useful.:rolleyes:
-
And it's in focus!! Whoo hoo!! :) Looks great, Jaime. Like the use of music too.
-
The best DP in the world can only shoot what's in front of the lens, so the set/location first of all has to look good. In addition, compositing effects look best when you plan them out ahead of time. So for example, if you know you want the image of a lighthouse on a windswept rocky coastal shore but you can't find the perfect match of real lighthouse and real shore, then you would find the shore location without a lighthouse that you like best and shoot that. You would leave room for the lighthouse to be added later and take note of the lighting conditions so you can replicate them later. Then you would shoot a model lighthouse or a create a digital model with CG and composite that in, lighting it to match with the plate that you shot. But if you shoot without planning, the composite won't be very convincing. When putting a set together, think about the color and texture of the objects and structural elements you're using and make sure they complement each other. Think about creating a space with depth - foreground, midground, background. Think about where the windows and doors should be, if any. Think about the character(s) that is supposed to exist in that space, and how they would arrange things, what elements they would bring in to the space. Think about what kind of emotional reaction you want to create in your audience and then figure out how to create that effect with the above elements.
-
having trouble preserving saturation when exporting
Satsuki Murashige replied to Jamie Metzger's topic in Post Production
Hmm. In QT Pro 7.6, there's a checkbox in the General Preferences tab that reads: "Enable Final Cut Studio color compatibility" When enabled, video is not displayed using ColorSync. Source colors are read with 2.2 gamma and are displayed in a color space with 1.8 gamma. I'm assuming you're monitoring with 2.2 gamma to begin with, so if that's the case, then this could be your problem. *Just tested it: with the box unchecked, video is brighter and more green so that sounds like the issue you were having. -
shooting again on the Genesis
Satsuki Murashige replied to David Mullen ASC's topic in In Production / Behind the Scenes
Awesome, thanks for the report David. It's great that you found a fast, reliable system for monitoring on set with the Genesis. I do think the whole DIT tent approach is really a holdover from video production and should not be necessary for digital cinema cameras that shoot in raw or log mode. Exciting times we're working in! Also, funny that you mention the ACs pulling from the monitor on those long lens shots knowing how you feel about that. ;) Chayse Irvin recently posted about using a similar workflow on a feature with the Red camera: http://www.cinematography.com/index.php?showtopic=36954. He created RSX curves in RedAlert in pre-pro based on tests for a rough LUT and had them applied to the ProRes dailies for the editors. Though he wasn't able to actually monitor the LUT on set (as of Build 17), I think this is the way we'll be shooting with the Red in the future. -
Lighting Night Ext. Gritty
Satsuki Murashige replied to Joseph Nesbitt's topic in Lighting for Film & Video
Please post of frame from the film showing what you want it to look like. You'll get more responses that way. FYI, there's no such thing as a 3K. There are 2Ks and 5Ks for tungsten, 2.5K and 4K for HMIs. -
Need shaft of light without HMI???
Satsuki Murashige replied to Kyle Stueve's topic in Lighting for Film & Video
Usually the "shaft of light" effect is a background lighting effect, rather than a key (though of course you could do that). The only way it would work as a fill is if you bounced the light back up to the actor. You can use any focused light source for this, so a ellipsoidal spot or a Dedolight would work. Also look into 1000w par 64 fixtures with VNSP (Very Narrow Spot) globes, which put out a huge amount of focused tungsten light. They get very hot though, watch out. They won't be as powerful as a larger HMI, but you can cluster multiple units together to get a multi-shaft effect. If you're budget opens up, then there's a Dedo 400w HMI that you could look into. And you can also get 400/800w Joker HMIs inside a 'soidal housing to take advantage of the optics. -
Gorgeous stuff Tom! I like the satellite shots, made me laugh. Don't think you'll have problems finding work, judging from your reel. Keep it up!
-
why are films as long as they are?
Satsuki Murashige replied to sam williams's topic in General Discussion
90 minutes to 2 hours is standard in the U.S., but not necessarily standard elsewhere in the world. I hear in India the average film is 3 hours or more. So there are social and cultural differences to take into account as well. It's fascinating to read about the early days of film and how different business models came and went. I recommend reading "Film History: an Introduction" by Bordwell and Thompson. -
Nice, Stephen. I like the length too, I guess I've got to recut my reel now. :) Are you gonna put up an HD version?
-
having trouble preserving saturation when exporting
Satsuki Murashige replied to Jamie Metzger's topic in Post Production
Yeah, that's the place. It's only accessible by a narrow dirt path on the edge of a cliff, no lights at night. I shot her short down there and we had to carry the doorway dolly and all our other gear down by hand (and haul it back up in pitch dark). It was interesting, to say the least. For anything bigger that can't be carried by two people, you'd have to bring it in my boat. :ph34r: Well, it seems from the before/after pics that the export is undoing all the corrections you've made. Not just color sat. but also gamma curves. So I wonder if there's some setting that needs to be enabled that would allow the grade to appear. What do color bars look like when you export them with the same settings at the head of video clip? Since you didn't color correct them, if they appear desaturated and low-con then it must be a setting in Compressor applying a global correction. If they appear normal, then it must be some setting in FCP before sending to Compressor. I don't know why you would see the proper color in the preview window if that were the case, but it's a place to start. -
Me four. Plus, I like taking home a bunch of new cores after a shoot... They make awesome air hockey pucks.
-
having trouble preserving saturation when exporting
Satsuki Murashige replied to Jamie Metzger's topic in Post Production
Hey, that's Shelter Cove! My friend lives in the 2nd house on the left... What's the original file format you're sending to Compressor and what is the destination format? What does it look like in the Preview window before starting the compression? I've only noticed obvious gamma and color sat. changes when making mpeg 2 files for DVD. Are you getting the exact same results with the different destination formats? What about when you export via Quicktime Conversion instead of Compressor? -
Which in turn is why I wrote this: I guess that's what you were trying to say with the "in capable hands" part, but that renders the first statement meaningless. Pixelvision in "capable hands" would look good too. Let's turn this thread into a "how can good cinematographers get better images" debate rather than yet another digital newbie beatdown dogpile where nobody wins and everyone comes out dirty. Exactly. But don't you think that would be a more interesting conversation? One we haven't already had before a million times over? I don't mean to pick on you Chris, I'm just frustrated because I thought the conversation had turned toward a more positive direction and now we're just rehashing the same ground again.
-
San Francisco Rental and Crew
Satsuki Murashige replied to Chad Stockfleth's topic in General Discussion
Hey Chad, For Red rental in the Bay Area, check out: http://chatercamera.com/ and http://videofax.com/. Both have 12x Optimos, Ultra Primes, and Superspeeds. Chater also has Master Primes. If you need Cooke S4s, go here: http://lucamera.com/ For a Fisher 10, go here: http://dtcgrip.com/ In addition, here's a complete film services directory for the Bay Area: http://reeldirectory.com/ If you need G&E crew, try these guys (from the reel directory listings): Jon Fontana Fontana Film & Video Services (415) 505-0168 (415) 505-0168 Cell Description: Gaffer/ Key Grip with 1, 3, & 5 Ton Grip Trucks. Lights, Grip Equipment, Generators, Dollies, Arri Hmis, Briese Lights... Joe Mendoza The Little Giant (415) 672-0148 Description: Key Grip/ Gaffer with access to any size truck one ton, Three and Four Ton Grip Trucks No problem. Everything you need HMI's, KINOS, Tungsten, Dollies, Generators, whatever. And...hablo espanol. Both Jon and Joe have their own guys. In the Bay Area, we don't normally have separate G&E departments on smaller jobs, but instead one gaffer/key grip and then grips who swing. Also, when is your shoot and what will you be shooting? I might be available to crew. Call me. :) -Satsuki 415.317.2964 satsmura@sbcglobal.net -
:lol: Thanks for the mental image, Rick! Now I want that on a T-shirt. Bob, indeed sir, these new cameras are terrible. If I had wanted a telephone booth, I would have ordered one.
-
Sam, it seems to me that you are mainly worried about "what a good DP would do." I guess this is because as a newbie you do not want to appear to be a "bad DP." Well, let me just say this: it takes many, many years of experience to become a "good DP." You need to read mountains of books and periodicals. You need to spend thousands of hours watching films. You need to shoot millions of frames of stills, video, and motion picture film and make hundreds of mistakes (and learn from them). All this before eventually becoming, God willing, a good DP. So first, don't worry about "appearing to be a good DP." It will happen eventually or it may not, but it's not going to happen overnight. Just accept that you are a student and that you have a lot to learn yet. Instead, be open-minded. Develop your imagination and your taste for images. Learn to answer these questions: does this frame look good or bad? Why do I think that? What's wrong with it? How I do to fix it? There is no magic formula, no secret sauce, no "usual working practice" here that will replace your own eyes and brain. Believe me, if there was some magic shortcut here, some way to avoid actually seeing, thinking, and judging, we would tell you. But there isn't. If you can't tell good from bad, if you look at a frame and have no gut reaction one way or the other, then we can't help you. Nobody can. But I just don't think it's possible for you not to have taste, however underdeveloped it might be. After all, when you taste plate of food, don't you immediately judge it? "Mmm, this is tasty!" Or "Blegh, this tastes like dogfood!" When you see a girl at the bar, don't you think: "Dang, she's hot!" Or "Ugh, she looks like my grandma!" And when you watch a film, don't you think: "Man, this looks awesome!" Or "Geez, my mom could have shot this!" This is judgement, and without it you would not be human; you would be a machine. So before I answer any more of your questions, I want you to answer mine: Is there a particular film that you consider to have good cinematography? What is it? Why do you think it's good? Please post a frame grab from the film that illustrates your examples. I'm looking forward to the discussion.
-
Do it Annie. But don't do it for you. Do it for the poor little orphan camera. It needs a good home. And it's sooooo cute!
-
Sigh... Sam, it's very simple. DOES IT LOOK GOOD? If so, then leave it. COULD IT LOOK BETTER? If so, then change something so it looks good. Does that answer your question?
-
I disagree Chris. At its worst, film looks terrible. If you've ever gone to film school, you know what I mean. *(also see: the new "Indiana Jones"). Simply knowing how to expose a piece of celluloid does not a DP make. I guess that's what you were trying to say with the "in capable hands" part, but that renders the first statement meaningless. Pixelvision in "capable hands" would look good too. Let's turn this thread into a "how can good cinematographers get better images" debate rather than yet another digital newbie beatdown dogpile where nobody wins and everyone comes out dirty. I think you make a good point about how twiddling with camera settings rather than twiddling with lights is fundamentally changing the role of the cinematographer. Part of the problem is that for broadcast video cameras, you NEED to twiddle camera settings to get the best out of the camera because there's so little room to correct in post. But I think that good video shooters (ie. light twiddlers) with a trusted DIT painting their image do great work on a regular basis. Again, I feel that applying that model to digital cinema cameras is a mistake and we need to figure out a standardized repeatable way to get good images out of them.
-
I very much agree, Bruce. Of course, it's difficult to keep up with every new camera that comes out since things are changing so quickly these days. I see production cameras falling into three basic types: film, broadcast video, and digital cinema. There are many experienced film shooters and video shooters who know their medium and have command of it. But I think most DPs do not yet fully understand digital cinema and are trying to mentally fit it into one of the two previous categories. Just today, I overheard one of the most highly regarded DITs in the business complaining about how even he is trying to wrap his brain around exposing for the Red camera. And even a brainy guy like Stu Maschwitz of of the Prolost.com blog can only conclude "expose to the right and protect highlights." We need something more precise than that. A truly proven and reliable system for digital cinema exposure has not yet been discovered, or at least widely standardized - everyone has their own system and none of them are the same. No one has yet come out with "the zone system" or "the waveform/vectorscope/paintbox" for digital cinema. I find this as exciting as it is frustrating. I think the "monitoring LUT" approach combined with light metering and a deep knowledge of the sensors used in the major cameras has promise.
-
The frames look fantastic, Chayse! I love the rich contrast - it seems like your lighting philosophy is to expose for the highlights and ND or stop down the lens, then bring up the foreground with well-placed keys. It looks like you're working at higher footcandles than a lot of DPs these days which is refreshing. It's not that same murky, weird flat fleshtone, "capture everything but crush it in post" look that's everywhere now - I dunno exactly how to describe it but it just looks like film at its best, old-school, simple, refined, ballsy. I was watching "Braveheart" last night in HD and admiring how John Toll always seems to place his key in the perfect place and make it look simple, realistic and refined with rich contrast, all at the same time - I think you've got the same touch. I think it's especially the midtones which look very natural. The RSX curve that you created seems to mimic that film print "roll off" curve you were talking about, whereas I think most people end up twisting the curves to try to bring back detail in the shadows/highlights after the fact because they didn't light and expose for that. That was one of the things I didn't like about some shots in "Che." Instead, you're throwing away information on the ends that you don't need to avoid clipping, and so you can do it simply for the look without losing significant detail. That you created this look using the Red is even more impressive to me because there seems to be a great deal of confusion about how to get the best out of that camera. It seems to me that you've figured it out - instead of trying to figure out how to maximize the sensor's dynamic range with the various gamma/color space/asa settings, we should be creating LUTs in pre-pro, shooting tests, and lighting and exposing to fit within the LUT range, not the whole range of the sensor. I think we somehow got way off track in the last several years with shooting in available light and "fixing it in DI" where we ended up asking too much of the capture medium, be it film or digital. We need to start being more conservative in our fundamental approach to exposure if we want our images to look better. Anyway, thanks again for your production diary Chayse, it's been very educational!
-
First time with 35...Mitchell NC vs Eyemo...
Satsuki Murashige replied to Kirk Anderson's topic in Mitchell
So does Deluxe. You should, it totally beats the pants off of digital! :P Check out this transfer facility: http://www.cinelicious.tv/?page_id=4. 1080P telecine direct to hard drive for $275/hr. Can't beat that. -
Additionally, it helps to think about lighting this way: Motivation: Where is the light coming from? What is the source of the light supposed to be? A window, the sun, the moon, streetlights, car headlights, fluorescents, neons, light bulbs, reflections off of car windows, etc. For every source of light in a scene (and there can be one, two, or a dozen in a single scene), you would use the following criteria to determine how to use your lights to mimic each effect. 1. Quantity: How much is there? Is there enough light? Too much? 2. Quality: Does it cast a hard shadow, a soft shadow, or hardly any shadow at all? How does it make the environment or face look? Is it static or moving? 3. Direction: Where is it coming from? Above, below, side, back, 3/4, front? How high or low? How far or close? 4. Color: Is it red, green, blue, cyan, magenta, yellow? White? Tinted? Mixed colors? Complementary?
