Duncan Brown
-
Posts
549 -
Joined
-
Last visited
Everything posted by Duncan Brown
-
Oh I know, this is after all Cinematography.com, I'm just fascinated by how fixated people were on capturing golf swings, apparently. Duncan
-
Hey I had a limited market golf swing camera once upon a time! 8 exposures on a single Polaroid sheet. https://www.photrio.com/forum/threads/fs-mitchell-graph-check-sequence-camera-8-exposure-sequence-on-one-4x5-picture.90242/ Duncan
-
Best workflow for scanning a 16mm film
Duncan Brown replied to George Thengummoottil's topic in Film Stocks & Processing
Probably one of those "if cost matters, you can't afford it" situations? Duncan -
WTB - UPB-1A Lomo tank (16mm, 15M/50ft)
Duncan Brown replied to Duncan Brown's topic in Cine Marketplace
Woohoo! Get to searching! Duncan -
WTB - UPB-1A Lomo tank (16mm, 15M/50ft)
Duncan Brown replied to Duncan Brown's topic in Cine Marketplace
Yep, that was me you edged out, so that really doesn't help me, ha! Duncan -
Just thought I'd post an update. Those backordered pins didn't come in May like they were supposed to, except for the 2mm (oversized) ones... and I can now see the drawing of them was incorrect. The grooving is in the middle, not at one end as pictured and as I thought matched the originals. SO that means the originals MUST be tapered, as those are the only ones that definitely have the grooves at just one end (about 1/3 the length.) I ordered some of those in April and they are also backordered, with an expected ship date in July, that I fully expect to also slip. Stupid global supply chain disasters due to COVID... Anyway, whenever they eventually get in, I will get back to this project. Duncan
-
WTB - UPB-1A Lomo tank (16mm, 15M/50ft)
Duncan Brown replied to Duncan Brown's topic in Cine Marketplace
Really? Nobody has one stashed in the attic somewhere, that they'd be willing to sell along to the next crazy person? Duncan -
Is the question "I don't have access to the Avid for my personal projects, so how bad is it going to be to learn a new low/no cost alternative?" ? Duncan
-
Looking for Canon FD SSC 24mm 1.4 Aspherical
Duncan Brown replied to Phillip Kaminiak's topic in Cine Marketplace
Haha, I also grabbed a couple of spares of that during my bargain basement frenzy :-) Duncan -
Looking for Canon FD SSC 24mm 1.4 Aspherical
Duncan Brown replied to Phillip Kaminiak's topic in Cine Marketplace
Mine did, not sure about anyone else's. For years of shooting still with Canon cameras, my 24/2.8 was my "normal" lens. I just like the field of view and the look through it, though of course you have to be careful with angles and things because it's pretty wide. It's got pretty deep DOF like any wide lens, so I always wanted the 1.4 Aspherical version to be able to combine my favorite lens with the occasional shallow focus when needed. Then came the big digital revolution and analog abandonment in the 2000s, and I scooped up cheaply all those lenses I had lusted after for decades: 24/1.2 Aspherical, 55/1.2 Aspherical, 85/1.2 Aspherical, 300/2.8 Fluorite, 14/2.8 rectlinear, 7.5/5.6 fisheye, 35/2.8 tilt-shift, and others. All in breechlock versions, like I preferred, except for the 14 (never made that way) and the 7.5 (couldn't pass up the screaming deal on the new-FD version.) Since we may never see a bargain time like that again for those lenses, I'm never giving them up. See my survivors at the estate sale if you want them. Duncan -
Looking for Canon FD SSC 24mm 1.4 Aspherical
Duncan Brown replied to Phillip Kaminiak's topic in Cine Marketplace
Got one, but you can pry it from my cold dead fingers, etc. Duncan -
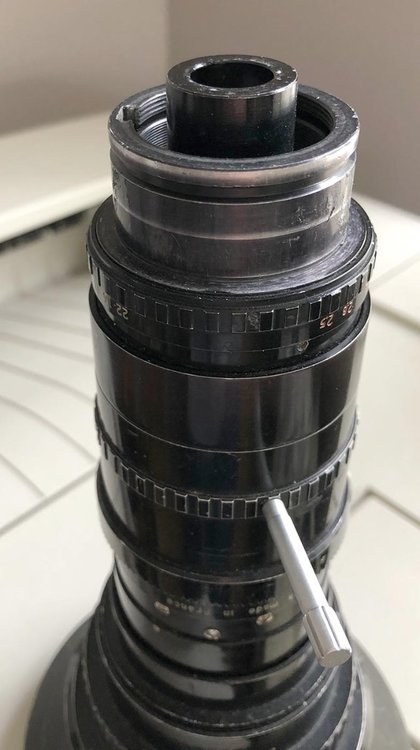
Just for the historical record, here is what that lens' mount looks like when it's Arri-S from the factory: Duncan

-
OK, my wider lenses definitely need more than the 1" or so depth of the shorter one, so the longer one would universally fit any Arri-S lens, I think, I'll order some of those! (RCL-20) Duncan
-
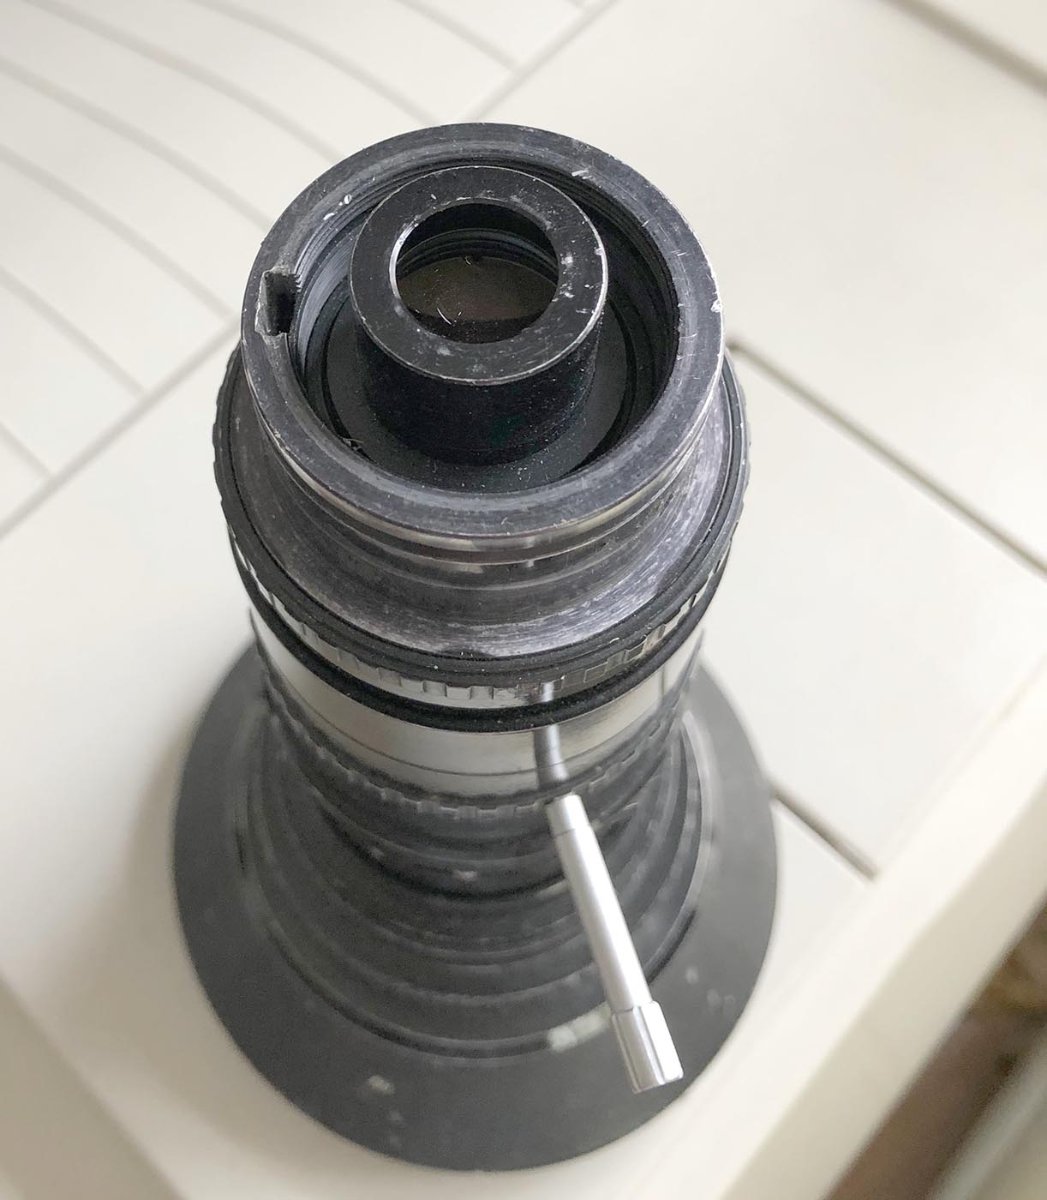
I have an Angenieux 12-120 in Arri-S mount and a Colcine doubler, and can verify this wouldn't work in that setup either. The Arri-S mount needs about 18mm of depth just by itself, and the Colcine adapter has about 20mm of depth before you hit the retaining ring for the first element. Any lens with rear elements that protrude more than a smidge aren't going to fit. I must say, the rear of my lens looks nothing like yours. It does look like yours have some sort of aftermarket/custom mount adaptation from whatever it originally was, to Arri-S. Duncan
-
Oh, in addition to the normal photographic reasons I like it for still shooting, it also ends up very weirdly flat once cut into 6-picture strips. (Weird in comparison to a lifetime of experience with about every other B&W still film made.) That makes it a joy to print in an enlarger, especially because I'm one of those oddballs that likes to frame well, then print with a filed out mask, to get every last speck of image as originally shot. With film curled in either or both directions, having so little support from the negative carrier can cause focusing issues. Not so with 5222. Duncan
-
I shoot a lot of 5222 respooled (by me) into 35mm canisters for still shooting. I don't completely understand why, but when scanned it is a complete grain horror-fest, but when printed the traditional way onto photographic paper, it's fine. I've made 20x24 prints with grain that would make you think it was shot on medium or even large format film. I really like it for still shooting. Not such a fan of how much Cinestill charges. I first spool the 400 ft rolls down onto 100 ft rolls on small cores, to match what normally goes into a 35mm bulk loader, then use a bulk loader to put it into Shirley-Wellard cassettes. Both the bulk loader and the cassettes use a sliding light trap, so I'm not sending the film through felt a bunch of times. Over on Photrio I've occasionally sold off extra 100 ft rolls of it at my cost. I have the split reel to handlle 1000 ft rolls, but Kodak doesn't charge any less per foot for that so there's no advantage to me to the extra hassle. (I have it to be able to spool down various weird rolls of Kodak lab film I've played with in still cameras over the years.) Duncan
-
You can also get twice as many for about the same price if you get them more like the correct length (RC-26): https://www.amazon.com/Caplugs-99391222-Plastic-Threaded-Connectors/dp/B077DDBSYV/ I may do a little more measurement of my various lenses before deciding which to buy.. Duncan
-
Hey there they are! Less than a buck apiece (but you have to purchase 20, which explains why you have a whole box of them I guess!) Thanks for the part number. https://www.amazon.com/Caplugs-99394926-Plastic-Long-Threaded-Connector/dp/B077DBQZ8C ETA: they're precisely the right diameter, and about twice as long as they need to be, which could either be left alone, or easily sliced down to size. Duncan
-
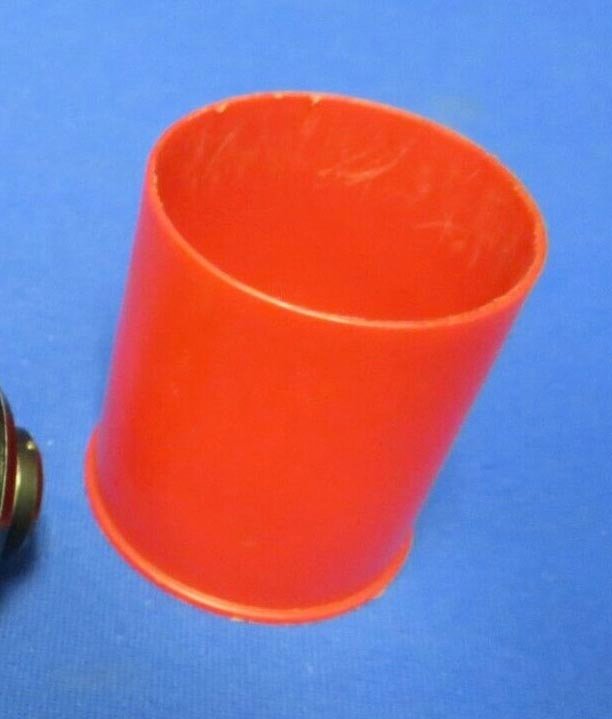
Here's a picture of one of the eBay ones seen in lens sales ads. I've definitely seen caps like that used on plastic pipes, but can't seem to locate a supplier for ones that size. Duncan
-
Haha, that's a little too low-budget even for me. I've seen a bunch of lenses on eBay with some sort of red plastic cap that looks like it was made to cap off PVC pipe or something, but haven't yet figured out where they come from. Duncan
-
Cooke 300mm Anamorphic / i Lens T3.5 CF 10' Prime Lens
Duncan Brown replied to Curtis Willis's topic in Cine Marketplace
I think for those of us who could never in a million years afford this lens, you should at least post a picture or two here so we can dream... Duncan -
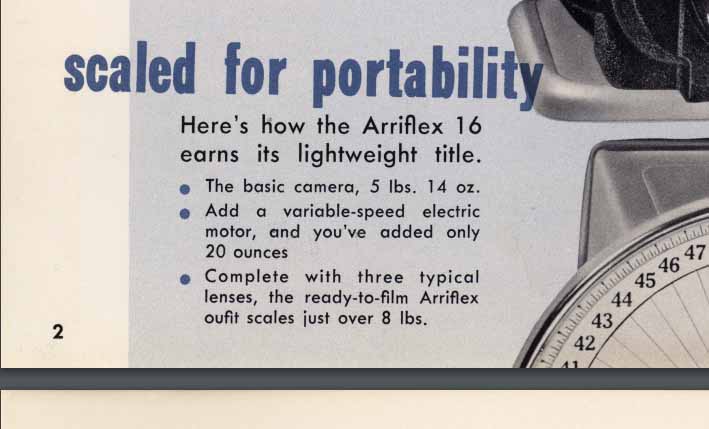
From the Arri brochure I scanned and put here: http://backglass.org/duncan/arri/paperwork/arriflex_16_brochure_01.pdf ...here's a screenshot of the relevant part. Duncan
-
Looking for a UPB-1A tank in the US for less than the crazy prices on eBay for the ones in Russia and the Ukraine, and for less shipping cost than those take to get to me. Surely someone sprung for one at some point and no longer needs it? I'm looking to develop some B&W 16mm Magazine film and this seems like the least-bad option. Thanks, Duncan
-
Scans of old miscellaneous 16mm-related paperwork
Duncan Brown replied to Duncan Brown's topic in General Discussion
An example of what Title-Craft could output for you back in the day, using that order form:
-
Scans of old miscellaneous 16mm-related paperwork
Duncan Brown replied to Duncan Brown's topic in General Discussion
A bunch more: http://backglass.org/duncan/16mm/baia_editor_pamphlet.pdf http://backglass.org/duncan/16mm/baia_editor_pamphlet_100.pdf http://backglass.org/duncan/16mm/title_craft_order_blank.pdf http://backglass.org/duncan/16mm/title_craft_order_blank_100.pdf A bunch of the little inserts that Kodak stuffed in with your returned your film when you had them process it: http://backglass.org/duncan/16mm/kodak_kp20747p_processing_insert_1952.pdf http://backglass.org/duncan/16mm/kodak_kp20747p_processing_insert_1952_100.pdf http://backglass.org/duncan/16mm/kodak_kp20747r_processing_insert_1956.pdf http://backglass.org/duncan/16mm/kodak_kp20747r_processing_insert_1956_100.pdf http://backglass.org/duncan/16mm/kodak_kpphi20747a_processing_insert_1966.pdf http://backglass.org/duncan/16mm/kodak_kpphi20747a_processing_insert_1966_100.pdf http://backglass.org/duncan/16mm/kodak_c3_105_cameras_film_insert.pdf http://backglass.org/duncan/16mm/kodak_c3_105_cameras_film_insert_100.pdf http://backglass.org/duncan/16mm/kodak_c3_336_projector_film_1962.pdf http://backglass.org/duncan/16mm/kodak_c3_336_projector_film_1962_100.pdf http://backglass.org/duncan/16mm/kodak_a3_798_christmas_insert.pdf http://backglass.org/duncan/16mm/kodak_a3_798_christmas_insert_100.pdf Enjoy the trip down memory lane! Duncan