

Guy Holt
-
Posts
680 -
Joined
-
Last visited
Everything posted by Guy Holt
-

Recreating Late Afternoon Light.
Guy Holt replied to michael c barlas's topic in Lighting for Film & Video
How I would approach this question is to start with how many foot candles (FC) the T5 will give you at 21ft. According to the Arri Photometric calculator, at med. flood it will provide 477 FC. I would then multiply that by the transmission coefficient of 1/2 CTB which according to the Rosco website is 52% to calculate that 248 FC will come out the other side of the gel. According to the Lee website, the light lost to Hampshire Frost is less than a ¼ stop which means that you will lose, conservatively, another 31 FC to the diffusion (1 stop = 124 FC x .25 = 31 FC.) Subtracting the 31 FC from the 248 FC that came out of the ½ CTB, you can expect to have 217 FC on set. To calculate what stop 217 FC will provide, all you have to remember is that 100FC at an ASA of 100 at 24fps (180 degree shutter) will give you a stop of 2.8. So 217 FC at ASA 800 should give you a stop of about 11, which means that a 5k should be plenty strong enough, especially since you are probably going to want to balance your sun source at a half key because late afternoon light should be fairly weak. Where it will draw 42 Amps at 120V, you can’t plug a 5k into the wall. You will need some other means of powering it. A 60A Transformer/Distro on a modified 7500W Honda EU6500 will handle it without a problem. Guy Holt, Gaffer ScreenLight & Grip Lighting rental & sales in Boston -
The role of L.E.D lighting in filmmaking
Guy Holt replied to Aaron Takhar's topic in General Discussion
While you can white balance out/time out the magenta or green bias of LED fixtures in digital video cameras/digital film intermediate, the camera/timer is not able to replace the parts of the spectrum that are missing from LEDs all together. And since gels only rebalance the spectral distribution of a light source by passing the wavelength of the color that they are, gels cannot correct for these deficiencies either because there is not much light of those wavelengths to pass in LEDs to begin with. Left: Tungsten source, Right: White Phosphor LED source. This inability of most LEDs to render color accurately is very visible in the tests performed by The Academy of Motion Picture Arts and Sciences (AMPAS) as part of their “Solid State Lighting Project Technical Assessment” I mentioned previously (see http://www.screenlightandgrip.com/html/emailnewsletter_generators.html#anchorHigh%20Output%20AC%20LEDs for details.) In one (above) a model was photographed wearing a dress that had a number of different blue tints. Footage was shot with both a true tungsten source and a White Phosphor LED source. The tungsten-lit footage displayed all of the subtle differences in blue tones in the fabric, while the LED-lit footage, lacking cyan output, showed just a nice blue dress, without the same richness of hue. Since the light doesn’t put out much cyan, the camera/film simply can’t record it. The same holds true of flesh tones illuminated by LED light. As is also evident in the pictures above, skin tones don’t reproduce well under LED lights (remote phosphor included) because of the steep drop off of high frequency colors (above the 600nm cut off) such as pinks, reds, oranges, and other long wave-length colors. As the illustration below, comparing the reflected spectral distribution of a Caucasian skin tone under theoretical pure white light (an even distribution of all wavelengths) to that of a Phosphor White LED demonstrates, absent these wavelengths the skin tones look pale under LEDs because light reflected by the skin tone is likewise absent these critical long wavelength colors. Reflected Spectral Distribution of Caucasian skin tone under theoretical White Light and Phosphor White LED Light In the picture above illuminated by the Phosphor White LED, both the cyan/blue dress and the skin tone, don’t reproduce well because you can't get accurate color reflected from an object unless that color is in the light in the first place. In other words, if the light source doesn’t generate the color (cyan), it is not reflected by the object (the dress) and so the camera/film simply can’t record it. And, as Cinematographer Daryn Okada, ASC, discovered the hard way in an experience he recounts in the ICG Magazine (http://www.icgmagazine.com/wordpress/2011/06/02/it’s-a-phosphorous-world/), color gel packs, camera white balance, or digital intermediate timing can’t bring it out if it isn’t there to begin with. Like many ASC cinematographer, Daryn Okada only uses LEDs as “touch up” lights to add a little something where key lights don’t cover. After a recent experience, he doesn’t use LEDs even for that limited purpose. Needing to touch up a face on one talent mark, he hid a small LED unit behind a chair, to add some glow to an actress’s face when she reached a mark where the keys had fallen off. “The manufacturer claimed the unit to be a ‘tungsten LED source’” he recounts. “She stopped right in the doorway, where I had this LED, and looked fine. But when I got the dailies back, her face was totally magenta.” What’s worse, Okada says the image could not be repaired in post, because there wasn’t enough of the right color of light in the scanned negative for a color timer to bring out. This is a good example of the fact that, the bottom line is that, simply by nature of their discontinuous spectral distribution, even high CRI LEDs will never accurately reproduce colors on screen regardless what can be done in post. You have to be wary of all the claims made by LED head manufacturers. Whenever a new lighting technology comes on the market, the manufacturers put a little spin on the scientific data which has a tendency to cloud issues. For this reason, to pick the right LED luminary for a particular job it helps to have a thorough understanding of the technology. For our company newsletter I have put together an overview of the technology and what LED products are available for motion picture lighting (available at http://www.screenlightandgrip.com/html/emailnewsletter_generators.html#anchorHigh%20Output%20AC%20LEDs.) Guy Holt, Gaffer, ScreenLight & Grip, Lighting Rental and Sales in Boston -
Information that should be part of a database is the power factor (pf) of a light. I am discovering that a lot of LED AC power supplies are not power factor corrected (pfc) making them much less efficient than tungsten lights that have unity power. With power factors as low as .45, LEDs can draw twice the current than a tungsten light of the same wattage. If you don’t take into account the extra current they will draw and the harmonic currents they will generate, you may find breakers tripping and portable generators running erratically. (The Litepanel Sola 4 has a pf of .60 and Total Harmonic Distortion of 77.7%) The manufacturers of LED Light fixtures generally do not give power factor specifications for their products. One would think that the less expensive LED lights would not be pfc, while the more expensive ones would, but that proved not to be the case in recent testing I did of fixtures. Over half of the fixtures that I tested at random (from the inventories of Boston area rental and lighting sales companies) were not pfc. With power factors ranging from .45 to .63, these fixtures generated considerable harmonic distortion (THD ranged from 75-85%.) (The pf of the Litepanel Astra drops to .54 when dimmed to 50%) Even those that were pfc generated harmonic currents when dimmed. For instance, the pfc of the new Litepanel Astra 1x1 above dropped from .99 to .54 when dimmed 50% (THD increased to 83.2%.) To see which LED lights are power factor corrected or not, use this link to see some of the results of my tests. Guy Holt, Gaffer ScreenLight & Grip Lighting Rental & Sales in Boston
-
Using Color - At what point do Gels effect CRI
Guy Holt replied to Albion Hockney's topic in Lighting for Film & Video
That's because LEDs don’t put out much beyond 625nm, so there is not much for a CTO filter to pass to rebalance the light output to 2900K. The result is that the “corrected” light is too cool. Another undesirable consequence comes from the fact that Full CTO is designed to pass extra green (there is a bump in the spectral transmission curve of Full CTO in the green portion of the spectrum) and so it creates, given the amount of green inherent in Daylight LEDs to begin with, a disproportionate amount of green (creating an overall green bias) to the "corrected" light when used on Phosphor White LEDs. Use this link to test results demonstrating this with a Lightpanel 1x1 Daylight Spot. The gel pack that eventually made the Lightpanel 1x1 Daylight Spot in the test marginally similar to a tungsten light, was only able to do so at the expense of two stops – so much for the greater efficiency of LEDs. Guy Holt, Gaffer, ScreenLight & Grip, Lighting Rentals & Sales in Boston -
middle of no where roadside lighting?
Guy Holt replied to Brian Nelson's topic in Lighting for Film & Video
Deleted duplicate post -
middle of no where roadside lighting?
Guy Holt replied to Brian Nelson's topic in Lighting for Film & Video
Deleted duplicate post -
middle of no where roadside lighting?
Guy Holt replied to Brian Nelson's topic in Lighting for Film & Video
+1 Dusk-for-night, is an important technique for indie filmmakers to learn because it is a means of obtaining expensive looking production values for very little money. Dusk-for-night uses the fading daylight as an ambient fill to gain a base line exposure in wide establishing shots without using a big source. Typically it is intercut with closer framing shot night-for-night to create a realistic night scene. The advantage to shooting dusk-for-night over day-for-night (the other low budget alternative to expensive night-for-night cinematography on a large scale) is that if you are shooting a house or city street you can incorporate set practicals like window or porch light, car headlights, or even streetlights or raking moonlight in a wide establishing shot. But in order to get the balance right between your lamp light and the fading daylight requires the right location and careful planning. For example, the key to success in shooting the house pictured below dusk-for-night was choosing the right location. To get the subtle separation of the night sky and trees from a dark horizon, you don’t want to shoot into the after glow of the setting sun. Instead you want to find a location where you will be shooting into the darker eastern sky. With dusk-for-night, you have maybe a thirty-minute window of opportunity after the sun has set to shoot the wide master before the natural ambient light fades completely so you have to have everything planned out, rehearsed, and ready to go. In order to get the balance right between your lights and the ambient dusk light in the limited time you have to shoot the establishing shot, you have to start with larger fixtures and be prepared to reduce their intensity quickly. For instance if you want the glow of an interior practical light raking the lace curtains in a window, start with a PH213 in the practical and 2k Fresnel raking the lace curtain. Wait until the ambient dusk level outside has fallen to the point where the balance between the natural light and your lamp light looks realistic and then roll. To get a second shot or take, open the camera aperture a half stop and drop a single in the 2k head, dim down the PH213, and wait again until the ambient dusk level outside has again fallen to the point where it looks realistic and then roll. If you continue in this fashion with nets after you have exhausted your scrims, and a PH212 when the dimmed PH213 starts to look too warm, you will be able to get multiple takes out of the diminishing dusk light. Likewise with a streetlight or moonlight raking across the front of the house. To create a moon dapple on the front of a house against a night sky, you will need a good sized HMI set on a high oblique angle so that it will rake across the front of the house. Break it up with a branch-a-loris and wait. When the ambient level of the dusk sky has fallen to the point where it looks realistic against the moonlit house and the practical lit interior - roll. You can even add a car pulling up to the house, but you have to be prepared and have enough manpower standing by to dim the practicals, net the lights, and scrim the car’s head lights very quickly. The final touch is to use a graduated ND filter on the lens to darken the sky and balance the camera between daylight and tungsten so that the ambient dusk light filling the shadows is cool and the practicals and tungsten lights motivated by them remain warm but not too warm. Once dusk is past, you shoot the close coverage night-for-night. The technique we used to light the house pictured above, you can use lighting a roadside scene as well. For example, the scene below takes place in the middle of a near vacant parking lot of an all night convenience store. The establishing shot of the brightly lit convenience store situated in a wide-open expanse of a empty parking lot at night was shot dusk-for-night because the production didn’t have the resources to light up the parking light and building to separate it from the night sky. Close coverage was then shot night-for-night with nothing more than a single modified 7500W Honda EU6500is and a small tungsten package of 1ks and 650w Fresnels. Shooting on the side of the road, you will be in the same predicament they faced here. With no building or other sound barrier within a reasonable distance to block the sound of the generator, Gaffer Aaron MacLaughlin put the generator behind their grip truck as far from set as possible. This was only possible because he used a transformer to step down the 240V output of the generator, and in the process compensate for the voltage drop they experienced over the 500’ cable run to set. If you want to use an HMI larger than a 4k, you can parallel two Honda EU6500s with a 120A paralleling box. Guy Holt, Gaffer, Screenlight and Grip, Lighting rental and sales in Boston. -
Given your frame rate and the light attenuation of the water that John mentioned, you will need some sizable fixtures to light from above. I would think a 4k HMI or larger would be needed. Whatever fixture you decide to use to light the pool be sure to use GFCIs on all the cables supplying your lights – whatever size they happen to be. GFCIs are a must when working around water in order to avoid someone taking a potentially lethal shock. If you decide to go with HMIs you will need film style GFCIs, like Shock Blocks, that are specifically designed for motion picture lights. To prevent the nuisance tripping that electronic HMI ballasts can cause with standard GFCIs, film style GFCIs sense on an "Inverse Time Curve." And, to deal with the harmonics that non-PFC HMI ballasts draw (that will cause other GFCIs to trip), film style GFCIs include a harmonic filter. Attenuated by the filter, the harmonics generated by dirty loads such as non-PFC HMI ballasts, pose less of a problem. If you want to learn more about ground fault protection in wet situations, I have made available online an IATSE training curriculum that I developed for Local 481. It covers ground fault protection for everything from battery boxes to Crawford Studio generators. You will find it at this web address. Guy Holt, Gaffer ScreenLight and Grip Lighting Rental & Sales in Boston
-
Using Color - At what point do Gels effect CRI
Guy Holt replied to Albion Hockney's topic in Lighting for Film & Video
A major problem with low CRI sources is that gels (party, effects or color correction) do not produce the same repeatable result that you’d expect from gelling a high CRI continuous source like tungsten. Take for example the discontinuous spectrum of even high CRI remote Phosphor LEDs like the Cineo Trucolor. As you can see by the spectral distribution graph for the Cineo with 3200K panel above, they have a spike in the blue range that does not exist in the continuous spectrum of a tungsten light source (green line.) The greater proportion of blue and green/cyan in the Cineo Trucolor 3200 will result in an unexpected and undesirable result if a color correction (CTO, CTS, CTB), or color effect gel (Congo Blue, Bastard Amber, etc.) calibrated for the continuous spectrum of tungsten light is used on this discontinuous spectrum of a 3200K remote phosphor LED. The same is true of the Cineo Trucolor with the 5600K panel above. The quite prominent blue spike (black line) will likewise result in an unexpected and undesirable result if a color correction, or color effect, gel calibrated for the continuous spectrum of a continuous daylight source is used on the discontinuous spectrum of a 5500K remote phosphor LED. Color correction and color effect gels are a part of a finely calibrated imaging system that involves a highly specific light receptor (film emulsion or video sensor), light sources, and color correction or effects gels calibrated for both. Where that exists between film emulsions/video sensors and tungsten and/or daylight sources it is possible to mix dyes in a gelatin materials to create desired effects (it has taken decades to hone this system.) To use the available color correction and effects gels on the discontinuous spectrum of LEDs is a misapplication of a finely tuned system designed for continuous spectrum light sources only. Use this link for examples of what happens when you put a color effects gel designed for tungsten source on the discontinuous color spectrum of LEDs. Guy Holt, Gaffer, ScreenLight & Grip, Lighting Rental and Sales in Boston. -
Brightshot Luminator instead of HMIs
Guy Holt replied to Marco Materassi's topic in Lighting for Film & Video
While that may be true in terms of lumens generated per watt, I am discovering that a lot of LED AC power supplies are not power factor corrected making them much less efficient than HMI ballasts which are, for the most part, power factor corrected (pfc) these days. With power factors as low as .45, LEDs can draw twice the current than a HMI of the same wattage. If you don’t take into account the extra current they will draw and the harmonic currents they will generate, you may find breakers tripping and portable generators running erratically. (The Litepanel Sola 4 has a pf of .60 and Total Harmonic Distortion of 77.7%) Unfortunately, the manufacturers of LED Light fixtures generally do not give power factor specifications for their products. One would think that the less expensive LED lights would not be pfc, while the more expensive ones would, but that proved not to be the case in recent testing I did of fixtures. Over half of the fixtures that I tested at random (from the inventories of Boston area rental and lighting sales companies) were not pfc. With power factors ranging from .45 to .63, these fixtures generated considerable harmonic distortion (THD ranged from 75-85%.) (The pf of the Litepanel Astra drops to .54 when dimmed to 50%) Even those that were pfc generated harmonic currents when dimmed. For instance, the pfc of the new Litepanel Astra 1x1 above dropped from .99 to .54 when dimmed 50% (THD increased to 83.2%.) Use this link to see which LED lights are power factor corrected or not. Guy Holt, Gaffer ScreenLight & Grip Lighting Rental & Sales in Boston -
LED - RGB changeable strips - anyone use them?
Guy Holt replied to Albion Hockney's topic in Lighting for Film & Video
As I am discovering, a lot of LED AC power supplies are not power factor corrected. Which means that if you do not take their poor power factor (which can be as low as .45) into account when running LED Ribbons the length of the motel you can find yourself tripping breakers because the lights will draw twice the current you would think. A good example of this was a Christmas movie shot here this last January. The set decorators dressed a large tree (20’ high) with hundreds of LED strings. Where each string was just a few watts they figured they could plug them all into one circuit. After the breaker tripped several times, only then did they call in the electricians to sort out the mess. But of course now the production is waiting for the tree lights to come on before they can shoot and the electricians caught the blame. (The LiteGear RGB Lite Ribbon pictured above has a pf of .45) Unfortunately, the manufacturers of LED Light fixtures generally do not give power factor specifications for their products. One would think that the less expensive LED lights would not be pfc, while the more expensive ones would, but that proved not to be the case in recent testing of fixtures. Over half of the fixtures that I tested at random (from the inventories of Boston area rental and lighting sales companies) were not pfc. With power factors ranging from .45 to .63, these fixtures generated considerable harmonic distortion (THD ranged from 75-85%.) Even those that were pfc generated harmonic currents when dimmed. For instance, the pfc of the new Litepanel Astra 1x1 dropped from .99 to .54 when dimmed 50% (THD increased to 83.2%.) One could argue that the wattage of LED fixtures is so low that the harmonics they draw and kick back into the electrical distribution system is so low that it does not matter from a practical standpoint. While that is true to a degree, when used as the predominant source of light in a studio, like the new BSkyB studio pictured, or for a night exterior powered by a portable generator, the harmonics generated by even small LED fixtures will accumulate and effect their power source adversely. To see which LED lights are power factor corrected or not, use this link to see some of the results of my tests. Guy Holt, Gaffer ScreenLight & Grip Lighting Rental & Sales in Boston -
Brightshot Luminator instead of HMIs
Guy Holt replied to Marco Materassi's topic in Lighting for Film & Video
I have never heard of brightshot luminator LED lights and a google search turns up nothing. Does the manufacturer have a website that you can direct us to? Guy Holt, Gaffer, ScreenLight & Grip, Lighting Sales & Rentals in Boston -
Manual or schematic for old Arri HMI ballast
Guy Holt replied to JD Hartman's topic in Lighting for Film & Video
There are several things you need to know about the Arri magnetic ballasts and you won’t find them in a manaul. First, they were made by Irem and marketed by Arri which means the Irem schematics on Galaxy’s website would be applicable. Also, magnetic ballasts in general are not forgiving when it comes to flicker. The problem with them is that the light intensity of a HMI powered by a magnetic ballast follows the waveform of the supply power and increases gradually until it peaks and then decreases. Since there are two peaks per cycle (+ & - ), the light pulses twice every AC cycle or 120 times a second (see illustration below. ) This fluctuation in the light output is not visible to the eye but will be captured on film or video if the frequency (Hz) of the AC power is not precisely synchronized with the film frame rate or video scan rate. If the AC Frequency of the power were to vary, a frame of film or video scan, would receive more or less exposure depending upon the exact correspondence of the film/video exposure interval to the cycling power waveform because the light intensity is pulsating at twice the AC frequency. The sinusoidal 60Hz current of a magnetic ballast (left) creates a pulsating light output (right) Electronic square wave ballasts eliminate the potential for flicker by squaring off the curves of the AC sine wave supplying the globe. Squared off, the changeover period between cycles is so brief that the light no longer pulsates but is virtually continuous (see illustration below.) Even if the AC Frequency of the power were to vary, a frame of film or video scan, would receive the same exposure because the light intensity is now not pulsating but nearly constant. In other words, electronic ballasts are “flicker free” because they square off the power sine wave which causes an increase in the duration of the peak level of light output so that the light is on more than it is off. Electronic HMI ballasts are also called “square wave” ballasts for this reason. The down side to electronic HMI ballasts is that because of their sophisticated electronics they are more expensive and more fragile than magnetic ballasts, and if they are not power factor corrected, they will draw more current than a magnetic ballast. The refined square-wave signal of an electronic ballast (left) creates virtually even light output (right) (Illustrations courtesy of Harry Box) Magnetic ballasts will operate reliably on the Honda EU series generators because Honda's sine-wave inverter technology provides much higher quality power than conventional (non-inverter) generators. With a waveform distortion factor of less than 2.5%, the power generated by Honda’s EU series of generators is quite often better than what you get out of the Crawford Studio Units. The power these machines generate is rock solid with a frequency variance of only hundredths of a cycle - which eliminates the need for costly crystal governors. The Honda EU series generators provide true sine wave power with enough frequency stability to power HMI's with magnetic ballasts without flicker at certain safe frame rates and shutters. As long as you shoot at one of the many safe frame rates, magnetic ballasts are “flicker free” with the Honda inverter generators. Depending on the type of filming you do, you may in fact be better served by an older magnetic ballast over a non- Power Factor Corrected electronic ballast. A non-pfc 1.2kw electronic ballast draws 19amps (verses the 13.5 amps of a magnetic ballast) so it will always trip the common 15amp house circuit and will trip a 20 Amp circuit if there is something else, like a computer or light, on the same circuit. Where you can't always know what else is on the same circuit, or even if it is a 20 or 15 Amp ciruit, a 1.2kw magnetic ballast drawing only 13.5 Amps is the safer bet since it can operate on a 15 amp circuit even with other things on the circuit. Non-Power Factor Corrected electronic ballasts are meant to be used on film sets where every circuit is 20 Amps and you know what is on the circuit because you are distributing the power yourself from a tie in or generator. If your style of shooting requires that you plug into wall outlets, you will be better served by a magnetic ballast. But that is not the only benefit to using a magnetic ballast over a non-PFC electronic ballasts. If you don’t have access to the newest PFC electronic ballasts, the older magnetic ballasts are in fact cleaner running on portable gas generators than non-PFC electronic ballasts. That is because the harmonic distortion created by non-PFC ballasts reacting poorly with the distorted power waveform of conventional AVR generators limited the number of HMIs you could power on a portable generator. The primary factors limiting the use of HMIs on portable generators has been the inefficient use of power by non-PFC electronic ballasts and the harmonic noise they throw back into the power stream. The adverse effects of this harmonic noise (evident in the oscilloscope shots below), can take the form of overheating and failing equipment, efficiency losses, circuit breaker trips, excessive current on the neutral wire, and instability of the generator’s voltage and frequency. For these reasons it has never been possible to operate more than a couple of 1200W HMIs on a conventional 6500W portable gas generator. As is evident in the oscilloscope shots below of a 1200W magnetic HMI ballasts on grid power (left), on power generated by a conventional AVR generator (middle), and power generated by an inverter generator (right), the lagging power factor caused by the inductive reactance of magnetic ballasts has by comparison only a moderately adverse effect on the power waveform. Outside of causing a voltage spike in the inverter power, magnetic ballasts actually show a positive effect on the already distorted power waveform of the Honda EX5500 conventional generator. For this reason magnetic ballasts work better on conventional generators with frequency governors than do non-PFC electronic square wave HMI ballasts. These oscilloscope shots show that if you don’t have access to the newest PFC electronic ballasts, the older magnetic ballasts are in fact cleaner running on portable gas generators than non-PFC electronic ballasts. And, where inverter generators like the Honda EU6500is do not require crystal governors to run at precisely 60Hz, you can operate magnetic HMI ballasts reliably on them. In addition, the smaller magnetic ballasts (575-2500W) offer the distinct advantage of being less expensive and draw less power (once they have come up to speed) than the commonly available non-PFC electronic equivalents (13.5A versus 19A for a 1.2kw.) Of course there are downsides to using magnetic ballasts. One down side is that you are restricted to using only the safe frame rates and shutter angles. But, when you consider that every film made up to the early 1990s were made with magnetic HMI ballasts you can see that being limited to the safe frame rates is not all that restrictive. Another downside to magnetic ballasts is that you can’t load the generator to full capacity because you must leave “head room” for their higher front-end striking load. When choosing HMIs to run off portable generators, bear in mind that magnetic ballasts draw more current during the striking phase and then they “settle down” and require less power to maintain the HMI Arc. By contrast, an electronic ballasts “ramps up”. That is, its’ current draw gradually builds until it “tops off.” If it sounds like I’m hyping the Honda EU6500is generator, it is not because I rent or sell them. As a Gaffer of a lot of tight budgeted independent shorts, I think these machines are a major development in portable power. Since magnetic HMI ballasts will operate flicker free at all standard frame rates on them (without the need for a crystal governor), inverter generators like the Honda EU6500is give new production life to older 2.5kw & 4kw HMIs with 120V magnetic ballasts. And now that you can parallel two of them for 120A output, they give new life to 6 & 12kw HMIs as well. For more detailed information on using magnetic HMI ballasts on Honda portable generators, I would suggest you read a white paper I wrote on the use of portable generators in motion picture production that will be available soon as an e-book from the Academy of Production Technology Press (APT.) Harry Box, author of The Set Lighting Technician’s Handbook has cited my article in the just released 4th Edition of Harry Box's “Set Lighting Technician's Handbook” (http://www.screenlightandgrip.com/html/BoxBook.html) and featured on the companion website “Box Book Extras." Of the article Harry Box exclaims: “Great work!... this is the kind of thing I think very few technician's ever get to see, and as a result many people have absolutely no idea why things stop working.” “Following the prescriptions contained in this article enables the operation of bigger lights, or more smaller lights, on portable generators than has ever been possible before." The original white paper is still available online for free at http://www.screenlightandgrip.com/html/emailnewsletter_generators.html. - Guy Holt, Gaffer, ScreenLight & Grip, Lighting and Grip Rental & Sales in Boston -
One (huge) size fits all? (Day Exterior)
Guy Holt replied to Phil Soheili's topic in Lighting for Film & Video
I have always found reflector boards and overheads to be useless under rapidly changing conditions. They work great in modeling your talent when the sun is out, but as soon as the sun goes behind a cloud they are useless, resulting in the shots of even a short scene not matching when you get into the editing room. I agree with Jacques that you definitely need a large HMI source. A 6k will work, but as Albion points out it will require a large generator and all the baggage that comes with it. A better choice would be the Arri M40. It has the output of a 6k Par but you can run it, along with other lights, on a 7500W modified Honda EU6500is/Transformer gen-set that provides a single 60Amps/120V circuit. Like all M-Series lamp heads, the M40 is equipped with MAX Reflector Technology, a unique and very bright open face reflector design that combines the advantages of a Fresnel and the output of a PAR in one fixture. Focusable by the turn of a knob (from 17-55 degrees), the MAX reflector produces a remarkably even light field and a crisp, clear shadow. The elimination of spread lenses, makes MAX reflector lamp heads comparable to par configurations of even a higher wattage. In fact, the M40 is brighter than some 6K PARs on the market. To power the M40, ARRI has engineered a dual wattage ballast that will operate on supply voltages ranging from 100-250V. With Active Line Filtration (ARRI's system of Power Factor Correction) built in, the M40 ballast is incredibly efficient and generates virtually no harmonic noise - enabling it to reliably operate on portable gas generators like our 7500W modified Honda EU6500. And drawing only 36A at 120V, the M40 leaves room (24A) on the 60A circuit of a 7500W modified Honda EU6500is/Transformer gen-set for other lights, even their M18. The approach that I find works best to maintain continuity in rapidly changing light is to shoot the establishing master shot when the sun is in a backlight position. Shooting into the downside of your talent, a M40 is large enough to create a sunny feel in a fairly large frame. Up to that point I shoot the close coverage under a full silk. Shooting the coverage under a silk offers a number of advantages. If the sun is coming in and out of clouds, the silk takes the directionality out of the sun and knocks down its’ level by two and half stops so that again a M40 is large enough to create a sunny feel in your close ups. A good example of this approach is a scene I lit for a low budget feature that took place around a campfire in a small clearing surrounded by woods. Surrounded on all sides by woods, we knew that we would lose direct sunlight in the clearing early in the day and would need lights. We also knew that the scene was going to take all day to shoot because of its’ extensive dialogue, so we figured out where the sun was going to be throughout the day and where it would look best for our establishing wide shot. Where it was a two shot, mostly over the shoulder of one character talking to the second character who was standing with his back to the campfire with the woods behind him, we decided to wait until the sun had moved into a near back light position to shoot the establishing shot. So we shot our close coverage first with nothing more than a 4k Par and 1.2k Par under a 20x light soft frost on top of which we threw leaves. The 4k was heavily diffused and positioned so that it gave the talent the most attractive modeling. The 1.2kw was positioned as a backlight where the sun would be when we would eventually shoot the wide - this way there was always an edge in every shot for continuity. When the time came to shoot the establishing shot, the shadow of the overhead frame and stands were thrown forward and did not interfere with the wider framing. Since we were still shooting under the Frost, we were wider open on the iris and so our exposure dug into the dark woods and brought out more detail. As an unexpected added bonus, the smoke from the campfire drifted into the woods, creating shafts of light where the sun broke through the tree canopy. What would have impossible to cut together without lights, turned into a beautifully lit scene, and was accomplished with nothing more than what could be powered on a modified Honda EU6500is generator. Guy Holt, Gaffer, Screenlight and Grip, Lighting Rental and Sales in Boston. -
The role of L.E.D lighting in filmmaking
Guy Holt replied to Aaron Takhar's topic in General Discussion
For a accurate assessment of the color rendering capability of LED fixtures see The Academy of Motion Picture Arts and Sciences' “Solid State Lighting Technical Assessment" - a research project in which they systematically tested and compared the LED technology available at the time to Incandescent and HMI light sources. On their website they have posted not only side by side comparisons of chip charts exposed under each light source but also set pieces, wardrobe, and make-up. To maintain neutrality, no brand names are mentioned in their results, but they chose lights that reflect the various approaches taken by the major manufacturers of LED fixtures for motion picture applications. You can find a link to the Academy of Motion Picture Arts and Sciences’ “Solid State Lighting Project Technical Assessment", as well as other information regarding LEDS on our website at http://www.screenlightandgrip.com/html/emailnewsletter_generators.html. - Guy Holt, Gaffer, ScreenLight & Grip, Lighting and Grip Rental & Sales in Boston -
The role of L.E.D lighting in filmmaking
Guy Holt replied to Aaron Takhar's topic in General Discussion
Another problem with LEDs (remote phosphor included) is that color correction gels are not calibrated for their discontinuous spectrum and so you get unexpected results from their use on LEDs. Where you know what to expect when you put a color correction gel, say ¾ CTO, on HMI or Tungsten lights, you don’t know what you will get putting that same gel on an LED light. The reason is that because of their discontinuous spectrum, the use of CC gels on LEDs have unintended and undesirable consequences. 3/4 CTO gel passes only certain wavelengths (represented by the spectral transmission curve (center)) of daylight (left) to create the color spectrum approximating that of a 3200K tungsten light (right.) The same 3/4 CTO gel applied to a daylight LED (left) passes the same wavelengths (represented by the spectral transmission curve (center)) to create an unknown color spectrum that does not approximate a 3200K tungsten light. A good example of this is what happens when you try to convert the 5500K out-put of Phosphor White LEDs to 2900k with Full CTO gel. Where you can do it with some success with HMIs because there are long wavelengths in it’s continuous spectrum to pass disproportionately to the blue part of the spectrum to achieve a nominal 2900K, since LEDs don’t put out much beyond 625nm, there is not much for a filter to pass to rebalance the light output to 2900K, so the “corrected” light is too cool. Another undesirable consequence comes from the fact that Full CTO is designed to pass extra green (there is a bump in the spectral transmission curve of Full CTO in the green portion of the spectrum) and so it creates, given the amount of green inherent in Daylight LEDs to begin with, a disproportionate amount of green (creating an overall green bias) to the "corrected" light when used on Phosphor White LEDs ( link to test results demonstrating this with a Lightpanel 1x1 Daylight Spot.) The gel pack that eventually made the Lightpanel 1x1 Daylight Spot in the test marginally similar to a tungsten light, was only able to do so at the expense of two stops – so much for the greater efficiency of LEDs. Guy Holt, Gaffer, ScreenLight & Grip, Lighting & Grip Rental and Sales in Boston -
Best times of the day and weather for shooting
Guy Holt replied to Gabe Phillips's topic in Lighting for Film & Video
This is an example of dusk-for-night, which is an important technique for indie filmmakers to learn because it is a means of obtaining expensive looking production values for very little money. Dusk-for-night uses the fading daylight as an ambient fill to gain a base line exposure in wide establishing shots without using a big source. Typically it is intercut with closer framing shot night-for-night to create a realistic night scene. The advantage to shooting dusk-for-night over day-for-night (the other low budget alternative to expensive night-for-night cinematography on a large scale) is that if you are shooting a house or city street you can incorporate set practicals like window or porch light, car headlights, or even streetlight or raking moonlight in a wide establishing shot. But in order to get the balance right between your lamp light and the fading daylight requires the right location and careful planning. For example, the key to success in shooting the house pictured below dusk-for-night is choosing the right location. To get the subtle separation of the night sky and trees from a dark horizon, you don’t want to shoot into the after glow of the setting sun. Instead you want to find a location where you will be shooting into the darker eastern sky. With dusk-for-night, you have maybe a thirty-minute window of opportunity after the sun has set to shoot the wide master before the natural ambient light fades completely so you have to have everything planned out, rehearsed, and ready to go. In order to get the balance right between the practicals and the ambient dusk light in the limited time you have to shoot the establishing shot, you have to start with larger fixtures and be prepared to reduce their intensity quickly. For instance if you want the glow of an interior practical light raking the lace curtains in a window, start with a PH213 in the practical and 2k Fresnel raking the lace curtain. Wait until the ambient dusk level outside has fallen to the point where the balance between the natural light and your lamp light looks realistic and then roll. To get a second shot or take, open the camera aperture a half stop and drop a single in the 2k head, dim down the PH213, and wait again until the ambient dusk level outside has again fallen to the point where it looks realistic and then roll. If you continue in this fashion with nets after you have exhausted your scrims, and a PH212 when the dimmed PH213 starts to look too warm, you will be able to get multiple takes out of the diminishing dusk light. Likewise with a streetlight or moonlight raking across the front of the house. To create a moon dapple on the front of a house against a night sky, you will need a good sized HMI set on a high oblique angle so that it will rake across the front of the house. Break it up with a branch-a-loris and wait. When the ambient level of the dusk sky has fallen to the point where it looks realistic against the moonlit house and the practical lit interior - roll. You can even add a car pulling up to the house, but you have to be prepared and have enough manpower standing by to dim the practicals, net the lights, and scrim the car’s head lights very quickly. The final touch is to use a graduated ND filter on the lens to darken the sky and balance the camera between daylight and tungsten so that the ambient dusk light filling the shadows is cool and the practicals and tungsten lights motivated by them remain warm but not too warm. Once dusk is past, you shoot the close coverage night-for-night when a package consisting of what you can run on a portable generator will suffice. If you parallel two of the Honda EU7000is generators for 120A output, you will be able to use a 6k HMI for your moonlight at dusk on top of a sizeable tungsten package to light the interior of a house to a high level to match the daylight. For example, the scene below takes place in the middle of a near vacant parking lot of an all night convenience store. The establishing shot of the brightly lit convenience store situated in a wide-open expanse of a empty parking lot at night was shot dusk-for-night because the production didn’t have the resources to light up the parking light and building to separate it from the night sky. Close coverage was then shot night-for-night with nothing more than a single modified 7500W Honda EU6500is and a small tungsten package of 1ks and 650w Fresnels. With no building or other sound barrier within a reasonable distance to block the sound the generator, Gaffer Aaron MacLaughlin had no recourse but to put it behind their grip truck as far from set as possible. This was only possible because he used a transformer to step down the 240V output of the generator, and in the process compensate for the voltage drop they experienced over the 500’ cable run to set. Guy Holt, Gaffer, Screenlight and Grip, Lighting rental and sales in Boston. -
Have to disagree. He is lit consistently from the side when the only motivated source is the store window, which is directly behind him. That and the cool color temperature tells me there is a large soft source to frame right. One new approach to lighting night exteriors that Gaffer Tony Lullo does on “Chicago Fire” is to use Mactech 96 LED panels rigged under a condor basket to create just this type of soft ambient light. The production stills below are from an episode from season two where a car has crashed into an electrical pole causing a black out. To create a soft ambient top light, he rigged several Mactech 96 fixtures with 5500K tubes under a condor and flew it over the scene. He then used another Mactech 96 on a rolling stand with 3200K tubes to create the warm glow from the resulting electrical fire. Since the Mactechs draw only 8.4 Amps each this approach can be very cost effective because it means you can run your entire set off of a couple of paralleled Honda EU6500s. One of the biggest hurdles to obtaining good production values in low budget digital cinema productions is the high cost of the blimped studio generators required to power large HMIs for wide night exteriors (the signature of high production values.) Not only are blimped generators expensive to rent, but they also come with hidden costs. Since rental trucks like those from Ryder or Penske are not equipped to tow, you quite often have to hire the rental house's grip truck to tow them. And, since most rental houses require that one of their employees drive their trucks (for insurance reasons), the production has to hire a driver at roughly $575/10hrs - which is probably more than anyone else on a typical indie crew is getting paid. All of this makes the traditional approach of an 18k Fresnel in a condor very expensive. Now that you can parallel two modified Honda EU7000s or EU6500s for a combined output of 120A there is a more cost effective alternative. A complete paralleling system consists of two generators, a Paralleling Control Box, and a Transformer/Distro (either 60-, 84-, or 100 Amp.) Parallel operation of two Honda EU6500 generators made possible by our new Paralleling Control Box) The EU7000 generators require modification to interface with the Paralleling Control Box, which syncs the frequency and equalizes the load between the generators. The paralleling control circuitry uses the Pulse Width Modulation (PWM) of the generator's inverters to control the load sharing. The phase angles of the two generators are synchronized using open loop architecture. The final function of the control box is to switch the outputs of the inverters to a common bus after their frequencies are locked in step (same phase angle and time base.) (As demonstrated here, our new HD Plug-n-Play Paralleling System can power a 6K HMI as well as 2-2k and 2-1k Fresnels) To provide power that is readily accessible in industry standard outlets, the Paralleling Control Box is outfitted with a 240V Bates receptacle. The 240V Bates pocket enables you to power larger HMIs than has ever been possible before on Hondas (4k - 9k ARRIMAXs) power a Transformer/Distro. The Transformer/Distro serves several important functions in this system that enables two EU6500/7000s to be paralleled, but its' primary function is to step-down the combined 240V output of the two generators into a single large 120V circuit (either 60-, 84-, 100 Amps) that is capable of powering more small lights (it can power up to 10k Quartz). The Transformer/Distros are outfitted with the industry standard 120V Bates receptacle so that you can use standard distro equipment, like Bates Siameses, Extensions, and Break-Out boxes to distribute power around your set, breaking out to U-Ground Edison Outlets where ever needed. Our 60A Transformer/Distro provides 120V power to smaller lights while a 6K HMI operates at 240V) An added benefit to using a Transformer/Distro to distribute the combined power of the two generators is that, no matter where you plug into the Transformer/Distro on its' secondary side, it automatically balances the load on the generator's two legs (which is critical for successful paralleling of two machines – use this link for details.) Where the four Mactech 96 LED fixtures lighting the action area of this crash scene from Chicago Fire draw only 34 Amps total, there is plenty of amps remaining on a couple of paralleled Hondas to power more lights to light the deep background when you consider that both the ARRI L7 LED Fresnel and Kino Flo Parabeam 400 use approximately 2 Amps. In fact, with the efficiency of lights today there is enough power on a couple of paralleled Hondas to power just about all the lights needed to shoot a night exterior on a digital cinema camera. This combination of brighter, more efficient lights, with more sensitive digital cameras, and new more powerful portable generators makes it now possible to achieve remarkable results on a tight budget. Guy Holt, Gaffer, ScreenLight & Grip, Lighting Rental & Sales in Boston
-
Matching tungsten to cloudy exterior
Guy Holt replied to David Calson's topic in Lighting for Film & Video
Talk about impractical. Nothing is more impractical than gelling a tungsten light to balance it to overcast daylight Balancing tungsten to 5000K with full CTB cuts the output of the light by 70%, which means that a 1000W 3200K light becomes a 300W 5000K light when you put Full CTB on it. To put double CTB on to balance to the much cooler overcast light will cut the output of a 1000W 3200K light to a 160W light. In situations like this it would be better to use 5500K light sources, like an HMI, to start with. A HMI will give you considerably more lumens/watt than a color corrected Tungsten 1k, and use up a lot less power. When you are starting out it is easy to underestimate how bright daylight is even on an overcast day. Since the sun puts out something like 10’000 foot candles, even on an overcast day a large HMI is needed. Big shows that I have worked on use a 12k Par and diffuse it heavily to match the shadowless light of an overcast day. Where you probably can’t afford a big HMI and the big generator to operate it, your best bet would be a 4k Par through a light diffusion since they can be run on a modified Honda EU7000 generator. To record dialogue without picking up the sound of the generator, you should run the generator out of the back of a van or truck. To avoid line loss over the long cable run to the generator use a Transformer/Distro on set to boost the voltage to compensate for the drop of voltage you will get over the long cable run. If you have any questions about using transformers with generators, I would suggest you read an article I wrote on the use of portable generators in motion picture production. Harry Box, author of “The Set Lighting Technician’s Handbook” has cited my article in the just released Fourth Edition of the handbook. If you haven't yet read the article, or looked at it in a while, it is worth reading. I have greatly expanded it to be the definitive resource on portable power generation for motion picture production. Of the article Harry Box states: "Great work!... this is the kind of thing I think very few technician's ever get to see, and as a result many people have absolutely no idea why things stop working." "Following the prescriptions contained in this article enables the operation of bigger lights, or more smaller lights, on portable generators than has ever been possible before." Use this link for my news letter article on the use of portable gas generators in motion picture production. Guy Holt, Gaffer, SceenLight & Grip, Lighting and Grip Rental & Sales in Boston. . -
Most household tungsten lamps have a color temperature around 2700K which makes them warm to begin with on tungsten balanced film so you don’t have to do anything to get a warm look out of them. The PH 211, 212, and 213 bulbs are rated 3200K but only for a few hours and then their Kelvin drops. Don’t try to light your talent with only practical’s because they will blow out. Not only is supplemental lighting required to light your talent, but you must also treat the practicals to make them look realistic. I find that practical lamps never look convincing unless one treats the lampshade as well as boost the bulb wattage. That is because if you stop down to keep the shade from burning out, the output of the practical, on the table it sits on or the wall its on, looks rather anemic. I find you get a more realistic look if you boost the wattage of the bulb and line the inside of the shade with ND gel. It is a delicate balance to obtain. You can obtain this delicate balance without a monitor, by using the old school method with incident and spot meters and a selection of practical bulbs including PH 211, 212, and 213 bulbs. Years ago Walter Lassaley, BSC, instructed me to balance practical’s such that an incident reading of the direct output one foot away from the bulb is one stop over exposure. I have found that rule of thumb gives a realistic output to the practical - the light emitted downward onto the table top and upward onto the wall or ceiling is realistic. After establishing the practical’s output using an incident meter, you then use a spot meter to determine how dense an ND gel is needed to line the inside of the shade so that the shade does not become too hot. Guy Holt, Gaffer ScreenLight & Grip Lighting Sales & Rentals in Boston
-
exposing the interior for the exterior
Guy Holt replied to Nossair CHKERBOUBY's topic in Lighting for Film & Video
In this situation that would not have been possible because it was a three camera shoot so we had to keep the floor clear and rig everything. -
exposing the interior for the exterior
Guy Holt replied to Nossair CHKERBOUBY's topic in Lighting for Film & Video
Here in New England we tend not to ND Windows for two reasons. A lot of our locations have windows with divided lights and so it is very time consuming to cut the gel into the individual panes so that it doesn't wrinkle. The second reason is that there are usually clouds in the sky so the sun comes in and out during the course of a shot. As David pointed out a double net is a lot quicker and if you oversize your net you can angle it relative to the window to make it fatter or thinner to camera and cut the contrast by more than a stop. If you angle the net you can also bring a light in the open side so that you have consistent light even if the sun goes behind clouds and the net is not cutting the intensity of the light. Even then you will probably need at least a 4k inside to balance the interior to an exterior on a sunny day. For example, my company, ScreenLight & Grip, lit a segment of a special two-hour program for British Television’s Channel 5 that presented the same problem that you are facing. Host June Sarpong interviewing a marine archaeologists The show told the story of the Whydah - a pirate ship that sank off Cape Cod nearly 300 years ago. In a unique TV experiment, marine archaeologists on Cape Cod dove to the wreck to salvage pirate booty live on air. In addition to the dive on the wreck, the program also included specially shot dramatic recreations of the story of the Whydah’s notorious pirate captain Black Sam Bellamy. To link between the modern-day adventures of the marine archaeologists and those of Black Sam Bellamy, co-presenter June Sarpong hosted marine archaeologists and pirate historians from a makeshift studio under a tent situated on a bluff overlooking the dive site. Host June Sarpong interviewing a marine archaeologists Where they wanted the dive site to serve as a backdrop to the makeshift studio, the show's producers wanted the Salvage Ship to be seen clearly on the water in the shots of June and her guests. This requirement created a similar interior/exterior contrast problem to the one you are facing. We rigged a couple of 4kw and 2.5kw HMI Pars into the frame of the tent in order to get them as close as possible to our subjects, but even then we didn’t have quite enough output to compete against the sun outside. A 4k HMI Par was rigged overhead as a key for each subject The final ingredient for success was a double net strung across the open backside of the tent. The net further reduced the contrast by bringing the exterior levels down and in line with the pumped-up interior. The trick in situations like this is to strike a delicate balance between the interior and exterior light levels so that the net disappears to the camera without the exterior becoming overexposed and losing important detail – the Salvage Ship out on the water in this case. Another advantage to netting the background is that it takes the hard edge off of HD. It creates the illusion of a shallower depth of field or the selective focus we associate with film. A double net was stretched across the open side of the tent facing out onto the water. Where it took a 4k Par on each of the talent, plus a double net across the back, you can see that you need a lot of light to balance interiors to exteriors. The problem with using 4k par HMIs is usually powering them. If you know how, you can plug them into 240V wall outlets with a transformer/distro, or the 120A combined output of paralleled Honda EU6500s will run the package we used on the Channel 5 show (use this link for more details.) Guy Holt, Gaffer, ScreenLight & Grip, Lighting Rental & Sales in Boston -
ArriSun 1200 Plus with Magnetic Ballast flickers visibly
Guy Holt replied to Tom Morrow's topic in Lighting for Film & Video
In my experience, flicker that you can see with your eye typically has to do with a loose connection in the power supply. Try rewiring the plug end because you might have some broken conductors in the plug. If it is the 1200 compact ballast, try moving the AC cord around next to the cable strain relief on the ballast. If the flicker goes away in some positions but comes back in others, then there are some broken conductors at that point where the AC cord enters the ballast and you will have to replace the cord inside the ballast from the strain relief to the breaker. To do so, cut the cord just before it enters the ballast and then thread the cord into the ballast through the strain relief and wire it to the breaker. For more details on how to trouble shoot HMIs see http://www.screenlightandgrip.com/html/emailnewsletter_generators.html#anchorHMI%20Lights%20with%20Magnetic%20Ballasts Guy Holt, Gaffer ScreenLight & Grip Lighting Sales and Rental in Boston -
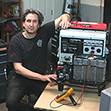
Any tungsten halogen bulb can operate DC as well as AC. The trick is to provide it with 120V DC. The traditional approach to powering tungsten lights with DC on stages was to wire ten 12V deep cycle marine batteries in series. But, in response to a DP’s recent posting on the CML, for some way to power a chandelier flicker-free for a high-speed commercial shoot (pictured below), I built him a 120V AC to 120V DC power converter so that he could power the chandelier and other practicals flicker free at high speeds. He shot with it several weeks ago and reported that it “performed beautifully” and at “2,000fps was rock solid.” The one I built for him could handle up to a 1000W tungsten load, but I have since scaled up the design to handle a Jr. with CXZ lamp. The larger converter (pictured here) will accept input AC voltages from 90-140V, and 190 – 250V and put out a constant 120V DC. It can operate at both 50 and 60 Hz. It also has a series LED display to indicate the total load put on it between multiple tungsten Fresnels and incandescent practicals. And, as you can see in the picture above, it is a lot smaller and lighter and more easily concealed on a set than ten 12V deep cycle marine batteries, wired in series, which has been the traditional approach to powering tungsten lights with DC on stages. Guy Holt, Gaffer, ScreenLight & Grip, Lighting and Grip Rental & Sales in Boston.
-
It depends on what effect you are after. For a cold glint in the eye use a small 150/200 fresnel, scrimmed way down, just above the lens to create a point of light. For a warm glow use a large china ball dimmed way down, just above the lens. Guy Holt, Gaffer, ScreenLight & Grip, Lighting sales & rental in Boston.
