
Satsuki Murashige
-
Posts
4,560 -
Joined
-
Last visited
Everything posted by Satsuki Murashige
-
Lighting a scene set at dawn
Satsuki Murashige replied to Satsuki Murashige's topic in In Production / Behind the Scenes
That's good advice -- sometimes though, it looks wrong, and I'm not sure what to change! I guess I just need to light it one way or the other, watch the results, and learn from my mistakes? You can't become a lighting wiz in a day, I guess. Thanks for the advice as always, David. I really appreciate it :) -
Lighting a scene set at dawn
Satsuki Murashige replied to Satsuki Murashige's topic in In Production / Behind the Scenes
Cool, thanks for the tip Hal! I'll ask around at our theater department. On a separate note, I've noticed that when I plan out small details like this in advance, a lot of times the ideas don't work out and I have to change them on set quite a bit -- usually I just go back to something I 've done before that I know works, but then I feel that I haven't learned that much. So my question to you is: do you think it's better not to go into such minute detail and just have an overall plan when you prep a lighting setup? Is it just experience that will reduce these types of blunders? By the way, if anyone reading this thread sees any potential problems or sees a better/easier way of accomplishing these four lighting elements, please feel free to comment -- I could really use your input since I'm not at all sure that some of these things will work. I'm open to all suggestions at this point. Thanks again, guys! -
Lighting a scene set at dawn
Satsuki Murashige replied to Satsuki Murashige's topic in In Production / Behind the Scenes
Hey, that's a really cool idea! You know, we do have a Crank-o-vator stand on the sound stage... Hmm. What direction would you bounce the light from? From the window side, maybe from above the stage flat? Or would it be more of a bounce back from the far wall? Thanks for the tips, David! Hal, the scroll sounds like a cool idea, but where would I get something like that? Are the scrolls motorized, or do you turn them by hand? Sorry, I don't know much about theater lighting at all! I'm afraid computer controlled lighting is way out of our budget (out of my pocket, basically). I was kinda hoping for a more low-tech solution -- thanks for the suggestions though. Hi Ankit, here at San Francisco State University, we mostly study film theory instead of shooting. In cinematography class, most of the exercises are very basic because the faculty assume that you know nothing when you start (which in some cases is true, others not). The first one I had was to shoot 100' of 16mm and do three shots: a pan, a transition (move from one character to another), and a 360 degree pan. I know, it sounds very boring, and it was! Another one was to light a simple day interior scene on the soundstage. This one was a good one because I had never worked on a soundstage before, though I had read a lot about it -- I learned how to put up a 10K, and how junior stands worked, and how to put lights on a batten, what a twist-lock plug was, etc. But basically, I have to admit that I did not learn very much from the production classes at this school. Mainly, I learned by reading lots of film books, reading this forum, asking questions from more experienced people, shooting my own projects, and crewing on bigger projects as a PA and AC. I'm constantly amazed at some of the people in my classes who don't have any interest in doing these things -- they just want to shoot their own (usually horrible) projects and goof off the rest of the time. So I guess you have to educate yourself ultimately, and just take what you can from the school you go to. Sorry to sound so depressing, but I believe it's the truth. -
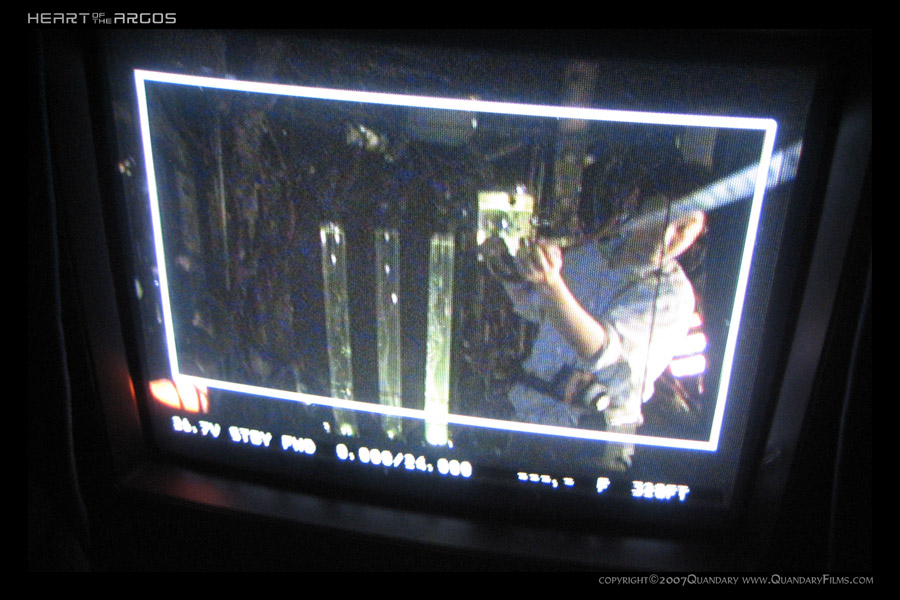
Hi everyone, I know this sub-forum is usually for professional productions, but I thought I'd post my work from this class assignment because I've done a lot of prep for it and would like some feedback on my working method, thought process, and perhaps what you might have done differently. :) Also, I'll have stills from the shoot and will post them here afterward. So, I'm lighting a short scene from "The Power of One" this Wednesday in my directing class. The parameters of the class dictate that the scene be no more than 3 pages, that the crew consist only of our classmates, that we shoot on miniDV on the JVC GY-5000, and that we have 3 hours total to build our set, light it, shoot it, break it down, and completely wrap the stage. Though this sounds like a really short amount of time, the previous scenes have gone well and finished on schedule when they've been well organized and fully prepped. The class is split into two crews of 10, with rotating crew positions -- crew A goes in the morning and crew B in the afternoon. This week, I'm the DP for crew B. The film "The Power of One" is set in 1950s South Africa. The story is about an English boy, PK, who is orphaned and secretly begins hanging out with black South Africans. He meets a imprisoned prophet who teaches him to box and begins spreading a myth about him as a peace-bringer to the black tribes who suffer under apartheid. As PK grows up, he is torn between white society and his black friends with whom he increasingly identifies. The scene we're shooting is about halfway through the script -- PK and his roommate Morrie are sneaking back into their boarding school dorm room at dawn. PK has been out fighting in an illegal boxing match against a black opponent. The boys enter to find Gideon Mandoma, PK's opponent in the match, waiting for them. Gideon has heard the myth about PK and calls on him to defy apartheid and teach the black people to read and write. Here's a link to the script, it's about 3/4 down the page in PDF format. The scene is #115. http://www.script-o-rama.com/table3.shtml I haven't seen the film because we don't want to copy or emulate it -- instead, we are supposed to read the script and interpret the scene in our own way. The director has pretty much given me free reign as far as lighting goes, so long as I work quickly and get the first shot off in 45 minutes or less. We are shooting on the school soundstage which has battens but no lighting grid, so we'll try to light from the floor whenever possible to move quickly. For this class, we are only allowed to light with 2K fresnels, 1K and 2K soft (zip) lights, and (3) Mickey Moles (1K open face lights). Anything else, we have to rent. The director and I have chosen this still frame from "Pride & Prejudice" (2005) as our main visual reference for the scene: We like the moodiness of the soft light and how it barely illuminates the room -- we plan on creating a similar silhouette of Gideon framed against a window. In our version, the light will be a cyan pre-dawn skylight, and the window will have a heavy canvas curtain over it to further soften the light and hide the view outside. As the boys enter the room from the lit hallway, warm tungsten light will briefly spill across Gideon's face as the door opens and closes. Gideon will stand up, and Morrie will flip on the desk lamp wired to the light switch by the door, which will bounce off the wooden desk and softly uplight the boys' faces as they approach Gideon. As Gideon speaks to PK, the curtain behind him will begin to glow pink and orange with the first rays of the rising sun. After Gideon leaves through the window, the curtains will rustle in the gentle morning breeze. Here's my lighting diagram. Skylight -- I was going to create the soft, cyan skylight by bouncing two 2K fresnels gelled with grid cloth and blue and green gels into a 4x4 silk raised up as high as possible and angled down at 45 degrees, placed a few feet outside the window (stole the idea from Adam Frisch!). Hall light -- The light from the hallway could be a 1K zip light hung from the battens, gelled 1/4 or 1/2 CTO and angled down to light Gideon in the room to key briefly. I'm unsure about whether or not the zip light is the right light for this effect though -- it might be too powerful and have too much spread. Perhaps bouncing a Mickey off the back wall and into the room would be better? Desk lamp -- I was thinking of putting a 75w bulb in the practical desk lamp fixture and darkening it with streaks n' tips. It would have to be cued by a crew member to the actor's actions. I was going to use a Dedolight on a magic arm clamped to the top of the stage flat to enhance the practical and replace it altogether when the practical was not in the shot. The benefit to this would be that the Dedo would be more powerful, manueverable and focusable than the desk lamp, so I could cheat the bounce light on the boys' faces much more easily with a bounce card. Matching could be a problem though. Sunlight -- This is the biggest problem. I was originally going to just use a 2K fresnel and a 2K variac dimmer (the color temperature shift would be motivated by the warm-hued sunrise gradually cooling off as it rises higher in the sky). Problem is, I can't find a 2K variac to rent in this city, just a 1K. The closest rental house that has them is across the bay, too far for this shoot. One alternative is to find some metal shutters (sort of like venetian blinds) and put those right in front of the light. Those are hard to find, and probably impossible to rent. Another alternative is to stack a bunch of nets and scrims in front of the light, and gradually pull them all. This is probably too labor intensive and time consuming to reset. So what I finally came up with is to use the three Mickeys behind a silk and turn them on one by one. I'd put the first one on a 1K dimmer and fade it up. The other two lights, I'd put a whole bunch of scrims into to make them less obvious. Going through a layer of silk and a heavy curtain, it might read as one source gradually fading up, I don't know. Anyone have a suggestion here? Well, that's it -- longest ... post ... ever. If you've gotten this far, thanks for reading, and I hope it wasn't too annoying for you. I appreciate any and all comments, criticism, and suggestions. Thanks! P.S. Almost forgot -- I plan to net the back of the lens with a black stocking to cut some of the edge off the video and also to get some halation around the practical bulb and the lit desk. Does anyone have advice on how to do this with the 1/2" chip GY-5000 camera which I believe has a B4 mount but almost no clearance behind the lens? The lens is the 7.3-55mm f1.9 Fujinon, and the damn lens shade is stuck and won't come off, so I can't even net the lens front.
-
Samcine, Kelly Wheel, or tables?
Satsuki Murashige replied to Chris Keth's topic in Camera Assistant / DIT & Gear
Hi Christopher, I've been wondering this same thing myself, but where are you going to get a Samcine calculator, since they are no longer made? -
Canon Scoopic with interchangeable lenses
Satsuki Murashige replied to Patrick Cooper's topic in 16mm
Wow, never heard of this. Did you find out when this camera was supposed to be produced? Though really, the great appeal of a Scoopic is the relatively low price... otherwise an Arri S/B or a Bolex RX5 would be a far better choice IMO. -
City College of San Francisco. The class is called Film 90 Advanced Film and Digital Finishing. It's taught at Monaco Labs in SF by colorist and company VP John Carlson. It's once a week, 4 hour class. It's a really good class and cheap too :) Here's the blurb about it from the school's catalog: FILM 90. Advanced Film and Digital Finishing (3 units) Lec-3, lab-3, field trips Prereq.: FILM 24, 25 and 56; and completion of or concurrent enrollment in FILM 54 Repeat: max. 9 units Advanced survey of state of the art practices and technologies in celluloid and digital film finishing and laboratory work, including timing, color correction, film to tape transfer and tape to film transfer, taught through lectures, field trips, and hands-on exercises. Class meets primarily off campus at a local laboratory facility. http://www.ccsf.edu/Catalog/homeHR.shtml
-
Hey Jonathan, I'm a little confused about what you're trying to accomplish in your test -- it sounds to me like you're trying to find a way of increasing the color saturation of the film stock beyond what it can normally produce by using a gel or by under/overexposure. Is that about right? It seems to me that getting a highly color-saturated image on film is most successful when you have highly color-saturated objects to photograph (regardless of whether they are painted, dyed, or lit by color gels). I think any boost in color that you get from re-rating your filmstock will be so slight that a few tweaks of the knob in the telecine suite will completely obscure the difference between a normal negative and a moderately dense negative. Of course, you could start by shooting with a highly color-saturated reversal stock like Fuji Velvia 50D which you can get at Spectra Film and Video in LA (expensive, though!), and pola and grad filters would help. In fact, if you're open to using filters, you could try shooting tri-color process (multiple successive exposures on the same film stock with pure red, green, and blue filters) to emulate a 3-strip Technicolor look. Combining that with a highly color-saturated subject in front of the camera ought to give you what you asked for. So: Velvia reversal stock + tri-color process + highly saturated subject = B) Some links about Tri-Color: http://en.wikipedia.org/wiki/Sergei_Mikhai...rokudin-Gorskii http://www.adorama.com/Catalog.tpl?op=acad...;article=032105 The Spectra link: http://www.spectrafilmandvideo.com/Film.html P.S. How do you like John's class so far?
-
Hey thanks, Luke! I actually ended up making my own reports in Excel, but these are better. The shoot went very well by the way - we were ahead of schedule by two minutes the whole day, so I guess I'm not as bad an AD as I thought I was. :)
-
Confused after getting negative film back
Satsuki Murashige replied to Patrick Cooper's topic in 16mm
Hi Patrick, Negative film always comes back from the lab on a core (usually a 3" core). This is because negative film is almost always either workprinted or telecined, then vaulted at the lab for storage and safekeeping, whereas reversal film is meant to be projected directly. Negative film also usually has leader added to it (unless you ask the lab to PROCESS ONLY) for the same reasons; reversal does not. By the way, workprint also always comes back on a core (usually a 2" core for rolls 400' for less). You need to use one split reel and one take up reel to project it, or two split reels to run the film on a rewind bench. These split reels "hold the film in place" so it doesn't spill off of the core. If for some reason you wanted to project your negative (or put it on a rewind bench), the procedure would be the same -- get at least one split reel and put your film on it first. Then do as you would with workprint. Just remember, negative film is much more delicate than reversal film, and can get damaged very easily (it's acetate and not polyester, after all). Think twice before handling any negative that is important to you, as putting it through a projector will almost certainly scratch it and ruin it. Obviously, registration tests and the like are excluded from this. Hope this helps :) -
Hey guys, I realize this is a bit of a long shot ... but, I need some blank sound report forms for tomorrow morning and was wondering if anyone here has a copy or a link that they could send me. It's for a Directing class shoot that I'm AD'ing (not my specialty, as you might be able to tell) so I can make do if necessary, but it'd sure be nice to show up with proper forms. B) Anyway, thanks for looking!
-
Recipe for warm sunset
Satsuki Murashige replied to claudio rietti's topic in Lighting for Film & Video
Color Temperature Straw and Color Temperature Orange. They're both orange looking, but CTS is more yellowish, and the CTO is more red. Using a few different colors ranging from pink to orange can make a sunset/sunrise scene more interesting. Perhaps also filling the shadows with blue to emulate skylight would look good, but it depends on the mood you're trying to create. Try to use what you've observed in real life to create, rather than looking for recipes. I've seen one sunset that lit a room an almost blood-red color (ironically, we were shooting a high-key day interior facing in the other direction at the time!). -
OCT18 or OCT19 to Arri B-Mount?
Satsuki Murashige replied to Allen Achterberg's topic in Russian Gear
If you have a 2C you could have someone like Les Bosher make you a hard front in OCT-19 mount. Then you could swap the turrets out, depending on whether you were shooting a scope or spherical project. Of course, it would be a pain to have to calibrate the FFD each time you swapped mounts. Or, I wonder if you could machine a 2C turret with an OCT-19 mount and a PL mount (or B-mount)? That would really open your lens choices up. The OCT-19 mount is probably too big for that though. -
OCT18 or OCT19 to Arri B-Mount?
Satsuki Murashige replied to Allen Achterberg's topic in Russian Gear
Did you see this thread? http://www.cinematography.com/forum2004/in...showtopic=17799 Can't be done with a PL mount, so there's probably no way to do it with a B mount either (they have the same FFD). But you could buy the Lomos and have them remounted. I've heard that only the round front anamorphics can be remounted to PL (and presumably to B mount as well) -- maybe Olex can confirm that? -
Hi David, I haven't shot with 7265 yet, but I have shot a lot of 7266. I would start by rating the Plus-X at 80 ASA, and then bracket the exposures by 1/2 stop and 1 stop in either direction for the test. If you're shooting at night with existing light, you'll probably need to shoot with Tri-X, though. You might try using fast lenses like the Superspeeds and shooting at lower frame rates (16 fps, 12 fps, etc.) for MOS shots to increase exposure. By the way, 7266 is not nearly as grainy as its negative counterpart 7222, Double X -- you might be surprised at how fine-grained it can look. You might also want to try shooting day-for-night with colored filters to darken the sky. Usually, a #25 filter (Red) will turn a blue sky to dark grey. Combined with underexposure, you can make blue skies appear black, while still shooting in broad daylight. A #25 filter loses 3 stops. B&W panchromatic film (like 7265 and 7266) is more sensitive to bluish light (~5500K) than to red (~3200K), so you need to rate it differently to get the same exposure. Hope this helps!
-
Sorry for the double post - I wasn't able to edit the previous one in time. Please disregard it. Awesome website, Matthew - thanks for the link. About choosing the correct CoC for a shoot, I'd like to know what values you guys use for the following: (I've filled in a few, based on what I've read from various sources, like David Elkins's book and the ASC Manual). Gauge: 35mm Format: Anamorphic 2.40:1 Release: Theatrical -- Release: HDTV (1080i) -- Release: TV (480i) -- Format: Standard 1.85:1 Release: Theatrical -- 0.001" Release: HDTV (1080i) -- Release: TV (480i) -- 0.05" Format: Academy 1.37:1 Release: Theatrical -- Release: HDTV (1080i) -- Release: TV (480i) -- Format: Super 35, full aperture 1.33:1 Release: HDTV (1080i) -- Release: TV (480i) -- Format: Super 35, 1.85 Release: Theatrical -- Release: HDTV (1080i) -- Release: TV (480i) -- Format: Super 35, 2.40 Release: Theatrical -- Release: HDTV (1080i) -- Release: TV (480i) -- Gauge: 16mm Format: Super 16, 1.66 Release: Theatrical -- 0.002" Release: HDTV (1080i) -- Release: TV (480i) -- 0.001" Format: Super 16, 1.85 Release: Theatrical -- Release: HDTV (1080i) -- Release: TV (480i) -- Format: Super 16, 2.40 Release: Theatrical -- Release: HDTV (1080i) -- Release: TV (480i) -- Format: Reg. 16, 1.33:1 Release: Theatrical -- Release: HDTV (1080i) -- Release: TV (480i) -- HD Format: HD, 1080i, 2/3", 16x9 Release: Theatrical -- Release: HDTV (1080i) -- Release: TV (480i) -- Format: HD, 720P, 2/3", 16x9 Release: Theatrical -- Release: HDTV (1080i) -- Release: TV (480i) -- Format: HD, 1080i, 1/3", 16x9 Release: Theatrical -- Release: HDTV (1080i) -- Release: TV (480i) -- Format: HD, 720P, 1/3", 16x9 Release: Theatrical -- Release: HDTV (1080i) -- Release: TV (480i) -- I know this list is absymally long, but I'm thinking that if we compile a list put it into the FAQ, it might be a good resource for AC's, especially since I'm sure many of us will have experience in some formats, but not others. I was also thinking about using the DoF calculator on the Panavision site to compile a small handbook that could fit in my back pocket -- much cheaper than a Samcine, multiple Kelly Wheels, or a Palm Pilot with PCine. Does anyone else think this is a god idea? Thanks!
-
Awesome website, Matthew - thanks for the link. About choosing the correct Cof for a shoot, I'd like to know what you guys use for the following: Gauge: 35mm Format: Anamorphic 2.40:1 Standard 1.85:1 Academy 1.37:1 Super 35, full aperture 1.33:1 Super 35, 1.85
-
Ah, I see, thank you David. I didn't know that 35mm projector lenses were fixed focal length.
-
Hi Frank, First, congratulations on the write-up in AC - I remember reading it and thinking the subject matter was pretty hardcore! It was also interesting to read about your solution to the focus problems of shooting in red-gelled light. Second, it seems that most modern theaters project 1.85:1 by filling the frame height of the screen. So simply removing the 1.85 aperture mask would cause the top and bottom of the 1.33:1 image to spill off of the screen. Was this part of the problem when you screened the film at festivals? Did you have to have the projectionist move physically the projector back a few feet? Or was it just a matter of zooming out the projection lens?
-
M. David Mullen & The Astronaut Farmer in AC
Satsuki Murashige replied to Tim Carroll's topic in Cinematographers
Awesome, I can't wait! (Though I guess we already have more info from David's production diary than the article could possibly include.) Congratulations David, both on the film and the AC article. The HD trailer looks great, by the way. -
Ah, I stand corrected! Thank you, Phil. My project's editing mode was set for "DV Playback," rather than "Video for Windows." I'll try not to spout any more unsubstantiated drivel.:) Phil C., thanks for the input, I really appreciate it. Again, thanks very much you guys.
-
Nope, it only does standard def., NTSC 60i, 24P, 24PA, and PAL. Looks like I have to get Premiere Pro 2.0 to edit HD. That's a whole other issue, though. I guess my real question is, how do you guys incorporate footage from various video sources (DV, DVCPRO 50, DVCPROHD, DVCAM, HDCAM, etc.) into your reel? Do you just dub it all down to the lowest common denominator, quality-wise (DV)? Or do you pick the highest quality format, and transfer everything to that, even if it's only for DVD? And what aspect ratio do you use? Letterbox? Pillarbox? Is this a stupid question? :huh:
-
Hi, So I'm in the process of putting together my reel, and I'd like to include some 24PN 720p DVCPRO HD footage that I shot on my last two shorts. My other footage is 16mm transferred to miniDV, which I can edit just fine at home on Premier Pro 1.5. I guess I'd have to downconvert the 24PN footage to DV with a 2:3 pulldown to incorporate it into the timeline, but is that all I'm missing? Are there any tips for doing this kind of thing? Thanks!
-
"Pancakes" short apocalyptic drama
Satsuki Murashige replied to Elliot Rudmann's topic in Please Critique My Work
Nahh, that lens just breathes, nothing you can do about it. Actually, if you're somewhere in the center of the zoom range, you can compensate for the breathing by zooming out slightly on far-to-close focus pulls and vice-versa. By the way, the minimum focus for that lens is actually 3'7" or so. The lens just isn't marked past 5', so you have to paper tape the lens barrel and make your own marks. -
No thanks - as with all dangerous activities, I leave bike riding to my camera op.:) That's Tim, Matthew. Probably. I've heard you can add a few extra inches by systematically breaking your leg bones in a few places, pulling them a few centimeters apart, then letting them grow back together. Then repeat as necessary. B)