silvan schnelli
-
Posts
78 -
Joined
-
Last visited
Everything posted by silvan schnelli
-
@Mark Kenfield Yeah that’s basically what I did recently. Well I just linearized the images and then calculated how much compensation I needed to add for the spot and incident readings. But as you mentioned these then, as expected, lined up pretty much with the cameras false color readings. I also now understand Steve Yedlins explanation and reasoning on his website entry.
-
Steve Yedlin mentions that he first calibrates his light meter to spec before then using compensation to match the incident and spot to 18% grey. How can this be done, what apparatus would need to be used? I’m pretty sure he calibrates it using known luminance values and the meters in absolute lux/fc and cd/m^2 mode. My best bet to do this would be to film grey cards, linearise the gamma and see if it lands at 0.18.
-
I’ve seen this mentioned a lot, but have personally tried to stir clear from this terminology, as to me, it never really made sense. Why would anyone photography commercials differently, than narrative work and music videos? How can something look narrative and how can something look commercial, even just stills without context. However, more and more I’ve been wondering if there is some substance to this term. I often do find that commercials seem to look more polished and clean, and it makes me wonder if such look has its place in narrative, as I can often find “the look” quite pleasing. It feels a bit silly to talk about it but I’ve done tests simply showing people stills and they seem to often guess pretty accurately if it’s a commercial or narrative work. What are your guys opinion on this? I’ve also heard that commercials have more time to for grading/color timing, but not sure how true this is? Example of a beautifully photographed commercial by Mauro Chiarello
-
@David Mullen ASC Thank you that does make sense. The example with the flashlight source vs a long moonlight scene is something I have been thinking about a lot. Especially how a hard cut from a daytime scene to a long nighttime scene would render. Seeing as you would most likely want a scene that looks darker and have a night ambience, but where the audience is still able to see a lot, especially when it comes to the actors. I think this is where I have seen a lot of shots have bright key lights, but that are higher contrast and cooler.
-
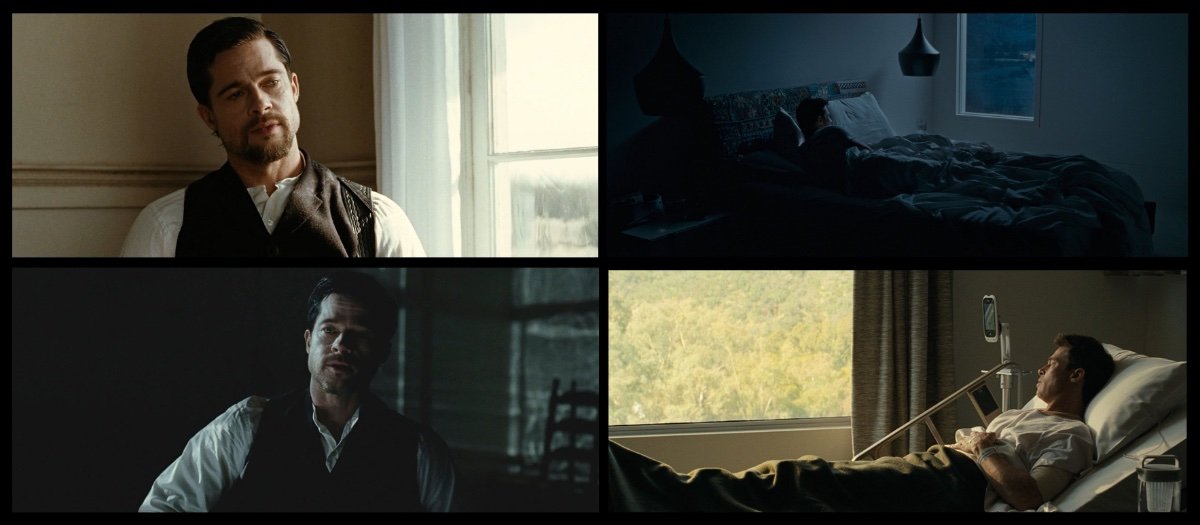
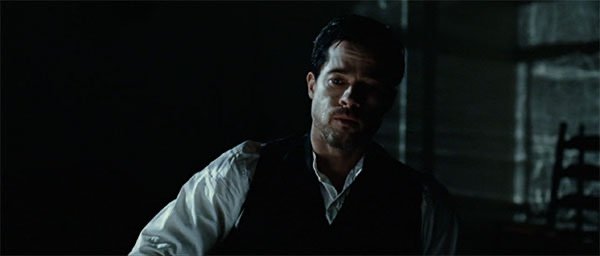
I have been thinking about the differences of how I would handle lighting a moonlight-lit interior vs a sunlight-lit interior. As a result, I have also looked at a lot of references from movies and have noticed that the exposure levels on faces for night scenes tend to sometimes be just as bright as daylight scenes or perhaps just slightly less. I have also come across this reply from Sir Roger Deakins ASC BSC on lighting "Moon light for exteriors", and I think he has said something similar on the Deakins Podcast (https://www.rogerdeakins.com/forums/topic/moon-light-for-exterior/) "There are photometric charts that you can study to find what light will give you the required foot candles and width of beam at any given distance. I would start by looking at the chart for an 18K HMI. To shoot at 2.8 and 800 ISO you need something like 12.5 foot candles depending on whether that is a back light or a front light." In conclusion, it seems to me that from what I've seen, is that Cinematogaphers often still try to correctly expose for the key light, but achieve the nighttime or dark-feeling by having much stronger contrast ratios (such as through a weaker fill light) and that the scenes tend to be cooler or having a sort of blue-tint to them. Or do Cinematographers also slightly underexpose the key lights on the actors' faces for more "realism"? Attached below are examples from the movies Ad Astra, shot by Hoyte van Hoytema ASC, NSN, FSF and The Assassination of Jesse James West, shot by Roger Deakins, with contrasting day and night scenes that seem to have key lights of similar brightness.

-
For an upcoming project I would like to produce an effect on the Vortex Creamsource 8, where thee light basically transitions from one end of the Planckian Locus to the other. This would mean that the light would go from a CCT of 2200K to 15000k. I am new to using DMX and practically don't have any hands on experience, which is why I'm asking in this forum incase someone has done something similar? Ideally I would be able to send some DMX protocol that tells the light the following things: A CCT starting point, end point, the CCT increments of each step and the time taken for each CCT step. I would happily appreciate any recommendation on hardware or especially software that would allow for such specific adjustments/effects? It's a very small scale student project and only involves a couple of vortex lights.
-
Exposure in Robert Eggers Nosferatu
silvan schnelli replied to silvan schnelli's topic in Lighting for Film & Video
@Stephen Perera Yes I am actively reading that forum, it’s got so many great replies from Jarin. I was considering if I should put the question on the forum but due to the length and so others can get exposed to it more easily and reply their thoughts and knowledge too, I decided to post it separately. -
Exposure in Robert Eggers Nosferatu
silvan schnelli replied to silvan schnelli's topic in Lighting for Film & Video
I also don’t think I quite understand what is meant by the comet lighting strategy. Jarin Blaschke said that “In terms of fill light, my philosophy is that it's always an extension of the key light; in this situation, the additional light we used to augment the fireplace is almost like the tail of a 'comet' with the source at its head. The key from the fireplace is the brightest source in the frame, and then the light gradually diminishes as you arc around to the actual fill, which you would never place directly opposite the key.” Initially I was thinking of a key light coming more from the back almost like a kicker and then a fill that wraps from that direction more towards the shadow side. I think I saw this a lot in Nosferatu. However I also started wondering if this would risk the shadow side to go very dark compared to having a traditional fill that is practically on the opposite side. Or another scenario where the a fill light can become very frontal if the key is at a traditional Rembrandt angle. -
I was really happy when I saw that in the recent ASC issue (January 2025), that cinematographer @Jarin Blaschke specifically talked about his lighting and exposure ratios on his latest film Nosferatu. If I understood correctly, for the exterior night scenes he mentions underexposing the fill light by 4 stops and the key by 2 stops, with respect to his ‘comet’ type lighting. On the other hand for night interiors he underexposed the key and fill by 1/2 less. He then talked about his exposures for daytime interiors, where he underexposed the fill by 1 stop and overexposed the key by 4 stops. (I think everything is referring to incident readings). I think he also mentioned that he rates his stock one stop slower to get the shadows out of the toe. This makes me wonder if that means, that theoretically, the key for the interior scenes were 5 stops over (and everything else is also a stop higher) or if his explanation already included his slower rating of the stock? I have not yet extensively shot with film, so I was very surprised to read the sheer latitude and of having keys that were 5 stops overexposed and also the strong ratio of 5 stops between key and fill. I always thought this overexposure was just to increase the shadow information and that it’s then corrected back down in post for correct exposure. But now I am wondering if people overexpose film and then just leave it overexposed.
-
To my understanding now, Steve Yedlin calibrates his light meter due to the fact that the incident and spot meter have slightly different figures to what they consider middle grey.
-
Do you have the dome in or out, do you point it towards the light or towards the camera, do you block off light with your hands? And for your method of metering please explain why? Example 1: For example let say you have a fill light from on top which should give a slight cool light and a key from the side. Would you meter the fill facing the light or facing the camera and what about the key. Example 2: Or what I often think about is when you have a key light and then a hard backlight that either spills as a sort of rim or kicker, how would you meter this intensity? Or do you guys prefer setting exposure with the spot meter. I hear that spot meters are more for last minute adjustments and corrections, and placing of certain exposures in the scene and that’s how I tend to try to use it.
-
What’s the origin of correctly exposed middle gray?
silvan schnelli replied to silvan schnelli's topic in General Discussion
@Simon Wyss thank your for the reply. I’ll have to look more into it and read some SMPTE papers. -
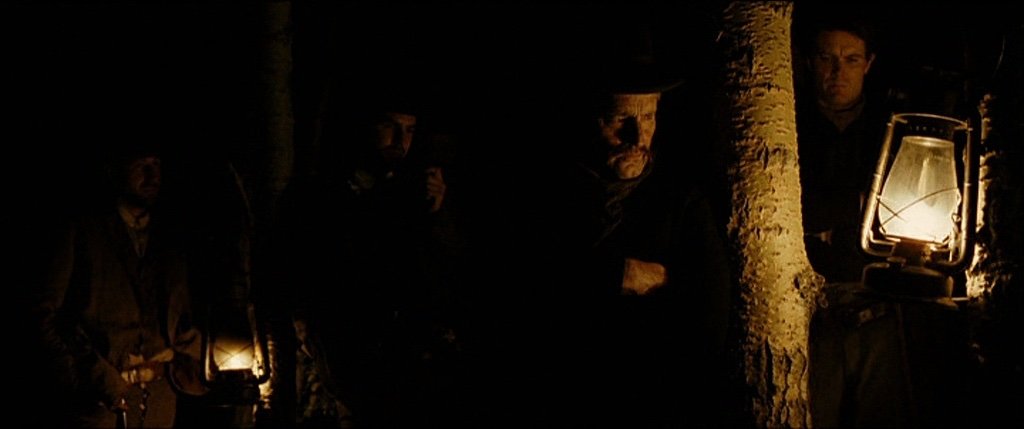
How do you guys go about setting your white balance on your cameras, relative to the lights CCTs that are being used. For example when looking at the train robbery scene from Assassination of Jesse James, shot by Roger Deakins, ASC, BSC. Im pretty sure they used a tungsten balanced stocks and lit with dimmed down 250/300 watt bulbs. I’m not sure what the color temperature of the bulbs would be, but I often see movies shot on Kodak Tungsten balanced stock with tungsten lighting, yet the skin tone still often have a warm, yellowish tone or the practical lights. I would think that the color rendition would be white, if it’s a tungsten balanced film. I know a reason may be that the tungsten’s spectral distribution may affect the rendition of the skintones, but surely the effect wouldn’t be that present. Or for example I saw some behind the scenes of Skyfalls, where Deakins was shooting at CCT 4200 and I think lighting the scene with a lot of incandescent light and golden foil. Is there a general consensus on camera white balance vs light CCT used to obtain warm skin tones? Have people tried using HMI’s and just changing the CCT on the camera? How do you guys asses what CCT to use on your camera? Do you generally correctly white balance and then apply CTOs or Plus greens, to achieve the effect? I’ve also read for example that Darius Khondji ASC, AFC, likes to color correct the the ambient fill light to match the shadows? I’m guessing the shadows caused by his key lights and what not. Or Greig Fraser ACS, ASC, mentioned also something about either desaturating the fill light or having a cooler fill light, but I’m not sure. I understand that the best way to find personal preference is to test it, but I am just curious about if some of you have go to settings, rules or guidelines. Some examples:

-
How does AI affect the film gear industry?
silvan schnelli replied to Uli Meyer's topic in General Discussion
In regards to lenses I have been thinking about the possibilities of AI depth maps to emulate certain lens effects in 3D space. Similar to what I think they do in animation. E.g. anamorphic bokeh. However lenses are so complex and engineered by the best of the best. So even if it becomes convincingly good, I don't think anyone would choose it over an actual lens with said characteristic. I think something similarly was talked about on the forum Lift Gamma Gain. -
Movies with peculiar bokeh?
silvan schnelli replied to silvan schnelli's topic in Lenses & Lens Accessories
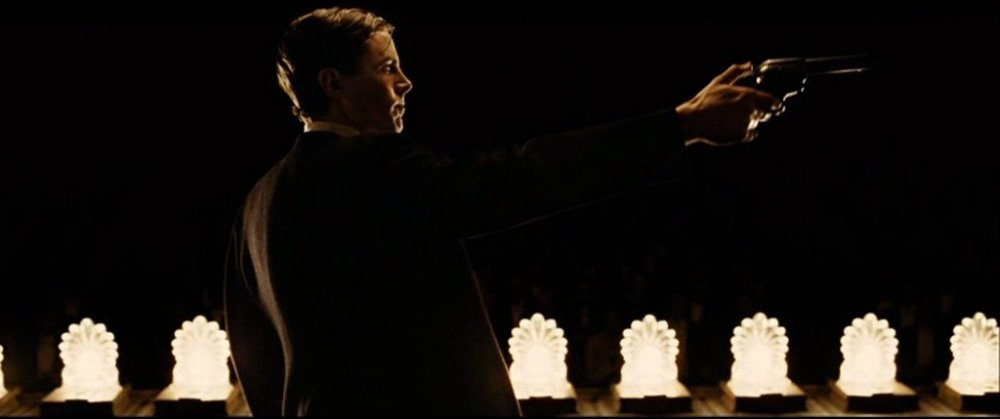
@David Mullen ASC With an example from almost a century ago, how do you think they would have exposed for such a shot. I would think today it be much easier with a monitor. How would they have calculated the f-stop or metered the scene ? -
Overexposing for cleaner footage?
silvan schnelli replied to Jarlath McKernan's topic in General Discussion
Interesting, I’m currently reading up on this. -
Overexposing for cleaner footage?
silvan schnelli replied to Jarlath McKernan's topic in General Discussion
I personally highly recommend readings ARRIs white paper on Dynamic Range, which talks about Exposure Index, SNR (Signal to noise ratio) and other things. The logic of overexposing and then bringing it down in post is valid, for reasons such as increasing SNR (less noisy appearance), the fact that making a scene darker is much more forgiving than brightening a scene and and overexposing allows for more information in the shadows. However, I do think that especially with todays digital cameras which have very good shadow latitude overexposing for the shadows is not as necessary, perhaps for a dark scene like yours it would be. An interesting point was brought about by David Mullen ASC in his recent appearance on the Team Deakins Podcast. He notes that it’s okay to underexpose as long as you know that, you or anyone else isn’t planning on bringing up the shadows later down post production pipeline. Going back to the paper, a digital sensor to my knowledge only has one ISO speed, sensitivity to incident light, and that different EI settings are simply different curves, which change what signal value the camera interprets as middle gray. But seeing as the dynamic range of camera does not change (the maximum light a camera can capture before the photodiode becomes saturated and the minimum light to give a usable signal, what changing the EI does is give you either more highlight latitude or shadow latitude. I think this is also why in ARRI Raw you can still change the EI, you have exposed the sensor and changing the EI now just is choosing what is middle grey. Practical Use: A lot of people quote the EI of 800 to be the Alexa’s base ISO, meaning that if you want to overexpose it, you could set an EI of less than 800, e.g. 400. This would theoretically bias you to overexpose the sensor by one stop. The benefit though is that the image is overexposed but the EI already pulled down the image for you, so you have an overexposed image, but one that is correctly exposed to the way you want to light it. If you film in RAW this correction is not baked in, as the sensor data has not been debayered yet. This process is very similar to analog film and I think it was specifically designed to be so similar to maybe allow Cinematographers to film in the same way that they have been. I hope this explanation helps and just wanted to note that your shot is very nice and moody. A question I have myself is that I’ve always wondered if filming at EI 400 and correctly exposing would give me the same result as filming at EI 800, overexposing 1 stop and pulling it down in post. Intuitively I would think yes and the differences may be minor, but I guess depending on the the log encodings (e.g. logc3 the different curves have slightly different slopes) and the way the image is pulled down, minor differences may be noticeable. https://www.arri.com/resource/blob/295460/e10ff8a5b3abf26c33f8754379b57442/2022-09-28-arri-dynamic-range-whitepaper-data.pdf https://teamdeakins.libsyn.com/technical-knowledge-for-cinematographers -
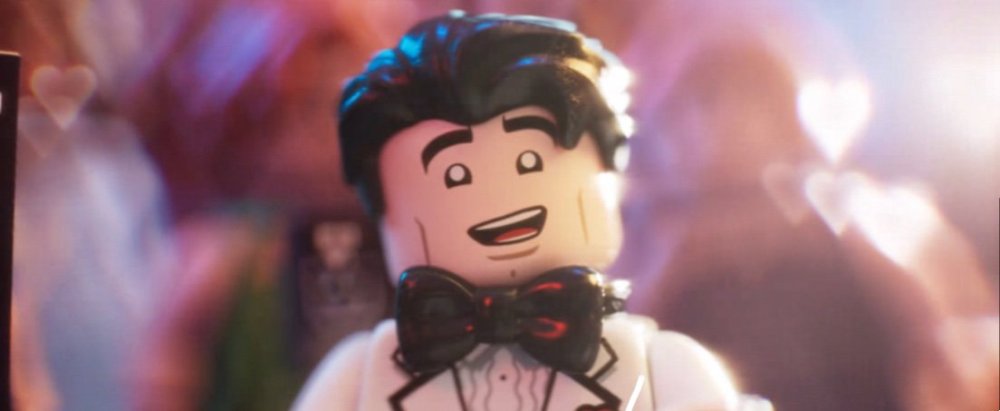
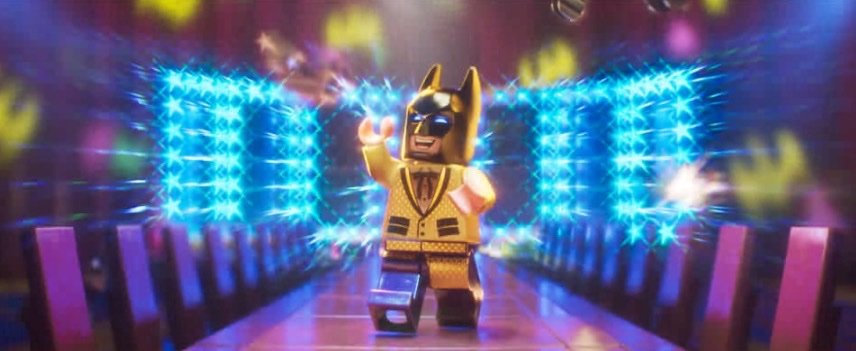
I recently saw The Lego Batman and the cinematography done by Behzad Mansoori-Dara and Craig Welsh is mesmerizing. One thing in particular that caught my eye was the peculiarly shaped bokeh they produced during some of the scenes. I wonder if there are any life action movies utilizing this technique. I’ve recently seen it in the Indonesian movie Agak Laen. And why is this technique so rarely used: - It it because it seems to deviate too much from realism; although I’ve seen a lot of other techniques which I would think are just as bold. - Or is it due to the technical difficulty of having a different entrance pupil and having to calibrate this. Or other issues such as diffraction or other optical aberrations? I know David Mullen ASC once talked about Gregg Toland ASC’s use of a Waterhouse stop to achieve those iconic f/16 shots. I’d be curious if any of you have tried this technique and if so how you guys went about it?
-
What’s the origin of correctly exposed middle gray?
silvan schnelli replied to silvan schnelli's topic in General Discussion
@Nicolas POISSON thank you for the lengthy reply, although when it comes to exposure I do usually just expose correctly (as in how I want it to look) and use EI accordingly to shift the latitude, so technically over and underexposing. I do see the appeal for ETTR, especially since pulling down brightness is much more forgiving than pulling it up. But for the reasons you have mentioned, as well as digital cameras having very good shadow latitude and with the fact that ETTR you technically are losing control of the images latitude distribution, I wouldn’t expose this way. My question though, is a bit more related to how did they decided how a correctly exposed 18% gray appears like with respect to the appropriate camera settings. Which includes things like how did they view these images. -
I feel quite confident in lighting with a meter and placing my exposure within a scene. I also often feel like I grasp the concept of middle gray, as it is one of the most basic/essential ones. However, every-time I’m asked to explain it to someone, numerous questions arise within myself. After a lot of pondering I have came to the conclusion of what my understanding would be: Middle gray when talking about cinematography is a sort of response setting by the camera. It doesn’t refer to a certain luminance from an object or illuminance hitting the sensor. Light meters use the EV formula to ensure that that similar exposure values can be generated at different scene illuminance values and/or camera settings. Furthermore different manufactures can place middle gray at different code values, e.g. the recent example of logc3 and logc4. Also important to note is that a middle gray patch, visually reflects half of the light it hits, this is 18% of the light as human vision is logarithmic. Question But the most fundamental question I would have is who or what exactly determines this correctly exposed middle gray. Yes middle gray is the middle tone, but what exactly is middle tone? I’m guessing this is where the calibration constant comes into play, which seems to practically determine what this is. At least this would be my guess? Correctly exposed Middle gray doesn’t refer to a specific luminance reflecting off an object, or a specific illuminance hitting the sensor. It isn’t based on being in the middle in a log encoded image (EI can change this). In conclusion my understanding is: Scientists/Photographers noticed that when an object reflected 18% of the light projected on it appeared to be half of the light incident. However, correctly exposed middle gray must have been another decision made. Where it was agreed upon that that specific rendering of this 18% gray by the camera at specific settings (governed by the EV equation), is considered correct. What was the goal of middle gray? I’m guessing it was to help achieve a balanced image, as in this doesn’t appear too dark too bright. Monitors and Cameras: So I am assuming that middle gray became a standard for the way monitors and cameras were manufactured and calibrated. I apologies if the question is a bit pedantic and verbose. It just never felt right for me to simply say middle gray is when 18% gray appears the way it should be or correct. I think also the term correct exposure can often become dangerous as it makes students (coming from a current student) believe that if the shot isn’t correctly exposed (the Caucasian skin-tones aren’t 1 stop over middle gray) it must be wrong. I know this must partly also come from the film days and the fear of a thin negative, with films superior highlight handling and lower latitude in the shadows. I have grown accustomed to trying to light for the way I want it to look, as is always advocated for by cinematographers such as Sir Roger Deakins ASC BSC. Of course also coming into play is having enough information to make it through the whole post pipeline, but EI and over/under exposure can help with this.
-
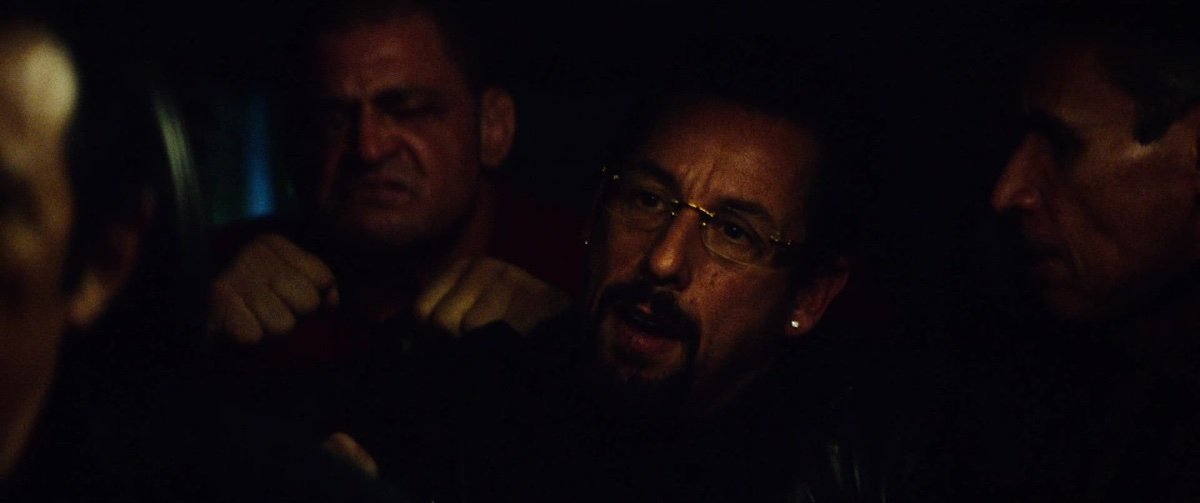
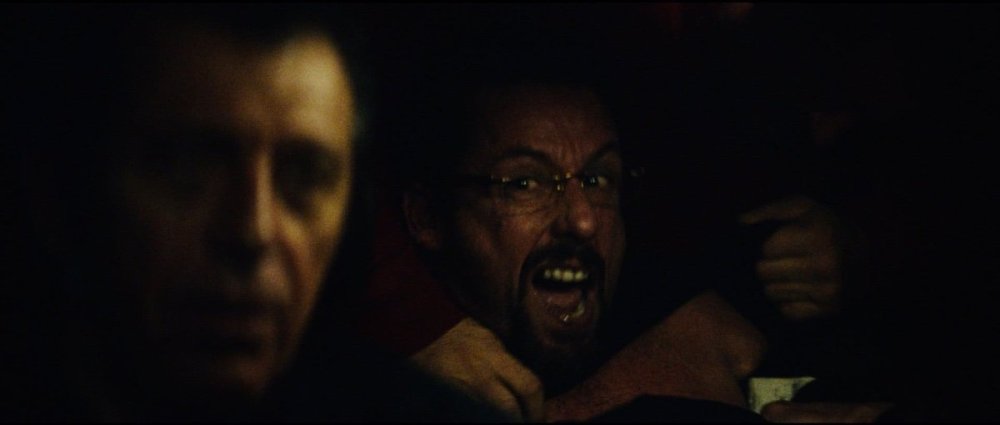
Here are two amazing frames by Darius Khondji from Uncut Gems that I think mirrors the painting that you attached. The visible and coarse exertion on Adam Sandler face is also very fitting with Baroque art. I’m pretty sure Darius Khondji himself takes a lot of inspiration from paintings.

-
Thank you @David Mullen ASC for taking your time to reply to my question. I was really amazed by your BW still photographs displayed in the ASC magazine.
-
Roger Deakins is wrong.
silvan schnelli replied to John F Hebert's topic in Lenses & Lens Accessories
I think it’s also important to mention that boiled down in essence, I believe it’s perhaps even more so about the distance of the camera to the individual and hence the perspective. To me at least thinking this way also makes it more intuitive when it comes to choosing the focal length of a lens. Personally its usually a question of how close do you want to be to the subject and how much do you want to see around the subject. - The distance to the subject is what ultimately dictates the perspective and how physically close the audience will usually feel to the said subject . - The focal length, size of sensor and cropping then dictates the Angle of view, or in other words how much we can see. I feel like that if we are exactly at the same distance to the subject, no matter if it’s a 25mm or 50mm, the audience will feel the same closeness to the character, because the camera is quite literally at the same distance. However, the amount of the frame that you can see (the AOV) of course also influences this. It’s also good that a similar depth of field can often be achieved even on different focal lengths and/or distances, if the exposure allows for it. This is just my take on the question though, and I think is also what Roger Deakins is talking about, when he talks about focal lengths and intimacy. -
Apologies I meant to say better SNR and appearance of less noise
-
I just wanted to add to my answer as I think it hasn’t addressed the question directly enough. I agree with the above answers who mention that what Greig Fraser is probably referring to the fact that he set the base native ISO of the camera to 12800, which to my knowledge has the same dynamic range as the base ISO of 800 and the same latitude above and below middle gray, it’s just more sensitive. And again I want to emphasizes that setting an EI of 3200 at base ISO 12800 and correctly exposing the scene at EV0, is technically overexposing the sensor, but the EI curve already doing the exposure correction in camera, so the shot is correctly exposed, but with all the characteristics of overexposing. I personally usually don’t like to overexpose just for the sake of overexposing, but much rather think about how I want the scene to be exposed, although I understand why someone would and I think Sony most likely recommends overexposing for less visible noise. However, digital does have really good shadow handling, so I think overexposing is not as essential as it is when shooting on film. This is just based on my experience and from the papers and articles I have read.