


David Regan
-
Posts
217 -
Joined
-
Last visited
Everything posted by David Regan
-
Lot of it depends on the space and your shot selection, the size of your lights, and of course the look you are going for. I.e. If you are lighting large wide shots, and you only have a couple 650/300w fresnels, and you want it too look bright and toplit, you're probably going to be best off using the existing fluorescent. Perhaps you could get away with hiding a small unit or two somewhere, and just use it to accent certain parts of the set that you wish to bring out. If you do so, be careful about the direction and quality of the light, nothing will give away the source like a big sidey shadow behind a weight bench, especially in a room we know is traditionally lit from above. Bring various grades of plus/minus green gels to even out inconsistant color temperature between fluorescent bulbs. Then when you move in for close ups/medium shots, you can use your tungsten lights, perhaps gelled to match, and use them to better control the look on your subjects. I know you're not looking for any special look, but don't box yourself in against getting creative. I incidentally had a spec shoot in a weight room, also HVX, and we just turned off the existing flourescents, and lit it with a few small units from the floor. Doesn't look like a typical gym necessarily, but it worked for the effect we wanted. If I recall we just had a 1k Openface, a 650w Fresnel, and a 575 HMI. It was a situation where just those lights weren't going to illuminate the whole room in a way that worked for us, so we just got selective with our lighting/shots, and made something nice out of very little. You can see examples below. Be creative and you can come up with some really nice results. Good luck, let us know how it turns out!
-
If you are using a fluid head, warm it up for your DP when you get to set in the morning, get it loose so it's not sticking from the cold. If I'm outside in cold with the camera, I like to run it without film for a few hundred feet, get everything running nicely. If you happen to come inside for any reason to shoot something watch for condensation that will build up quickly on the lens/filters. If you have your heated eye cup cable, hooking that up is a nice thing for your DP Watch for snow (if applicable where you are) getting on lenses/filters And yeah, as said, keep your hands warm, it can be tough to load a mag with numb fingers, I've been there, it's not fun. Good Luck!
-
I swear cube taps are God's gift to electrics. Check the 'Set Lighting Technicians Handbook' by Box, probably the most promoted literature on this site. It has lists of things every electric toolkit should have, the 'essentials.'
-
Can depend on what type of fluorescent bulb too. If it's a new restroom, under new fixtures, they are probably cool whites, and as mentioned can be blue if anything. I shot in a fairly new hallway on Tungsten, where the ceiling was packed with fluorescent fixtures, and the bulbs rendered quite cool, which was easily timed out, and no flicker issues. Take a color meter reading in there if you can to give you a better idea of what you are working with. A digital still with a camera set up at 3200K WB and 200 ISO with a 1/50 speed shutter can give you an idea of look as well, especially with regard to color. Good luck
-
I think the answer your looking for is contrast. In that if you want an exposed subject with dark environment, as Willis/Storaro did in the examples you mention, light your subjects, in the way that works for you and the story, but keep light off the walls or whatever you want to be 'dark.' The difference between your dark areas and your lit subject will determine the extent of the effect. i.e. for simplicities sake, imagine you take an incident meter reading under the light that is illuminating your subject, and it reads a T4.0 Then you take a reading in your shadow areas, the darker parts of the room where light isn't falling directly, and it reads a T2.8. Thats only a stop difference, so your shadows won't really be that deep, and especially if you are shooting film, you will still be seeing plenty of detail. Using this as an example, how the scene looks is about controlling that ratio. In the example above there is only twice as much light (one stop difference) between your subject and your shadows. I don't know exactly what the differences in those movies you mentioned, some could be manipulated in post for sure, but just consider that for the effect you talk about, you need a high contrast ratio between your subject and the shadows. Hope this helps, good luck
-
In Casino Royale, I really liked the way they were going with Bond, much more rough around the edges, less gadgets, a lot more raw and physical. With Quantum, it just really didn't seem to work for me, maybe due much in part to a storyline which I though went all over the place. So many characters just forgotten, twists that seemed to happen for no necessary reason, it all just felt muddled. Whatever happened to a bad guy that just wanted to blow up the world? Although I suppose having the last two Bond films feature an economic and environmental villain respectively, is fairly relevant and topical in today's world. I thought there was a lot of nice cinematography here, but also some I didn't understand. Lots of hard nose shadows and fierce edge lights as someone else mentioned stood out to me, but at the same time, Roberto knows what he is doing, so I'm sure there was a reason, at least for some of them. Also during the airplane fight sequence, there were a couple of shots with the planes flying by where I felt the VFX really jumped out. At the same time I did really enjoy the dessert sequences, and the shots in the canyon, very moody and elegant.
-
I've been in the same situation before, (but with less film), not much money so we did our edit on DVCAM, then do a select takes transfer from to HD. I went through Postworks NY to do it, we just sent them our Final Cut file with all the footage and the flats, they extracted an EDL from the FCP file, and did then transferred those takes only. Everything worked out well I thought, and it saved a bit of money. It was pretty seamless from what I could tell.
-
Panavision Prime - Appears Warm?
David Regan replied to Jess Dunlap's topic in Camera Assistant / DIT & Gear
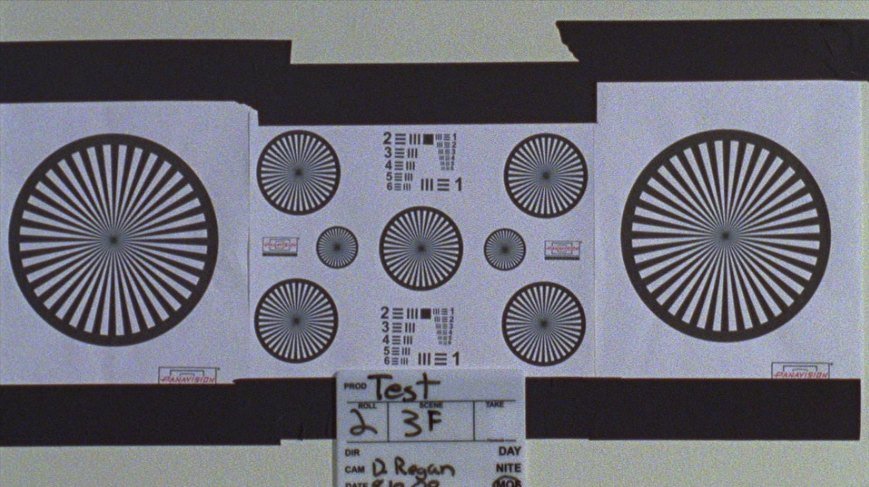
I did a lens test a couple months back, and oddly enough I had one lens that was the odd one out also. Granted it was an older lens set (It was some old Cooke S2s) but still nonetheless lenses are lenses, and you can see the effect. This is the 32mm and how all the rest of the lenses looked: Then this is the 100mm, and the only lens that looked like this: This stills are from a 1light transfer to HD (16mm) I was looking for color variation, so told the lab to just time to the graycard and this roll and not adjust anything else. Curious how stuff like this happens with lenses. I figure it's the kind of thing easy enough to balance out, but I made sure not to use the 100mm for shooting something like a graycard, which could bias my roll.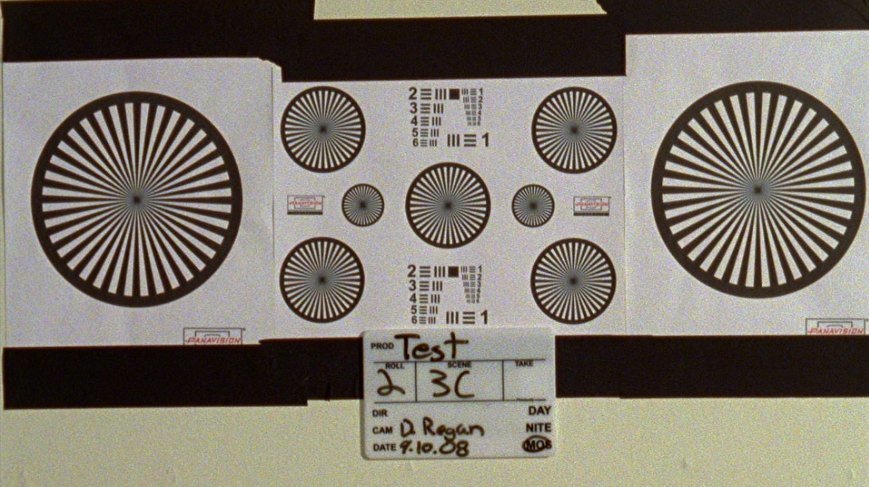
-
Assuming this is what your asking... Choosing a lens, like most things in cinematography, can be practical and aesthetic. Practically, as you mention given environments, you might be in a really cramped space, and just have to see certain elements in your frame, so you may need a wider (shorter focal length) lens. Or you might not be able to get very close to a subject, and need to use a telephoto lens. Another practical consideration might be exposure, certain lens types are faster (meaning you can open up more to allow more light in) than other sets. Aesthetically speaking, lenses can convey a mood. A wide lens, say an 18mm, expands the space, objects seem further apart, it exaggerates distance. It can also lead to distortion, which is often found to be displeasing, if you ever get close to a subject on a wide angle their facial features will be somewhat warpped. Wide lenses are often thought to be comical, and they can exaggerate motion, small movements by objects seem enhanced. Opposite this is a telephoto lens, say a 100mm. These lenses compress the space, objects apear stacked up and on top of each other. It flattens out the image so to speak. Motion towards and away from the camera is diminished, think that last time you saw a NASCAR race on TV, when all the cars are driving towards the camera, they all appear to be bunched up, and you don't really see that they are moving alot, until they hit the curve. Obviously these are the basic elements of what a lens does, choosing the right lens is a big decision, and can really affect the success of how a scene is filmed emotionally.
-
Kickers, edgelights, rims - all about them.
David Regan replied to Chris Keth's topic in Lighting for Film & Video
I really like motivated kickers, which I think look great when you have an idea of the source. For moodier, int. scenes with practicals, I love soft wrapping kickers. Almost too soft to call a kicker really. This was made with just a baby bounced, took some tweaking to get the angle to look right, then it's flagged off the left and back walls. I just really like the way you get that light spilling around the hair/neck, in a way that the practical never really would do, but still looks nice. (I think lol) Or I've done the opposite extreme, which in this example is a 1.2k HMI with a wide lens blasting through the window on the left. Normally I would never do something this hot, but since I can see the source, and have established it I think it sells, as the script is supposed to be set in a very hot portion of the summer, (Of course its actually freezing) so I wanted to get that feel of the obtrusive burning rays of sun coming into these peoples lives. Again its sorta tough to talk about these without mentioning the why lol.
-
Student is asking for help
David Regan replied to Daan Werdefroy's topic in Lighting for Film & Video
Notice how soft/wrapping the light is. Especially in the CU inserts of the butter knife etc...you see slight shadows but they are not hard or dramatic. Ideally this seems like a situation for a 12K bounced into a 12x outside the window, for a large soft source, with fill from inside but given the budget and location limitations you'll be working around that I assume. Your approach sounds good, just be aware of the back wall, and the angle of the light hitting it. Not sure of the exact geography of your location, but if you see much to the right like in the wide shot, and see the edge of the window, you'll want to get your light raking that wall as close on to that angle as possible. I would frame out the window, give myself a couple feet breathing room, then bounce, or punch a 575 or 1200 through a 4' of diffusion with the angle coming so it rakes the back wall and doesn't hit it directly. The problem will arise, with the lamp inside, it will be invariably quite close to your wall, and you'll experience a lot of falloff, where the right side of frame is quite hot, and the left side gets darker too quickly. The still you posted has a much more gradual and gentle gradation from bright to mid tones. Also the left side of the girls face is a little hot for my taste, seems it could be taken down maybe a 1/2 stop. And as Kiarash mentioned, finessing the fill in CU is important. Notice in your wide the girls face is relatively split, dark on the right side of her face, bright on left. However in the CU there is much more gradation and subtlety, you can see a very slight soft edge coming from frame left now, and the light wraps nicely, there is perhaps a somewhat more frontal fill being used. Good Luck! -
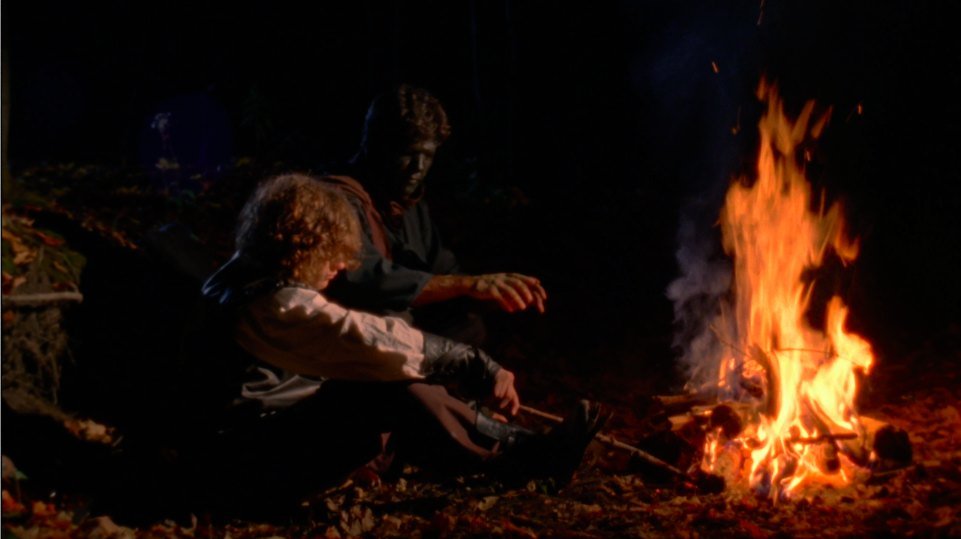
Hey Tim, I was shooting (unfortunately) all the way open. I had anticipated a larger fire, but it was so small, that even when my additional light was dimmed all the way up, I was only reading a 2.8, so I was a hair closed from a T2.2. In retrospect I shoulda added more light and stopped down, which would have helped the lens out too, but I think at the time I was worried too strong a light would overpower the natural flicker the real fire was creating. Thats interesting though, I'll have to keep that in mind next time, thanks for the time.
-
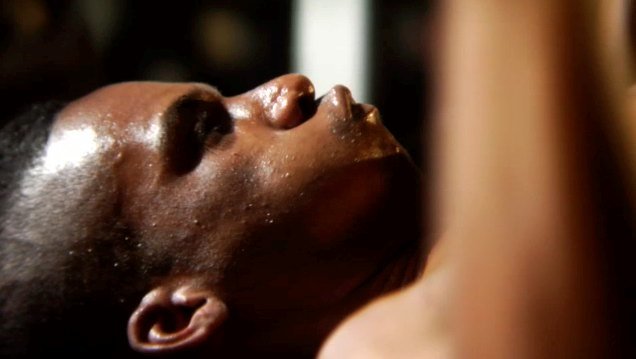
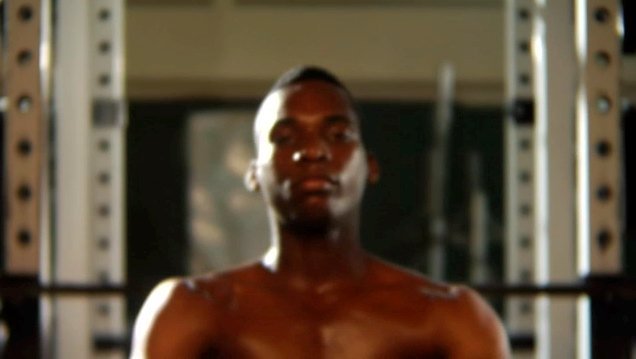
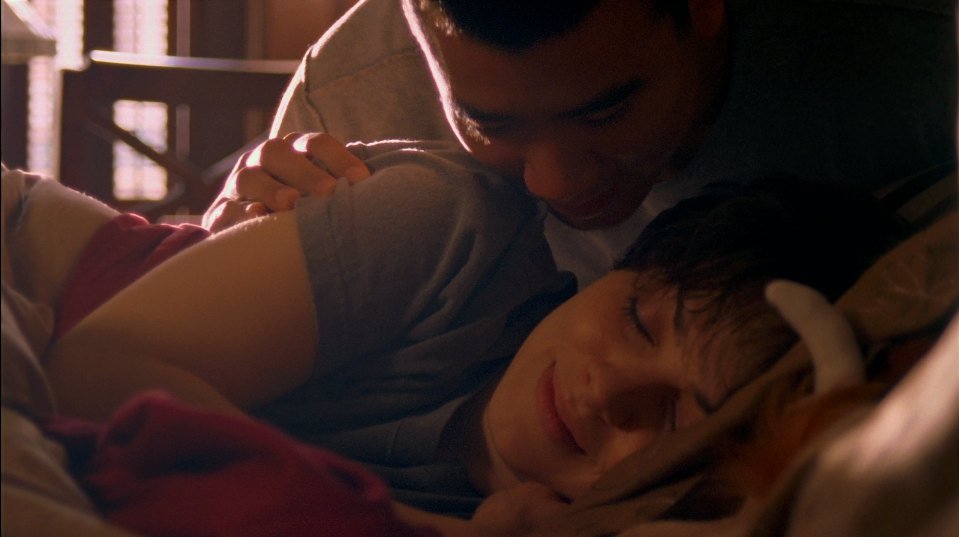
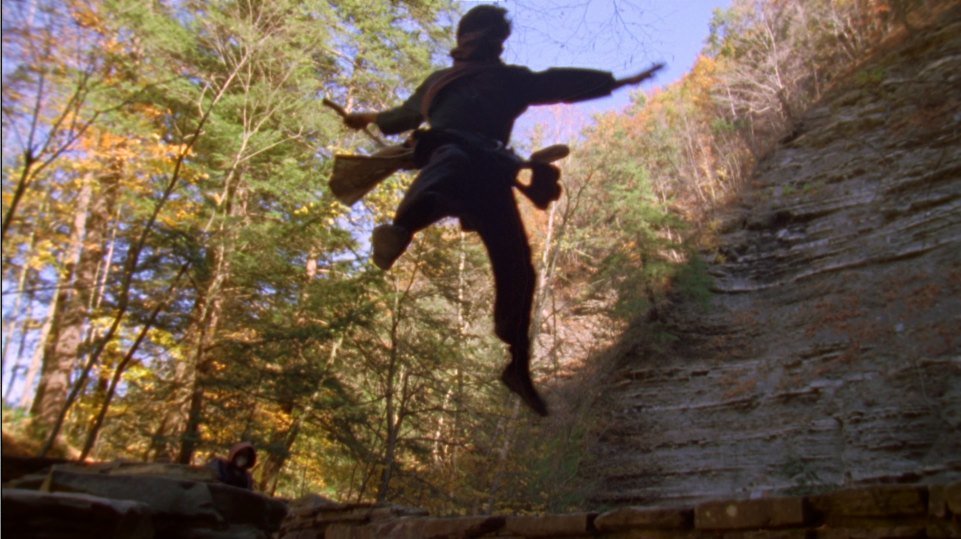
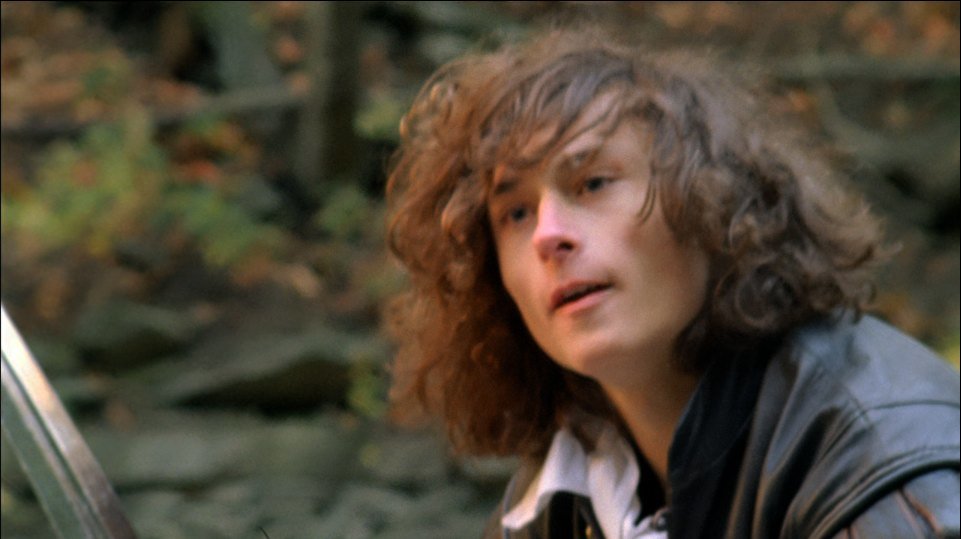
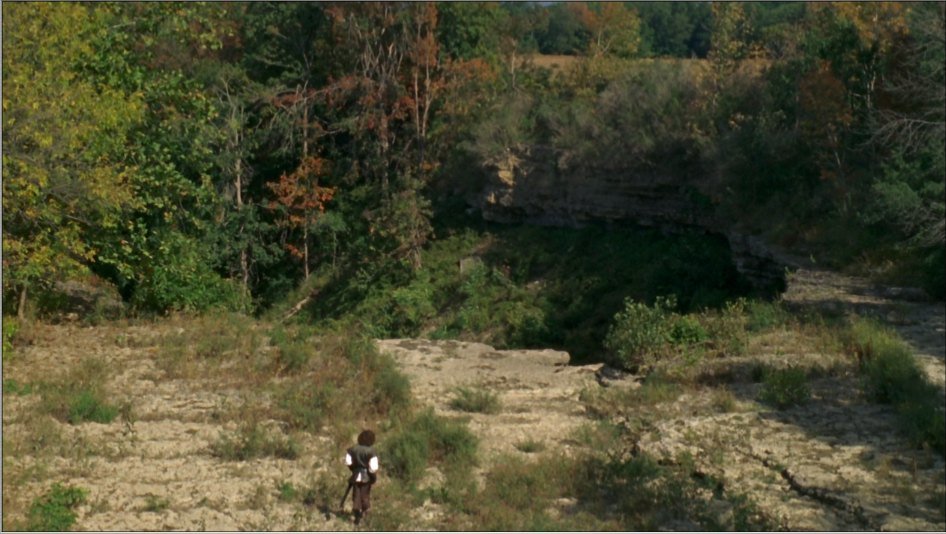
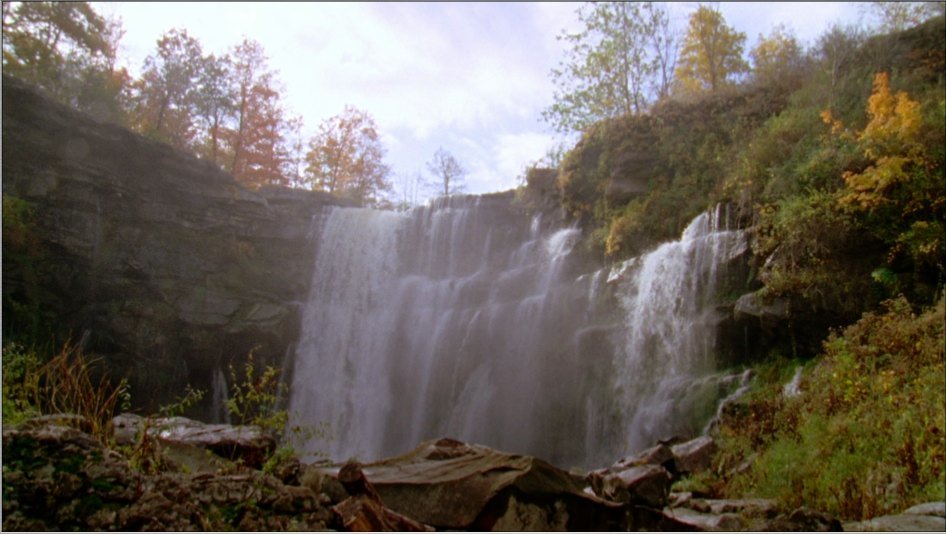
Hey Steve; yes we are shooting in the Rochester area, the film is being made at RIT, so we're right next door to you. I'd definitely be happy to give you a call about helping out, It's always good to meet fellow filmmakers. We are sort of in a stage of inactivity for the moment, our exteriors being basically wrapped, now we have studio shoots coming up, so sets have to be built etc...It'll probably be a few weeks before we get rolling on those, but I'll let you know. Send me a PM with your contact info and we'll be in touch. (All the following stills are actual grabs from an HD bestlight transfer of the film) So as just mentioned, we are pretty much wrapped exteriors. A few pickups to be done, but even if we wanted to shoot a lot more we couldn't really, due to the rapidly changing look of fall, most of the leaves are off the trees. So I'm happy we got done when we did. For our last days of shooting, we started out with a small scene at the base of this waterfall. The funny story about this place was when we scouted it it was a dried up riverbed, leading to this dried up waterfall. When we came to shoot a scene in the riverbed at the top of the falls about 3 weeks ago it looked like this As we were shooting that morning however, we heard a noise, and turned to see a river creeping steadily towards us. We rushed the equipment out of the riverbed, and before long the dried up river was a full flowing waterfall. We managed to cope with it, made some minor rewrites to the script, and then this past week picked up our scene at the bottom of the waterfall. It was a beautiful location to shoot at, and the water was great at that time of day, the sun was backlighting the mist in a very pleasing way. Unfortunately that scene took longer to shoot than was expected, and our next location we moved to was a good distance away. By the time we got there, and got everyone through costuming and makeup, I was really low on light. It was only about 4pm, but we were shooting in a gorge where no direct sunlight was hitting. Plus it was a fairly complex fight scene, and I knew to do it justice I was going to need more time to get the shots we really needed, and the light wasn't going to give us that in this location. So we had to make a tough call, and decided it was best to come back the next morning. It was a bit of a risk, because our actor had to go back to Oregon the following day, so we knew making our day the following morning would be huge. But we decided to instead that night shoot a small campfire scene that was also needed, so we headed back, set that up, and made a nice scene out of it. I had never shot a campfire scene before, or any scene really where fire was the primary motivating source. I knew to bring up the level I could use my tungsten units, and was aware something like a flickr box or magic gadget would be usefull. But for budget reasons we didn't rent one, so I ended up just putting a 300W unit from behind the fire, and had it on a dimmer being controlled manually by someone. It wasn't great, because obviously the color temp fluctuated. It looked very nice on the warm end, so I kept it dimmed around there, and was quite pleased when I got the footage back. The fire added the more obvious flicker effect, and then I used a redhead with 1/2 CTB (which ended up being a bit too blue I thought) as a backlight, and to add depth to some of the trees. A word about the one actor in the BG with the darker face. That face was actually a prosthetic, made of thin latex, to give his face all these bumps and textures, as though he was somewhat made of bark in a way. The mask turned out pretty well considering it was the first time the director or anyone involved had tried doing it, the problem for me was how dark it was. My initial thought had been a sort of dirty drab green, with shades of brown, but we ended up with the darkest green I've ever seen, which did look nice, but made exposure hell for me. You can see in the attached still how his face just falls off to no detail, it's just so dark the mask reflected almost no light. But it was a challenged and I worked with it, although I certainly think I could have done better helping exposure on his face out. The next morning we returned to our wonderful gorge location, with beautiful weather. I have to say the lighting in this location was some of the best I've ever had outside. because no direct sunlight hit the bridge we were on, it was a sort of cool ambient light to begin with. Then I found, as the sun rose it hit the sides of the cliff face, and then bounced back, creating a huge, warm, shadowless source from one side. It was beautiful light to work with, because we were in such a rush (I think we did nearly 20 setups in about 2 hours) due to our actor availability, I didn't really have time to add fill/shiny, but in this location it didn't really matter. You can see the sun hitting the cliff-face in this photo: And it's soft effect here: Also I had that link to a 'trailer' but now we have a much better version, with more footage, that we are using, you can check it out here to get a feel for it. http://vimeo.com/2100193 Give you some idea of the shooting as well, aside from the compression. It's somewhat over the top and corny, but it's more than anything its just to hype it up at school, and give an idea for the film, which it does. It would be great to get any feedback on the shooting as well, like I said, I'm green when it comes to shooting fight/choreography sequences. All said, it was a good few weekends of shooting, wonderful weather, wonderful locations, and a great cast and crew that made the shoots some of my favorite so far. More than anything I've learned a huge amount, which is always the best thing that can come from a shoot I think. Since we now break for a few weeks to build our studio set, it will be some time before I have more posts. Cheers everyone
-
Hey everyone. I just put together a new cut of my reel, you can check it out here: http://vimeo.com/2076080 It always amazes me every time I go back to re-edit a reel with new footage how I usually don't like 75% of the footage I had before <_< Anyways enjoy, any comments/criticism would be welcome. Cheers
-
Also, just for fun, I put some clips together into a sort of fake trailer, just something to build up the film. It's small, but gives you an idea of the some of the stuff we've shot so far. You can check it out here: http://www.flickr.com/photos/14564846@N03/2963918536/ Enjoy!
-
Just got a bunch of footage back from lab, and I'm pretty pleased with the results. I guess I could talk first about the lab situation. As our school is here in Rochester, NY, we are getting our footage processed locally at the Kodak lab in Rochester. I was aprehensive at first, all my test footage had gone through Postworks, NY, and while I knew Kodak would do a good job, it was an unknown factor. But Kodak was great, their lead colorist was a huge help, and put up my test footage on their Spirit while I got to go through it with him on the DaVinci. Very helpful to me, both as a cinematographer on this project, and in general as it helped me learn more about the options in postproduction, as I still feel quite green on the subject. It's great to see what a good colorist can do. So with that in my mind, I was able to shoot with a lot more confidence. Most of this footage was of a the film's final fight scene, and we were blessed with beautiful sunny weather for the two days it took to film. However due to how it was shot, character's were in strong backlight much of the day, and I had several shots framed against the sky for the intro to the fight. However having seen the 7205 in transfer helped me know just how I could expose it, and could confidently expect detail in both the subjects faces, usually underexposed by 2-3 stops, and the sky. And sure enough the footage came back looking great and as I had hoped. While I'm on the subject of backlight, which often entails sun shooting down the lens, I encountered a problem that makes perfect sense but I never forsaw or noticed on the day. While I preferred an older set of Cooke S2 primes, for the remote locations such as the one we were at, I stayed on a zoom for practicality sake, an older Zeiss 10:1, T2.2. However the zoom has a serial number painted white around the inside of the barrel in front of the glass, and when I was in backlight situations, the sun would hit that white and reflect the serial number into whatever filter's I was wearing. Very annoying, and I found out this phenomenon the hard way. Well at least I know now, I'm curious if this is a common problem, or if serial numbers are not white very often for that reason. (There is a picture of it on my flickr set for this film) I had never shot a fight scene before, and was somewhat nervous to do so, not entirely sure what coverage would be needed. The plan I ultimately went with was to just first cover myself with some wide's dollying back and forth, and then the same in CU. Then I would do OTS on the hero character, and some handheld as well. Finally I would do a take slo-motion, because we wanted some of those moments in the fight. Finally, I would shoot specific inserts of actions that really looked cool, i.e. ducking under sword blades, jumping over swords, kicks, punches etc...Looking at the footage I'd say it should cut nicely, but I'll be interested to see what the editor does with it. We also did some poor-man's aerial photography, using a power parachute, which is essentially a go-kart with a propeller and a parachute. It was a blast to do, and the footage was all great with regards to color and focus, but there was just too much sway in the rig, which led to real steadiness issues. There are a couple usable seconds in a few of the takes, which may or may not make it into the film, but it was a great experience nontheless, and worth doing, if for nothing else than to at least learn some of the logistics and complications of aerial shooting. Again, sorry my account isn't letting me post stills on this site, more stills have been put up at flickr for you to check out. All of these are actual footage grabs from a DVCPRO HD transfer from Kodak. There is no color correction here on my part, just the colorist's work off the graycard. http://flickr.com/photos/14564846@N03/sets...57608002195054/ I look forward to any thoughts/criticisms, and I'll be posting more as it comes. Cheers
-
Preferece between Kodak and Fuji
David Regan replied to Nick Centera's topic in Film Stocks & Processing
If you are shooting 7217 that's 200T. I haven't shot the Fuji equivalent, but the Kodak '17 is a sharp stock, so any grain you have, which will be slightly accentuated from the smaller neg. area of regular 16mm will be more noticeable if the negative isn't properly exposed, or you have large areas of flat color without contrast. Just something to keep in mind, but as for the Fuji stock others who know about it will chime in here. -
Very beautiful work Tom, very inspirational. Really enjoyed the shots with the changing light on surfaces such as the rocks and trees. Keep up the good work. Cheers
-
Let's share some still photos...
David Regan replied to Jonathan Bowerbank's topic in Please Critique My Work
http://www.flickr.com/photos/14564846@N03/ My flickr account, some set photos, grabs from footage I've shot, and other random photography -
Thanks for the complements guys. (Stephen your site looks great by the way) Yeah, prod. design seems to get overlooked a lot, but fortunately not in this case. I guess there isn't one specific designer so to speak, it's been just mostly a team effort on the part of a bunch of the director's friends, who happen to be very good at this sort of thing. So it's been a lot of relay on my part, but it's certainly been working out so far. Should have a bunch more footage back early next week, so I'll update the shoot then.
-
Production's begun on a 20 min Super16mm short I'm shooting over the course of the next couple weeks. The film is basically aimed a younger audience, revolving around a fantasy adventure storyline. It's got all the elements of a fun shoot, and so far that's proved to be the case. Great production design has made my job a pleasure, we started out shooting exteriors at a small hut, that has been made to look as though it is built into the side of a hill. I laid out what I needed as far as making the location shootable for the angles we wanted, and it was great to get to set on the day and find everything looking not only as I had hoped, but perfectly real. It was one of those great moments you just feel the environment has stepped off the page and into your world. I was fighting a setting sun to get a lot of coverage in this location, so I lost some light for my final few shots, but I think the scene is still ok, it's mostly a montage so it can jump around. I pushed the stock a stop as well, it was 7205 250D, and doing so gave a really nice saturated contrasty look. It is the last time the main character is at home before leaving on this adventure, so I wanted the location to really stand out. There is a bit of increased grain, especially in the underexposed areas of the negative, but I was willing to live with it. This site isn't letting me post any files at the moment for for now here is the link to some stills on Flickr. These are actual grabs from the HD transfer, done by Postworks NY. http://www.flickr.com/photos/14564846@N03/...57608002195054/ This is the only footage I have back from the lab at the moment, so I'll post the rest of the information when I get the other footage.
-
Hey Andres I actually just did a push/pull test with the 7219, not much just a stop either way. The pulling was a very subtle difference as Karl said, you don't see it too much. Subtly reduced contrast and saturation can be seen in the color chart, but as far as grain goes, its very minimal. I find the 7219 already holds up so well, the grain is very minimal if it is properly exposed. Even over/underexposed by 2 stops, it was still very usable, some increased grain, but not terrible. I'll try and post some stills if I can ever figure out why this site won't let me anymore lol. Cheers and good luck.
-
After a summer of ACing and not really shooting too much, it was nice to get back into things with a music video. It was a 2 day HVX shoot, with a 3rd day for pre-lighting. Great band to work with, very good director, and an awesome crew made it a really fun shoot. There's some pretty extensive green-screen post production, combining stop-motion and 3D with the live-action, so it'll be a while before there's a final video to see. For some reason the site isn't letting me attach anything, so I've posted a flickr link to some grabs from the footage. The Director wanted a dark gothic look, everything being sort of surrealist, a non-existent red-room. So I went after a toppy low key look keeping a lot of the set in shadow. There were really only 2 major lighting setups, one for our green-screen, and one for the set. Everything was shot in studio, so I had quite a bit of flexibility with lighting and what I could do. My major lighting for these shots consisted of a skirted spider lights (A sort of knock of 1k space light) over each band member's approximate position. A 2k and 1k fresnel raked the band from a back to 3/4 back position. Then there were some highlight spotted on the clock on the wall, and on the curtain's. Pretty simply really. For the greenscreen, I wanted to keep a toppy-sidey look to things, so I originally had a 5k bounce set up above the talent, but I found it didn't really do as much as I had expected, after I exposed for my side-key and back light. So my main sources were a 2k through 250 as a backlight, and a 2k blonde through a 4x of 1/4 grid as my side key. I'll be looking forward to the final product after all of the greenscreen. The following link is to stills from the footage, I'd love to hear any thoughts, it's definitely nice to get back into the swing of things. http://www.flickr.com/photos/14564846@N03/...57607666103755/
-
SPINNING CAMERA EFFECT...HOW TO ACHIEVE THIS???
David Regan replied to Daniel Porto's topic in Grip & Rigging
Revolution lens system will do this. I think it's based on the same principle as the Frazier lens system Mark mentioned. http://www.clairmont.com/spec_items/rev_lens.html -
Yes definitely multiple monitor cables as Jamie recommended. The RED shoot I'm currently on has gone through several of said cables. Be aware the 12v power as mentioned is 4 pin lemo. So if you want to use say a Microforce zoom control or some such accessory that typically uses the 3pin fisher, get an adaptor. And also if you don't get an HD compatible monitor and are running a BNC out of the SDI breakout box (again highly recommended) get a downconverter or something similar for your monitor. In our case we run a BNC out of the SDI into a box then then sends out an HDMI signal to the monitor. RED currently has a RAM solid state drive we have gotten in addition to our RED Drive from time to time, which has been great for car mount shots etc...because as you should be aware, it is not a good idea to use a RED Drive on shots with lots of bumping, as the drive will probably drop frames. Good Luck