


Michael Nash
-
Posts
3,302 -
Joined
-
Last visited
Everything posted by Michael Nash
-
Creating a good workspace for Color Correction
Michael Nash replied to Rodrigo Silvestri's topic in Post Production
I'm not a professional colorist, but this is what I use at home for general-purpose image work. I surround the frame with 50% luminance gray. It provides not only a neutral color reference, but a neutral luminance reference as well. -
I'd be worried about getting the diopter mounted straight -- you look pretty "skewed" in the second pic. ;) I don't imagine the CA would go away when mounted on the Zeiss lenses. But you never really know how the optics will combine until you try it.
-
Remember that filters work by canceling colors, not adding them. That means that in addition to "coloring" the frame they can also be used to reduce saturation of the complementary color, when colortimed back to normal. A pink/magenta filter would tone down the green saturation, but probably not far enough for you without screwing up the skin tones. When the image is left left alone (not color timed back to normal), warming filters in the yellow-red range can actually make green foliage look more healthy and "Spring-like" by canceling the blue and enhancing the yellow. You can see the effect by eye, so try out a few filters.
-
Oops! It's 1/6th. You've got the right idea; I somehow counted the wrong fingers! :P ISO numbers have a geometric relationship; double the number, you double the sensitivity (i.e. one stop). The common ISO speeds are divided in 1/3's of a stop. 640 is 1/3 stop faster than 500.
-
It can be done with the F900 (there are lots of movie examples where it's been done successfully), I just don't know the post path. I don't think it's as simple as dropping 60i into a 24p timeline, since you've got to create complete frames from each field. If you're going to use all 60 fields to create 60 frames, you would shoot with a shutterspeed of 1/120 to get the same motion blur as you would get with true 60fps shooting. Seems like that Panasonic 2700 model would be the one for me...
-
You mean the right psychotropic enhancement... :P
-
1000 ISO is one stop faster than 500 ISO. f1.4 at 500 is f2.0 at 1000. F4 is three stops from f1.4; so you'd need to use an ISO that's three stops faster (4000), or a shutterspeed that's three stops slower than 1/48 (1/3 second).
-
Drop Ceiling Scissor Clamp
Michael Nash replied to David Calson's topic in Lighting for Film & Video
Remember, it's not just the clamp but what the clamp is attached to, i.e. some flimsy aluminum strips held up by wire. If in doubt, don't "hang" the light from the clamp, hang the weight of the light from something more substantial and just use the clamp as a mounting point for aiming the light. That said, small units like Tweenies are usually pretty safe. Give the mounting point a test "tug" to see what flexes or gives before hanging anything from it. -
Production design is the tried-and-true solution for faking a location or environment. Hollywood routinely shoots snowbound New York in Los Angeles during the summer by loading up the set with foam, real snow, chicken feathers, or whatever. Now obviously on a student budget you can't afford to dress large areas to look dry, but you might be able to do some creative "cheats." Use coverage to show what you want the audience to see, and not what you don't. Tighter shots mean less background to dress with dust and pale colors. For wide shots try to avoid any views that show green foliage. In editing use lots of cutaways and establishing shots of subject that say "drought," like wilted plants and dust blowing across bare patches of dirt. Then with the cinematography you can create a hot, dry feel with overexposed highlights and pale warm colors.
-
Transferring JVC GY-DV 100, 200 or 250 to film
Michael Nash replied to George Ebersole's topic in JVC HD
The step up adapters also act as extenders, so not only is the field of view narrowed compared to the lens' original format, the focal length is increased slightly as well. Not always the best way to go for flexibility when shooting. The PL adapter is unique, and an attractive option. -
Transferring JVC GY-DV 100, 200 or 250 to film
Michael Nash replied to George Ebersole's topic in JVC HD
True, the adapter & mount makes a difference. There are also adapters for 1/2" and 2/3" lenses, each with their own characteristics. -
Looks like it's gonna be soft. What lens do you have for the BL? That will make a difference. Ultimately you just have to shoot some tests.
-
Transferring JVC GY-DV 100, 200 or 250 to film
Michael Nash replied to George Ebersole's topic in JVC HD
Canon's prosumer HD cameras can turn out exceptional looking images, especially if you make good use of the extensive image control they offer. That said, I really can't stand Canon's ergonomics and interfaces and don't like using their cameras. But that's just my personal preference. http://www.usa.canon.com/app/html/XLH1/index.shtml -
Filming to references of he director
Michael Nash replied to Lars Zemskih's topic in Lighting for Film & Video
With reference pictures I leave technique for last, even if the technique used in the picture is obvious. Instead I concentrate on the feel and tone first, since that's most likely what the director is responding to. Then I look at the common visual elements between the images like color, contrast, texture, light quality, and so forth. From that I'll determine my own approach that makes sense for the film. In this case what I see in common is a low-key palette with only tiny spots of highlight, a high contrast ratio, a monochromatic amber color scheme, and an even distribution of tones across the frame in a mostly closed-form composition. Your own lighting technique can be whatever you want it to be, but you've basically got two choices for getting the color: color the lights (with gels), or color the entire image (with a camera filter or in telecine). The difference is that with colored lighting you can control colors independently in the frame; with a colored image it's the entire frame or nothing. -
I mis-spoke; I meant iDVD, not iMovie. In any case, I learned the hard way by trying to burn a true 24p timeline to DVD and kept ending up with a stuttery mess. I ended up using DVD Studio Pro, but had to teach myself the app first. Yes DVD Studio Pro is a much better app for DVD's, but 24P>60i>iDVD is ridiculously easy. Just choices.
-
It just so happens that last night's episode of CSI dealt with this same issue. A murder is committed in a restaurant that serves the food in complete darkness, and the audience has to "see" what happened during witness recounts. They came up with an interesting, but stylistic solution -- they shot the actors in black limbo but with a harsh spotlight that would fade up and down to highlight details and faces. Very artificial, but interesting. You can watch the episode here. A friend of mine came up with another solution -- you could have a black screen with little blinking white eyeballs, like the old cartoons... :P Looking forward to seeing what you come up with, Mr. Prieto.
-
Robert Elswit talks about his B&W experience on Good Night, and Good Luck here. There's also an article in American Cinematographer November '05.
-
Creating Post Production Depth of Field
Michael Nash replied to Walter Graff's topic in General Discussion
We didn't give you feedback. You just believed we have an opinion and know what we're talking about because we tricked you into thinking we do. Clearly none of us really have any clue. -
http://www.claudiomiranda.com/Alpine.html http://www.claudiomiranda.com/Alpine75mm.html Don't expect definitive results from someone else's test though, especially from a little QT on the web.
-
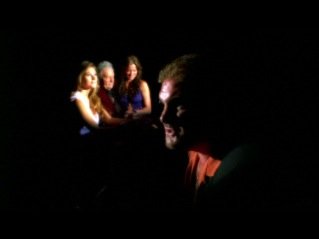
Girls Aloud video.
Michael Nash replied to Adam Frisch FSF's topic in In Production / Behind the Scenes
Yes, they had those girls poppin' all over the place, didn't they. Nice job, and you obviously have good control over the frontal/glam technique. I gotta say though, I've never been a fan of the single-source frontal light for wide shots, where the effect can fall apart. You've done a nice job as always, so my criticism is over that look in general, not your work. It's such a delicate balancing act of exposure and contrast with the background that it can go from glam to grime in an instant. If it gets too dark or contrasty it all goes slimy and seedy with a harsh deer-in-the-headlights or police flashlight look, or worse looks like plain old bad lighting. If the background gets too bright it just looks flat, and you can't get that "predatory" modeling (again, in the wide shots). I'm still looking for alternatives to wide shot lighting in a glam style like this that run less risk of slipping into seediness. I've got some ideas, but need to try them out first. Thanks for the behind the scenes details. -
What's to critique, it looks great! I guess it does beg the question though, when you're doing something like this that's outside the realm of normal human experience, how do you want to use familiar visual cues to control how real or surreal it appears? For example, the exposure is too bright to look like nighttime and too dark to look like daytime, and ends up looking artificial or unreal. Same thing with the color temperature; to appear like night it would need to be bluer (even though we know moonlight is daylight balanced), yet it's too dark to look like daytime, and ends up looking odd. Imagine what the effect might be like if it was exposed and balanced for a convincing nighttime or daytime look. Or, you might like it all looking unfamiliar and un-relatable. Just something to think about. How did you determine exposure?
-
Creating Post Production Depth of Field
Michael Nash replied to Walter Graff's topic in General Discussion
The problem with artificially softened backgrounds is that it's easy to buzz the background so much that it becomes "optically" unrealistic in comparison to the foreground that's in focus, respective to distance and focal length. If you think about focus as a cone that gets wider from the point of focus, softness progresses in a linear fashion. If you've got a person's head clearly in focus from front to back you wouldn't expect the near background to be extremely soft. Doing that creates the illusion that focus is behaving more like a trumpet bell instead of a cone, which ends up looking unnatural. The technique is good, but in the talking head interview the background looks too soft to be realistic. I think taking it down a notch and it would be more believable. Also when you've got a lot of depth you might need to do multiple layers of defocus to create a convincing "cone of focus." You'd expect the cars to be sharper than the building across the street. The zoom in/buzz was a nice touch though, and convincing. -
Question on Shutter Angle
Michael Nash replied to David Calson's topic in Students, New Filmmakers, Film Schools and Programs
In the strictest sense it does leave a trace, but it's exposed for a much shorter duration than the time the shutter is completely open. The sum total of exposure to light tends to obscure the motion blur artifacts. Plus, the shutter is changing angle as it wipes the frame, making an irregular artifact. Some of these new CMOS cameras do see an artifact from an "effective" moving shutter that goes vertically down the frame. Motion that goes horizontally gets exposed at the top of the frame first and the bottom of the frame last, resulting in a diagonal displacement of motion blur. http://dvxuser.com/jason/CMOS-CCD/ -
FOV
Michael Nash replied to David Calson's topic in Students, New Filmmakers, Film Schools and Programs
There's a straightforward geometric relationship between focal length and field of view. A focal length that's twice as long sees exactly half as wide. Start simple with three focal lengths; a focal length that's "normal" for the format, one that's half that length, and one that's double that length. In the 35mm format these would 25mm, 50mm, and 100mm. Consider these three equal steps as your standard of reference for "wide," "medium," and "tight." Of course these definitions are arbitrary, but it's a useful start. Then, add two more intermediate focal lengths, "medium wide" (35mm) and "medium tight" (85mm). You'll find that the three "medium" lenses will become your workhorse focal lengths for story telling, and the wide and tight lenses will be reserved for wide masters and tight inserts. Anything beyond your wide and tight focal lengths you can consider "very wide" or "very tight," again remembering that the field of view is mathematically derived from the focal length. Use this as a starting point. After a while you'll develop your own style and uses of focal lengths. -
Well, not to jump all over it, but one caveat: simple DVD burning applications like iMovie will only burn 60i (in the NTSC world), so you would follow the same 24p path as for broadcast. You did qualify your statement, but that's one detail that does trip people up.