

Dom Jaeger
-
Posts
3,512 -
Joined
-
Last visited
Everything posted by Dom Jaeger
-
Yeah this is hogwash. C mount lenses can be very accurately set for back-focus, I do it all the time for Bolexes, Beaulieus, ACLs etc. They absolutely have a hard mount, that repeatably allows a lens to seat within 0.01mm variation. You don't need to collimate each lens to each body, you set everything to the C mount standard, cameras and lenses. It's 17.52mm, a standard that goes down to 1/00 of a mm for a reason. What lets C mounts down usually is wear to the focus helicoid, and obviously it's not a good mount for heavy zooms. A 6mm lens can be calibrated on a good collimator. I've collimated plenty - Kinoptik 5.7mm or 6mm Ultra 16 or 6mm Optex for example. For fixed focus (meaning not able to focus) wide angles, like an Angenieux 5.9mm it's a little harder as the lens focus is set to around 8 ft, but some collimators have optics that allow you to check collimation at closer distances, or a tech can project the lens if their projector has a C mount, which my old Chrosziel projector has. A final option is to check it through a reflex viewfinder or gate focusing tool, which works but is not as accurate.
-
It's a non-reflex Bolex, so there's nothing in the camera that would make a lens "work well" or not, if it's a good lens it will work well. The only thing you need for SLR lenses is a decent adapter that seats the lens at the right flange depth, and a manual aperture lens. The main problem with using 35mm stills lenses is that you'll struggle to find the sort of focal lengths that are commonly used on 16mm. A typical wide angle would be 10mm or less, and a normal lens around 20- 25mm. Your 52mm Vivitar is essentially a telephoto lens on 16mm format. If the Vivitar isn't focusing it could be a few things. We'll assume the lens itself is OK. The adapter could be out (although usually a small flange depth error will just shift the focus scale a little, you should still be able to form an image). Alternately maybe the adapter is not screwing all the way in, so check nothing is obstructing it. That issue would make the lens only focus on close objects. If you have some C mounts, you can check if the top viewfinder works for them to rule that out. Presumably you have read the manual and know to adjust the viewfinder focus for your eye.
-
There is a standard winder without the gear that sits more flush to the camera. You can still use the Rex O Fader winder, it just sticks out more.
-
It's really very straightforward. Unlatch the arm from the variable shutter lever. Unscrew the winder lever (turn it clockwise). Undo the single screw in the middle of the Rex O Fader and lift it off.
-
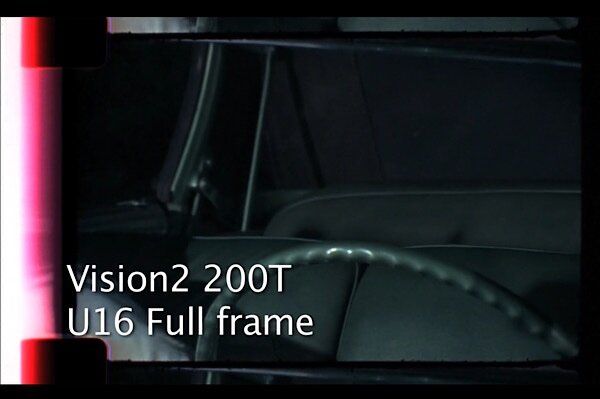
Ultra 16 is a bit of a dodgy format honestly, a sort of cheap DIY attempt to replicate S16. Many of these conversions have been done by amateurs who just roughly file out the gate on both sides, though it should be OK if Bernie O’Doherty did it. The gate extends a bit into the S16 side, and also into the side where the perfs are, so you end up with an image that has the perfs cropping in top and bottom. On some cameras like the K3 this allows light leaks from the perfs, like this: You end up having to crop the top and bottom to remove the perfs, and then crop in the left side to remove the perf flare, and you end up almost back where you started. Some cameras are a bit better with perf flare, but you still need to crop the height to remove the perfs. You can also sometimes get scratching between the perfs since the film slides over a support rail there, and there is an opening for the pulldown claw. It’s also the area where edge code is printed on the film stock. Here’s an Ultra 16 conversion by Bernie: Below is roughly where the original 1.37 gate would be, to get a wider aspect ratio like 1.78 or 1.85 you also just crop top and bottom. As you can see, a good Ultra 16 conversion does give you a little more width, but as mentioned not all scanners are set up for it and not all wide angle lenses will cover it. I would definitely ask for footage from any Ultra 16 converted camera, to check how bad it might be. The other thing to consider is that the original viewfinder optics and ground glass may not cover the expanded area, so you might not be able to frame accurately.


-
Arriflex stability is generally excellent, even with older cameras, providing they’re in good condition. SR 1, 2 and first gen 3 use fixed side rails which can wear after many thousands of feet and introduce some lateral instability. I’ve serviced heaps of them, either by replacing the side rails or adjusting their position. Any old un-serviced camera can have issues. Some of the gate weave from Arri SRs can be introduced by the scan depending on how it registers too. But there’s mountains of perfectly stable old 16mm footage shot on these cameras to prove that they do not inherently have gate weave. A lot of SRs got worked to death since they were the industry workhorses in the 80s, 90s and 00s so if the movement is too worn you can’t do too much, but many were also properly cared for. SR3 Advanced and 416 uses a different gate design that basically never wears. These days a bit of instability between frames can be sorted in post anyway, the thing with an Arriflex is the film remains stable during exposure because of the registration pin. In terms of avoiding S16 SR2s, I’ve seen a lot of perfectly fine S16 conversions of those cameras, like the P&S Technik ones, and even those that have machined early gates such that the support rail is not machined back tend to work just fine most of the time. There are more cowboys around these days working on pro cameras than there were back in the film days, most of the work done back then was pretty reliable.
-
This is a view often bandied about, and while it’s certainly more true for film cameras than digital cameras, there is definitely a potential difference in image quality because of the camera used. A pro camera like an Arriflex is built to higher tolerances with sturdier materials, with many fine adjustment possible. Things like gate flatness and perpendicularity with the mount, mount flatness and centering, flange depth accuracy and vibration isolation, registration accuracy, pressure plate tolerances, guide materials etc all help to make sure the film is placed very accurately in the gate for exposure. Amateur cameras will not have this level of mechanical accuracy, so you can get variations in how well each frame is held and evenly exposed, and how flat the frame sits. It’s also much easier for amateur or older cameras to cause scratches or bruises, to have light leaks, lose their loops or have stability issues due to wear or just poor registration. Then you have the viewfinder system. An Arriflex or Aaton viewfinder will allow you to focus much more accurately than other cameras, the mirrors are perfectly flat and the ground glasses bright, and they can be set to the very fine tolerances (0.01mm) required to perfectly replicate what’s being exposed on the film. So you’re much more likely to have a focussed image recorded. Then you have the mount - a PL mount allows you to use the best lenses available, solidly mounted with options like a follow focus or focus motor, lens support and matte box etc. All of which affects the quality of image. You can of course find great lenses in C mount or CP-16 mount or Cameflex mount or Arri Standard but they will be older and more limited, with great variation in condition. Anyway the point is you can use plenty of older cameras for lots of things, music vids, experimental films, fashion shoots, student shorts or just learning to shoot film, but if you want to make narrative drama or anything that you hope gets distributed then you need to use pro cameras and lenses. The odd film shot on a Bolex gets some attention, but they’re few and far between. I know a few filmmakers who started with Bolexes or Eclairs and slowly built up a reel until they got some interest and could afford to buy an Arri SR2 or SR3. The quality of their footage jumped a level and they could actually start charging for their work. I also know people who spent years buying and selling various old bits of gear and wasting money on failed shoots who never got to realise the film they wanted to make because they got too caught up in the gear. If you’re a producer my advice would be to focus on the script and sets and casting and funding and either rent the camera equipment when you’re ready to shoot or find a DoP to collaborate with who already has some gear. Or buy a Bolex and start shooting for fun.
-
Camera used in 'Miley Cyrus - Flowers'
Dom Jaeger replied to Fabian Schreyer's topic in On Screen / Reviews & Observations
All the examples I’ve seen have not been able to resolve very well, particularly wide open. The mechanical build is quite decent, but optically they are pretty mushy. And if the back focus is a little off the optical quality degrades further. -
No, I don't own one, or know much about CP16s really. But in terms of what you were asking for that's about as cheap as you'll find for a decent S16 PL mounted camera with HD tap and zoom, fully serviced by a reputable company with very good techs. As Robin said, it's easy to go down the rabbit hole of spending a lot of time and money on old cameras that need repairing, finding accessories that fit, finding lenses (not many good options in CP mount) etc. As far as DIY servicing, film cameras are generally beyond the scope of non-professionals, it's very easy to introduce worse problems than the ones you tried to fix when you don't really know what you're doing. Personally I think renting a pro camera and lenses is the way to go if you have a project ready to shoot, and buy something simple like a Bolex to play around with now, no need for S16 really, just crop to get a wider frame.
-
Angenieux 17-68mm F2.2 Type L2 - Reflex Compatibility?
Dom Jaeger replied to Raaf Sundquist's topic in Bolex
It's not a hard and fast rule about lenses under 50mm, particularly zooms. The main factor seems to be the exit pupil depth. A lens with a shallow exit pupil (being the image of the iris as seen from the rear element) is more susceptible to aberrations introduced by the prism. I would shoot some tests at different apertures to see how bad it actually is at the wider end of the zoom range. -
Visual Products has a S16 CP16R currently for sale for about 9K, complete with PL mount, zoom and HD tap. That's about as good a deal as you'll get for what you want. https://visualproducts.com/product/cp-16r-super16-camera-package/
-
Angenieux 17-68mm F2.2 Type L2 - Reflex Compatibility?
Dom Jaeger replied to Raaf Sundquist's topic in Bolex
Here's a nice brochure outlining the various types of Angenieux 17-68 lenses: https://www.pacificrimcamera.com/rl/01067/01067.pdf The early silver zooms used L1 for the reflex dogleg models, L2 for normal C mount, and L3 for RX Bolexes. Later black versions used letters after the designation, so 4x17A was the dogleg version, 4x17B was normal C mount and 4x17C was for reflex Bolexes. -
For future reference, the manual for the reflex (dogleg) version of the Pan Cinor 17-85 mentions that you can either use the tool supplied (which few have nowadays) or simply unscrew the lens by about one turn, then press the mount against the camera while turning the lens to the correct position. The mount is internally sprung, as Simon mentioned, once fully done up it should not rotate.
-
Questions like this are easily answered by reading the manual, which can be found with a simple google search. https://usermanual.wiki/Manual/somberthiotpancinor85compactinstructions.169125904.pdf The manual pictures a custom tool to rotate the mount, but you can use a lens wrench or something similar.
-
Lateral instability is usually due to the side rail spring mechanism not working properly, it could be gummed up or deformed, but I'm not familiar enough with that camera to comment on how the lateral guidance works. Also sometimes a claw off-centre from the perf can pull the film laterally. The other question is how the scan has stabilised the film, what scanner was used. But in theory stability can usually be improved by a technician.
-
If the loop itself is getting shorter (not just shifting position) then there is a discrepancy between the feed sprocket and the take-up sprocket. They are linked by gears, so the shafts should be turning at the same speed, which keeps the loop a constant size, but it's possible either the top sprocket is loose on its shaft (two screws hold it) or the film is somehow not engaging with the top sprocket correctly, perhaps too large a gap between guide and sprocket, allowing the sprocket teeth to slip over the film perfs. Ideally a newly bought Bolex should go for a service, it may save you a lot of wasted film, time and money. It's like buying a vintage car that's been kept in a garage for decades and expecting it to be roadworthy. Also just a thought - older Bolexes can have double perf sprockets, with teeth on the top and bottom, which are not compatible with modern single perf film stock. But normally single perf film just wouldn't run through the camera.
-
Almost all modern PL lenses still adhere to the mirror clearance standards of the film era, in other words they don’t protrude too far past the mount. If you are concerned, here’s a diagram of allowable rear protrusion dimensions to clear an Arriflex spinning mirror camera like a BL4: (Sorry for the low resolution, this site now limits pics to under 18kB which is barely useable). The surface to measure from is the lens mounting flange, with the four wings, where it seats on the camera mount. You’ll find nearly all lenses tend to fit inside this envelope. Optically, cine lenses made for digital cameras will work perfectly fine on film movie cameras, so you don’t need to worry about that. Full frame lenses will cover a larger area than a Super 35 film gate, but if the focal length is the same then the angle of view will be the same as a S35 lens. The only thing you sometimes need to worry about with modern lenses is the slope of the camera body where the mirror is housed. That can sometimes foul on the iris ring of some lenses before they are fully seated in the camera mount. I have heard Xeens can do this on certain cameras, so ideally test them at a rental house or rent one to test before buying. CP.2s are Ok. Happy filming!

-
No argument here, just discussing the weird world of anamorphic artifacts! So mumps refers to the optical effect that used to happen with older anamorphics that would cause an actors face to appear wider than normal when filmed in close-up shots. It was due to the lens squeeze factor reducing below 2x as you focused closer, which meant when you unsqueezed the image the subject was wider than it should be. Panavision developed a mechanism to counter this back in the 50s, which is still used in their modern anamorphics today, albeit in a more refined way. The mechanism uses two counter rotating astigmatisers which manage to maintain a 2x squeeze through the focus range. One of the by-products of this mechanism is that Panavision anamorphics don't breathe much, as most other anamorphics do. You can see this in the test you linked to before, where the background doesn't expand or contract horizontally during a focus pull. You're only seeing the vertical smearing of the anamorphic out-of-focus areas, and maybe a little vertical breathing. The actor's face looks pretty consistent at different distances too. Other modern anamorphics use different design tricks to overcome the mumps effect, but they still tend to breathe, in the sense that the focal length appears to change, the background field of view expands or contracts. Older Panavision anamorphics like the C series used a basic gear driven mechanism for the astigmatisers which wasn't able to customise the rate of squeeze variation, so there could still be a little variation, and close focus was limited. More modern lenses like the G and T series use a different mechanism that can customise the astigmatiser rotation which allows more fine tuning and better close focus. Regarding the squeeze discrepancy in La La Land .. well, it happens. Could be a C series was used at it's close focus limit, or had been customised to focus closer. Lenses get adjusted or modified and sometimes I come across one that has a slightly altered squeeze factor. Panavision customises lenses all the time. I suspect it was different focal lengths rather the same lens, but who knows.
-
No mumps with Panavision anamorphics. This was shot primarily on T series with a bit of older C series, just like tons of other big budget movies. Big focus pulls with Panavision anamorphic lenses look different to spherical focus pulls, you get a vertical smearing of the out of focus areas. Other anamorphics can also have severe breathing, which can be even more distracting, but Panavision anamorphics have a mechanism inside that adjusts the squeeze while focussing to avoid mumps and reduce breathing. But a lot of filmmakers avoid big focus pulls with any anamorphic lenses because they can look a bit weird and pull you out of the movie.
-
Congrats on finding such a great camera that you can use for free! First step would be to read the manual, an actual Bolex one not the various college manuals you can find on the net that can contain misinformation. Here's one for the Rex 4: https://www.vintagecameras.fr/images/MonSite/BOLEX/H16_Reflex/_Doc/Bolex_H16Reflex_Manual_en_Revu.pdf Here's a thread about the 18-86 zoom, with some info about it: https://cinematography.com/index.php?/forums/topic/95617-ii-kern-paillard-vario-switar-125-f-18-86mm-ee-h-16-rx-maybe-vario-switar-86-f25-18-86mm-ee-battery-manual-question/ You'll want to get yourself some dummy film to practice loading, and check that the camera is running ok. Hopefully your college might have some old exposed or out-of-date film you can use, otherwise maybe ask a local lab. The Rex 4 uses 100 ft daylight spools. Some things to check on the camera: You should be able to wind up the spring, then run the camera at 24fps for about 28 seconds. Listen to the sound, most Bolexes slow down a bit in the last 5 seconds, especially when film is loaded. If the camera slows down very noticeably before that, it may need a service. You can still use cameras like this, but limit shots to shorter takes, and always wind the spring up before each shot. When you run the camera, make sure that the take-up spindle (the lower one) is turning smoothly, not starting and stopping or sluggish. You should be able to hold it to stop it turning with one hand, then when you release it, it should spin again. If this doesn't happen, the camera needs a service. Sometimes a drop of oil under that spindle can help, but essentially if that spindle doesn't turn properly then the film won't take up and you'll end up with the film looking like spaghetti inside, un-useable. You can remove that zoom by turning the knurled ring at the back anti-clockwise. I find it easier to have the camera facing up while undoing that ring, so the weight of the zoom isn't binding the mount thread. Once the lens is off you can check the glass surface just behind the middle lens port. This is the reflex prism that sends a quarter of the light to the viewfinder. It should be clean and free from fungus. You can clean it with a tissue dipped in isopropyl alcohol or lens cleaner. If you rotate the turret out of the way you can flip the prism out to blow dust off the ground glass on top (use a lens blower), and maybe clean the rear surface as you would the front. The turret should have a bottom port locking cap and a lock at the top right. You want both of those engaged when mounting a heavy zoom like this. Practice loading your dummy film, and check that the loop stays in position. The take-up should wind the film on snugly. Next step would be to shoot a quick test, if you want to make sure that you don't waste time and money filming with a crew and actors etc only to get the film back with an issue. Find yourself a lightmeter, or even just a lightmeter app so you can set your aperture. The manual will tell you what your exposure time should be (1/80 sec for 24fps), then just input the film stock speed. If you get a battery for it the zoom does have auto-exposure, but it may not be working, so I probably wouldn't bother with that. You can always ask more questions here when you need to. Happy filming!
-
Arriflex SR I light meter malfunction - am I doing something wrong?
Dom Jaeger replied to Sebastian Bock's topic in ARRI
It’s been a long time since I looked at an SR 1, and most of the ones I’ve seen had the light meters removed or disabled, so I don’t remember exactly how the needle should behave. But I do recall that the needle is very easily bent if someone has tried to clean the glass surface just above where the ground glass sits. I also thought the light meter circuit only comes on once the switch is in the half down (standby) position. Have you read a manual? Is yours an original Bayonet mount camera or has it been converted to PL? Pics would help. Personally I would stick to using an external light meter anyway. Regarding the viewfinder, please be careful fiddling with screws if you don’t know exactly what they do. SRs have numerous adjustment points and some screws should really not be touched. There is only really one screw that adjusts the tension where the viewfinder meets the camera body, which is the 190 degree rotation from left side to right. You need to loosen the outer lock ring half a turn before adjusting the inner Allen screw though. It’s here: Without dismantling the viewfinder, which has rotating prisms inside set to maintain a level image, there aren’t any other user adjustments. If things are very stiff the grease probably needs to be cleaned out and replaced, which is not really a DIY job.
-
Sorry Joe, I don't have access to that manual anymore. I was using a free image host site back then which subsequently demanded a subscription and all my images disappeared. Learned my lesson, now I upload low-res images directly, but unfortunately it's too late for some things.
-
Cooke Varotal 25-250mm MKI service question
Dom Jaeger replied to bj's topic in Lenses & Lens Accessories
Ok, sounds like something loose rather than worn, so probably fixable. If you can find a tech familiar with these zooms it would be advantageous. -
If you go from a Rex 4 with a 10x viewfinder to an SBM with a 13x viewfinder, then yes the image is a bit larger and easier to see. Early SBMs can have 10x viewfinders too though, so in that case it would be no different. The condition of the camera can also make a difference - fog, fungus or corrosion in the optics can reduce the image quality drastically.
-
Cooke Varotal 25-250mm MKI service question
Dom Jaeger replied to bj's topic in Lenses & Lens Accessories
Is there an issue with the image? Do you get image shift or focus backlash when you adjust the zoom? If not I’d leave it be, otherwise maybe see what a tech says. It could be beyond repair if it needs parts that have worn, or be too expensive for what it’s worth.

