Joerg Polzfusz
-
Posts
425 -
Joined
-
Last visited
Everything posted by Joerg Polzfusz
-
IMHO The „stereo“ version is lacking details like the shadows cast by the aircraft’s body and tail wings. And the pseudo infrared version should always show that the engines and their output are a lot hotter than the other parts of the aircraft. Not to mention that it looks like being made from another aircraft flying at the same flight level as the aircraft (which wasn’t the case according to the stereo version) and I doubt that the movement of the three „ufos“ are matching the movements of the three „ufos“ from the stereo version…. But I am not an expert… You might also want to check which satellite in the area was able to do this stereo video and how the poster on YouTube managed to get access to it (with nobody else having access to this video)… Another good question: why should any satellite track the flight of a civilian aircraft in stereo (unless it’s a military satellite tracking the test flight of three new anti-aircraft missiles)?
-
Kodak 16 mm edge code assistance
Joerg Polzfusz replied to David Tilotta's topic in Film Stocks & Processing
Hi! Maybe these links help?! https://www.paulivester.com/films/filmstock/guide.htm https://www.kodak.com/content/products-brochures/Film/Guide-to-Identifying-Year-of-Manufacture-for-KODAK-Motion-Picture-Films.pdf Good luck with finding the answers! Jörg -
Dampening ring for Schneider-Kreuznach Beaulieu-Optivaron
Joerg Polzfusz replied to Jonathan Chong's topic in Super-8
Why did you remove the motor anyway? If you need the plain C-mount-version, I would recommend buying it instead of damaging the Beaulieu-specific extensions that weren’t supposed to be removed. -
The attachment turns the camera into a fix focus one. When shooting outdoors on a sunny day, you should not notice any difference. But when it’s cloudy or worse, then you might notice a difference. My main problem with the attachment is that the camera‘s focus and zoom have to be at the correct positions (infinity and outermost macro on the 310xl). But everytime I am getting the camera out of the bag, something rotates. And when I forget to check this, the next scene will be out of focus… ?
-
Hi! General remark: According to the S8-standard, the recorded image is slightly larger than the projected one. And most cameras even record a „larger than needed“ image. It’s hard to tell from this single image from the video whether the „too dark“ area is outside the „projectable area“ or not. So it might not be a defect at all, but a normal behavior of the camera. Camera: I once had a camera with a defect in the claw/film advance. It also resulted in areas of the image that were too dark. But on top, parts of the image have also been out of focus. It’s hard to tell from that single image whether this is the case here, too. But it could also be vignetting from external filters/sunshades or from the lens (e.g. not properly screwed in when it’s a camera with a removable lens). Or some dirt somewhere in the camera. (The dirt could also be some part of a deteriorated internal filter.) Or the cameraman simply forgot to unscrew the gradient ND filter. ? Processing: When the area varies throughout the film, then this could have also been a problem with the processing (not enough chemicals, too much or too little agitation,…). Telecine: Do other films come out properly? Otherwise the telecine might have been not properly switched back from regular8 to super8 - or there’s something stuck, e.g. a small piece of film, that produces a shadow. I guess that there are even more possible causes. But it is hard to tell without a sequence of the whole video (maybe 10s?) and without a macro photo of the film (showing maybe 3 frames). Good luck in finding the cause! Jörg
-
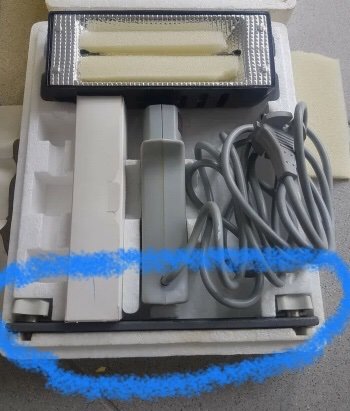
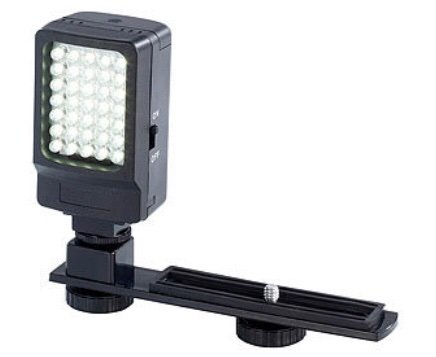
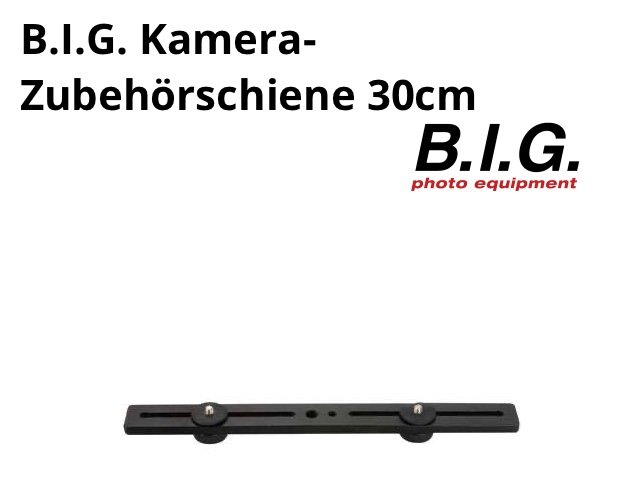
An old metal bar with a halogen lamp (from the 70s - image from eBay) and its today’s equivalent with an led lamp (and the bar most likely made of plastic - image from an online shop)… …however, the metal bars are still produced and sold (without halogen lamps though) - the image in the previous posting is from an online shop.
-
In German, these metal bars are usually called „Blitzschiene“, „Kameraschiene“ or „Zubehörschiene“. They are available in various flavors and in different lengths: with tripod mounts, with „cold shoes“ (for flash lights), … and they are also available in L-shape.
-
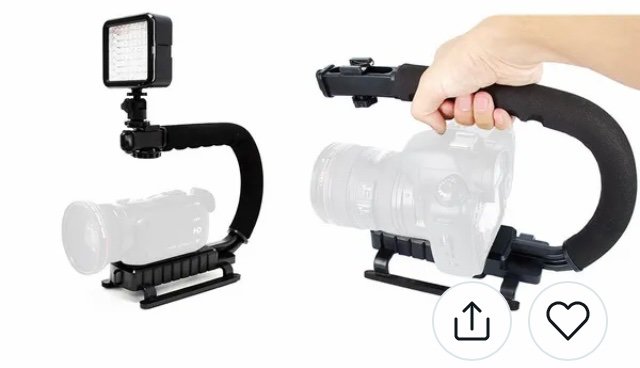
Hi! There have been (and are) many generic cages - also for bulkier/larger videocameras like the Canon C300. I’m pretty sure that there’s one that will accidentally fit your Beaulieu. The main question is: Does it have to be a full cage? What about a C-shaped grip as in the attached image? They are also available in various sizes and materials (including metal). And there are also metal bars that have been used to put a 1000W halogen lamp onto the same tripod as the camera. No clue what they are called in English. I gonna post a photo later. Hope this helps Jörg
-
Super 8 - Beaulieu 4008 ZM4 help
Joerg Polzfusz replied to Ernest Kabashi's topic in General Discussion
The manual is linked above. See everything related to „Y“ and page 29. -
"Focusing" with fixed-focus lenses?
Joerg Polzfusz replied to Eric McCammond's topic in Lenses & Lens Accessories
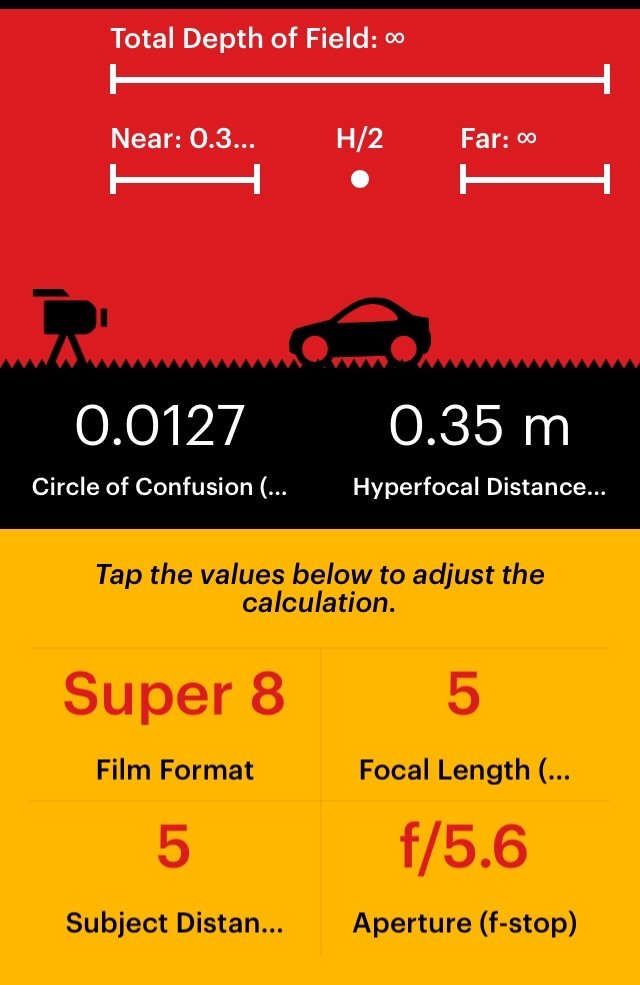
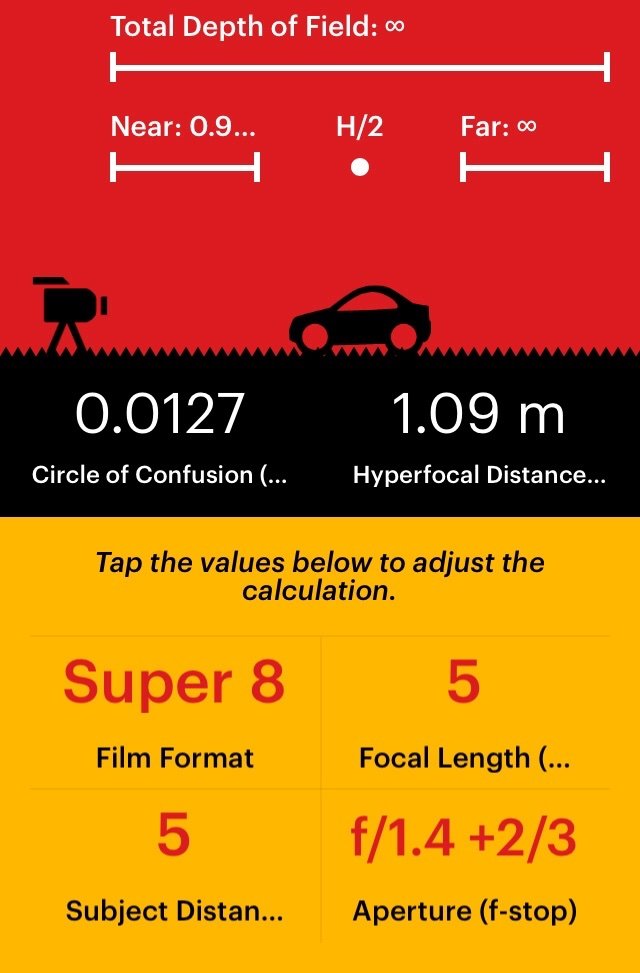
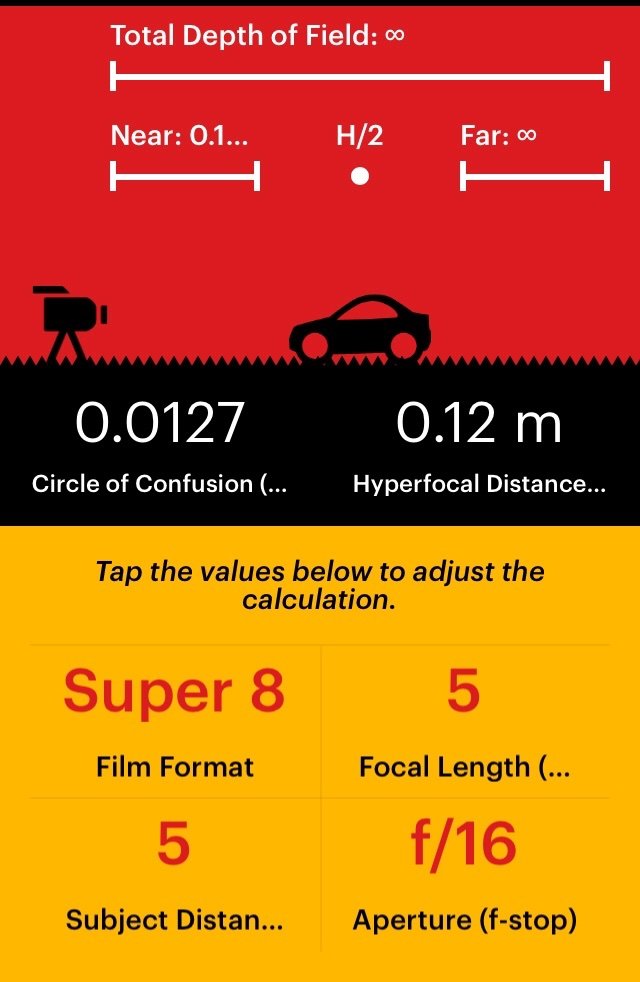
Hi! Depending on your lens, it’s most likely set to something between 2m and 10m. The only thing that changes with the f-stops are the near distances and the hyperfocal distances. (The far distances also changes, but fix-focus-lenses are usually designed to have a far distance that only changes from 100m to „endless“, so you can ignore it.) Use a depth of field calculator (there are also free tools on the web) and try to figure out whether your numbers are the hyperfocal or the near distance. Or do it like everyone did in the past with these lenses: simply ignore focusing - they simply work. Jörg


-
Hi! According to the manual, the „Quarz Zoom DS8-3“ only runs for approximately 30s at 18fps when fully wound. So, depending on your frame-rate and given that the keystone is older, 20s could be normal.
-
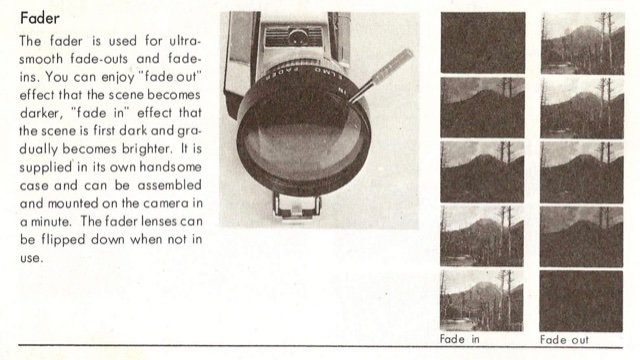
Bolex/Bolsey also sold something like the „vignetter“ - with a clockwork motor:
-
BTW Elmo sold a similar fader (variable nd filter) for its Super 103 and other cameras with a non-TTL exposure system
- 5 replies
-
- 1
-

-
- film cutter
- editing tools
- (and 3 more)
-
I guess that the movement of the wire in the cable release is simply moving the discs/vignetter. Or does it have an integrated clockwork motor?
-
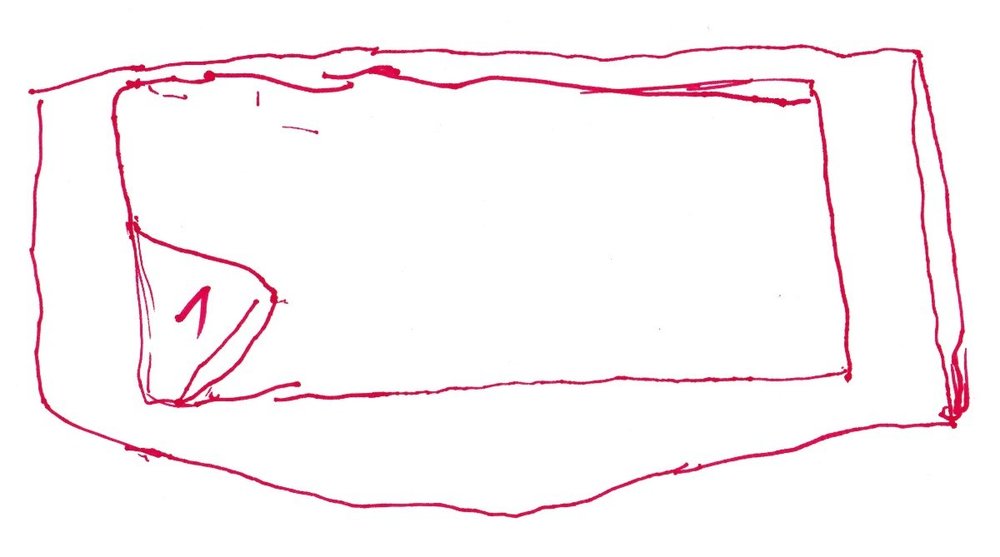
Hi! I finally managed to do the „camera as projector“-test. After inserting some fresh batteries and putting the smartphone’s torchlight at the correct position in the film chamber, I was finally able to see a faint image on the sheet… This is the result: the outer lines indicate the projected area, the inner lines the visible area in the viewfinder. The „triangle“ with the 1 inside is the viewfinder‘s underexposure indicator. ? (And yes, there’s a Hypergonar8 attached to the camera. ? The slightly tilted rectangles are caused by a minor misalignment of the Hypergonar, of the placement of the camera and me and my daughter accidentally shaking the tripod.) As you can see: The visible area is smaller than the projected one. Whether this is by purpose (safety area or Fuji’s cost saving) is unclear. BTW: the right lines are approximately parallel and hence constantly 2cm apart, while the left lines aren’t parallel: it’s 1,5cm on the top and 2cm at the bottom. Is this 0.5cm difference (inner top left corner‘s horizontal distance to the outer rectangle) the explanation for the filmed titles/signs not being centered?
-
Hi! The problem is also on the film (see attached image). ☹️ I will try the „camera as projector“-hint the next days. Thanks for your hints Jörg P.S. The base of the attached image is shot with my smartphone without any magnifiers. Hence it’s so unsharp. ? The yellow and brown lines are taken from Wikipedia‘s Super8 vs. Regular8 image.

-
Thanks. At moment, I‘m in Dresden for an extended weekend, betraying my Fujica P2 with a Canon 310xl. ? (But please don’t tell my other cameras that I am traveling without them! ?) Will check on Wednesday (or maybe on Thursday, depending on when I‘ll return).
-
Why don’t you ask them? https://en.botteganalogica.it/product-page/pellicola-single8-fomapan-r100 has got a contact field at the bottom. And unlike C&S, there’s no „only inside the EU“ disclaimer. (Don’t be afraid of the mix of Italian and English language on the website. The owner, Riccardo, can speak English - it‘s only the automatic translation that sometimes doesn’t work. He also has got other technical problems with the website, e.g. pop-ups that shouldn’t show up anymore.)
-
Hi! In my last Single8-film, I shot various signs - all centered in the TTL-viewfinder like this: However, when projected, the signs are all on the left like this: (simulated images, not from the actual film) Any ideas? Could this be the projector’s film-gate (as the projected image is smaller than the recorded one)? Or is one of the mirrors to the viewfinder misaligned? (Oops, yes, maybe I should inspect the film under a magnifier. But I cannot do this before Wednesday.)
-
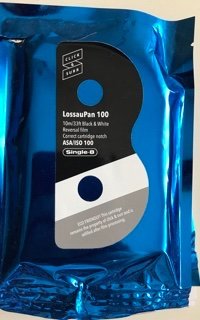
To answer your Click&surr question… s. attached image. ? (I gonna shoot another cart this weekend, then they will be send to Andec.) Click&Surr and Bottega Analogica only have got a limited amount of empty cartridges. Hence they are selling them only with „process paid“ (having a contract with the lab for returning the carts to them for reloading). Hence, it doesn’t make sense for them to ship to the US. (I also used Bottega Analogica in the past and am very, very happy with the results. The main reason for choosing C&S this time was a timing issue: shippings from Italy sometimes only take 3 days, but sometimes more than a week. And I simply forgot to order in time… ?)
-
You might also want to take a look onto the first three photos of this Japanese webpage: https://web.archive.org/web/20160324090835/http://www.nakanocam.com/8mm_page/8mmcartridgeandr.html
-
Hi! Use some white leader (at least 5m) to test reloading in light. The leader will try to unwind itself like the real film. ? When you can load the cart in less than 5min in light, then you will still need at least(!) 15min in darkness for your first carts. And with your first attempts, you will probably end up with the perforation on the wrong side or with the film base on the wrong side (the emulsion has to be closer to the lens than the base). ? You can normally load 12m of acetate based film into a single8-cart. One exception is the Fomapan R100 as it‘s stiffer: When you load more than 10m, the film might jam. The wheels/cores inside the cartridge each have a small spike to attach the film. (I simply punched 2-3 overlapping holes into the film with one of those adjustable punches for leather belts. This is good enough to attach the film to the spike.) Alternative approach: Use double sided scotch tape to glue the film onto the wheels. But ensure to remove the tape before processing the film. Keep in mind that the film is following a different path in the cartridge than the tape in a MC. (But it’s engraved onto the cartridge.) To open the cartridge, simply follow the gap between the two outer parts with a small, sharp knife (e.g. Swiss Army knife) with very little pressure. This is usually enough to crack the cartridge open (as Fuji luckily used a minimum amount of glue). Later use scotch tape to keep it closed. But don’t use any thick tape like gaffer tape. Otherwise the cartridge might not fit into the camera anymore. Keep in mind that the camera will later read the cartridge‘s arc or holes/dimples to detect the film‘s sensitivity. So either modify this or use matching cartridges or use manual exposure. That‘s pretty much it. Good luck!
-
Hi! All LEDs are emitting visible wavelengths. And the lightmeters are reading visible wavelengths, too. Hence, I don’t see any problems. (The lightmeters also don’t become inaccurate when you put colored gels in front of your halogen lamps - unless you are using orthochromatic films, infrared films/cameras or sensors that don’t react to certain colors.) However, due to the spike in the blue wavelengths in many products, LEDs might have an impact on the color temperatures. But you would have to check this with a color meter.
-
Yes, you’re right. Sorry, my mistake. I’ve last used my Nautica in the year 1 or 2 BC (before Covid-19) and I use too many different cameras. ? However, the camera knows when you have enabled the filter and automatically takes it into account for the auto-exposure. (Sorry, I have only got a German service manual.)

-
The camera simply assumes that all used films are 40 or 160 ASA Tungsten. It only differs between these two types. The camera doesn’t really know 25 and 100 ASA. These two values are only the effect of „Tungsten balanced films with enabled color correction filter“ (aka: the user has moved the orange switch to sun = the user has enabled the filter = there are 2/3 f-stops of light that don’t reach the film any more). But as the camera is using TTL lightmetering, it would automatically correctly compensate for all kinds of filters . When using daylight balanced films in this camera, e.g. Vision3 50D or E100D, then the filter switch has to be set to „bulb“ (filter disabled) unless you want to pretend that you have filmed something on Mars. (As the camera‘s film sensitivity detector is rather simple, the V50D will be exposed at an okay 40ASA, while the E100D will be heavily overexposed at 160ASA.) For b&w films like the Tri-X, it‘s best to set the switch to „bulb“ - unless you want to use the color correction filter as an orange filter (e.g. for portraits or for increased contrast when shooting landscapes or buildings). Even though the Tri-X is officially rated as 200ASA, Kodak has notched it as 160ASA. That’s because of the Super8-standard that doesn’t define any notches for 200ASA. However, the Tri-X is working fine when exposed as 160ASA.