


Kiarash Sadigh
-
Posts
102 -
Joined
-
Last visited
Everything posted by Kiarash Sadigh
-
12. What does anamorphic mean? Anamorphic cinematography is a technique of calculatedly distorting (squeezing) the camera image by using anamorphic lenses. The purpose of this distortion is to achieve a 2.40:1 image aspect ratio ( 2.35:1 in older days) from an academy aperture of a 35mm film. Anamorphic cinematography produces images that have a wider horizontal span compared to a standard 35mm frame. One of the advantages of filming anamorphic is achieving a drastic increase (almost 60%) in usage of the negative area, thus a noticeable increase in resolution, sharpness and overall quality of the image.
-
28. What is the difference between Super-35 and anamorphic? Super-35 and anamorphic (Cinemascope) are both 2.40:1 film formats, however there is a fundamental difference between them. The image of the anamorphic format is first squeezed by an anamorphic lens in the camera in such a way that it incorporates the entire vertical (all 4 perforations), and not the entire horizontal area of the academy aperture. So, in the anamorphic format, the image captured on the original camera negative is squeezed. This squeezed image is then kept through the process of creating the release print and then unsqueezed by anamorphic projection lenses in theaters. The image of the Super-35 is not squeezed in the camera, on the contrary this image is captured by normal lenses in such a way that it incorporates the full academy aperture; from left to right (including the sound track area) and from top to bottom (including all four perforations). So in Super-35 format the original camera negative image is NOT squeezed. From this image, the desired 2.40:1 composition is extracted (by masking the top and bottom) and then SQUEEZED optically to create a dupe negative. The image of this dupe negative (or internegative) captures the exact same area of an anamorphic camera-original negative; meaning from top to bottom stretching four perforations and from left to right leaving the soundtrack area empty. From this squeezed internegative, thousands of squeezed positive prints are made and sent to theaters to get unsqueezed and projected. So the fundamental difference is that in anamorphic format, the image is first squeezed by the camera lens but in Super-35 the image is captured normal and then squeezed to create dupe negatives and prints.
-
Poppy Exterior Music Video
Kiarash Sadigh replied to Matt Workman's topic in Lighting for Film & Video
Thanks Rolfe, will try this next time shooting ext. -
How to choose lighting fixtures
Kiarash Sadigh replied to Ashley Barron's topic in Lighting for Film & Video
Putting a gear list together could be tricky, especially for a low budget production...you want to make sure you have as lean of a list as possible.... I can't tell you exactly how to do it but here are some guide lines: - There is always a tendency to underestimate the number of C-stands, Flags, Sand bags and cables...so what ever number you have in mind, add a few more... -C-stands are very important, you should always list a variety of them: regular, baby stands, turtle base and rocky mountains...if you're ordering 5 c-stands, then make sure you have at least one of each - I wouldn't waist my c-stands on the lights, order lightweight aluminum stands instead they are great for your smaller fixtures (up to 2k) - When shooting on location, always try to draw power from your stove/ dryer outlet...you can in fact order a stove dief, which will give you 3x20 amp breakers on a regular house hold outlet... - I always count the number of the stands I have and then multiply them by 4 to get to the number of sand bags I need... - Try to get more flexible fixtures as opposed to specialty ones...a Readhead can directly back light a medium size sanctuary! , can shoot through a chimmera for a nice portrait set up or shoot into a 4by4 white foamcore for a bigger soft-light effect...very versatile...A 4bank-2 feet Kino flo is also very versatile imho, it can switch between daylight or tungsten and can be your key, your backlight, your fill and as separated bulbs you can even light inside a car with...you can mount it on your dolly for a dolly-back hallway shot or just keep one of the bulbs, put it on top of your camera and use it for a nice catch light... - for every fixture you order you need to get enough grip equipment in order to be able to rig the fixture almost wherever you desire...for instance if you're getting a 1.2 hmi par (which comes with a 2k spigot) you need to have 2k accepting stands to have your light at stand-level...what if you want to put your 1.2 down on the floor and bounce it off of something? then you need a 2k baseplate...etc. -Alway order a couple of magic arms with maffers on either side - I always order a 2k lighting boom pole, it allows me to send my light deep into the set on location... - always order one or two different sized pole cats...I especially love setting up a large polecat at the corner of tight rooms then cardellini off to a pepper or something...this is especially very good for when you don't have room to spread the legs of your stand...or you see them in your shot etc. you need to be careful with them though as they don't stand heavy weights... -Shooting exteriors, you either have to rent a generator and spark up or light it with good old planet sun....for the latter you need mirror boards, and stands to hold them, you also need white and black foamcores for bounce or negative fill...it's also great to take a 12by or an 8by frame and fabrics...you can set up your 8 by and bounce a four shot pretty decently... -make sure you order tongue dollies or laundry dollies if you have to carry the gear too far from where your truck is parked... -For exteriors make sure you order cable matts.... -if you 're ordering noisy generators then make sure you can box around it with some material to kill the noise... - Always think of rain...order Tar paper for your lamps, get extra pads for your cables...order extra apple boxes in case your dolly track is going to be on a rough terrain... - Order dog ears and lots of sash to prevent your frames from sailing -a versatile lighting list always has both day light and tungsten fixtures, it always has fluorescent and open faces...and it always has tiny peppers and larger fresnels (think Arri 150 and Arri 1k fresnel) - always order dimmers or use you own homemade ones...you need them to bring your practicals down etc. - And make sure you order as much black felt as you can ...they come really handy... good luck! -Kiarash - -
Poppy Exterior Music Video
Kiarash Sadigh replied to Matt Workman's topic in Lighting for Film & Video
This is very interesting, I've done something similar with silk on top and nets on the side but not with blacks all the way around...do you have more stills you can post for us to take a look? -
I faced a very similar situation and decided to experiment with tar paper a bit...first I asked the art department to dress the windows with dark curtains...in this case dark brown played nicely with the rest of the color palet....then we blacked out the windows with tar paper in a way that one side of the tar paper (the side closer to the camera) was left untaped...the bleed of light through that gap would kick the curtains with just enough day light that it appeared as if we had it all lit outside..you just have to make sure it's not super windy outside...
-
Art referenced by cinematographers
Kiarash Sadigh replied to Robert Sawin's topic in General Discussion
Vermeer has had a recent come-back for its one-source look....very influential on cinematographers -
Steve, shooting ext day is all about putting a leash on the planet sun, take over its spill and use it the way you want.... In a sunny day situation you're dealing with three major brightness ranges: Highlights, midtones and shadows... you should be mainly concerned about your highlights and shodows...and here is what I recommend to do.... Wide shots: bolck so that you're actors are mainly backlit by the sun...then look and see what you're getting on the shadow side...for instance if they're standing on a concrete floor then they're getting a good amount of bounce into their faces already...grass will bounce back green, so see if you can cover the grass with muslin in your wide shot...if not...an 8by8 Muslin will do a great job.... Medium/Close-Ups: When you move in...then you can fill the shadows with your muslin (styro foam is good too) and bring your direct sun light down by quarter silk (not a full silk, very important) or high-light diffusion (highlight is like a vinyl version of Opal)...I always knock the direct mid-day sun a nudge down using very very thin diffusion...this is specially great for when you're shooting a close-up of a talent facing the sun.... you gotta be carefull with not filling too much and loosing your ratios.... For filters...your best friend is a polarizer...it'll cut down the reflection on the faces caused by sweat, make-up and heavy handed bounce... you also want to have a couple of ND soft grads for your sky... good luck!
-
"one source" practical lighting in studio
Kiarash Sadigh posted a topic in Lighting for Film & Video
I'm shooting a scene as a part of a documentary in front of a 30'by30' white limbo... The scene is sort of an abstract rendition of an archive vault...imagine a wide shot of the pshyclorama, there is a desk in the middle of the white area surrounded by filing cabinets...there is a single shaded lamp ( practical) hanging on top of the desk, illuminating the isolated area...the rest is all dark except for the fall off of the lamp. At one point the host of the show walks from the dark areas behind the desk and stands in the light, talking to the camera...since this practical lamp and has a very topy look, I'm wondering how do you go about lighting the host gracefully without casting a double shadow on the studio floor, or disturbing the circle of light created by the practical? I also want to dolly into the set as he walks (not every take but as an alternative)...so I thought about rigging a soft bank on the dolly etc. let's talk.... -
right lights to shoot big churches
Kiarash Sadigh replied to Cristiano Assuncao's topic in Lighting for Film & Video
For three years I traveled around U.S and canada shooting churches for a Television series...I shot many many sanctuaries and never felt like I needed big lights...most sanctuaries I've come across have big and colorful windows...you just have to find the best time of the day for the positioning of the sun, if you can afford that. The challenge I faced in these sanctuaries was mostly dealt with splashes of lights into deep and dark wooden areas...so i would carry a wealth of source fours, dedos...or simply 650 fresnels and peppers...you also need lower stands or baseplates screwed into panckackes so you can hide your lights/peppers behind the altar or pews Now if you have some money and want to invest and enhance your visual language, i would look towards Ultrawide lenses (even fish eye)/ Dolly and tracks/ and a Jib arm...any of these tools would greatly change your regular camera-on-sticks look.. good luck... -
Par Strength for Bounced Moonlight
Kiarash Sadigh replied to Tim Wu's topic in Lighting for Film & Video
I'm referring to the video you've attached, arri 125w/200w dc pocket par for eye light or fill... -
Par Strength for Bounced Moonlight
Kiarash Sadigh replied to Tim Wu's topic in Lighting for Film & Video
You may want to consider a small DC-run HMI, like Arri pocket par or a K5600 Joker Bug...they can both get equipped with pancakes like that.... -
I'm shooting this documentary and we're recreating certain scenes. The story is about a famous canadian journalist who mysteriously died and his body was found at the bottom of this 40-feet gorge, on a flat rock by the river side. Some say he was pushed, so that's why this scene has such importance to the story I have scouted the gorge and seen the exact spot. There is a protective fence about 10 feet away from the edge and we're going to remove it for the shoot. Also, we are going to recreate his fall a few times and each time a bit differently, things like throwing a dummy, POV etc. My question is about the POV shot.... Here is the shot I have in mind: the camera travels across the ground towards the edge, at the height of 8 to 12 inches, for about 4 to five feet looking straight ahead and then goes over the edge and then tilts down to see the depth of the gorge.... Logistically I am thinking of laying tracks down to about 6 feet of the edge...then have a jib on the dolly so that the jib's arm is sticking out of the front of the dolly for about 8 feet...this will send the arm for about 2 feet over the edge by the time we hit the end of the tracks. My fear is not being able to convey the depth and power of the height....what if I shoot this and end up having a bland wide shot looking 40 feet down at nothing....where the audience can't pick up where to look I'm shooting with HVX200, feeling that 60 FPS will give me the most freedom and am thinking about a fish eye adaptor...this doc is meant for broadcast and not big screen I would love to know about your experience, what do you think is the best way to shoot this, considering a low budget doc, how can I bring the thrill of the height into this? Any feedback would be greatly appreciated...
-
Lighting an open field at night
Kiarash Sadigh replied to Lindsay Mann's topic in Lighting for Film & Video
That's exactly it! my gaffer caught a huge moth and he called it a "spinning totem pole" ...that's how crazy it was!...I lit a white tent from inside..it was a dream sequence...and after 5 minutes the tent turned black...we had to stop shooting and planned to do the sequence in studio instead... -
Lighting an open field at night
Kiarash Sadigh replied to Lindsay Mann's topic in Lighting for Film & Video
well, this may sound a bit off topic but it's very important for you to think about bugs when you're sparking lights in the woods in summer time...I've had a terrible experience...rent a couple of bigger sources for this purpose, spark them up before hand, and this will hopefully attract the bugs away from the set... good luck. -
This is a posting I left here on April 17 2008...hope it helps: In putting together a lighting kit you need to think about these things: a-For most head shots you need a soft source, so you can either go about creating your own soft source by bouncing a red head into a 4by4 foam core etc. or you can buy a soft source...out of all soft sourecs I've tried I recommend Lowell Rifa, it's extremely quick to set up and relatively durable...for a regular kit I recommend a Lowell Rifa 55 b-You also need a hard source, this is for lighting a larger area or when you cannot get close to your subject, also when back lighting and bouncing...most hard lights can also turn into soft sources using a Chimmera, bouce card, wall, umbrella etc. I would say you need 2 hard sources to start your kit........... a small fresnel like an Arri 150w (fantastic light) or if you can't afford then go for Lowell Pro (wattage can vary) ...you also need a second hard source that is a bit bigger and stronger than your 150w....I'd say either a readhead, or any 650w fresnel you can find on craigslist or ebay c- You need a few stands...I'd get one very strong and sturdy and two to three lightweight stands...the height your stands reach is very important too...make sure you have at least one that goes higher ... d- ALways carry a few small grip equipment...now this list can go on and on but I tell you what my bare minimums are.. - A grip head: this will turn your regular stand into a C-stand...well almost..you can mount a Kino if you want...or send an arm horizontally over etc. - A Cardellini Calmp: This can mount anywhere and do anything possible in most situations, even act as a scissors clamp with more reliablility - A magic-arm kit...extremely multi tasking, too much to list e- Other stuff: 1-Extension cables : carry both a few heavy duty ones and one or two house-hold looking, in case you can't avoid seeing the cable in your shot...2- A Felxfill or a bounce 3- A cube tab 4- assorted gells and diffusions 5- some clothes pins 6- some black wrap 7- extra bulbs 8- a multi tool... Last but not least, a good quality case... Good luck and have fun!
-
Always getting the same look
Kiarash Sadigh replied to Malik Sajid's topic in Lighting for Film & Video
All the above is great, I just want to add the fact that you can back light them too...if the still you've posted is in studio, then back lighting is not an issue, however if this is on location with a 9' ceiling, you have a little challenge to face...last time I back lit a shot like that I had a 2k boompole right beside the camera reaching deep into the set, behind and above the actors, then I hung a 2by2 kino (which by the way creates a lot of torque when reached that far) so you have to sand bag the hell out of your pole... other notes: put a dimmer on your practical and dim it down, cut your walls by hanging a cutter or a solid flag if you have the means, avoid leather furniture, try to shoot letter box if possible...this particular still you've posted has too much head room imo...take your camera back and zoom in to maintain a similar composition with less dof, use your nd filter/shutter speed to open up aperture, avoid showing feet they can be distracting...good luck cheers, Kiarash -
exterior urban lighting at night
Kiarash Sadigh replied to Nate Schenker's topic in Lighting for Film & Video
Yes...if you ended up going with your Tung plot (which I wouldn't recommend) then leave them naked (more output and punch) and CTO your foreground lights..... then white balance to the CTOed fixtures in the FG and your BG or moonlight will naturally fall into blueness. Also, in case you go HMI, you can bounce as oppose to shoot-through...your light will more likely be evenly spread out....and sometimes it's easier to rig a bounce four stories high than a light. good luck! -
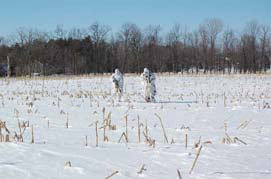
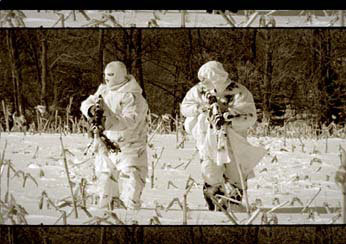
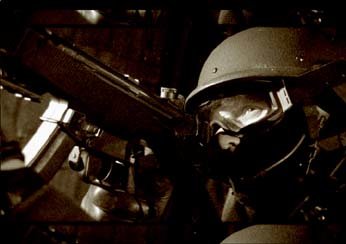
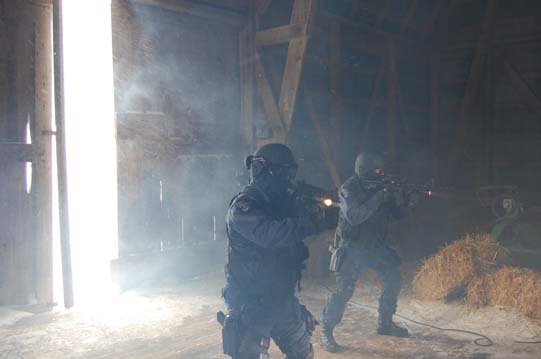
...and some more....
-
...and some more...
-
I achieved this look in post...(the "before" shots were taken on the set by various people, but it gives you the idea) take a look...I'm going to have a couple of postings to fit these pics...
-
Best lighting books for film?
Kiarash Sadigh replied to Brock Smith's topic in Lighting for Film & Video
Do you get to work with film? Are you interested in gaining an in depth understanding of exposure? Which is somehow relavant to the magnificient world of video..... then check out " The Negative" by Ansel Adams...it's priceless. http://www.amazon.com/Negative-Ansel-Adams...4874&sr=1-3 -
In putting together a lighting kit you need to think about these things: a-For most head shots you need a soft source, so you can either go about creating your own soft source by bouncing a red head into a 4by4 foam core etc. or you can buy a soft source...out of all soft sourecs I've tried I recommend Lowell Rifa, it's extremely quick to set up and relatively durable...for a regular kit I recommend a Lowell Rifa 55 b-You also need a hard source, this is for lighting a larger area or when you cannot get close to your subject, also when back lighting and bouncing...most hard lights can also turn into soft sources using a Chimmera, bouce card, wall, umbrella etc. I would say you need 2 hard sources to start your kit........... a small fresnel like an Arri 150w (fantastic light) or if you can't afford then go for Lowell Pro (wattage can vary) ...you also need a second hard source that is a bit bigger and stronger than your 150w....I'd say either a readhead, or any 650w fresnel you can find on craigslist or ebay c- You need a few stands...I'd get one very strong and sturdy and two to three lightweight stands...the height your stands reach is very important too...make sure you have at least one that goes higher ... d- ALways carry a few small grip equipment...now this list can go on and on but I tell you what my bare minimums are.. - A grip head: this will turn your regular stand into a C-stand...well almost..you can mount a Kino if you want...or send an arm horizontally over etc. - A Cardellini Calmp: This can mount anywhere and do anything possible in most situations, even act as a scissors clamp with more reliablility - A magic-arm kit...extremely multi tasking, too much to list e- Other stuff: 1-Extension cables : carry both a few heavy duty ones and one or two house-hold looking, in case you can't avoid seeing the cable in your shot...2- A Felxfill or a bounce 3- A cube tab 4- assorted gells and diffusions 5- some clothes pins 6- some black wrap 7- extra bulbs 8- a multi tool... Last but not least, a good quality case... Good luck and have fun!
-
Bright morning light through large window
Kiarash Sadigh replied to Zac Halberd's topic in Lighting for Film & Video
That's right, you can also work on the Green-Magenta grid if you want...I worked on this show where we constantly had to match two cameras due to numerous locations changes (XD cams) and not two cameras always have the same exact color rendition...and guess what? swatch books where my best friends... In a way you can work with the combination of these two techniques, meaning that you can cool down your interrior using white balance and just slightly warm up your source and get the mired shift you want without CTO-ing you HMI too much thus losing intensity. good luck! -
You're probably better off searching this site under "Sunset" to get more results in such a short notice. But let's say you get there to the location...make sure you have plenty of time to set up and find the best angle....make sure your lens and filters are perfectly clean....have a couple of ND soft grads with you....then as the magic moment arrives take your spotmeter out and read the brightest area of the sky, whatever you read sould be set as 2 stops over...so if you read f11 then set your camera to f22...if you read f5.6 then set the camera to f11 etc. ..if you don't have a spotmeter then use your incident meter and turn your disc away from the sun (facing east)... whatever you read, set it to 1.5 to 2 stops under...this means that if you were to shoot a face with the west sky in the BG then your face would've been 2 stops under.... One more thing: never forget to look behind you...sometimes the sky opposite the sunset looks more dramatic and interesting than the sunset...especially after the sun is down and when the clouds catch the drama... good luck!