

Dom Jaeger
-
Posts
3,510 -
Joined
-
Last visited
Everything posted by Dom Jaeger
-
http://news.techeye.net/hardware/stanley-kubrick-invented-the-ipad-in-1968 Bad news for anyone who is busy inventing a sonic screwdriver, holodeck or re-hydrateable pizza.. B)
-
If you weren't already planning to do so, it would be a good idea to spend some time at the rental house familiarising yourself with the system. You can download the SL manual here: http://www.davidelkins.com/cam/manuals_software/manual_files/moviecam/sl_manual.pdf If you're loading, fitting the film core onto the mag spindle properly can be a little tricky, so read up on that and practice it if you can. (It's similar to the coreholder in Arricam mags, if you know them.) It might also be worth checking that the digital footage readouts on each mag are working - the internal memory battery gets recharged when a mag is mounted to the camera, but may have died if it hasn't been used in a while. Though that should be something the rental house has checked.
-
You need to take out the baffle plate to remove them. Have a look at these webpages: http://www.k3camera.com/k3/krasnogorsk-3-disassembly.php http://www.k3camera.com/k3/k3s16mm-install.php
-
Hi John, I use a germicidal cleaner that I got from Zeiss years ago - "Fungusreiniger" says the label, but no mention of the specific agent or ingredients. You dilute it with ethanol, and leave it on the affected surface for an hour. It works very well - fresh fungus disappears without a trace. Of course if the fungus has been there a while it will have thoroughly etched into the coating, but the germicide will stop it spreading. I'm not sure if Zeiss still sells it, but you could inquire.
-
Hi James, there's no single test, but here are a few things you can do to check the important stuff: Load up the camera with some dummy stock and with the camera and mag doors open check that everything is running smoothly. A can of expired film is good for this. It's also a good way to get familiar with loading and lacing (in particular the lower loop needs to be correctly set). Check that the doors all seal well, and that the mags and lens attach firmly. Remove the film and check it carefully for any scratching. Don't worry about occasional random scratches, look for continuous or repetitive marks. Light scratching outside the image area or on the backing you can probably live with until you send the camera to a tech for the Ultra conversion. Adjust the eyepiece diopter so the ground glass texture is visible, set the zoom to the long end at maximum aperture and focus on a subject 6 feet away. Check that the lens scale matches the distance. Zoom to the wide end and check that the subject remains in focus. Try the same thing focusing on a very distant object (effectively infinity on the lens scale). A discrepancy could be due to either the lens or the ground glass depth, if you have another lens it can be helpful to compare them. Shoot a registration (or steady) test. I described the procedure in this thread: http://www.cinematography.com/index.php?showtopic=52742 Remember to close off the viewfinder eyepiece if you're not looking through it when filming (a good idea during a reg test in case you move the camera with your eye pressure. The camera should be very firmly supported. At the same time you could check the ground glass framing by marking the framelines visible through the viewfinder on to the test chart, which will show you where the framelines are relative to the camera gate aperture when you view the test. Shoot a focus test. Easiest thing is probably a sheet of newsprint taped to a tilted board. Light it so you are using the the lens at its widest f-stop, where back focus/flange depth is most critical. Focus on a circled word in the middle, start at the long end and work to the wide end. Again, a discrepancy could be the lens or the camera flange depth. Without a strobe timing gun, you could check the camera speed by either timing how much footage runs through in a certain time period, or filming a clock that displays seconds. Obviously the longer you go the more accurate your measurement will be. The out-of-sync warning light on the door side (and the 'S' displayed in the viewfinder) should tell you if the camera is not running to speed though. Listening to the camera during film tests will give you an idea of how noisy it is, whether sound work is possible, or when you might need a sound barney. Most critical are the scratch test, registration test and focus checks. Other potential issues like light leaks or focus breathing in the gate will show up in the filmed tests. To properly check focus issues, the lens collimation and camera flange depth and ground glass depth need to be checked by a tech with a collimator. Good luck with it!
-
Long lens, little DOF question?
Dom Jaeger replied to Aaron Solomon's topic in Lenses & Lens Accessories
Yes, depending on their design and range, some zooms will have their fastest f-stop restricted as they approach the long end, as the size of the optics limits the entrance pupil diameter. Some older zooms allowed for a faster f-stop at their wide end, but the image would visibly darken if you zoomed in. To maintain a constant aperture the iris needed to be stopped down to the long end limit or beyond. -
Long lens, little DOF question?
Dom Jaeger replied to Aaron Solomon's topic in Lenses & Lens Accessories
Oops :rolleyes: That was meant to be "In a zoom the entrance pupil diameter will expand as the focal length increases". -
Long lens, little DOF question?
Dom Jaeger replied to Aaron Solomon's topic in Lenses & Lens Accessories
It can be a very confusing subject. Mathematically speaking, the factors affecting depth of field are the distance to subject, focal length and aperture. (There's also the circle of confusion value which changes depending on the viewing criterion and format and how much loss of focus is still considered acceptably sharp, but that's outside the lens factors.) Now because of the way subject distance and focal length are related, if the subject size remains the same across different focal lengths (by altering the distance), those 2 factors cancel each other out leaving only aperture as the determining factor of the depth of field. This is what David was explaining. The relative aperture or f-stop is is a measurement of how much light is transmitted through a perfect lens and is defined, as you said, by the ratio of the focal length to the the diameter of the entrance pupil. In a zoom the entrance pupil diameter (basically the image of the aperture as seen from the subject space) will contract as the focal length increases, maintaining a constant f-stop. So yes, fundamentally the entrance pupil diameter, the focal length, the distance to subject and the aperture all affect depth of field, but because these factors are all inter-related, the simplest way to understand it is: for a given format, with a constant subject size (and a chosen circle of confusion), the only factor determining depth of field is the f-stop. -
That is sometimes true, but criticism can also be an artform in itself. A particularly insightful critique can be more valuable than a thousand shallow plaudits to an artist who wants to grow. But criticism has its place - you don't critique a child's drawing, or a love poem from your girlfriend. And it needs to come from an informed perspective. We judge things differently depending on the intent behind them and our expectations of that intent, so if it's a big dumb action movie we judge it on how entertaining it was, if it's a low budget zombie flick by a first timer we might judge it by how inventively the genre has been tackled. But if it's a high brow art-house film you wouldn't criticise it for not having enough car chases. Which is sort of the attitude of the original poster (only in reverse). As many have pointed out, B movies have their place (for a number of reasons), and until you've tried to make a film yourself or at least have an understanding of the enormous challenges involved, criticising them for existing is a form of ignorance. I get annoyed when a film pretends to be something it's not, but that's probably more often the fault of the cover art or marketing.
-
To properly set the ground glass depth the camera needs to be mounted on a bench collimator, using a test lens that has itself been very finely collimated. A 50mm lens has too much depth of focus (at the image plane), it will look sharp even if the back focus is out by several hundredths of a mm, which is more than the ground glass tolerance should be. I use a test lens of around 18 to 25 mm focal length, which has a shallower depth of focus, and so allows for a more accurate setting. Judging sharpness by eye through the viewfinder with an 18mm is very difficult, which is why a collimator is essential. It's been a while since I worked on a BL3, but I think the 2 screws you've labelled 'B' are just plugs to cover the access holes. Underneath are two nuts that secure the slotted depth adjustment shafts. To adjust them, the nuts are undone half a turn, and the shafts minutely turned, equally to maintain flatness, then locked again with the nuts. It helps to have a special tool, basically a slotted driver within a socket driver, to hold the inner shaft and prevent it turning as you lock the nut. There is also a tool (and a complicated procedure) to measure flatness (necessary for even focus across the ground glass), but unless the shafts have been fiddled with, the ground glass should be flat from the factory, so equal adjustment of the two shafts will keep it that way. The centre screw is an excentre to adjust horizontal framing, beneath the ground glass are two more screws to adjust vertical and twist. Without wishing to sound like a party-pooping disciplinarian, as a rule whenever a camera screw has been sealed with paint (like the green stuff in your pictures) it is often a precisely set adjustment that shouldn't be fiddled with outside of a technician's bench. It's very easy to introduce more problems than you started with..
-
In my experience, visible specks in the viewfinder are usually either on the groundglass at the top of the prism (accessible when you rotate the turret and swing out the prism), on the optics just above the groundglass (harder to reach) or in the eyepiece. By swinging out the prism while looking through the viewfinder you can see if it's on the groundglass. To clean it, try blowing it with a puffer or compressed air before resorting to lens tissue and isopropyl alcohol. The surface is very easily damaged, so avoid rubbing it - if a single swipe doesn't work , probably best to leave it. By adjusting the eyepiece diopter you can see if it is in the eyepiece optics (the speck will rotate). It won't affect the film, so you could just live with it. The only optical surfaces that really need to be clean are the front and rear lens elements, and the front and rear surfaces of the prism, none of which will be in sharp focus through the viewfinder.
-
No worries Deepak, glad to hear you worked it out. Thanks for posting your findings, often people never report back and you're left wondering what happened.. Namaste :)
-
Sam Fuller was a great example of that. On the surface a film like Shock Corridor screams B movie - melodramatic, limited sets, average actors - yet he managed to sneak in some searing social critique and produce a truly subversive piece of art. His war films were similarly deviant - despite the appearance of a conventional B grade battlefield movie they often slyly condemned bigotry, racism and the collateral curruption of innocence, making them essentially anti-war (or at least anti the usual propaganda a government uses to convince its populace to fight one). It's likely an A movie at the time couldn't have got away with stuff like that.
-
As someone else mentioned, the loop formers on K3s were poorly designed, and often don't retract properly, causing the film to rub against them and potentially cause scratching and registration issues. Which is why many people remove them. There's a website that describes the removal process I think. The size of the loop is important for steadiness, but manually forming it is quite easy. The other main causes of unsteadiness in this kind of camera are too much pressure from the pressure plate, and friction in the gate (usually from dirt build-up). There are other causes, but these are the most common. If you're up for it, it might be worth removing the loop formers, cleaning the gate and checking that the pressure plate has some give when it's up against the film. To find out if the camera is scratching, run 2 feet of a 3 foot length of fresh stock through, then before removing the film, with a sharpie mark on the film where the gate starts and ends. Remove the film and study both sides for scratching (you're looking for continuous or repetitive longitudinal scratches. Depending on where a scratch starts relative to your gate marks, you can tell what part of the transport is scratching. If it's all good, shoot a quick test. It may not need a visit to the doctor.
-
Hi Robert, I'm not sure where you're located, but if you fail to find anything locally, I have a couple of Kinetal wings in my parts inventory - I could sell you one. I'm at the far ends of the earth, though! As John mentioned, there were similar wings fitted to older Arri mount Zeiss and Schneider lenses, so as well as service techs like Tim perhaps a long established rental house in your vicinity may have some old bits lying around. The Zeiss and Schneider wings have slightly wider screw spacing compared to Kinetals, so it would be easier if you can find the matching size, but it's not something a bit of filing couldn't overcome. If you're handy you could just make one out of a spoon handle.. B)
-
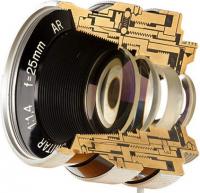
Yes it looks very similar to the prism in an old 35mm editing viewer that we have in our museum. The prism facets follow the film as it moves, so that each frame remains stable in the viewer before dissolving into the next. It's the same principle at work (reversed) in high speed camera prisms, though the ones I've seen are smaller and coupled with a spinning, multi-segmented shutter. To make a camera out of your nifty bit of treasure, you'd probably need a gate on the sprocket side to guide and hold the film at a consistent plane and a lens of some sort to focus through the prism. The smaller the lens aperture the less you need to worry about an exact focusing plane, so maybe just a pin hole would work? Otherwise a piece of tracing paper over the gate opening will let you see if you can get a focused image with a mounted lens. Without a shutter the prism facet will determine the frame, so you might get edges smearing or some other effect (not really sure!) but as John said, play around with some release print first and see how it works. Sounds like fun project!
-
Hi Phillip, the early Bolex motors - Unimotor, U-62, MC-17 - or ones made by Stevens, all drove via the 8:1 shaft. They tend to require different input voltages for the different speeds, either with transformers or variable battery packs. There were changes to the diameter of the 8:1 shafts, so if you consider buying a motor, ask the seller for the drive shaft dimensions to make sure it matches your Bolex. Regarding the Arri 16S - I'm sure you could still get them serviced by various people around the globe, but parts may be hard to find. Tim Carroll, who posts here a lot (though he's been quiet lately), is the master of all things Arri S. His website is a great resource for anyone contemplating investing in one: http://arri16s.com/ His advice on this would be a lot more reliable than mine. If you're in the US I'm pretty sure he still services them. (Tim?) Otherwise various Arri agencies might have a tech familiar with them. I can service them in Australia, but I only have a handful of parts. They're beautiful cameras, but your C-mount Bolex lenses won't be compatible, so keep in mind you'd also need to invest in new (old) lenses with Arri Standard or Bayonet mounts.
-
Ok - basically you shoot a grid pattern test chart, then you rewind the film, offset or twist the chart slightly, and shoot it again. On the first pass you shoot at all the frame rates you want to check, maybe 24, 50, 60 and 75. You only need to get 5 or 10 seconds at each frame rate. Make sure you label the chart with the mag number and each frame rate. On the second pass, with the chart tilted and the labels removed, you shoot that same length all at 24fps. Repeat the procedure for each mag. You only need to process the film, viewing the projected neg is fine. What you'll get is a double exposure with 2 grid patterns, offset so you can check if there is any movement between them. Don't worry about the whole image steadiness, that is unimportant (and related to the projector), what you're looking for is any change between the 2 grids. When a camera is steady the 2 grids will not move relative to each other.
-
Introducting a new ultra-wide film format called UltraPan8
Dom Jaeger replied to Nicholas Kovats's topic in 16mm
Nice work Nicholas, and Jean-Louis. The interchangeability of parts in Bolex H8 and H16 models makes this a fairly easy mod, though being a Bolex tech myself (far below Jean-Louis' experience however) I imagine it's not without some difficulties... unless you have the parts you need two cameras for a start. The advantage over cropping half of 16mm footage and then reshooting on the other half as Chris describes would be that it's much easier for the user, the lens is centred as opposed to using the top or bottom half of the lens image circle, and I imagine transfer would be simpler (that last one is a guess though). The disadvantage is that you're limited to the stocks available for double eight - namely reversal - unless you get that guy in England to reperf some negative for you. -
Hi Deepak, First off, I'm not very familiar with Aatons, but I work on other cameras, so maybe I can help a little. Otherwise, if someone who knows Aatons better chimes in, listen to them. If your other high speed footage was OK you can probably rule out things like unstable camera support, camera vibration or transfer issues. To properly work out what's going on I think you should shoot a double exposure steady test, at various frame rates and with each mag. If you're unsure of any part of the procedure let me know and I'll describe it (or at least the version I find works best). Just make sure the camera is firmly supported on a solid floor when you shoot the test. You haven't said what camera you're using, but as far as I know 75fps is the top speed of XTRplus and above 16mm Aaton models, so you're testing the camera and mags to their limit. Any wear in the movement, or out of tolerance pressure plates or clutches in the mags, or even just dirt build-up in the gate, will affect vertical steadiness at high speed more than normal speed, at least in the cameras I work on. But once you've shot a steady test you'll know for sure if it's the camera, a mag, or something external.
-
OK Matthew, if you say so. I'd rather be paranoid with a problem than a butthead, I guess. B)
-
Hi Matthew, I can only assume I'm one of the the 'film snob buttheads' you're referring to. Didn't you just express in another thread the desire not to see people abused on these forums? For the record, I thought a Bolex kit for under a grand was a good start for film newbies. I mentioned that given the plummeting prices for industry standard sound cameras, for sync sound it might be worth considering investing in one of those (these days starting at maybe 6 grand or less), rather than buying a camera for 1 or 2 that can be harder to find parts and service for. I never said it was the only option, and of course it's dependent on a person's budget, location and intent. I'm just one voice among many sharing their viewpoint. Because I'm a repairman my perspective comes from the service aspect. I'm more than happy to stand corrected, that's really why I post here - I'm more interested in learning than lecturing. So if you disagree with me, argue the point. Maybe someone in the States has a store full of Eclair parts, maybe there are plenty of CP-16 service guys out there, maybe it doesn't really matter. Calling me a butthead in a different thread does nothing to advance your argument, it just makes you sound like an angry crank. Sorry to further the highjack of this thread, but I find it galling to be abused and accused of helping along the demise of film when I've devoted my career to supporting it.
-
The right frames will be running in reverse, though, won't they? Which can be a cool effect.. Probably the simplest way to do split screen in-camera is to use a regular 8 camera that has back-wind facility - most of the high end ones had it (Beaulieus, Arcos, Bolex H8s, plenty of others). The film is on spools so it can be rewound as much as you like. If you get a camera with interchangeable lenses, you can remove the lens and mask half of the aperture with black tape. If the lens is fixed (or you don't want to screw around with the aperture) you could mask half of the front of the lens with a matte box or simply some cardboard, but the split won't be as sharply delineated. Then shoot one sequence, rewind the film, mask the other side and shoot again.
-
Hi all, for anyone in Melbourne interested in the history of movie cameras, over the next 2 weeks a selection of our museum 35mm cine cameras will be on display in the upstairs lounge of the Forum Theatre at 154 Flinders St as part of the Melbourne Film Festival. Worth a gander I reckon. :)
-
Hi Wiki, it's not as simple as marking a 16S ground glass unfortunately, but the same principle applies. I'm assuming it's a Standard 16 ground glass. In the past what I've done is cut 2 thin strips of contact adhesive, 1.5mm wide and 15mm long, and placed them along the top and bottom of the upper surface of the fibre screen. (The lower surface is where the frame seats in the camera, very important in maintaining the proper flange depth for focus, so you don't want to put anything on that side.) On the upper surface the fibre screen is recessed, so the contact adhesive strips are placed inside the top and bottom edges of that recess. I fold the last 1mm of the strips, to make a handle to remove them if they need repositioning. The handles can be snipped off with scissors once the position is correct. The relative position of your 1.78 frame doesn't matter, it can be centered or top or bottom etc. I find centered easier to mark. For extraction you just need to shoot a frame leader showing how you've framed. You need to fit the ground glass, check it through the viewfinder against a frame you've marked up, and reposition the strips if necessary. It can take a few goes, and some plastic tweezers and a magnifying loupe is helpful. Chances are you have TV frame lines (1.33) which as an aspect ratio crops in a little at the sides compared to the 1.37 full gate aperture. If you use the inner 'TV safe action' frame you'll be losing too much area to cropping, it's only 8.4 mm wide. The outer 'TV transmitted' frame lines (actually just corners) are 9.35mm wide, so if you used that frame you'd want you're unmasked 16:9 area to be a little under 5.3 mm height. But the corner markings mean it can be hard to judge the exact edges of the frame, unless you use more strips to complete the side frame lines. Perhaps simplest is to use the very outer frame line (surrounded by the grey area), which is the full aperture so you're using the maximum film width, but it will leave you no wriggle space on the sides. It's 10.3 mm wide, so your height then would need to be 5.8mm. Good luck!