Dom Jaeger
-
Posts
3,522 -
Joined
-
Last visited
Everything posted by Dom Jaeger
-
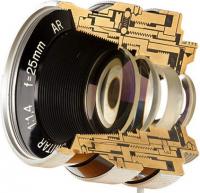
You may be able to turn the focus ring, but does it shift the optics inside? I'm guessing you need the mount part with a mating helicoid to actually focus the lens. If that's the case, you really just have the optics from a 1970s Zeiss Contax 1.4/35 Distagon, which is worth under $1k. If you want it useable as a PL lens, I think the easiest route would be just re-housing the optics through someone like TK lenses, GL Optics, Whitepoint or TLS. Some are more expensive than others, with long wait times. Forget "plastic rehousing", whatever that is, it needs to be done properly or you're just wasting money. If you wanted to try and use the original Technovision parts, I think you would need to enlist the help of an experienced lens tech or lens designer and a good machinist and probably spend a decent amount of money working out how to replicate the original keyed mount with mating helicoid and an iris ring. Or it's possible one of the rehousing companies would take on the challenge, but as a custom job it will likely be more expensive than just rehousing it.
-
Angular 'shadow' in frame. Any ideas on what's causing it?
Dom Jaeger replied to Chris Erickson's topic in Super-8
As Martin said, whatever the cause it’s unlikely to be repairable for less than a replacement camera. It’s most probably the filter or an optical surface inside a prism or doublet somewhere, which are very hard problems to fix. Unfortunately you just need to get another camera. -
Bolex Service and S16 Upgrade Recommendations - United Kingdom
Dom Jaeger replied to Robert Meakin's topic in Bolex
It’s easy enough to say things are overpriced when you remember a time when they were cheap, but the reality is vintage objects like cameras fluctuate in value. I’d love to find a flat base 13x viewfinder Bolex for £800, I buy Bolexes all the time for parts, but you just can’t find such bargains anymore. The only cameras that cheap or less are non-reflex, or early reflex models, or ones that are damaged or not working. So saying “don’t pay more than £800 for any Bolex” is more of a recipe for frustration than helpful advice these days. There are definitely over-priced Bolexes sitting on eBay, of course. I tend to wait for auctions, where actual values become apparent. S16 is a modern standard, but whether the benefit is worth the added cost is a tricky question. It does add quite a bit of extra film real estate - around 20% more - and provides a closer aspect ratio to what many filmmakers want for a final delivery. But it’s also true that these days you can easily crop a standard 16 frame to a wider aspect ratio without making the image too grainy. However there is definitely more value in a S16 camera, both by virtue of demand and by the extra work involved in a conversion. A S16 Bolex is worth around £1000 more than a regular one, provided the conversion is professional. A badly converted one should by rights be worth less, but people often don’t find out until they start using it. There are precious few places left doing good S16 Bolex conversions, but I can recommend a couple of people around the world depending on the model. I have started to offer the service for filmmakers in Australia. If anyone is offering a conversion for less than about £900 they are not going to do it properly, because it does require some precise work and ideally an overhaul at the same time. The only experienced Bolex technician I know of still working in the UK is Les Bosher, but unfortunately his work can be hit or miss these days. I suspect he passes some jobs onto less experienced people. His adapters are great though. There are a number of good EU based technicians, including Simon. Rex 3, 4 and 5 models are all good, with the same flat base and 10x viewfinder. They have a 133 degree variable shutter, not 172.8. The shutter angle is only approximate with Bolexes, as is the frame rate. If you can find a camera with a 10mm RX Switar that will do you well. To get the best from a reflex Bolex at maximum lens apertures, look for RX lenses (at least up to 50mm). It’s not so important with zooms. -
Bolexes are in fairly good demand at the moment, especially Super 16 ones. I would probably value it at around £3000 without lenses and without a recent service. If you have recently film tested it, that will make it more attractive to buyers. If you were optimistic and not in a hurry you might get up to £4000 for it. Selling it by auction would be the quickest route and let the market decide, but that can be variable. You can if course put a reserve on it.
-
Metering with a Sekonic L-398A - what exposure compensation for an REX 4?
Dom Jaeger replied to Jack Wormell's topic in Bolex
Here's a copy of the original manual for a Rex 4: https://www.vintagecameras.fr/images/MonSite/BOLEX/H16_Reflex/_Doc/Bolex_H16Reflex_Manual_en_Revu.pdf There are a few ways you can meter. Either use the "adapted" exposure times listed in the manual - ie 1/80 sec for 24fps. This takes into account both the 133 degree shutter angle and the 1/3 stop light loss to the viewfinder. Or if using cine mode on a light meter (which assumes a 180 degree shutter) then you need to compensate an extra 2/3 of a stop (1/3 for the prism light loss and 1/3 for the difference between 180 and 133 degrees). The easiest method is to set your meter ISO at 2/3 stop slower, so for instance if using 100 ISO film you would set your meter to 64, or if using 250 ISO set your meter to 160 etc. -
You can’t just alter the rear element position relative to the film plane, it’s intrinsic to that particular design. Sometimes lenses had the rear housing and even part of the rear element beveled to clear a reflex mirror, but that’s about all you can do without actually changing the lens design. If you simply shift a lens away from the film plane to clear a mirror, by shimming the PL mount for instance, the lens will no longer focus to infinity and would effectively become a macro only lens.
-
Optical effect to identify - Vintage Cooke Zoom
Dom Jaeger replied to Alec Lemonde's topic in Lenses & Lens Accessories
If you’re seeing image highlights doubled it’s due to reflections on internal glass surfaces. Sometimes it can be from sensor cover glass reflections or from filters. Odd flaring is more likely to be shiny surfaces inside, or oily iris blades. First step would be try it on a different camera. Did you ask VP? -
USED BOLEX H16 REX-5 S16 FILM CAMERA (MODIFIED) FOR SALE
Dom Jaeger replied to Roberto Checa's topic in Cine Marketplace
$12,500 for a Bolex with cheap as chips Cosmicar TV lenses? They aren't even suitable for a reflex Bolex. Make an offer indeed. -
Konvas 17EP-16 APK motor runs fine, but stutters while stopping
Dom Jaeger replied to Geffen Avraham's topic in Russian Gear
Sounds like a parking issue, not battery related. I’m not sure how a Konvas parks, but if it uses a motor encoder, I’d start there. -
So f/1.8 would be about T2.1? Given this is a very short range (less than a 2X) zoom, and only for mirrorless short flange depth cameras, I'm not sure it's such a breakthrough. There are already full frame T2.2 Sigma zooms and longer range T2.4 zooms by Canon available in more versatile mounts. But I guess it has a market. As Sebastian said, more of a variable prime really.
-
Exactly right.
-
They stopped manufacturing cameras about 15 years ago, like everyone else. But they have a huge inventory, lots of working bodies and even more in storage. Certainly no need to make more in this era, with the demand there is.
-
Between them Panavision and Arri Rental supply a sizable portion of the cameras used on the movies shot on film these days, certainly most of the bigger budget ones. Both companies have enough techs, knowledge and manufacturing ability to keep their fleets working, as long as people keep renting them.
-
Lol, anyone would think from reading this that Tyler is single handedly keeping film cameras working world-wide. I think he’s been doing it for about 4 years, compared to plenty of techs like myself who have decades of experience. It’s worth remembering that there are still quite a few movies and other projects being shot on film every year world-wide, plenty of rental houses that still rent film cameras and therefore techs that are maintaining them. I’m in my 50s, and not planning to retire for a good 20 years, and there are at least three other film cameras techs I know in Australia alone. Tyler often talks as if he has personally interviewed every tech in the world, but thankfully the world is a lot bigger than LA. In the US there are techs at Panavision, Arri, AM Camera, Visual Products, Du-All, TCS and no doubt other rental houses that have film camera inventories that need upkeep. I don’t know what expertise they all have. In the UK there are techs at Panavision and Arri still working on film cameras, as well as a few other places. There’s a few in Europe as well, and I know at least two young guys there who are learning to service Arriflexes and other things. The problem is that you do need expensive test equipment, tools and jigs, as well as the knowledge. That tends to mean rental houses are often the best places for servicing these cameras, as they have service departments with collimators, gauges, jigs and machine shops. That’s always been the way most techs learned the trade. They also often have inventories of parts left over from the film days, and manuals. You also often need one person for mechanical and optical issues and another to deal with electrical problems, as it’s beyond most people to master both. So a team of technicians rather than one guy. Expecting older techs to simply pass on their knowledge is difficult. You can’t teach camera service in a week long workshop. You can’t even teach it properly over a year working with someone in a service department. It takes minimum three to five years of mentoring, especially if you want to know how to work on more than one or two camera models. After over two decades I’m still learning things. What I have learned well though is how to avoid causing damage, and being careful not to upset certain settings that were factory set. And that’s the main issue I have with people rushing into fixing cameras. Some of the worst damage I’ve seen was caused by inexperienced, sloppy or over-confident service techs. My take is that filmmakers should be supporting rental houses, who are best placed to train a new generation of techs. But they need enough people renting their cameras and lenses to afford a service team. But hey, if there are ten people willing to pay for my time I’d happily do a workshop on film camera service!
-
For anyone needing one, the specs for an Arriflex SR belt are T2.5. 160 x 4mm
-
That's a first version Panavision VA large format lens. They had a bare aluminium finish, later versions are black. They also used Panavision large format zooms on this show. https://www.panavision.com/camera-and-optics/optics/product-detail/va-va
- 1 reply
-
- 2
-

-

-
K-3 Super 16 viewfinder modification is done
Dom Jaeger replied to Eugene Zagidullin's topic in 16mm
Seems like an interesting project. In the interests of assisting you, are you aware that the ground glass image needs to match the film plane within hundredths of a mm in order for it to be accurate for focussing? I can’t tell exactly how you mounted the larger ground glass but if the ground surface facing the mirror is not exactly where the previous ground glass surface was positioned you will not have accurate reflex focussing. With a zoom you may notice the focus drifts as you zoom out. The camera flange depth needs to be accurate too of course, which often isn’t checked with DIY S16 conversions. Camera techs normally set ground glass depth using a collimator and a calibrated test lens. My experience with K3s is that the ground glass position is not easily adjusted. -
Hi Uli, I’m curious to know what the “180 degree mirror method” is? S16 conversions to SRs normally require either the shutter angle to be reduced from 180 degrees or the movement to be modified for a faster pull-down. So I assume Georg was doing the latter?
-
No worries Sebastian. It's actually hard to find exact dimensions for 16mm Arriflex camera mirror clearance, so this tool is quite special. It would be great to measure it, or make a mold of the inside, in order to perhaps make 3D print copies of it.
-
That’s great news Simon! I will definitely be interested in this, if the price is reasonable.
-
It’s a tool to measure the rear protrusion of cine lenses to make sure the lens is compatible with a 16BL. Some earlier 16mm Arri mount lenses protruded too far and could hit the mirror of a 16BL. Handy tool, since it can check any lens to see if it will clear the mirror on all Arriflex cameras from the 16BL on. The 52.00mm flange depth never changed over the decades, and the minimum mirror clearance remained the same after the 16BL.
-
Zeiss 10-100mm T* f2.8 - no infinity focus?
Dom Jaeger replied to Heikki Repo's topic in Lenses & Lens Accessories
Sounds like a good plan Heikki! -
Zeiss 10-100mm T* f2.8 - no infinity focus?
Dom Jaeger replied to Heikki Repo's topic in Lenses & Lens Accessories
You obviously don't work on lenses. As I just wrote, a zoom has back-focus, front focus and infinity stop adjustments, all of which can affect if it reaches infinity. A lot of people watch a youtube video and think they can fix a lens themselves, then sell it on after they've screwed it up. It could be a dodgy adapter, but then the more obvious issue would be that the zoom doesn't hold focus. Plus Heikki mentioned that he tried it on his ACL without the EF adapter and had the same problem. As an experienced tech I would never say "it's gotta be" something, because it can almost always be several things. -
Zeiss 10-100mm T* f2.8 - no infinity focus?
Dom Jaeger replied to Heikki Repo's topic in Lenses & Lens Accessories
There is an infinity stop in the front focus mechanics that probably needs adjusting, as well as the focus scale itself if it reads infinity but doesn't focus there. If the zoom isn't holding focus as you zoom out from the long end, either the lens or the adapter need back-focus adjustment too. First step is setting back-focus, then front focus, then set the infinity stop. I'd recommend having a lens tech who knows these zooms look at it if you want it properly set up. Shouldn't be too expensive just to adjust these settings. -
So is it the thickness of the flange wings that is out, so the lock ring won’t turn over them? Or the mount won’t seat properly? On PL mounts, the flange wing thickness needs to be within about 0.05mm of the nominal size for the lock ring to properly lock. Manufacturing errors, a burr or distortion due to being dropped can cause problems. The front surface of the flange wings (not the rear, seating surface) can be lathed down if necessary. There can also be potential issues with the chamfer around the lip of the camera mount and the right angle cut of the lens mount where the rear cylinder goes inside the camera mount. If there is too much of a rounded corner on the lens (or adapter) mount it may not seat properly. I’ve sometimes had to lathe an undercut on cheap PL mounts so they seat properly. Unless it’s distorted a machinist should be able to fix the issue.