Feli di Giorgio
-
Posts
57 -
Joined
-
Last visited
Recent Profile Visitors
4,563 profile views


-
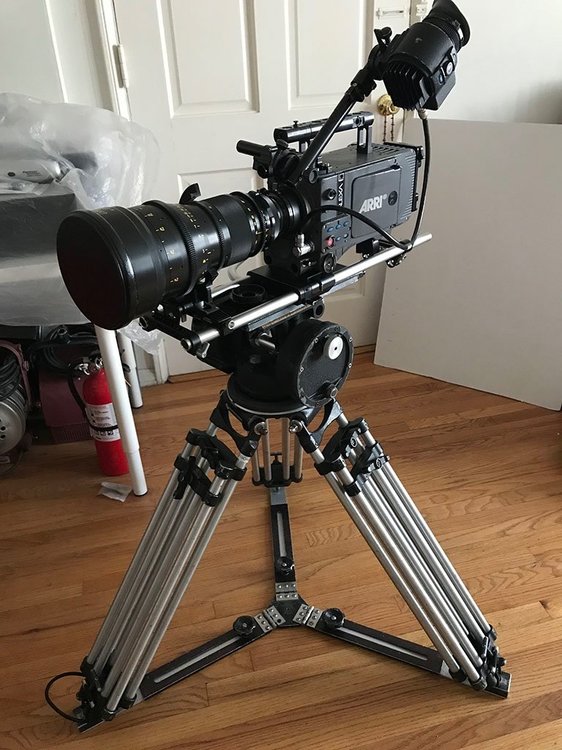
I own an Alexa Classic and here is my experience PLUS: - IQ is basically the same as all other Alexa cameras, except for the new Alexa35 and the obvious resolution differences. Which means it still is about as good as you are going to get. - IMO there still is no other digital cinema camera out there that handles highlight roll off as well as the Alexa. - Alexa color science still is the benchmark for skin tone etc - As reliable as a hockey puck. - Easy to operate - Built like a tank - Industry standard. Everyone knows how to operate the camera or process the footage. - The extra weight can actually be a plus, when you throw it on your shoulder... Just make sure you eat your Wheaties. MINUS: - The full-size body is 20 lbs. Once you add the battery, lens, monitor, coffeemaker etc the rig gains weight rapidly. Which necessitates a heavy duty fluid head and tripod etc. This will slow you down compared to shooting with a Mini or other small camera, even with enough people to manhandle it into place. This is probably my biggest complaint, even having dealt with film cameras, which weighed about the same or more. - Too heavy for a stabilizer - It's really power hungry. You need a lot of batteries to get through the day. - The Classic does not record RAW internally, so you need an external recorder. (The XT was the first with internal RAW) - If it breaks the repair bill can approach that of a used car. This is a serious problem. I purchased this camera for a very specific reason and that was to shoot an independent film. Owning my own camera will allow me to shoot at my leisure and with great flexibility. Also in this case a rental exceeded the purchase cost, so it made sense. If the camera gets me through this project I will have gotten my moneys worth. Even if I sold it for 50% of the purchase price I would be ahead of the game. That said ANY pro level camera like a Venice or RED is not going to be cheap to service. - It's a 4k world. Check with your production, if it's ok to shoot 2.8k I love this camera and the image it produces. IMO the Alexa still produces the best picture out there and this was a cost effective way for me to get that. If I had my choice I would like to have an Alexa Mini, just because of the size and weight. But they're still considerably more expensive, than a Classic . Personally I don't care about the sub 4k aspect. You aging actors will certainly be grateful... If I won the lottery obviously I would take the Alexa 35...
-

Correct way to mount a heavy lens
Feli di Giorgio replied to Dominik Bauch's topic in Camera Operating & Gear
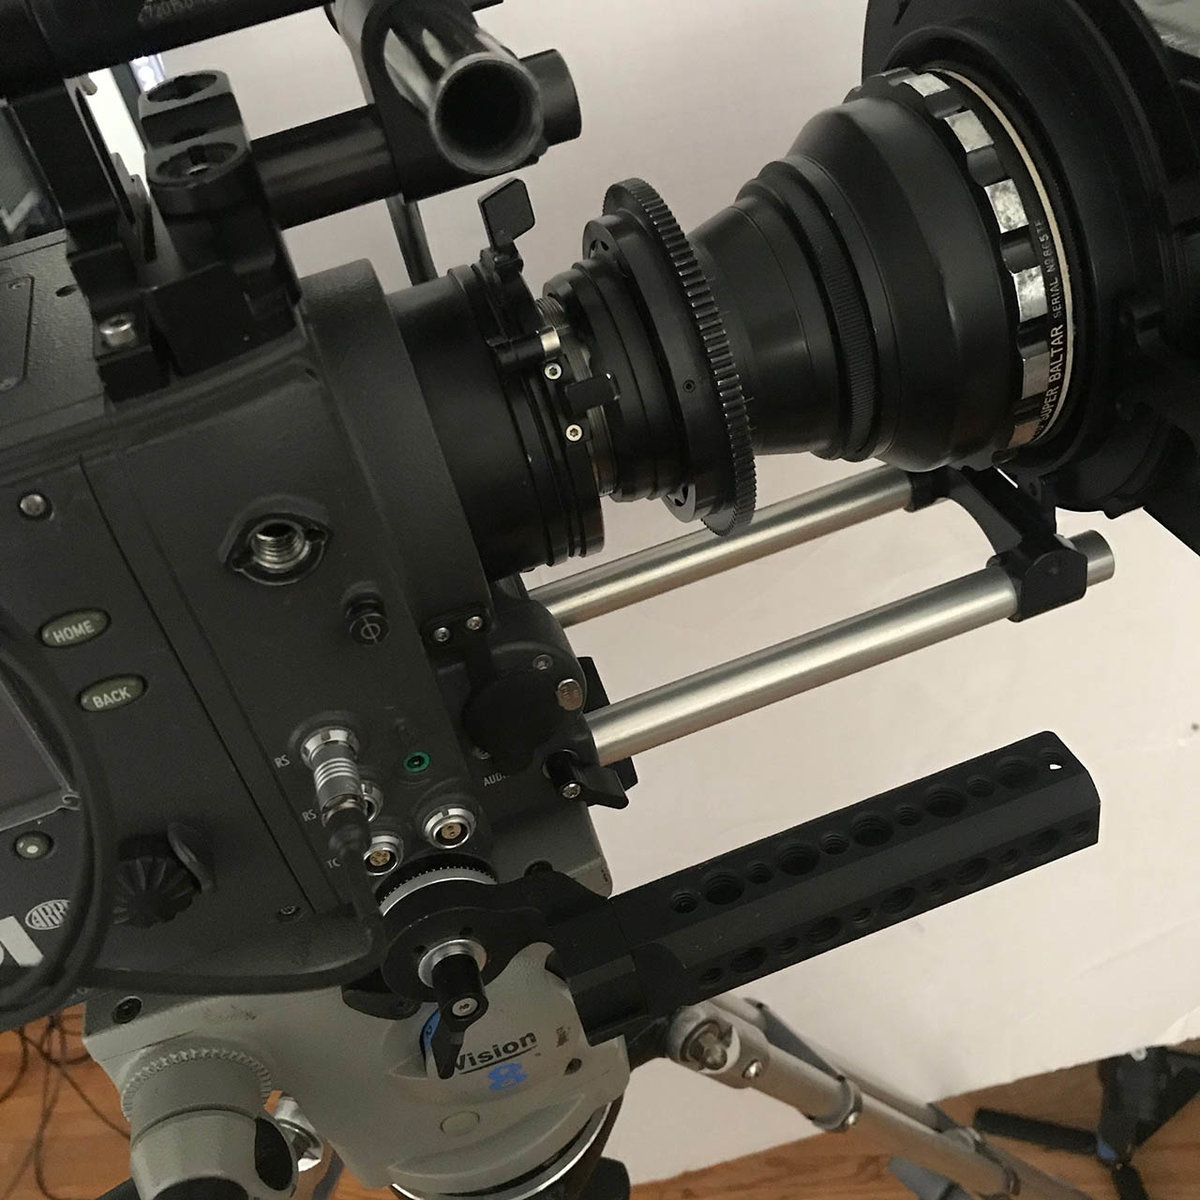
It's pointed up with the sensor exposed for just a few seconds. If there are two people involved in this you can even remove the PL lens mount cap at the last moment. Obviously using commonsense and being situationally aware are two requirements. I also don't recommend doing it like this I the rain. Or with the camera mounted on a car rig. But like I said, everyone has their own method. That's how I do it when conditions are right. -
Looking to buy Arri 2c or any 35mm camera
Feli di Giorgio replied to Boris bruno's topic in Camera Operating & Gear
Try www.visualproducts.com -
Correct way to mount a heavy lens
Feli di Giorgio replied to Dominik Bauch's topic in Camera Operating & Gear
Oh, boy. My favorite topic... I may be a little overly sensitive on this subject, but I have been burned in the past. I think everyone has their own method, but here is mine. I have a Cooke 18-100mm which clocks in at about 14 lbs and is around 18-20 in inches long. Needless to say that's a lot of weight to hang off the front of any camera. I've seen a few cringe inducing attempts to mount that lens by several camera assistants and finally came up with a procedure I feel comfortable with. Your milage may vary. First rule: If you don't have the upper body strength to handle a 25 lbs camera and 15 lbs lens with confidence ask for help! There is no shame in asking for assistance! Nobody will think any less of you and if they do they are off the show. We're a team and here to support each other as needed. Dropping the camera / lens or flexing the mount and knocking the camera out of focus will cost you dearly. Especially if you didn't ask for assistance, when you obviously needed it. MOUNTING / UNMOUNTING - Use 19mm rods and appropriate lens support bracket. - Mount Alexa on baseplate with 19mm rods in place - Rotate camera 90 degrees so the PL mount is pointing at the sky/ceiling and you're looking down on it. I place some sort of cushion under the battery plate to protect it. If you do this with the camera mounted on a tripod / head make sure it's stable and won't tip over! - Carefully lower the lens into the PL mount and lock it. Watch out for the rear element! Support lens and camera by hand and keep everything steady and level. - Line up the lens support post with the lens and screw it in. Lock down support bracket to rods. Next lock down the support post on the lens support bracket. This should give you a neutral lockdown without the support post pushing up or pulling down on the lens. - Double check everything is properly tightened down. - Rotate camera back into neutral position. - Viola! Reverse to unmount. This is where we get to my other pet peeve. Please do not grab the camera by its handle and then cup the bottom of the lens and use it as a second handle, when you lift a +40 lbs rig onto a head or when raising or lowering the tripod etc. Personally I'm also not thrilled with using the rods to lift the camera, because you are transmitting that force into the lens support, which then transmits it down the lens into the mount. But that's just me, because I got burned in the past. Granted a good set of 19mm rods are pretty darn stiff, but I still find it unnerving. Anything attached to the lens mount is basically a giant lever and physics are for real. I now install handles on my camera, even if it's sitting on a tripod. They make for perfect grips for lifting and manhandling the camera and eliminate any temptation to grab the lens or support rods. Anyhow, that's how I do it. Extra grip for manhandling camera. Depending on the follow focus setup I put them on both sides. No, that's not a Cooke 18-100 :-)
-
best monitor for color grading ?
Feli di Giorgio replied to Edgaras Kordiukovas's topic in Post Production
OLED complicates this even further. The contrast ratio and blacks looks nothing like even the best LED. At my last job we had one of the high end broadcast SONY OLED monitors and it was on a planet of its own. Comparing it to any big screen LED was a futile exercise. That said pretty much every professional grading suite I have ever been in has at least two monitors. A calibrated broadcast monitor for the colorist and a good quality 55' inch or bigger high end consumer panel for the clients. Lot's of Panasonic units, but I've also see a few LG. -
Maybe he was talking about the quality of the light from the bare bulb and 'texture' is just not a very good word to describe it. Sodium vapor has always felt very soft to me. Quartz hard. Frosted tungsten bulbs have a totally different quality than clear. One is soft the other hard. I've only ever seen one arc light in action, and it was pretty unique. Some of how we perceive it may be color temperature and spectral output. Also the size of the source. Something with a tight source looks different than a bulb with a big long filament. A big LED COB looks different than an array of smaller LED.
-
https://www.litegear.com
-
A good rule of thumb is to calculate 1 amp for every 100w. I know that's not 100% technically accurate, but still a good starting point. 20 amps for a standard household outlet. Leave a little headroom, so let's say 1800w max. Beware that separate outlets in a room may be running off the same 20 amp line.
-
CML just did a test. Tungsten vs various LED. Very interesting results... https://cinematography.net/LED-Camera/LED-Camera-Index.html I love the look of tungsten. It's very lush. But heat and power draw are big issues. You can't run anything bigger than a 2k on house power. Tungsten has gotten something of a new lease on life with digital camera being able to shoot at higher asa settings that film and still deliver great IQ. You can do a lot with a few of 300w/600w/1000w lights and a sensitive camera. But sooner or later you're going to run into the problem of not being able to run anything bigger than a 2k on house power or maxing out the amps available in your shooting location. Or the heat overwhelming the A/C. If I had the money I would shoot tungsten/HMI etc, simply because I like the way it looks. But if you are on a tight budget LED lighting is the miracle we all dreamed about for years. The reduced power draw of LED can make a production possible, that previously would have never happened due to the need for generators, A/C, permits etc.
-
best monitor for color grading ?
Feli di Giorgio replied to Edgaras Kordiukovas's topic in Post Production
You don't need a super bright display unless you're doing HDR or you're fighting ambient light contamination. 80-160 nits is the range for most sRGB / rec709 / P3 work. 10 bit, coverage of desired colorspace, uniformity across the display and in monitor LUT are far more important. -
I think that is one reason why the old Technicolor films look so amazing. The ability to art direct the color scheme of the entire set and every costume adds so much to the Technicolor look. On a side note part of that was driven by certain quirks of the Technicolor process. There were limitations to the color accuracy of the process, so there was a lot of testing. Sometimes a prop, costume, makeup etc had to be the wrong color in real life to photograph 'correctly' and appear the desired color on TC. That is something you still experience on occasion with modern film stocks. A long time ago I shot this short with the female lead dressed in a white coat and dark lavender gloves. The gloves came out black, because the stock was blind in that part of the spectrum. We would have had to make a wedge of different colored gloves and shot tests to determine the correct real life color so it appeared the desired color once photographed. But of course there was no money for that.... Anyhow...
-
best monitor for color grading ?
Feli di Giorgio replied to Edgaras Kordiukovas's topic in Post Production
Depends on how much money you have, if you need HDR and what colorspace (sRGB, rec709, P3) you are working in. You can drop $30,000 on a Sony which does everything. The EIZO 319 is good, but $6000. Maybe a top of the line DreamColor for rec709? The new Apple Pro XDR looks interesting, but I'm not sure if it's useable with anything but a Mac. I'd look at Flanders Scientific, they have a wide range of models. You're better off with a small, but accurate monitor, than a large unit that can't be trusted. One of the nicest features of the Flanders is that you can send it back to the factory for calibration. This used to be free, but I'm not sure if that still is the case. Accurate calibration is actually quite important. You need access to the right equipment and someone who knows what they are doing. Flanders uses a $20-40k meter that is operated by a real video engineer. You also get things like SDI I/O, built in waveform / vector scope, LUT support and all sorts of good stuff you'd expect on a dedicated broadcast monitor. This also makes it a great monitor to take on set and drive directly from the camera. I think the smaller 17 inch Flanders come in around $2500 PS: I have one of the small Flanders and like it very much. -
Mixing different LEDS: diffusion
Feli di Giorgio replied to omar robles's topic in Lighting for Film & Video
In my experience once you diffuse light it becomes difficult or impossible to tell what brand the source was. You are primarily concerned with the quality of the diffused light falling on the subject, so it becomes more about the diffusion material. I have mixed tungsten fresnel from Arri, Mole and B&A on the same shoot and it's impossible to tell much of a difference except in output. The lights from some companies are simply more efficient and therefore brighter than others. But once it's all diffused I think it's a non-issue. I have mixed 2 x Aperture 300D units with a cheap Godox 60D and in terms of diffusion it wasn't an issue, but the Godox is bluer and the CRI is not as good, so in some cases that was noticeable if you looked closely, but it was not a deal breaker. The main problem with mixing LED lights from different companies is that the CRI / spectral output doesn't match cross the board. Also color temp can vary. 5600 is not the same from many lights. I believe this is less of an issue with the highest quality units, that have a high CRI. Having something like the Sekonic 700 Spectrometer around comes in really handy, so you can see what you are dealing with... The cheap Godox that I bought on a whim certainly is inferior in terms of color rendition than the Aperture and I would avoid using it with my main lights, unless it was way in the background. And even then I would keep an eye on it to make sure that it was not producing a green spike etc. But in terms of diffusion it's a non issue. That's more about the diffusion material. The other main advantage to sticking with one brand of LED lights is that if they all have the same spectral output you can correct for any deficiencies or tendencies to lean green / magenta easily and globally in the digital intermediate. If you need to correct for several lights with different spectral output in the same shot things become interesting when you try to compensate for that in Resolve, Baselight etc It should be kept in mind that in the film days we did mix tungsten and HMI with Kinoflo that produced a noticeable green spike (I'm looking at you David Fincher...) unless you compensated for that with gels or a special filler (LLD?). And yet somehow we still managed to make pretty pictures. You just need to be aware of all the little quirks and know how to deal with them. CML recently did a LED shootout. Interesting results. https://www.cinematography.net/LED-Camera/LED-Camera-Index.html -
Doh. Yes, correct. ProRes RAW
-
Lighting Design Software?
Feli di Giorgio replied to Stephen Baldassarre's topic in Lighting for Film & Video
Have a look at this. https://www.elixxier.com/en/products/setalight3d.php I purchased this recently and am impressed.