Dom Jaeger
-
Posts
3,515 -
Joined
-
Last visited
Everything posted by Dom Jaeger
-
Arriflex 2B/C 400ft Mag Capacity
Dom Jaeger replied to Christian Flemm's topic in Camera Operating & Gear
I’ve often wondered whether European film companies ever released metric film cans, since the Arri mags were described as 60m/200ft or 150m/500ft. But 500ft is also half a 1000ft mag, so it makes sense from that perspective. It’s curious how the film industry mixes measurements, the consequence I guess of Hollywood’s dominance over what has always been a world-wide industry. We still call it 16 or 35mm film, and outside of a few vintage offerings lens focal lengths are metric, but film comes in imperial lengths and we still call the resulting product footage. Many countries, including us here in Australia (an otherwise metric country) also prefer lens distance scales in feet. I quite like feet for focus distance estimation, but as a technician I despise small measurements in fractions of an inch. -
Help needed - Eclair ACL Losing Loops
Dom Jaeger replied to Aaron Yang's topic in Camera Operating & Gear
Like Kamran said, what probably happened is either the loop shifted when you removed the mag or when you re-engaged the mag the claw missed the first perf and the loop shifted up. Always check the loop is centred or even has a little extra at the bottom before fitting a mag, and manually inch the camera over to engage the claw with the first perf. Listen to the sound as well when running to get used to how it should sound, usually you can hear if there's a problem. So likely just operator error, but if you want to have it checked, I second Visual Products, great techs with lots of experience. -
1.4x expander with s35 anamorphic lenses?
Dom Jaeger replied to Dominik Bauch's topic in Camera Operating & Gear
I don’t know the Atlas expander, but if it’s a low budget item I would expect there to be some optical degradation. Even high-end expander/extenders tend to cause a bit of that, simply by magnifying any faults a lens has, as well as introducing extra aberrations. You’ll need to test yourself to determine if the funk of the full image circle is worse than the expanded image. Other than that, you know the issues - one stop light loss, no lens data. You will also find the lens focus marks will be out by about an inch and a half, which is more of a problem at closer distances. -
Fungus inside my Arriflex 16ST Door Optics
Dom Jaeger replied to Ivan DImitrov Alexandrov's topic in 16mm
There can often be a little fungus in old viewfinder optics. The issue is more that it can spread across the affected optic rather than infect other lenses. Fungus spores are more or less everywhere, they just need the right environment to grow. Ideally, you should get the viewfinder optics cleaned, but as long as you keep the camera well stored, and perhaps air it out in the sun every now and then, it should be ok. Make sure the camera case itself isn’t damp or mouldy. You can use desiccant sachets or similar. Same goes for any lenses you have, avoid storing them in dark, musty, damp or humid environments, and air them out regularly. UV light tends to kill or at least retard fungal growth. I wouldn’t worry about lenses getting infected just by mounting them to the camera. -
The Dynamics of a Working Camera Department
Dom Jaeger replied to Gregory Irwin's topic in General Discussion
Well that's a gap in your resume you'll have to fill! -
The Dynamics of a Working Camera Department
Dom Jaeger replied to Gregory Irwin's topic in General Discussion
Have you ever worked on a movie in Australia, Greg? -
Bolex B8 - can anyone tell me what is causing this issue?
Dom Jaeger replied to Johnny Liu's topic in Bolex
That doesn’t sound right, the 4 front plate screws should all screw down tight. It is weird if all are stripped, yes. Unless someone put in the wrong screws? Imperial instead of metric or something. I wrote this a while back, all pocket camera are basically similar, if you ever want to go inside: http://cinetinker.blogspot.com/2013/01/servicing-bolex-d8l.html -
The Dynamics of a Working Camera Department
Dom Jaeger replied to Gregory Irwin's topic in General Discussion
Great stuff Greg! Thanks for sharing. -
Bolex B8 - can anyone tell me what is causing this issue?
Dom Jaeger replied to Johnny Liu's topic in Bolex
Well, the leak is across the film width. So look for any gaps in the film chamber going in that direction, perhaps the footage counter cover at the back? The frequency is probably related to how long your shots are, since the light must be leaking between shots. My guess would be the footage counter, so as an experiment try taping over the edges of the cover inside and see if the leak continues. If it is in-camera, you should be getting brighter flashes when shooting outside in bright sunlight, and depending on how long you pause between shots. -
How to charge the EBM Handgrip battery. SEND HELP
Dom Jaeger replied to Oliver Dahmen's topic in Bolex
Is the handgrip battery re-called? If it hasn’t been recelled in the last 5-10 years you’ll need to do that first. Then get a charger compatible with the new cell chemistry and voltage. Then wire the charger cable with a Tuchel connector that mates with the handgrip connector, making sure to get the wiring correct. If you’re not up to doing this yourself, ask someone like Sendean Cameras. I’m not really familiar with who works on Bolexes in the UK though. -
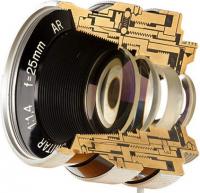
Yeah, interesting question. Element size relates to the design, which can be quite varied in terms of what the designer wanted to achieve. Every lens is a different set of compromises, a different path to a particular outcome. The primary factors in lens design choices are the angle of view and the maximum aperture. You’ll find both wide angle lenses and telephotos tend to have larger front elements than standard focal lengths, but for different reasons. A wide angle lens needs a large front element to allow the disparate angle light rays to all see the entrance pupil, which is where the lens FOV originates. The deeper the entrance pupil the larger the front element required. One consequence of a smaller front element can be “cat’s eye” bokeh where the bokeh balls become cut off wedges towards the edge due to the entrance pupil being only partially visible from the outer angles. A telephoto lens needs a large front element because it needs to be at least as large as the entrance pupil, which in a longer focal length can be quite sizeable if the lens has a relatively fast aperture. Whether a design uses a positive (magnifying) or negative (diminishing) front optical group, or internal focussing elements, and the spacing of these groups, all determines the size and depth of the entrance pupil, which in turn affects the front element size requirements. It’s easy to assume that a smaller front element in a lens of the same focal length is a sign of lesser quality, but that isn’t always the case. It’s really just a design choice.
-
That sounds like way too many accessories to be running from the camera (RS outputs can only handle about 2.5A), but it sounds like you have other problems if the camera is now still not running properly. Best take it to an Arri tech to diagnose and fix.
-
Take it to a tech at Arri rental, get a diagnosis and a repair quote and go from there. These aren’t DIY repair cameras, and internet experts generally can’t help with this sort of issue, or will misdirect you. The main thing you can do is make sure you’re powering the camera properly (try a different battery, different power cable), after that an experienced tech needs to have it in front of them to properly diagnose the problem.
-
I think a Bolex H8 RX with H8 RX Switars, properly serviced, will give you about as sharp an image as 8mm can achieve. Using a pocket Bolex like a B8/D8 you’ll be relying on the lens focus scale, which could easily be out using stacked adapters. And the pocket cameras don’t have the same registration stability as a H8 with a fixed sprocket-driven loop and better gate and pressure plate. If you really wanted to test the resolution capabilities of an 8mm sized film frame, you could just crop such a frame from the centre from a high res scan of 16mm footage shot on something like an SR3 with Ultra 16 lenses, or an Arricam with Zeiss Supremes. Then compare it to the H8RX footage and see if it looks any better.
-
ARRI Ultra Prime vs Zeiss Standard Speed
Dom Jaeger replied to Uli Meyer's topic in Lenses & Lens Accessories
Stopped down, not so much difference, but wide open UPs are cleaner with better contrast and even illumination. There’s about 30 years of optical advancement between them, so definitely an improvement in aberration correction, field flatness etc. But Zeiss glass and coatings tend to match well even over decades. UPs have more adjustments, so if someone untrained has fiddled with one they can easily introduce issues like decentration that will degrade the image, whereas Standards tend to remain optically ok. They develop things like image shift from worn helicoids or loss of contrast due to coating scratches instead. -
Here’s a Bosher S16 conversion where he doesn’t change the shutter angle, the mirror clearly moves in front of the gate before the shutter.

-
The primes were designed by Kenji Suematsu, of UniqOptics, but built by Tamron. The zooms were a combination of rehoused Tamron stills zooms and some custom designs, none very good. This transcript of an interview with Kenji Suematsu makes for interesting reading, and explains some of the dumb design decisions that went into the Red Pro Primes. They were never very successful except among Red fanboys. The lenses Kenji released were branded UniqOptics, but they were quickly sued into bankruptcy by Jannard. https://ddr.densho.org/media/ddr-densho-1003/ddr-densho-1003-11-22-transcript-77bea43e2d.htm For rehousing purposes you might be better contacting companies that specialise in that - TLS, Zero Optic, Whitepoint, GL Optics, TK lenses, Iron Glass etc, although most of them are very busy and have long wait lists.
-
This is one of the reasons having an experienced tech check over your gear is invaluable. The average user has no idea if their camera is actually working as well as it it should be. The guys from Visual Products are excellent techs, with many years of experience on lots of different cine gear.
-
The 13mm f/0.9 is an amazing lens for sure. You know you can use the octameter viewfinder on a Rex camera too?
-
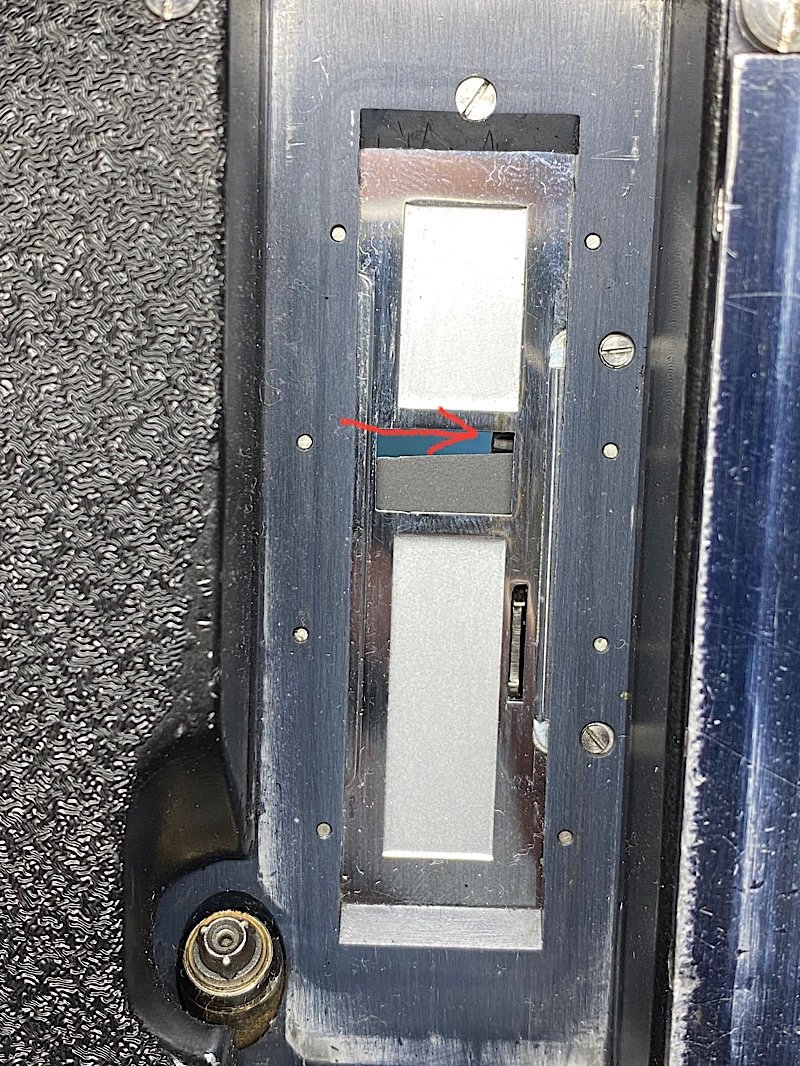
Yes, the wave spring washer sandwiched between flat washers, should exert some pressure to create friction. Make sure to grease the assembly. Bolex had a special tool to press down on the washer while pushing in or out the pin.
-
Well if both adapters are accurate, and allow clearance of the lens, then together they should seat the lens at the correct depth. You’re just making a Hasselblad to Aaton adapter in two steps. No need to compensate aperture unless there are optical reducers in there but it sounds like these are just mechanical adapters right? The lenses might be a little soft for 16mm, but worth a try. How does it look in the viewfinder?
-
Yvar Macro 150mm f3.3 Question
Dom Jaeger replied to Don H Marks's topic in Lenses & Lens Accessories
Glad to hear you got it working. It is indeed a clever and simple mechanism. -
Fitting a 435 movement is not a trivial job, even in the highly unlikely case that you unearth one somewhere for cheap. Have you looked into the labour cost of converting a 435? There are a handful of people worldwide who could do it nowadays, and most of those probably wouldn’t want to take it on, especially for the low cost you seem to be hoping for. What are you actually trying to achieve? You have a “dormant” camera that needs a new movement?
-
Yvar Macro 150mm f3.3 Question
Dom Jaeger replied to Don H Marks's topic in Lenses & Lens Accessories
The way the double rotation stop works is that the stop screw should be short enough to pass over the fixed stop pin, but not the steel ball in that groove. So the stop screw hits the ball, which does another rotation until it hits the pin. If someone lost the ball, they may have fitted a longer stop screw, not understanding the mechanism. -
Yvar Macro 150mm f3.3 Question
Dom Jaeger replied to Don H Marks's topic in Lenses & Lens Accessories
I think the stop should allow a double rotation of the focus ring, to get into the macro range. Perhaps the mechanism has been incorrectly adjusted or something. It uses a small steel ball as an intermediate between the stop and the stop screw.