Nicolas POISSON
-
Posts
122 -
Joined
-
Last visited
Everything posted by Nicolas POISSON
-
How to shoot extreme close ups
Nicolas POISSON replied to kris limbach's topic in Lenses & Lens Accessories
An example of what can be obtained with extension tubes. This was shot on an A7s3 in full frame mode, with an old still lens (Tokina ATX 35-70 f2.8), at F/11 if I remember correctly. My face was almost touching the lens, and was lit with small led panels (Viltrox RB08). The set-up is not comfortable by any mean. You could place the camera a bit farther away if you were using S35 or m43 sensor.
-
The old tripods were pretty interesting
Nicolas POISSON replied to Daniel D. Teoli Jr.'s topic in Off Topic
The hook underneath can be used to add sandbags or to anchor the tripod on a dolly for example. Although in this photo the bag seems just an accessory bag. The guy sure was a hipster well ahead of his time... What was marketed here ? Camera or clothes ? -
I do not think there is an exact classification specified in an official ISO document. Mine for full frame is: normal = 35 to 85mm, below = wide, above = tele. You will find some variation across people. All the more that there is the FF/S35 ratio that some people take into account, while some others do not and simply keep the same focal lengths in mind.
-
You are correct: there is no way to determine the lighting ratios because you have no idea of the curve used in post. It is even possible that "power windows" were used: some objects with the same reflectance could end up at different IRE levels, and some objects with different reflectance could end up at the same IRE. However, if you have access to log footage, the formula of the curve is often documented and you can determine the scene reflectance from IRE values. You can do that easily in DaVinci Resolve using a CST from the log to linear space. By the way, this is exactly the principle of EL Zone system.
- 4 replies
-
- 2
-

-
- lighting ratios
- lut
- (and 1 more)
-
Moonlight Color Temperature
Nicolas POISSON replied to Vivek Venkatraman's topic in Lighting for Film & Video
The value of 3800K is probably just for convenience. When you want to keep the look of warm 3200K tungsten and cool 5600K moonlight, you will often end up setting your WB around 4000K. The advantage is that there is no need to gel anything. But maybe you find the moonlight not cool enough, or the tungsten not warm enough. Say the look of 3200K tungsten is OK with a WB of 3800K (Mired Shift of 49) but moonlight is not cool enough. Then yes, setting your moonlight at 7700K will give you the same blueish light as if you had set WB at 3200K with 5600K moonlight (mired shift of -134 in both cases). But maybe you cannot change the colour temperature of the moonlight, it is fixed at 5600K. Then you set your WB at 3200K (mired shift of -134), and change the tungsten at 2800K (Mired shift of 49). Many LEDs can be set in a rather wide range of colour temperature. You have some latitude with the relative settings of moonlight cool white, tungsten warm white, and camera WB. Still, if you set the camera WB too close to one side of the range, you may not have enough latitude. So you will target the intermediate colour temperature. Here are some examples of four LED devices, with their colour temperature range. As you can see, the central colour temperature remains around 4000K: 3200~5600 => 4100K 2500~8000 => 3800K 2500~10000 => 4000K 3000~6500 => 4100K It is not a rule. If you mix LED devices simulating tungsten and HMI, you might prefer to configure all the set according to the HMIs. -
I guess you want to adjust the exposure using the aperture ? A very simple way would be to set your A7s so that the grey card falls at 41 %, then open the aperture one or two stops. If you prefer maths, you need the Slog3 Formula : out = (420 + log10( (in + 0.01) / 0.19) * 261.5) / 1023 ‘out’ is the target IRE value ‘in’ is the reflectance. For middle grey, IN = 0.18 (18%). One stop above is IN = 0.36, two stops is IN = 0.72 Target IRE is 41 % (0.41) for middle grey, 48 % one stop above, 56 % two stops above. The ‘10 % per stop’ rule is very generic. It depends on the log type, and even for a specified log, it depends on were you are on the curve. In the linear section, we get close to 7.5 % per stop in Slog3.
-
Anyone Want to Take a Guess at My Eyemo's Shutter Angle?
Nicolas POISSON replied to Aaron Martin @ OH's topic in 35mm
Measuring your image in Gimp gives an angle of 26°. But the perspective is making this measurement wrong. The photo should be taken right in front to avoid this. By the way, what's the purpose of the dual "11 /11" shutter ? -
Gerald Undone passes on Sony FX6, praises Canon
Nicolas POISSON replied to Samuel Berger's topic in Canon
ms = milliseconds. This is the time required to read the whole imager, and is an indicator of the rolling shutter. Yes, lower is better. However even amongst professionals, there are various opinions about the importance of this figure. The only thing sure is that the lesser the movement within your frame or from your camera, the lower the importance. You should really not care about this when shooting corporate talking heads. -
Lighting question for shot of subject at PC
Nicolas POISSON replied to Andre Klonowski's topic in Lighting for Film & Video
I would also use a flat LED panel on the display. Since the source will be right in front of the face, you do not even need a wide emitting surface. A small battery-powered panel does the trick. I would set it to a higher color temp than the camera to get a cold white. I would not bother changing the light: it is more a "TV" effect. A computer display is usually steady, unless the actor is supposed to be watching a movie. -
Sorry, my mistake about the MCPro. Still, a white light would be cheaper and lighter. The RB08 alone weighs 100g. I have 4 of them with chargers, 4 mini magic arms, and some accessories: all the stuff fit in a 21x32x7cm "EVA" case for a total weight of 2.5kg. I can put it in a messenger bag together with my laptop. The MC Pro definitely seems to be a higher grade device compared to the RB08: greater battery runtime, DMX/CRMX control, many accessories included (a honeycomb grid is very useful)... It is not the most portable option, but if this is portable enough for you, this is probably a better investment.
-
Usually, the key light will be a kind of white. You can play with the colour temperature, but keep it white. Some RGB panels produce a decent white, but you get better results with true white LEDs. You can use colour for lighting the background. It is of course possible to use colourful key light, but: - this is harder to set up, especially with LEDs that can produce saturated colours (beware of not clipping the corresponding channel), - this is harder to get a good-looking image, - this may give a "music video" look, which can be adequate for some styles, but not what is expected for classical music in a church. This is a matter of taste, though. I use a set of Viltrox RB08. These may be no longer sold, but you will find tons of equivalent devices. For stands, the Fosoto FT-195 is very compact once folded (50cm), and less crappy than the cheapest models. You will also need ball heads with 1/4" screw, tiny magic arms with clamp, cases, charger...
-
I also checked FalconEyes website and could not get the weight either. My Godox F200Bi (2x2 foldable panel) is 12kg for one single unit. The panel itself is less than 2kg, but you also need the power supply, softbox, cables, various accessories and case. The FalconEyes are smaller and probably way lighter, but for two units I would expect the whole package to reach 10kg. As I said, the problem with the MC pro is not power. It is an RGB light, which you don't want as main source. Once you have built a solid kit, then yes, you could add RGB lights. I think you pay too much attention to the hardware quality. Start with simple, lightweight, cheap lighting, and experiment with them. Learn how to place them, watch videos about 3-point lighting, define what rigging accessories you need to face any situation quickly (highly underrated topic), search the sweet spot between your ISO setting and how intrusive is your lighting... There are plenty of folks that get decent results with super cheap LED panels everyday.
-
One single light could do the trick, but you will need to place it carefully if you want good results. With more sources, you can fill shadows and this is more forgiving to placement. No offence, but I find it hard to get your constraints. At the beginning you seemed to need something extremely portable. Hence I suggested tiny panels that would weigh 300g. Then you are looking at flexible panels whose total weight is around 10kg. It is hard to give advices with such a wide range. Thanks to the sensitivity of modern cameras, you can get decent looking images using only 2 or 3 tiny 10W LED panels. Not "professional" results, but good enough so that nobody cares. The quality of the result will be more a question of position and focusing than power or softness.
-
I think you were doing a very common mistake (even amongst experienced professionals - and I used to mistake as well): soft shadows is not simply linked to the strength of diffusion, but to the emitting surface. One way to get a wide surface is to have a primary point source to light a wide surface of diffusion, which becomes itself a secondary wide source of light. Using a wide reflector does the same. You will not get soft shadows placing a diffuser close to the point source. Stacking layers of diffusion (as I have seen so many times) will not help either. You really need to get a wide surface evenly lit. That's why soft-boxes often use dual diffusion distant from one another: the first layer spreads the beam of the point source, so that it lights the whole surface of the second diffuser. Without this first layer, the beam would hit only a small part of the second one. Furthermore, what can be considered as "wide" is directly linked to the distance. The sun is huge, but so far away that it acts like a point source. A 30x30cm panel at 1m from the subject will create the same shadows as a 60x60cm panel at 2m. If you can place your diffuser close to the subject, you will get soft shadows from a not-so-wide surface. I'd say a panel will create soft shadows at distances comparable to its size. A 60x60cm panel will be definitely soft at distance of about 1m. It will be decently soft at 2m. It will not be that soft at 4m. I own a pair of Godox F200Bi which are similar to the LC160. I am pretty happy with the rendering. Two units fit in the case of one (included and good quality). That could be a good solution if you accept a 22kg case. The panel itself is light, but I an afraid any device of this type to be around the same weight with all the mandatory accessories. If you need a lighter kit, and if you do not want to spend too much time setting up the lights (those foldable panels need some time), then small or tiny panels could do the trick, but you need to accept hard shadows. This does not mean German expressionism style: you could have a relatively soft rendering, filling the shadows with a second hard light. Hard shadows does not mean high contrast ( another common mistake). Look at this still of Hania Rani, a Polish pianist (published in FutureMusic ) This is hard lighting from the sun at dusk I guess, but shows a relaxing feeling.

-
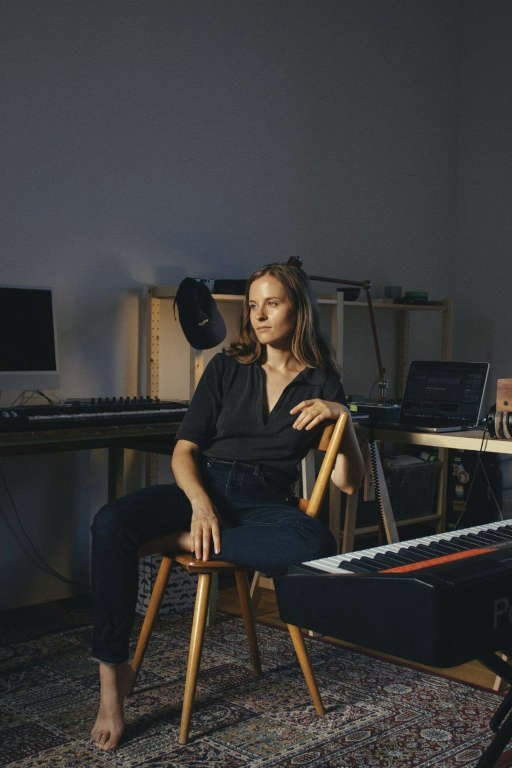
Mandatory safety hat.
-
The Aputure MC pros are RGB light panel. Although this can be useful to add some spots of colour in the scene, I would rather use white LED panels for the main lighting. You will find tons of these small battery-powered panels for less than 50e. The white point is adjustable down to like 2500K typically, not that far from candles. Usually the battery lasts like a little more than 1 hour at full power. Maybe you can run them on external smartphone power-banks if you need more time. These small panels will create hard shadows. But I am afraid you cannot get soft lighting given your constraints. This requires the light to be emitted from a wide surface. The greater the distance from the subject, the wider the surface. If light sources are like 1-2m from the talent, you could use a point-source light with a softbox. But this will require more powerful lights. They will be heavier, they will run on mains unless you buy big batteries that will add up to total weight, they will need stronger stands (heavier as well). You can find light stands way lighter than mic stands and reaching higher heights as well. I have a pair of Lastolite LAS1159 that go to 3m and weigh 1.35kg each. That is half the weight of a mic stand. These would be OK with a point source light and a 60x90cm softbox. If this is still too big, and if you follow the small panel route, Amazon sells 2.2m stands that weigh 900g and are like 60cm folded. These are low grade, but if you pay attention. this is a good way to save weight. These are not compatible with softboxes, by any mean. You could also buy cheap "11 inch magic arms" with included clamp. These are really helpful to hang the small panels (no more) almost anywhere.
-
Overexposing for cleaner footage?
Nicolas POISSON replied to Jarlath McKernan's topic in General Discussion
I used to think the same, but it seems sometimes pro guys use the term differently. Overexposure does not (always) mean clipping. It means you expose higher than you would using a light meter, or looking at a grey card on a waveform, compared to a recommended practice. Or higher than your own taste looking at the image with a standard LUT. In that meaning, it is the same as pushing / pulling, or rating a different ISO/EI. -
Overexposing for cleaner footage?
Nicolas POISSON replied to Jarlath McKernan's topic in General Discussion
Overexposing the sensor and bringing the brightness down in post allows for cleaner shadows because the main culprit for noise is the sensor itself. This is a very common principle of noise reduction : boost the signal before the source of noise, bring everything down (both signal and noise) after. Shooting in raw, log or 709 does not change this principle : this is too late. The key is that the sensor receives more light. This is at the expense of highlight margin. You gain in shadows what you loose in the highlights. Say the sensor adds « 1 » of noise (arbitrary unit). You set your camera to have a correct exposure. The optical signal ranges from 1 (shadow) to 10 (hot spots). Your signal/noise ratio is 1:1 in the shadows. Now you open the aperture by one stop. The optical signal ranges from 2 to 20. Signal to noise ratio is now 2:1. But hey ! The image looks overexposed now ! No problem : apply a x0.5 gain in post. The signal is back to 1:10, and the noise is 1x0.5 = 0.5. The signal to noise ratio in the shadows is now 1:0.5, which is the same as 2:1. This works perfectly as long as the sensor’s clipping threshold is greater than 20. If it is 15, overexposing lead to clip. Thus overexposing is a good technique when : - you want clean shadows - the scene has not much contrast, and the hot spots are far from the sensor’s clipping point. The RIAA correction for vinyls works the same way : the audio high frequencies are boosted before cutting the master. When playing the LP, the stylus sliding on the track generate a lot of high frequency noise. The RIAA circuit brings the high frequencies down. The signal reverts to linear, but noise is attenuated. Using cameras with a 0,45 gamma (shadows are boosted with respects to highlights), airing that signal (noise added) and bringing everything back to linear thanks to the inherent gamma 2,2 of the CRT, has been a noise reduction system used for years. I may be wrong but if you want cleaner shadow, you should lower your ISO/EI, so switch to EI 200. If you rate EI800, this will artificially brighten your image, and you will close the aperture to compensate. With less light, shadows are even more noisy, but y gain 1 stop of latitude in the highlights. Now with log encoding, there is another problem. The lower part of the log curve is, well, not log. If it were, the log curve would be a straight line, whereas all log curves have a toe. In that zone, the number of code values per stop is low, which makes it hard to grade. This may not be a big deal for 12bit log, it will be a greater problem for 10 and particularly 8 bit log. Note that this only happens for cameras that set the ISO shifting the log curve left/right. If you use Sony’s CineEI, or if you shift the brightness using exposure compensated LUTs on an external monitor, you will not have this problem. -
What’s the origin of correctly exposed middle gray?
Nicolas POISSON replied to silvan schnelli's topic in General Discussion
I struggled to get it as well. Here is the way I understand it now. Short answer : - when exposing to the right (ETTR), you match the brightest part of your scene to the clipping threshold of your sensor. - when using a grey card, you match the median brightness of your scene to the middle of the DR of your sensor. Statistically, the grey card happens to fall at this median brightness for most scenes. Long answer : You have a scene with a certain contrast (think of its histogram), you want to shoot it with a camera whose sensor has a certain dynamic range. Exposure is about how you match both. There are basically two techniques. The first one is well-know from digital photographers : Expose To The Right (ETTR). You look at the histogram, and open or close the aperture so that the brightest spots of the scene fall just below the clipping point of the sensor. This way, you maximize the light (the incoming signal) that reaches the sensor, without clipping. You get the best signal/noise ratio possible since the sensor is the main culprit for adding noise. But this technique has drawbacks : First, when shooting film (whether stills or movie), there is no obvious threshold of clipping. There is a highlight roll-off. You cannot match "to the right" since this is a fuzzy "right". Second, even in the digital age, there is another problem for film-makers. Imagine you shoot several angles of two actors talking, that will be later inter-cut. You have a hot spot in the frame of the shot (a lamp shade). This angle has a high contrast. Exposing to the right, the actor’s face will fall relatively low with respect to the sensor’s dynamic range. Now you switch to the counter-shot where the lamp shade does not appear. The contrast is much lower. Exposing to the right, the other actor’s face will fall way higher. You have the best possible signal/noise ratio for each angle. This may sound like a good thing, but noise will be inconsistent. The angle without lamp shade will be cleaner. The problem is that the human visual perception is hard-wired to detect changes, because change is potential danger (whether a tiger in the jungle or a bus coming while you are to cross a street). This is the same for human hearing, and that’s why the ambulance has flashing lights and varying tone. When angles are inter-cut, the varying noise level is more noticeable. So you do not want the best signal/noise ratio for each angle, you want a constant level of noise. For the counter-shot with lower contrast, you will not ETTR. You will expose like the shot, and loose some quality on purpose. A simple way to do this is to have a common reference in both frames that you will set at the same level on your sensor. Here comes the middle-grey card. But why middle grey ? The reference could be anything, as long as it is the same for both shot and counter-shot. It could be a white board as well. In the printing world, the darkest black possible reflects about 3 % of light, while a white sheet of paper reflects about 90 %. In a logarithmic scale (the human perception is logarithmic), 18 % reflection is halfway between those two values. So if the print uses all the levels from black to white, middle grey will statistically happens to fall at the middle of the histogram. Now a print only has 5 stops of DR, while modern camera easily has 10 stops or more. We can shoot scenes with greater contrast. But if the contrast expands toward both sides, which means the scene has simultaneously spots brighter and darker than what we could record with only 5 stops of DR, the 18 % middle grey remains at the middle. Take any scene you want, add a middle grey card to it, it will often fall at the centre of the histogram, whatever the contrast of the scene. Of course this is not always the case. Sometimes the histogram is unbalanced, or you do not pay the same attention to every objects in the scene. This is where you would use exposure compensation. Also, with high DR cameras, you may want to set the middle grey a bit shifted toward higher values. This means you expect that most scenes will not have spots that much brighter than the middle grey. Shifting the middle grey up means you will expose higher, and get cleaner shadows. Now, there is no defined IRE level for middle grey, as this completely depends on the curve used (whether log or rec709). On an A7sIII, The same scene, lit the same way, with the same exposure parameters (aperture, shutter speed) will have different histogram in S-log and S-log3. -
Legal/Video range or Full/Data range?
Nicolas POISSON replied to Wenqi Wei's topic in Post Production
Full range has been adopted on many DSLR for 8-bit log, where the difference between 256 vs. 220 quantization steps (16-235) may be more significant, especially for a log signal that is to be heavily processed. The same devices may still output in legal range for 8-bit 709 built-in profiles. As soon as there are enough quantization steps (say 10bit when you target delivery in 8-bit), the loss using legal instead of full range is really small. However the legal vs. data range question has become a real headache. HDMI being common to both computer and video world has not helped. For example (I hope I do not mistake): - my Fuji mirrorless always records and outputs video in full range, whether being configured in log or 709. - the Sony A7sIII outputs "extended" video range over HDMI when in 709 : 16-255 or 64-1023. Yes: neither legal nor full. I own an old Canon camcorder that uses the same extended range. When configured in Log, I think the A7s3 outputs in full range (not sure). - my Atomos NinjaV expects LUTs to output in the legal range. However I think most LUTs provided on manufacturers website output in full range. This is what you need when the LUT is used in an editing software like DaVinci Resolve. - BMD pocket cinema camera 6K outputs log in legal range. The Gen5 color science uses a log curve that is so flat, that the BMPCC6K hardly uses more than half the available code values. The 10-bit log could be coded in 9 bit. The culprit is not the use of legal range, but the choice made by BMD to define a log curve that can handle 20 stops of DR. - and the exact number of code values used depends on the ISO setting. The same is true for an Alexa, or any camera that sets its ISO shifting the log curve and baking in it. Add to this that manufacturers are not always very explicit in their specs, and you end up testing every single piece of hardware you use to check their range. Trust me, this is really no fun. Although this is not the world I am working in, I can easily understand that a higher grade camera manufacturer prefers to stick with the standards. Improving marginally the number of code values is really not worth it considering the mess it brings. -
So it would be some kind of flare ? Since the headlamp is a tiny but powerful source of light pointed right to the lens, this makes sense. The overall black background would also help to make this flare visible.
-
It's hard to say for sure, but I would expect a negative fill to have a stronger effect. This image has rather low contrast. Also, the clothes do not show the same shadow as the head.
-
At a distance, the room's acoustic plays a much more important role than the mic. If acoustic is lower than "great", there is not much to do. Shotgun mics with interference tube are not the preferred choice in reverberant spaces, as reflections cause weird comb filtering which translates into metallic / robot sound, a bit like if you were using a vocoder. It will be way easier to get decent sound using close miking. For the piano, you can mike the soundboard from the rear, or hide the mics in the piano behind the upper or lower panel. The later gives a darker sound and there is a risk of getting more pedal noise, but some pianists may want to remove the upper panel. The piano will benefit from a stereo recording. On the cello, you could use DPA 4099, which are easy to place, but will remain visible. You could also use any decent lavalier on the tailpiece (very easy to hide both mic and cable) or on the bridge.
-
Hard to tell since this is quite blurry and heavily post-processed. This could be a huge collection of "Astera" type tube light, with and additional centre light which could be anything. Or maybe this is purely CGI ?
-
Just in case: the FX6 can shoot in S35 mode, but the resolution is then limited to 2K (same on the A7s3).