Duncan Brown
-
Posts
552 -
Joined
-
Last visited
Everything posted by Duncan Brown
-
Alan Gordon gear device for Arri 16 - might be 716GE-5 ?
Duncan Brown replied to Duncan Brown's topic in ARRI
I was wondering what motor would go so slow you'd need to increase its speed 3X to get into interesting ranges for the 16S, but I hadn't considered the original motor! Other than crazy nostalgia, what would make someone want to hand crank an Arriflex? Duncan -
Alan Gordon gear device for Arri 16 - might be 716GE-5 ?
Duncan Brown replied to Duncan Brown's topic in ARRI

-
Alan Gordon gear device for Arri 16 - might be 716GE-5 ?
Duncan Brown replied to Duncan Brown's topic in ARRI

-
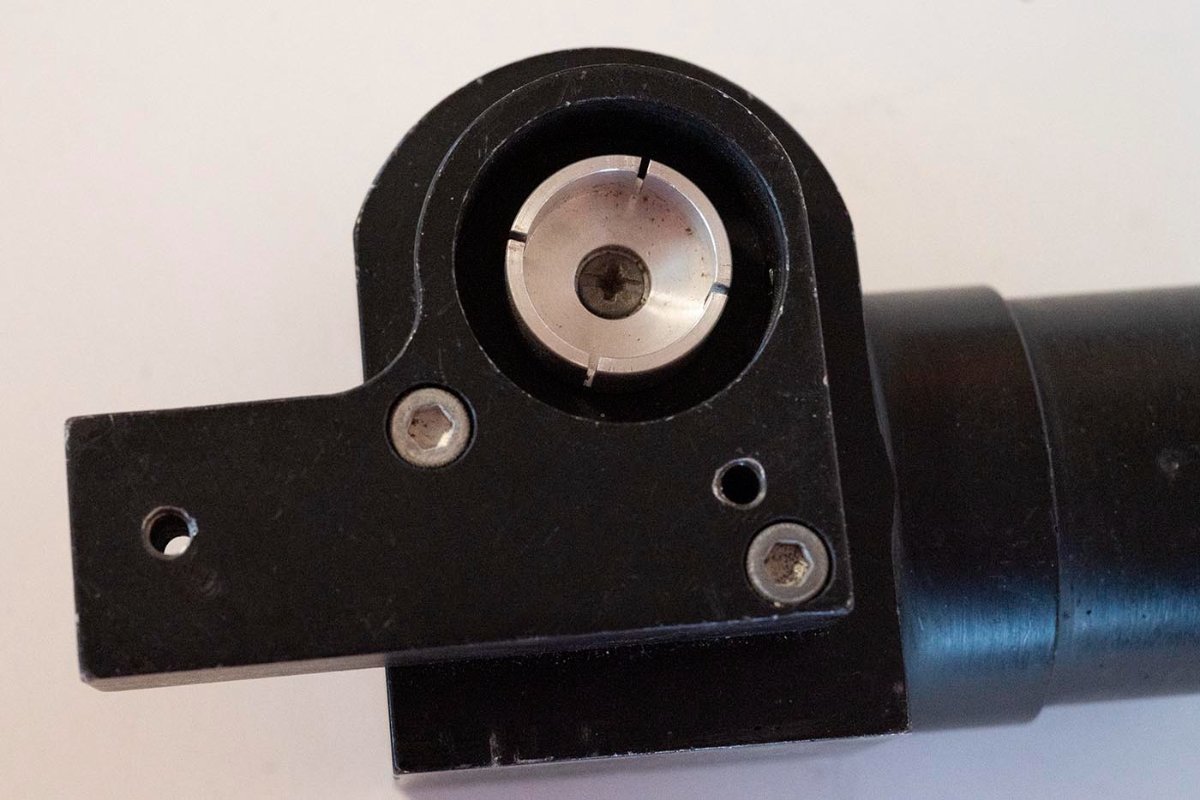
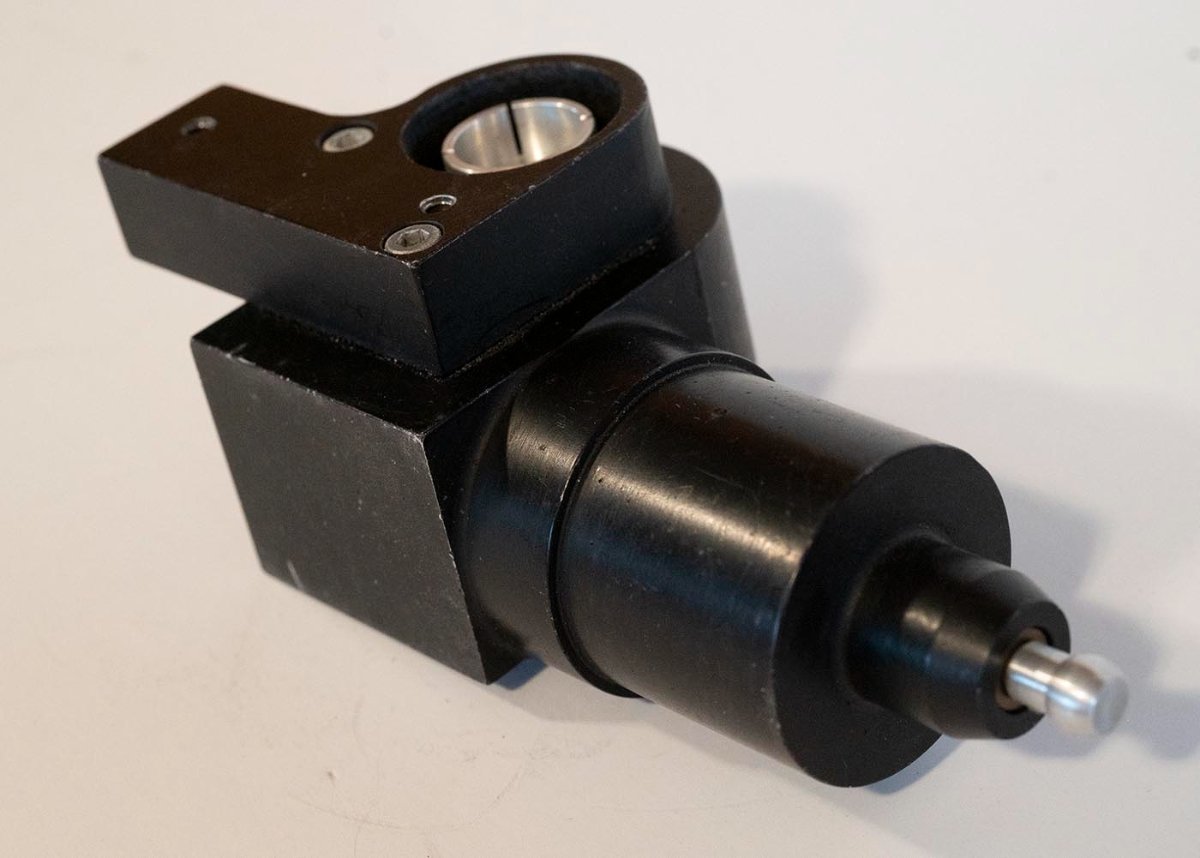
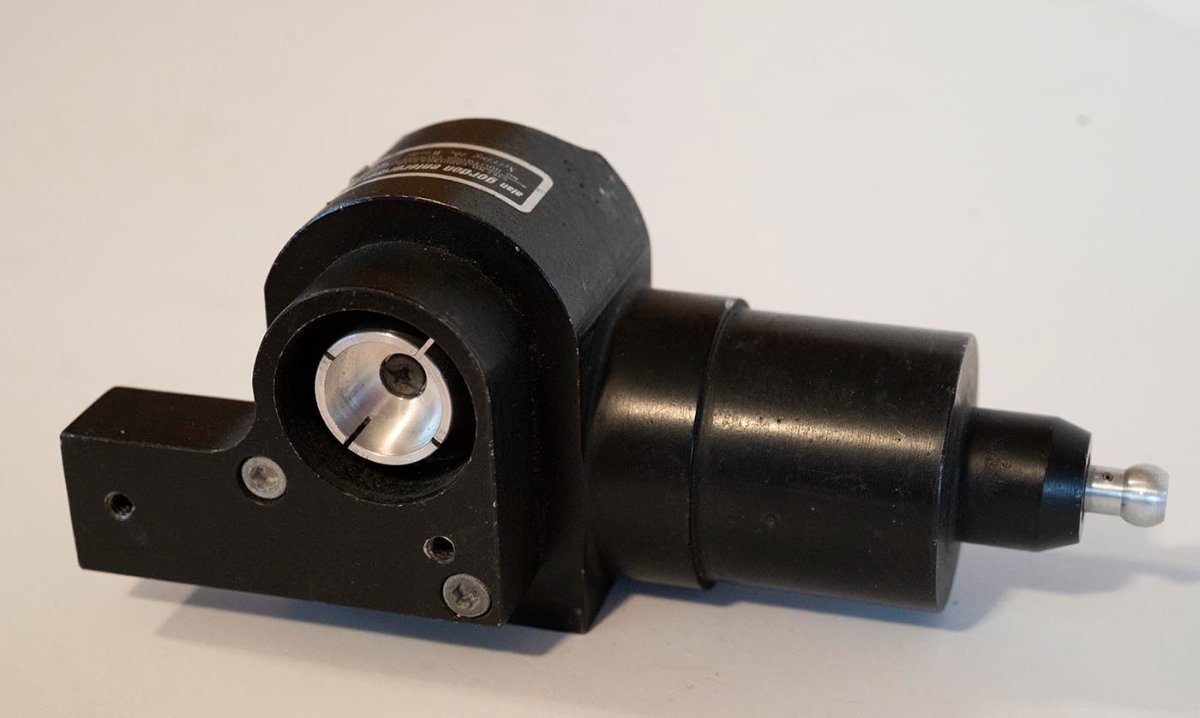
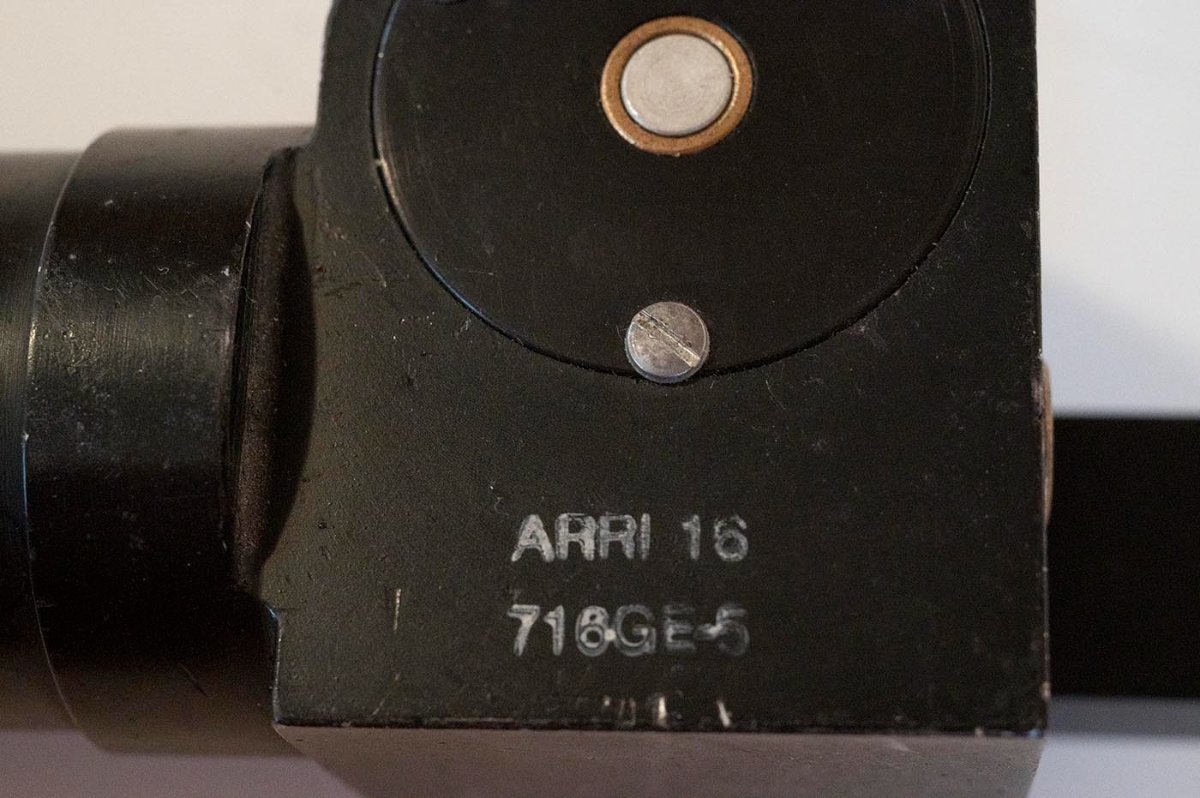
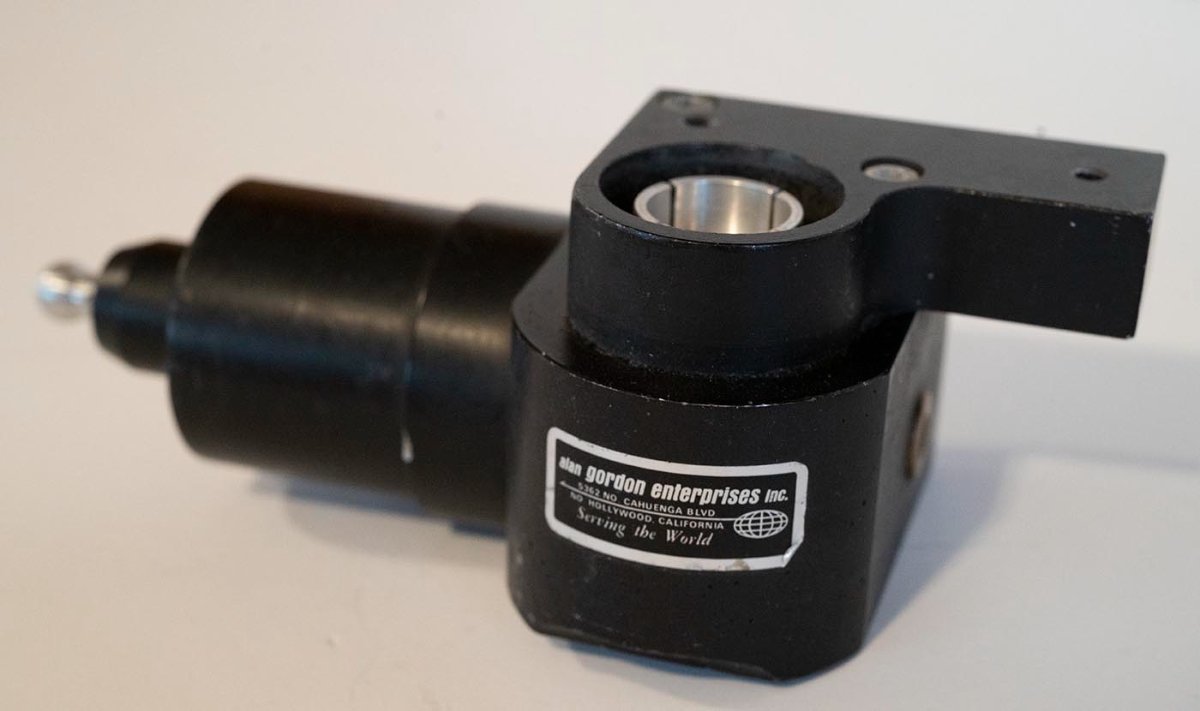
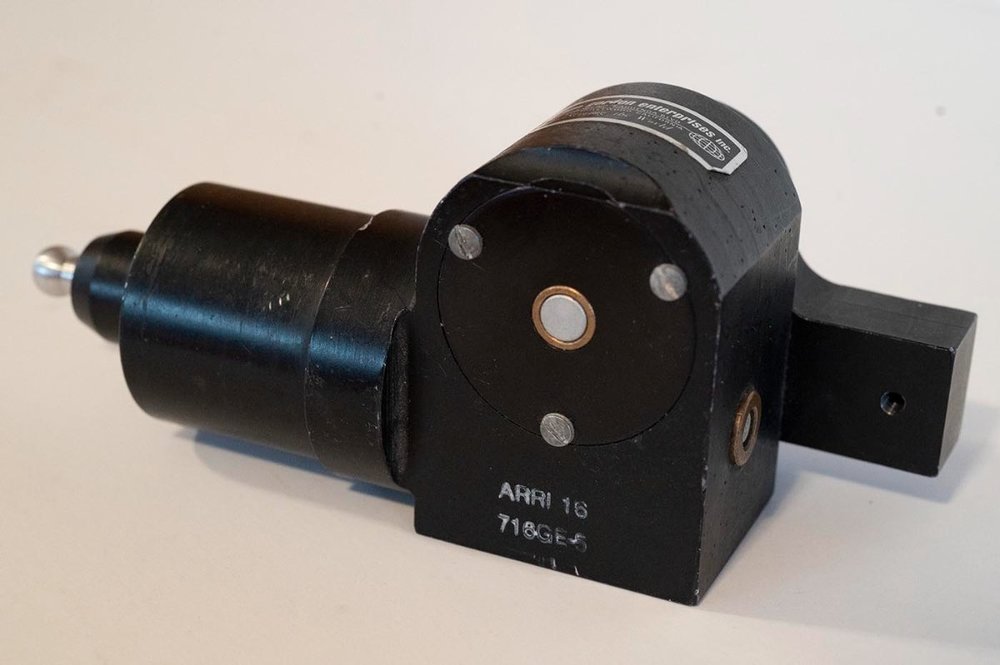
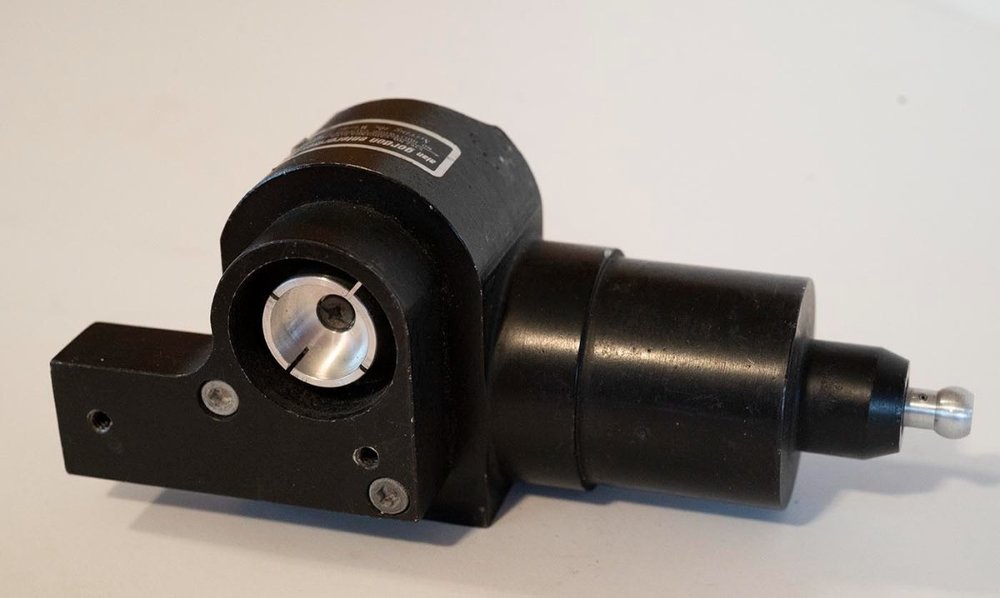
I have a very sturdy gear-up device of some kind which appears to be for an Arri 16 camera of some sort - at least the output portion matches my 16S motors exactly. The part number would appear to be 716GE-5 For every turn of the input portion, I get precisely three turns of the output ball. I guess a critical question is: what the heck fits into the input portion? In addition to the input wheel, there are also two threaded holes, which presumably are used affix the motor or drive device to this device, which then clamps into the camera the normal way like a motor would. (Do the other models of Arriflex 16, the M or the BL, have the same style motor attachment as the S?) Some pictures spread across multiple posts because of the size limits. Duncan


-
Converted Arriflex ST Super 16mm by ARRI - they exist!
Duncan Brown replied to Uli Meyer's topic in 16mm
Made it a wee bit bigger? Everyone awaits your forensic pictures! Duncan -
Converted Arriflex ST Super 16mm by ARRI - they exist!
Duncan Brown replied to Uli Meyer's topic in 16mm
Oh! Then just the standard setup for that era. Everyone always (rightly, I think) says how hard that would be to recenter that setup for Super 16. Though I guess if you're Arri maybe you just re-engineer it for the new center position and crank out 25 of them? Duncan -
Converted Arriflex ST Super 16mm by ARRI - they exist!
Duncan Brown replied to Uli Meyer's topic in 16mm
Too bad he never posted a picture! I look forward to more pictures of yours once you get it in your hands. I assume it's a single fixed lens mount, not a turret? Which mount it has might be another clue to the date it was made. Duncan -
Converted Arriflex ST Super 16mm by ARRI - they exist!
Duncan Brown replied to Uli Meyer's topic in 16mm
Fascinating! Where have these been hiding all this time?! But they must have been made in the70s? https://www.fdtimes.com/2009/08/20/the-early-years-of-super-16-and-how-it-all-started/ Duncan -
It's an 81MB file, tricky to email! But I just put a bunch of stuff up on archive.org so let's try a link to that copy: https://archive.org/details/arriflex_paperwork_scans/arri_16bl_parts_manual_october_1967_german/mode/2up Duncan
-
Here you go! https://archive.org/details/arriflex_paperwork_scans Duncan
-
I scanned this a while back and it might be of some use in your adventures. Unlike me, you can actually read it and not just look at all the pretty pictures! http://backglass.org/duncan/arri/paperwork/arri_16bl_parts_manual_october_1967_german.pdf Duncan
-
Another really nice one - an English/German instruction manual for the 16St. With good pictures, etc. http://www.backglass.org/duncan/arri/paperwork/arriflex_16st_instruction_manual_german_english.pdf 100dpi version: http://www.backglass.org/duncan/arri/paperwork/arriflex_16st_instruction_manual_german_english_100.pdf Working on an archive.org collection for this... (I already have an account there) Duncan
-
I shoot a *lot* of 5222 in my still cameras and have for years. At first I was very unimpressed with it as a film - it was a grainy mess. Then I got a chance to print it properly in a darkroom on photographic paper, and I was a convert for life. I've made 20x24 enlargements from 35mm negs and even at that magnification the grain isn't objectionable at all. I also scan lots of other 35mm negative and slide still film and it comes out fine - there is just some weird interaction between 5222 grain and still film scanners. (I mostly use a Coolscan 5000, so it's not just the flatbed scanners.) So far the 5222 I've shot on 16mm as motion picture film seems to come out pretty good, taking into account the smaller frame size so of course it will look a bit grainier when scanned in HD and viewed at that size. That kind of scanning doesn't seem to trigger the weirdness. Duncan
-
Another batch! I love these old sales flyers. http://backglass.org/duncan/arri/paperwork/arriflex_16_brochure_02.pdf http://backglass.org/duncan/arri/paperwork/arriflex_16_price_list_19610401.pdf http://backglass.org/duncan/arri/paperwork/arriflex_16_price_list_19660201.pdf http://backglass.org/duncan/arri/paperwork/arriflex_always_in_the_best_company_brochure.pdf http://www.backglass.org/duncan/arri/paperwork/arriflex_at_work_brochure.pdf http://www.backglass.org/duncan/arri/paperwork/arriflex_first_choice_of_professionals_brochure_196609.pdf http://www.backglass.org/duncan/arri/paperwork/arriflex_16_buckle_switch.pdf http://www.backglass.org/duncan/arri/paperwork/arriflex_allways_in_the_best_company_one_sheet.pdf And the 100dpi versions: http://backglass.org/duncan/arri/paperwork/arriflex_16_brochure_02_100.pdf http://backglass.org/duncan/arri/paperwork/arriflex_16_price_list_19610401_100.pdf http://backglass.org/duncan/arri/paperwork/arriflex_16_price_list_19660201_100.pdf http://backglass.org/duncan/arri/paperwork/arriflex_always_in_the_best_company_brochure_100.pdf http://www.backglass.org/duncan/arri/paperwork/arriflex_at_work_brochure_100.pdf http://www.backglass.org/duncan/arri/paperwork/arriflex_first_choice_of_professionals_brochure_196609_100.pdf http://www.backglass.org/duncan/arri/paperwork/arriflex_16_buckle_switch_100.pdf http://www.backglass.org/duncan/arri/paperwork/arriflex_allways_in_the_best_company_one_sheet_100.pdf The "First choice of professionals" one mentions a 32 minute film called "The Arriflex Story" - surely someone has a copy of that digitized somewhere?? Duncan
-
As mentioned you can check for voltage at the contact inside the motor cavity when the switch is depressed. You can also check for voltage at the pins of the cable coming from the battery pack to make sure it's not an issue with the pack or the cable. You can also use clip leads to run power directly from the battery pack to the contacts on the removed motor (bypassing the camera entirely) to see if the motor itself works. Basically you're trying a series of A/B tests to see where the electricity stops traveling from the battery to the motor when all assembled. I'm not where my camera is right now, but my recollection is that one screw on a thin metal cover inside the film chamber will get you to the contacts that the main trigger operate, so you can see if everything is working OK there too. Duncan
-
I mentioned this in another thread, but I'm a big fan of the Fuji Dark Box, model FDB12L - these were used by minilab operators to load paper cassettes, so they flooded onto the used market when the world went digital and minilabs all got chucked into the dump. If you stalk them on ebay or your other favorite used equipment site you're bound to stumble upon one eventually. They fold up into a briefcase sized package with hard sides, but then expand into a generously sized box, without being all collapsed on your hands and your film like a changing bag is. Duncan
-
WTB: Harrison Film Changing Tent (or similar)
Duncan Brown replied to Montell Taraschewski's topic in Cine Marketplace
Sorry, I am in the midst of a move and had to find the thing amongst all the boxes! When it is folded up for storage, it is a very compact 66x37x10 cm package with carrying handles. All folded out for use, it's about a 70cm cube, give or take a couple of cm in each direction. (I don't know how that compares to a Harrison tent, but it seems pretty compact to me, given how much space you have inside it when in use!) Duncan -
Oh sorry, I was saying NiMH was an improvement over the original NiCd, but only if you also use a more modern charger. Li-ion is probably even better still, but then you very much need a compatible charger. And always buy the tabbed cells when building your own packs. Duncvan
-
Just some general notes about building your own packs like this - you want to buy "tabbed cells" to construct the packs. They have those thin metal strips already spot welded to the batteries. You can then overlap/crimp-together the tabs from adjoining cells, and solder them up away from the batteries a bit to make the connections. Soldering directly to a battery terminal is fraught with peril (ask me how I know). If your original pack was NiCd cells and you want to use the original charger, then you should buy NiCd cells. NiCd chargers don't generally charge NiMH cells to their full potential. I usually buy the NiMH cells and get a newer charger. Tenergy makes some great cheap wide-voltage-range RC hobby chargers, and I just cut the connector off the end and substitute what's needed for the application at hand. Generally for packaging reasons, if you're trying to recell something, you're going to want to figure out what sized cells they used originally and get those again. Remember that rechargeable cells come in all sorts of packaging beyond just AA, C, D, etc. Sub-C is a common one in Canon still camera gear. Especially if you switch to NiMH, you can get a much longer-lasting pack in the same space with newer batteries, so sometimes recelling is good even if the old one is working. (In that case I'd probably buy a dead spare pack to work on...) Duncan
-
S16 Super Speeds Service
Duncan Brown replied to Danner Gardner's topic in Lenses & Lens Accessories
Well since they are now scrap, I can handle the disposal of them for you. I would even pay the shipping from Finland to the US! Duncan -
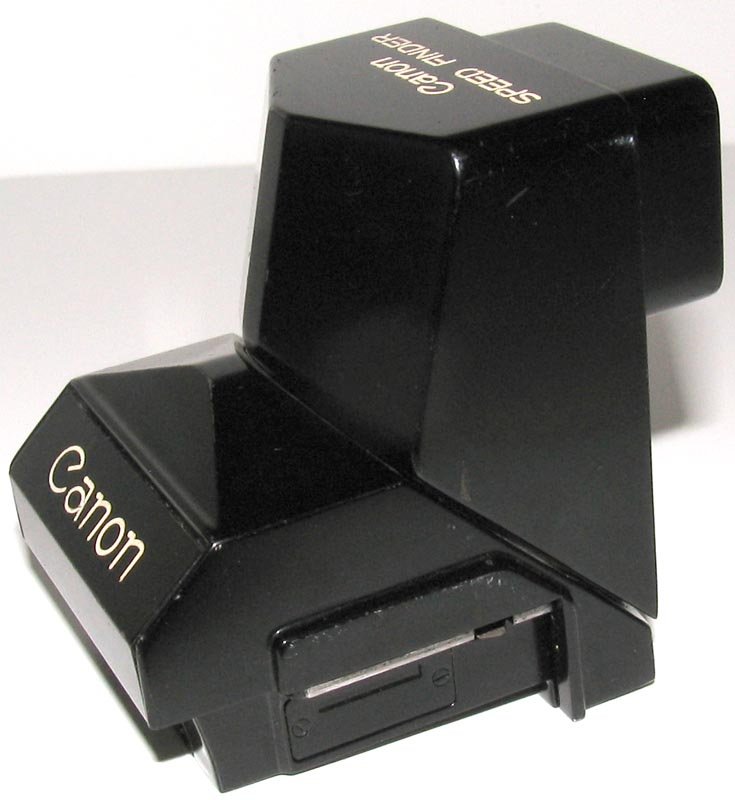
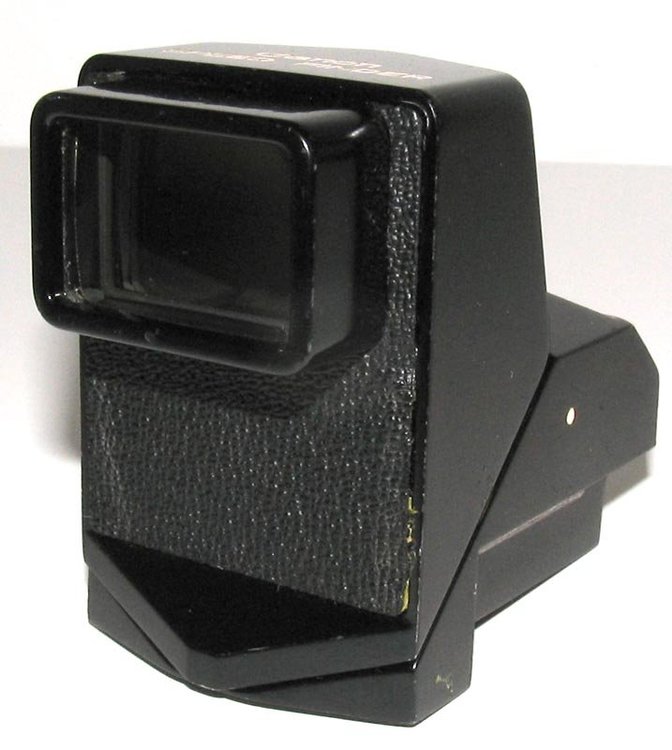
Figured I'd awaken this long-dormant topic rather than starting up a new one, just to keep all the similar information together... On my Canon F-1 still cameras (both the original, and the "F-1 new" there is an optional finder accessory called a "Speed Finder" - it's similar to the Arri periscope finder, but only usable in two positions - upright, like the normal SLR finder, and pivoted down, in the "waist level finder" position. Its claim to fame is that it makes the image big and bright and viewable with glasses on or in my case, with the finder held a bit away from the face so you can also watch your surroundings while shooting, say, sports from the sidelines of a game. For decades I've shot with those things permanently in place on my F-1 cameras. So clearly I needed a periscope finder for my 16S, right? Except I got one, and it seems to have the opposite effect from the Canon Speed Finder. The image is small and tunnel-visioned, and you need your face smashed right up against it to see anything. It's like looking through a long tube, where if you don't get your eye precisely dead-center, the image starts to disappear out of view. Is this just how it is? Or am I doing something wrong? Mounted wrong, viewing position wrong, something? I'll add a picture of the Speed Finder so you'll get the idea. Duncan

-
WTB: Harrison Film Changing Tent (or similar)
Duncan Brown replied to Montell Taraschewski's topic in Cine Marketplace
When all the one hour photo labs shut down en masse a few years ago, a whole bunch of "Fuji Dark Box" model FDB12L went on sale cheap. I picked up one of those. Here's a listing that gives a pretty good view of what it is and how it works - folds up into a little suitcase type thing that's easy to carry. https://www.alibaba.com/product-detail/Fuji-Frontier-Dark-Box-Portable-Photo_62437963297.html Generous amount of room inside, and doesn't have the sloped roof of the Harrison tents, or the complete lack of open space of a normal changing bag. They show up on ebay occasionally in the US, likely in Germany too. Duncan -
WTB - UPB-1A Lomo tank (16mm, 15M/50ft)
Duncan Brown replied to Duncan Brown's topic in Cine Marketplace
Dang! Incredibly long story, but I totally forgot I had years ago picked up a 16mm reel for my Nikor long-roll 35mm tank and reel setup! Found it hiding inside the tanks when I went to move them this weekend. So I think I'm good with that, and don't need to mess with a Lomo tank after all. I own too much crap, I tell ya... Duncan
-
300mm f2.0 Missing Mount (and aperture)
Duncan Brown replied to M Joel W's topic in Lenses & Lens Accessories
What manufacturer lens is it? Duncan -
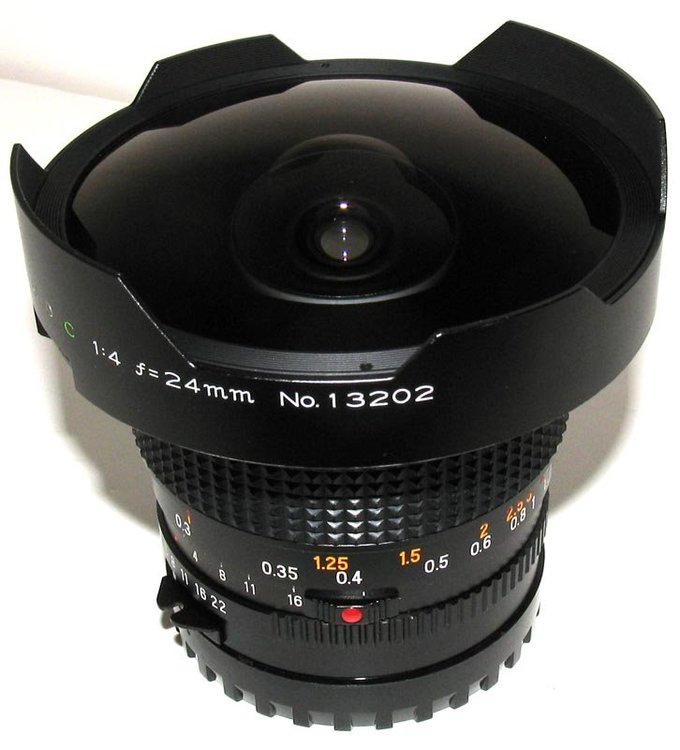
My Mamiya 24/4.0 (for the 645 camera) says "hold my beer" Duncan